Want to save this?
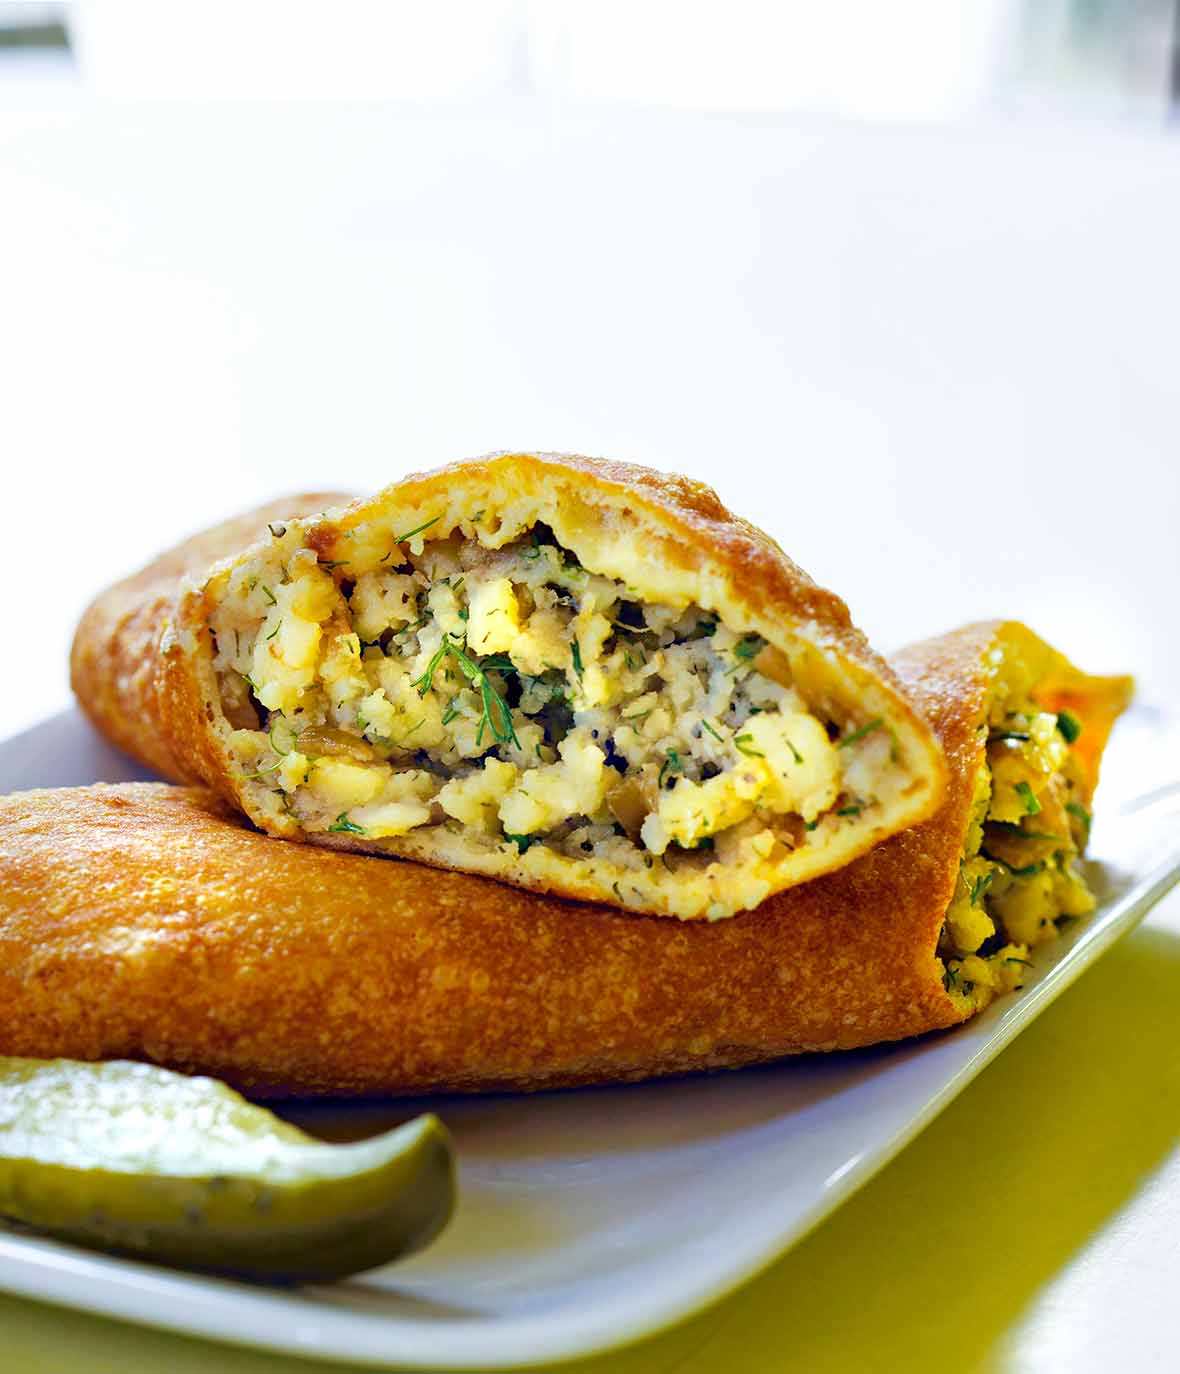
Potato Piroshki are probably the best-known Russian hand pies. Like all the incredible baked goods from Tbilisi N Yerevan Bakery, in West Hollywood, this recipe hails from Rita’s father, Elko Kakiyashvili, and has been in the family for generations. Although T & Y features five different fillings, the traditional potato piroshki with dill and caramelized onion continues to be the most celebrated. These piroshki are as authentic as you can get without traveling to Russia. Steaming the potatoes instead of boiling produces the creamiest mashed potato texture.–JoAnn Cianciulli

Potato Piroshki
Ingredients
For the potato filling
- 2 tablespoons vegetable oil
- 2 onions, chopped
- 4 russet potatoes, (about 2 pounds total weight), peeled and quartered
- 1 tablespoon finely chopped dill leaves
- Kosher salt and freshly ground white pepper
For the dough
- 1 package (1/4 ounce) active dry yeast
- 1 teaspoon sugar
- 1 1/4 cups warm water
- 3 cups all-purpose flour, plus more for dusting
- 2 tablespoons unsalted margarine or butter
- 1 large egg
- 1 1/2 teaspoons salt
- Vegetable oil, for frying
Instructions
Make the potato filling
- Place a large skillet over medium heat and coat with the oil. When the oil gets hazy, add the onions and cook, stirring often, until soft and lightly colored. Set aside.
- Place a steamer basket in a large pot and add water to a depth of 1 to 2 inches. Be sure the water does not touch the bottom of the basket. Cover the pot and bring to a boil over medium-high heat. Put the potatoes in the steamer basket. Cover and steam until there is no resistance when a fork is inserted into the potatoes, about 20 minutes.
- While the potatoes are hot, put them in a bowl and mash well by hand. (Mashing potatoes by hand may be a little more work, but the potatoes will be light and fluffy if you put in the extra effort.) Make sure there are no chunks of potato left. Mix in the dill and cooked onions; season with salt and pepper to taste. Set aside at room temperature to cool completely. The potato filling may be made up to 1 day ahead and kept in a covered container in the refrigerator.
Make the dough and assemble the piroshki
- In a small bowl, combine the yeast, sugar, and 1/4 cup of the warm water; stir gently to dissolve. Sprinkle in 1 teaspoon of flour and let the mixture stand until the yeast comes alive and starts to foam, about 5 to 10 minutes.
- Put the remaining flour in a large bowl and make a well in the center. Pour in the remaining 1 cup warm water. Add the margarine and break it up with your fingers into the warm water so it melts. Add the egg, salt, and yeast mixture. Mix with your hands, incorporating more and more flour into the center to form a soft, sticky dough. Lightly dust your hands with flour as the dough sticks to your fingers. Take care not to add too much extra flour, however, or the dough will become dense. Turn the dough out onto a lightly floured work surface and fold it over itself, kneading with the heel of your hand, until it’s smooth and elastic, about 5 minutes.
- Cut the dough into 6 equal pieces and roll into balls; they should be about 4 ounces each (about the size of a cue ball). Sprinkle the rounds lightly with flour. Cover and let rest for at least 30 minutes so they will be easier to stretch.
- Pat each dough piece into an oblong about 6 inches long and 2 inches wide. Mound about 3/4 cup of the potato filling evenly down the length of each piece, keeping a small border all the way around. Dust your fingers with flour and bring the long edges up to enclose the filling, pinching them together to form a tight seal. Check for any holes or tears, making sure the piroshki are completely closed.
- Gently pat the piroshki into 8-inch-long pies; they should spread out fairly easily. Turn the piroshki seam side down and gently pat the tops to spread them out. Lightly dust with flour, cover, and let rise again for about 10 minutes while heating the oil.
- Pour oil into a cast-iron skillet or deep, heavy-bottomed pot to a depth of about 3 inches and heat to 375°F (190°C) over medium heat. Working in batches to avoid crowding the pot, use a wide flat spatula to carefully lower the piroshki into the hot oil. Fry the piroshki on the first side until golden brown, about 2 minutes, then gently turn and fry the other side for 1 minute longer. Transfer to a platter lined with paper towels and let drain. Use more paper towels to blot any excess oil off the tops. Serve warm or at room temperature.
Notes
Oven Method
If you prefer to bake the potato piroshki instead of frying, arrange them on a lightly oiled baking pan and bake in a 375°F (190°C) oven until golden brown, about 20 to 30 minutes.Explore More with AI
Nutrition
Nutrition information is automatically calculated, so should only be used as an approximation.
Recipe Testers’ Reviews
Did you know only 68% of the recipes we test make it onto the site? This recipe survived our rigorous blind testing process by multiple home cooks. It earned the Leite’s Culinaria stamp of approval—and the testers’ reviews below prove it.

These piroshki are for true potato lovers who want to venture beyond baked and mashed. The potatoes are minimally seasoned, so make sure you use really good fresh russet potatoes. Don’t be intimidated by having to use yeast, and no need to wait for hours while the dough is rising. This one only needs just 40 minutes total. And the piroshki dough is cooperative when trying to close the pouch with a mound of the potato filling inside; it stretches with ease just where you need that nice elasticity—nobody likes dough with behavioral problems. I baked my piroshki, so I was able to cook all six at once. They were simple tasting, but yet very satisfying. And that little bit of dill was so buttery. We ate the leftover piroshki at room temperature, and they were just as enjoyable. In fact, I was able to taste the potato flavor better than when the piroshki was piping hot.

These piroshki have a very nice taste, but one needs to use care when assembling. You might need to widen the dough just a bit more to make it easier to fill. It’s pliable enough to handle the stretch. I had to know the difference between fried and baked piroshki, so I made both. The fried crust has a crispy exterior and is somewhat chewy with a light, almost sweet balance of flavour in the filling. The baked version has a smoother exterior with little less chewy dough, but the dill flavour is nicely emphasized; somewhat more than the fried version. These piroshki are quite tasty warm or at room temperature. Overall, I feel the fried version presents and tastes better, but more work is involved.
This bakery favorite has now become a personal favorite of mine. I’m partial to root vegetables anyway, but I especially enjoy eating potatoes. What I relish most about these piroshki is the filling itself. It is simply divine. The fresh dill and caramelized onions give the mashed potatoes such a sweet and earthy tone. These flavors are what truly make this fried bread so enjoyable to eat. You can eat the piroshki hot or cold. Either way, I’m sure you’ll have people asking you for more.
This piroshki recipe was easy to make and produced a wonderful comfort food that was both tasty and satisfying. I’ll definitely make these again, especially when the weather gets cooler.
These peroshki were wonderful! The filling itself was so much tastier than I expected from the simple ingredient list; after my first taste it was difficult to stop stealing forkfuls from the bowl as I worked. (I can’t say that I noticed any textural advantage to steaming the potatoes, though.) The piroshki dough came together quickly and was easy to work with, and although it was initially so soft that I had to sprinkle on flour every minute or so of kneading it never got tough. My only quibble with the directions is that getting one sixth of the filling to perch atop a six by two inch strip of dough while leaving a border around the edge is a bit ambitious. I used a slightly wider rectangle and sealed and shaped the piroshki without any tears. The results were lovely and uniformly shaped. I opted for frying mine, and the piroshki weren’t at all greasy and had perfectly cooked, tender pastry. The piroshki were huge—I would make this into eight or even ten next time—but we found that they made excellent lunches and, when halved, a worthy part of a big weekend breakfast.


Hi – thanks for this great recipe. Is there a way for me these ahead of time? Bake, freeze, then reheat? Any idea on what temp to reheat? Can I freeze before baking?
You’re welcome, Lauryn. I haven’t tried it specifically with this recipe, but based on my experience with similar dumplings, I think you can freeze them before baking and then just bake from frozen, adding an extra 10 minutes or so to your cook time.
These were so good! I added a hefty amount of salt to the filling and served with a chilli dipping sauce–my daughter declared them the tastiest things she has ever eaten.
Wonderful, Jo. Your additions sound great!