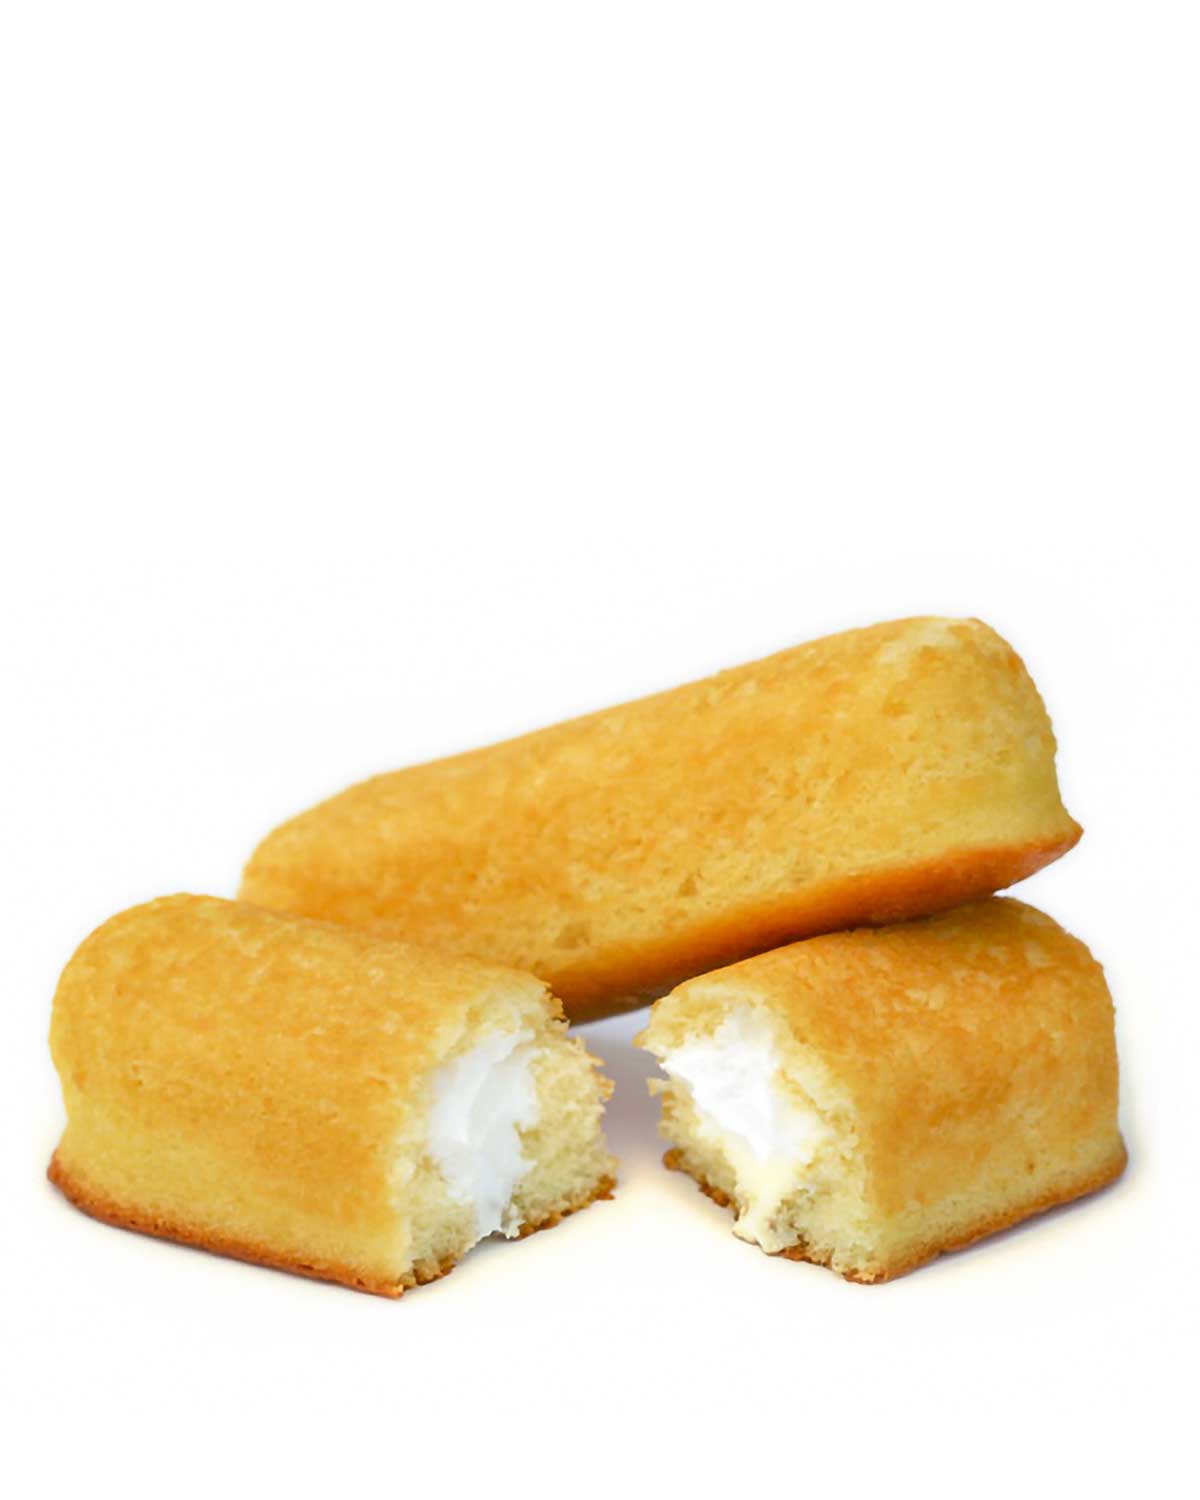
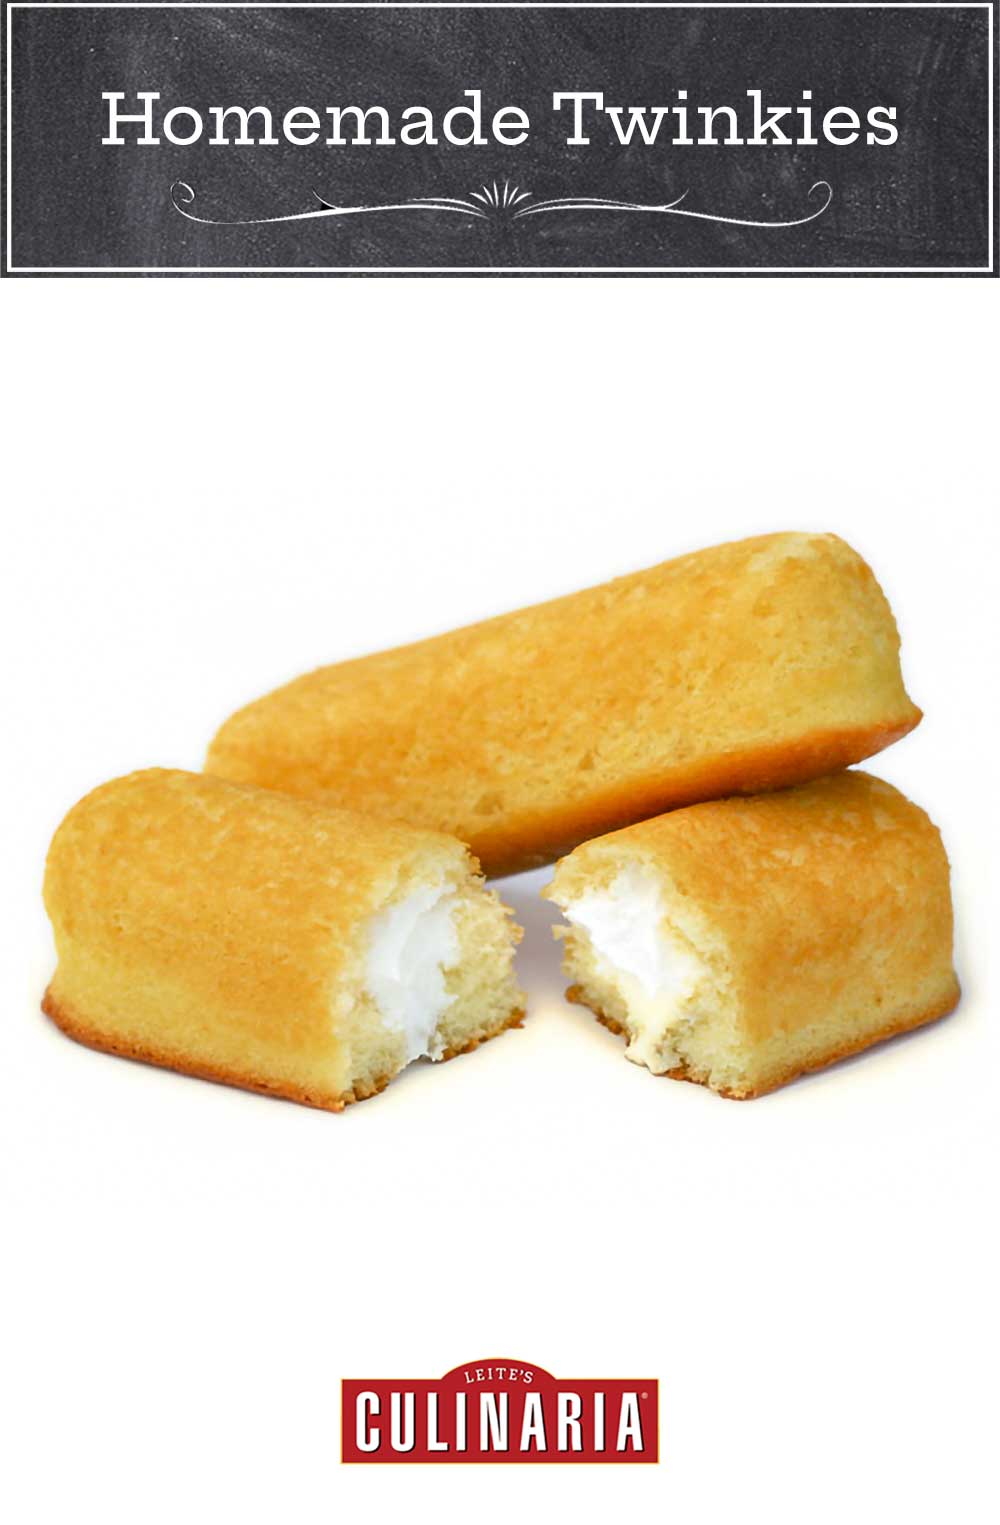
This homemade Twinkies recipe is my own riff on the Hostess Twinkie. I rely on my yellow sponge cake, coaxed into that familiar oblong shape via some creative tin-foil folding, and a seven-minute frosting that’s airy, meringue-y, and reliably sweet as a cream filling. And I cram as much filling in the sponge cakes as I can contain without the cakes exploding. Which is sorta surprising seeing as I’ve never cultivated even a meager appreciation, let alone anything resembling the requisite reverence, for the snack cake. I’m just not that into them. Still, I find the moist, flavorful crumb, and gobsmackingly sweet, fluffy filling of this divine little ditty outright irresistible. Especially when eaten slightly warm—something I can assure you will never happen with a Twinkie straight from the wrapper.–Erin Carlman Weber
What’s different about a sponge cake?
Technically, a sponge cake doesn’t contain any baking powder or baking soda. Instead of those leavening agents, sponges get their airiness from lots and lots of whipped egg whites. There are many types of sponge cake but that airy texture is what they all have in common. And, as the name suggests, these cakes take well to being soaked with syrups.

Homemade Twinkies
Equipment
- Twinkie mold OR spice jars; chopstick; piping bag or gun
Ingredients
- Nonstick cooking spray or vegetable oil
- 1/2 cup cake flour
- 1/4 cup all-purpose flour
- 1 teaspoon baking powder
- 1/4 teaspoon salt
- 2 tablespoons milk, preferably whole
- 4 tablespoons (2 oz) unsalted butter
- 1/2 teaspoon vanilla extract
- 5 large eggs, at room temperature
- 3/4 cup granulated sugar
- 1/4 teaspoon cream of tartar
- Seven-Minute Filling, er, Frosting
Instructions
- Preheat the oven to 350°F (175°C) and adjust the oven rack to the lower-middle position.
- To make your shiny, single-use Twinkie molds, start with a piece of aluminum foil, preferably heavy-duty, that’s approximately 14 inches long. It should be just a little longer than it is wide. Fold the foil in half lengthwise, then fold it in half again to create a rectangle that’s about 6 inches long and 7 inches wide. Repeat to make a dozen rectangles.
- Place 1 sheet of folded foil on your work surface, with the long side facing you. Place a standard-size plastic or glass spice jar on its side in the center of the foil, the jar’s long side also facing you. Bring the long sides of the foil up around the jar. The foil won’t reach all the way around, and that’s okay. Fold the foil in around both top and bottom ends of the spice jar, nice and tight. You’ll end up with a sort of trough situation. (Cookbook author Todd Wilbur has a video of the process here; if you’re impatient, fast forward to 1:10, where the action starts.) Repeat until you have 12 foil Twinkie molds. Spritz the molds with an obscenely generous amount of nonstick spray or use your fingertips to coat the molds with vegetable oil. Place the Twinkie molds on a baking sheet or in a roasting pan.
- Whisk the flours, baking powder, and salt together in a bowl.
- In a small saucepan over low heat, heat the milk and butter until the butter melts. Remove from the heat add the vanilla. Cover to keep warm.
- Separate the eggs, placing the whites in the bowl of a standing mixer fitted with the whisk attachment (or, if using a hand mixer or whisk, a large mixing bowl) and reserving the yolks in another bowl. Beat the whites on high speed until foamy. Gradually add 6 tablespoons of the sugar and the cream of tartar and continue to beat until the whites reach soft, moist peaks.
- Dump the beaten egg whites into a large bowl and add the egg yolks to the standing mixer bowl—there’s no need to clean the bowl (or, if using a hand mixer or whisk, simply place the egg yolks in a separate large bowl). Beat the egg yolks with the remaining 6 tablespoons sugar on medium-high speed until the mixture is very thick and a pale lemon color, about 5 minutes. Add the beaten egg whites to the yolks, but do not mix.
- Sprinkle the flour mixture over the egg whites and then mix everything on low speed for just 10 seconds (or, if using a hand mixer or whisk, until blended but not thoroughly combined). Remove the bowl from the mixer, make a well in one side of the batter, and pour the melted butter mixture into the bowl. Fold gently with a large rubber spatula until the batter shows no trace of flour and the whites and yolks are evenly mixed, about 8 strokes.
- Immediately scrape the batter into the prepared molds, filling each with about 3/4 inch batter. Bake until the cake tops are light brown and feel firm and spring back when touched, 13 to 15 minutes. Transfer the pan containing the molds to a wire rack and allow the cakes to cool in the molds.
- Just before filling, remove each cake from the foil. Using the end of a chopstick, poke three holes in the bottom of each cake, just like in the bottom of real Twinkies. Wiggle the tip of the chopstick around quite a lot to make room for the filling. (Again, you can see this in action, beginning at minute 3.)
- Scoop frosting into a pastry bag fit with a small tip about 1/4 inch across. Pipe the frosting into the holes you created in the bottom of the cakes. As you fill each cake, hold it in your palm and gently exert pressure on it so you can feel the cake expand, taking care not to overfill the cake, which would make it crack.
- Unlike real Twinkies, these won’t last indefinitely. They’re best served still slightly warm.
Nutrition
Nutrition information is automatically calculated, so should only be used as an approximation.
Recipe Testers’ Reviews
These homemade Twinkies were so much fun to make and eat. I took the easy way out and made them into muffins instead of the traditional Twinkie shape. I also made them gluten-free. The results were delightfully tasty, although not quite the way I remembered Twinkies tasting—but then, it’s been a long while. The sponge cake was light and airy and the filling was delightful. The batter had to be spooned, not poured, into the muffin cups, as it was too thick for pouring. Since I converted this batter to gluten-free, I can’t say if this is typical of the regular version. The baking time was also a bit longer for me at 20 minutes. To fill these, I inserted a pastry tip into the bottom of the cupcake. These disappeared quickly and all were delighted and happy to eat them.
Even if you don’t like Twinkies, this homemade Twinkies recipe is a keeper for the sponge cake alone. It was easy to make, tasted great, and I can see using it in other recipes in the future. I poured the batter into a muffin tin. The filling came together in about 3 minutes, although I beat it for the full 5 minutes to see what would happen. While the filling got somewhat chunkier, it didn’t affect the final texture when piped into the cake. There was more than enough filling, and it could have been reduced by a third. I also had leftover cake batter after filling my tin, so I poured the remaining batter into a couple bouchon molds, which served as a nice approximation to the Twinkie shape.

This homemade Twinkies recipe makes one of the best sponge cake recipes I’ve tried. It’s fantastic because it’s light, yet really moist. The 7-minute frosting is quite easy to make and works as a mock-Twinkie filling. Overall, Twinkies are much, much sweeter, and less spongy, than these homemade Twinkies. My kids preferred these plain, with no filling, whereas I preferred them with a jam filling and a sprinkle of confectioner’s sugar, much like my mother’s jelly rolls. Delicious! I’d make the sponge cake again (and again and again) because it was fabulous. I also would use it for tiramisu.


Where will I find the Twinkie filling recipe
Ramona, for these homemade Twinkies, we use seven minute frosting as a filling. You can click on this link for seven minute frosting or access it from the ingredients list in the recipe.