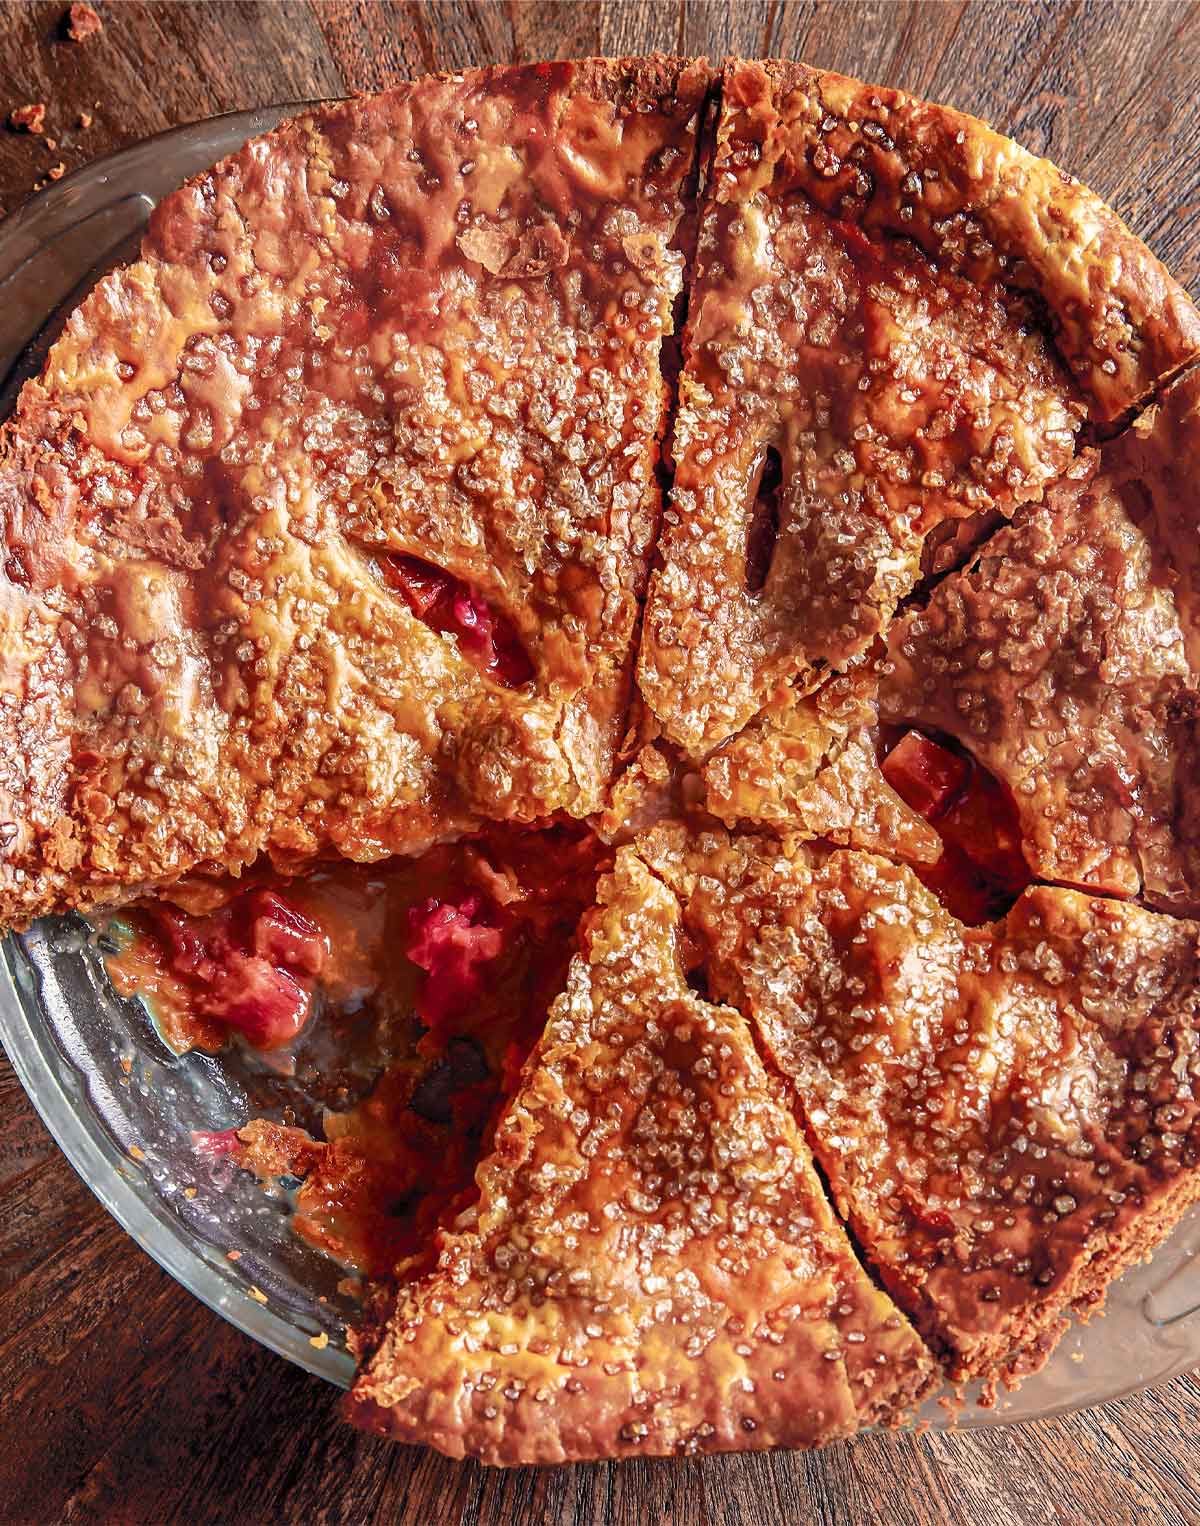
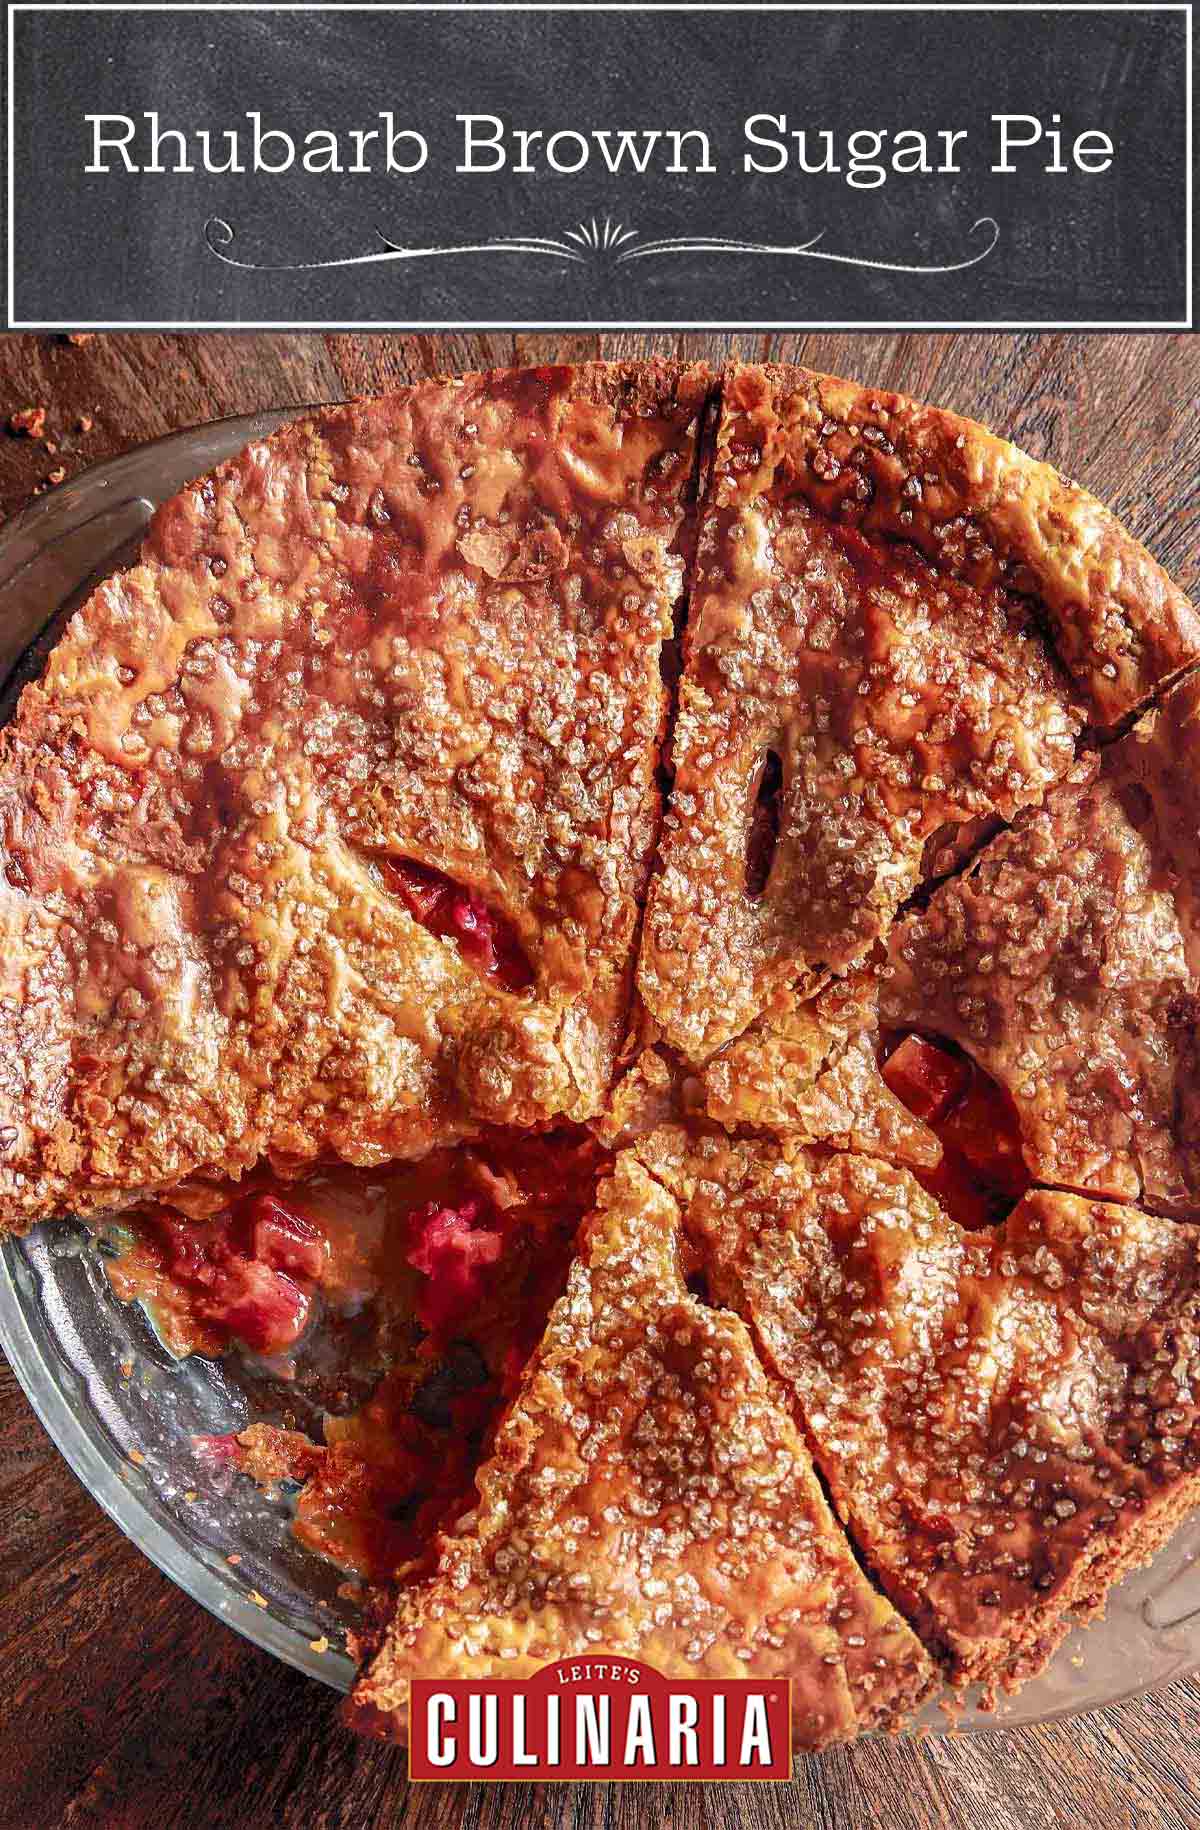
This rhubarb pie, in the words of our testers, is perfect. They’re so smitten with the otherworldly flaky crust and sweet-tart rhubarb enveloped in a rich custard filling, they’re literally shouting (well, ALL CAPPING) about it to us. You may find yourself doing the same.–Angie Zoobkoff
Rhubarb Brown Sugar Pie FAQs
If you taste rhubarb raw, it’s very, very sour or tart. It has a similar citrusy sweet tartness to a lemon or lime, and an unripe sour apple. It’s typically prepared with plenty of sugar, or mixed with sweet fruit such as strawberries, which renders it less sour, more pleasing, and makes it one of our favorite garden vegetables (yep, it’s a veg) to harvest each spring.
Ms. Chang has some great instructions in the recipe that will help to ensure your crusts will stay flaky and delicious. The keys are keeping the dough as cold as possible, the incredibly important blind bake, cooling the crust completely before adding your fruit, sealing with the egg wash, and then allowing your finished pie to cool all the way before wrapping it or covering it to store. Your patience and diligence will be rewarded with a flaky, crisp, unsoggy pie.
Rhubarb Brown Sugar Pie
Ingredients
For the pie crust
- 1 3/4 cups all-purpose flour, plus more for the work surface
- 1 tablespoon granulated sugar
- 1 teaspoon kosher salt
- 2 sticks (8 oz) unsalted butter, cold
- 2 large egg yolks, at room temperature
- 3 tablespoons whole milk
For the rhubarb pie filling
- 2 large eggs
- 1 tablespoon fresh lemon juice
- 1 teaspoon vanilla extract
- 1 1/4 pounds fresh rhubarb, trimmed and sliced 1/2 inch (12 mm) thick (about 4 cups)
- 2/3 cup superfine sugar (or blitz granulated sugar in a food processor or blender until finely ground but not powdery)
- 1/3 cup firmly packed light brown sugar
- 1/4 cup cake flour, sifted after measuring
- 1/2 teaspoon kosher salt
- 1 large egg yolk, for egg wash
- 1 teaspoon sanding sugar
Instructions
Make the pie dough
- In a stand mixer fitted with a paddle attachment, mix together the flour, sugar, and salt for 10 to 15 seconds.
- Cut the butter into 12 pieces and add it to the flour mixture. Mix slowly until the flour is no longer bright white and the mixture holds together when you clump it, and there are still lumps of butter the size of pecans throughout, 60 to 90 seconds.
- In a small bowl, whisk together the egg yolks and milk and add them all at once to the flour-butter mixture. Mix very briefly, just until it barely comes together, about 30 seconds. It will look really shaggy and more like a mess than a dough.
- Dump the dough out onto a clean work surface and gather it together into a tight mound. Using the heel of your hand, smear the dough, starting at the top of the mound and sliding your hand down the sides of the mound along the work surface, until most of the butter chunks are smeared into the dough and the whole thing comes together. (This technique is known as fraisage and makes for an exceptionally flaky pie dough. Trust the French. They know pastry.)
- Wrap the dough tightly in plastic wrap and press it down to make a disk about 1 inch (25 mm) thick. Refrigerate for at least 1 hour before using. (The dough can be stored in the refrigerator for up to 4 days or in the freezer for up to 4 weeks. Wrap in another layer of plastic if storing for more than 1 day.)
- Remove the dough from the fridge about 15 minutes before using it to soften slightly.
- Generously flick some flour over the work surface and roll out about two-thirds of the dough into an 11- or 12-inch (28- or 30-cm) circle. (Rewrap and refrigerate the remaining dough to use for the top.) Using a pastry docker or fork, poke holes all over the dough.
- Line a 9-inch (23-cm) ceramic, glass, or aluminum pie plate with the dough, leaving a 1/4-inch-wide (6-mm) lip around the edge (to allow for shrinkage in the oven).
- Refrigerate the pie shell for at least 30 minutes. (At this point you can wrap the tart shell well in plastic wrap and refrigerate for up to 1 day or freeze it for up to 2 weeks. If frozen, the pie shell can be baked straight from the freezer.)
- Preheat the oven to 350°F (177°C) and place a rack in the center of the oven.
- Remove the pie shell from the fridge and line it with parchment paper. Pour pie weights, dried beans, or uncooked rice directly onto the parchment; fill the pie shell all the way to the top. Blind bake the pie shell, rotating the pie plate halfway through the baking time, until light brown all over, about 30 minutes.
- Remove from the oven and let cool on a wire rack. Leave the oven on. When the pie weights have cooled down, remove them carefully from the pie shell and discard the parchment.
Make the rhubarb pie filling
- In a large bowl, combine the eggs, lemon juice, and vanilla, and use a fork to break up the eggs and whisk everything together. Add the rhubarb and toss to combine thoroughly.
- In a small bowl, combine the vanilla sugar, brown sugar, flour, and salt. Toss until evenly combined, then add to the rhubarb mixture. Mix everything together thoroughly. Pour into the baked pie shell.
- Roll out the remaining dough into a circle just over 9 inches (23 cm) in diameter. Drape it over the pie with the edge of the circle overhanging the edge slightly. Press gently to adhere the dough to the edges of the pie crust.
- In a small bowl, whisk the egg yolk for the egg wash. Use a pastry brush to evenly brush the top of the pie with the egg wash. Sprinkle the sanding sugar evenly over the top. Using a small paring knife, score the top with five 2-inch (5-cm) slits to make a star shape.
- Place the pie plate on a rimmed baking sheet to catch any drips and bake, rotating the baking sheet midway through the baking time, until the crust is thoroughly brown, 70 to 75 minutes.
- Remove from the oven and let cool completely on a wire rack before serving. Rhubarb pie can be stored at room temperature, well wrapped, for up to 2 days.
Nutrition
Nutrition information is automatically calculated, so should only be used as an approximation.
Recipe Testers’ Reviews
Goodness gracious, I feel like I should be shouting to someone about this recipe. It’s sneakily perfect. I love rhubarb. My husband Jay loves pie. I mean LOVES pie. Like he gets a birthday pie not cake. But mostly he tolerates my love of rhubarb. Well, let me tell you, he has declared this pie as one of his top three pies of all time. I cannot emphasize enough just how big a deal this is.
I am fortunate enough that where I live, the farmers markets are actually doing home delivery right now. And my delivery typically comes later in the day on Thursday. So I had planned on making my crust on Thursday and throwing the pie together on Friday. This was a different style crust than I usually make. I don’t normally make my crust in my stand mixer. And I don’t normally use eggs in my crust. But I have to say, this was SO easy. It rolled out so beautifully. And was SO flakey. This crust is staying in my repertoire for certain.
As the bottom crust was baking, my rhubarb arrived. It was GORGEOUS. I couldn’t resist, I HAD to make the pie Thursday. The local farm let me know they had picked it Wednesday. Which means it went from field to pie in less than 24 hours (how cool is that!?).
As the crust was cooling, I assembled the filling, which couldn’t have been simpler. It had the PERFECT amount of filling. I put it in the oven and, admittedly, it didn’t smell amazing. I could just smell the eggs baking. But when it came out of the oven it was gorgeous. You could see just how flakey the crust was. There was no way it would be cool enough to try that evening so we just had to wait until the next day. The following morning, we couldn’t resist. We cut a tiny slice before we even had breakfast. The filling turns to the most insanely gorgeous custard. The bottom crust was perfectly brown. After his first bite, Jay declared this pie was in his top 10 favorite pies of all time. Second bite, it climbed up to top 5. When we had it for dessert that evening, he amended it one more time. It was now in the top 3. As I’m writing this, he made sure that I was giving it a ten.
I brought half to some friends (one of whom is a pastry chef). They ate the entire half a pie in one sitting. Where I am going with this? The pie is flawless. Period.
I was excited to see a pie recipe—and a rhubarb pie at that!!! I grew up in the country and there were a few rhubarb patches and I would sit and eat it raw. IMHO rhubarb is the best pie.
This is a tasty pie. Two other people ate it and they loved it. The filling was sweet. The addition of the eggs and the brown sugar added a nice dimension. I seriously took up pastry making and pie-making a couple of years ago. The Pie and Pastry Bible by Rose Levy Beranbaum remains my go-to reference book. I have tried several pastry recipes. My favorite version is based on the tender flake one (the recipe is written right on the box of lard). I think a good pastry must first be very flakey and tender and it must be tasty enough that you would want to eat the pastry alone.
The fraisage technique in this recipe is the one I mimic in my pastry making as it is important to bring together the dry ingredients with the fat to achieve a flaky crust. Too much handling creates a tough pie.
This recipe did not use pastry flour. In making pastry, I do not use all-purpose flour, but for this recipe I did. I also add vinegar (vinegar increases flakiness) and I do not add sugar (sugar decreases tenderness).
This recipe uses a lot of sugar. I prefer to taste the tartness of the rhubarb to come through.
The crust was flaky enough but a little tough. I definitely will redo this recipe. With the filling, I will increase the amount of rhubarb (but will not increase the amount of sugar).
The pie was even better the next day. I find most pies are better the next day as the filling flavors have come together even more.

I grew up with rhubarb growing wild in the alleys of my neighborhood in Detroit. At the time (1950’s), no one had ever heard of Strawberry-Rhubarb Pie or Bluebarb Pie for that matter. It was straight up rhubarb, and I grew to love it! So, while I do love any and all pie variations that include rhubarb, I’m a sucker for the beautiful ruby stalks all on their own. This recipe has a nice variation on the usual flour-sugar combination in that it includes eggs. I found that I enjoyed the addition of the eggs, it mellowed out the flavor of the rhubarb just a bit, and gave the pie a bit of a custard quality. I followed all instructions faithfully, including measurements and timing, and my pie earned a rating of Tester’s Choice!
Let’s talk about the crust. I really really dislike a half-baked bottom crust, and I always pre-bake my bottom crust. But that’s hard to do when you are making a double-crusted pie. Even baking the pie on the bottom of the oven on a baking stone doesn’t always brown the bottom crust.
The ingenious method with this recipe is that you pre-bake the bottom crust, fill the pie, and then just lay the top crust right over the filling, gently pressing the edges together. The upside is that you get a beautifully crisp and brown bottom crust. The downside to this method is that you can’t make a beautiful fluted edge, that can only be done when the bottom crust isn’t pre-baked. Beautiful fluted edges may now be a thing of the past for me if I can get such a beautiful top and bottom crust every time!
I made one minor variation. Instead of cracking open a new egg to make an egg wash for the top of the pie, I decided to use one of the egg whites that were leftover from making the filling. The results were superb, a nicely browned top crust and all the sugar sprinkles stuck to the egg white wash, so if you’re a thrifty cook like me, just know that this works!


This pie looks gorgeous but coming from a place where rhubarb doesn’t exist, is it possible to replace it with any fruit, for instance strawberries?
Jill, baking is such an exact science, and rhubarb has a trickiness in terms of the water it exudes and the amount of sugar it takes to temper its tartness; I’d recommend you find a pie recipe developed specifically for another fruit. I have TONS on the site.
lolololol I re-read the recipe and realized that I’m in love with the crust more than anything hahah!
Will use the crust but with some other filling instead. 🙂
Hah! Fair enough, Jill. That TOTALLY works. Enjoy.
This is one of the BEST rhubarb recipes I have seen in a long time! I am drooling :-))
LOL. I feel the same, Angie! Thanks for taking the time to share that, and do let me know when you try it.
I’m sure this question has been asked and answered many times, but I’m not leaving this one to google. Can I use the large green stalks from my plants? Do they have to be red to be ripe? Thank you!
Deb, the leaves are toxic, so don’t use them. The green stalks are safe to eat, they’re just not that pleasant to look at in food. BTW, the color of the stalk is due to its variety rather than any gauge of ripeness.