
Most whole-wheat bread recipes turn out either squat bricks or white bread in disguise. We wanted a nutty, hearty, light-textured sandwich loaf that really tasted like wheat. We started with a good white-flour recipe and worked our way backward to “unrefine” it. We made a series of white bread loaves, replacing different amounts of all-purpose flour with whole-wheat to find the highest percentage of whole-wheat flour that we could use before the texture suffered, landing on 60 percent. To bump the amount of whole wheat up even more, we substituted protein-rich bread flour for the all-purpose flour. Next, we soaked the flour overnight in milk, with some wheat germ for added flavor. This softened the grain’s fiber, kept the dough moist, and coaxed out some sweetness. Finally, we turned to a sponge, a mixture of flour, water, and yeast left to sit overnight to develop a full range of flavor in our loaf. Adding honey lent complexity and swapping out some of the butter in our dough for vegetable oil cut the richness.
If you don’t have a stand mixer, you can mix the dough by hand. If you don’t have a baking stone, bake the bread on an overturned and preheated rimmed baking sheet set on the lowest oven rack. The bread can be wrapped in a double layer of plastic wrap and stored at room temperature for up to 3 days. Wrapped with an additional layer of aluminum foil, the bread can be frozen for up to 1 month.–America’s Test Kitchen
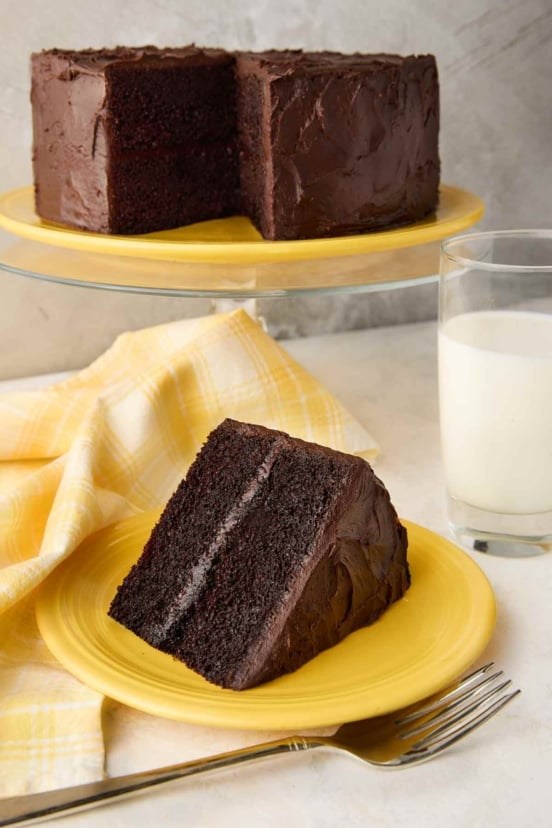
Whole-Wheat Sandwich Bread
Ingredients
For the sponge
- 2 1/4 cups bread flour, plus more for the work surface
- 1 cup water, heated to 110°F (43°C)
- 1/2 teaspoon instant or rapid-rise yeast
For the soaker
- 3 1/2 cups whole-wheat flour, plus more for the work surface and as needed*
- 1/2 cup wheat germ*
- 2 cups whole milk
For the dough
- 6 tablespoons (3 oz) unsalted butter, room temperature, plus more for the loaf pans, if desired
- 1/4 cup honey
- 2 tablespoons instant or rapid-rise yeast
- 2 tablespoons mild vegetable oil, plus more for the bowl
- 4 teaspoons table salt
- Nonstick cooking spray
- 2 cups water
Instructions
Make the sponge
- In a large bowl, combine the flour, water, and yeast and stir with a wooden spoon until a uniform mass forms and no dry flour remains, about 1 minute. Cover the bowl tightly with plastic wrap and let sit at room temperature for at least 8 hours or up to 24 hours.
Make the soaker
- In a separate large bowl, combine the flour, wheat germ, and milk and stir with a wooden spoon until a rough mass forms, about 1 minute. If the mixture is too soft and wet, add a little more flour, one tablespoon at a time, to achieve a shaggy consistency.
☞ TESTER TIP: The soaker will be a little looser in shape than the sponge but you still want to be able to knead it in the next step.
- Move the soaker to a lightly floured work surface and knead by hand until smooth, 2 to 3 minutes. Once again, add more flour, one tablespoon at a time, if needed, to achieve a smooth consistency.
- Return the soaker to the bowl, cover tightly with plastic wrap, and refrigerate for at least 8 hours or up to 24 hours.
Make the dough
- In the bowl of a stand mixer fitted with the dough hook, combine the sponge, butter, honey, yeast, oil, and salt.
- Tear the soaker into 1-inch (25 mm) pieces and add to the bowl. Mix at low speed until a cohesive mass starts to form, about 2 minutes. Increase the speed to medium and knead until the dough is smooth and elastic, 8 to 10 minutes.
- Dump the dough onto a lightly floured work surface and knead by hand to form a smooth, round ball, about 1 minute.
- Place the dough in a large, lightly oiled bowl. Spray a piece of plastic wrap with cooking spray and cover the bowl tightly with it, oiled side down. Let the dough rise at room temperature for 45 minutes. The dough may not rise significantly during this period.
- Gently press down on the center of the dough to deflate. Spray a rubber spatula or bowl scraper with nonstick cooking spray. Fold the partially risen dough over itself by gently lifting and folding the edge of the dough toward the middle. Turn the bowl 90 degrees and fold again. Turn the bowl and fold the dough 6 more times (for a total of 8 folds). Cover tightly with plastic wrap and allow to rise at room temperature until doubled in size, 30 to 45 minutes.
☞ TESTER TIP: The ambient temperature of your kitchen will determine rising time, so start checking for doubling after 30 minutes, especially if your room temperature is relatively warm. Ditto for the next rise as well!
- Butter two 9 by 5-inch (22 by 11-cm) loaf pans or spray them with nonstick cooking spray.
- Slide the dough onto a well-floured work surface and divide in half. Gently press 1 piece of the dough into a 17 by 8-inch (43 by 20-cm) rectangle, with the short side facing you. Roll the dough toward you into a firm cylinder, keeping the roll taut by tucking it under itself as you go. Turn the loaf seam side up and pinch it closed. Place the loaf, seam side down, in a prepared pan, pressing gently into the corners. Repeat with the second piece of dough.
- Cover the loaves loosely with cooking spray-coated plastic wrap and let rise at room temperature until nearly doubled in size, with the top of the loaves risen about 1 inch [25 mm] above the lip of the pan, 30 minutes to 1 hour. Start checking the rise early to prevent overflow!
- At least 30 minutes before baking, adjust the oven racks to the middle and lowest positions. Place a baking stone or large metal baking sheet turned upside down on the middle rack and an empty loaf pan or other heatproof pan on the bottom rack, and heat the oven to 400°F (204°C).
- When the dough has risen, in a small saucepan, bring 2 cups water to boil on the stovetop.
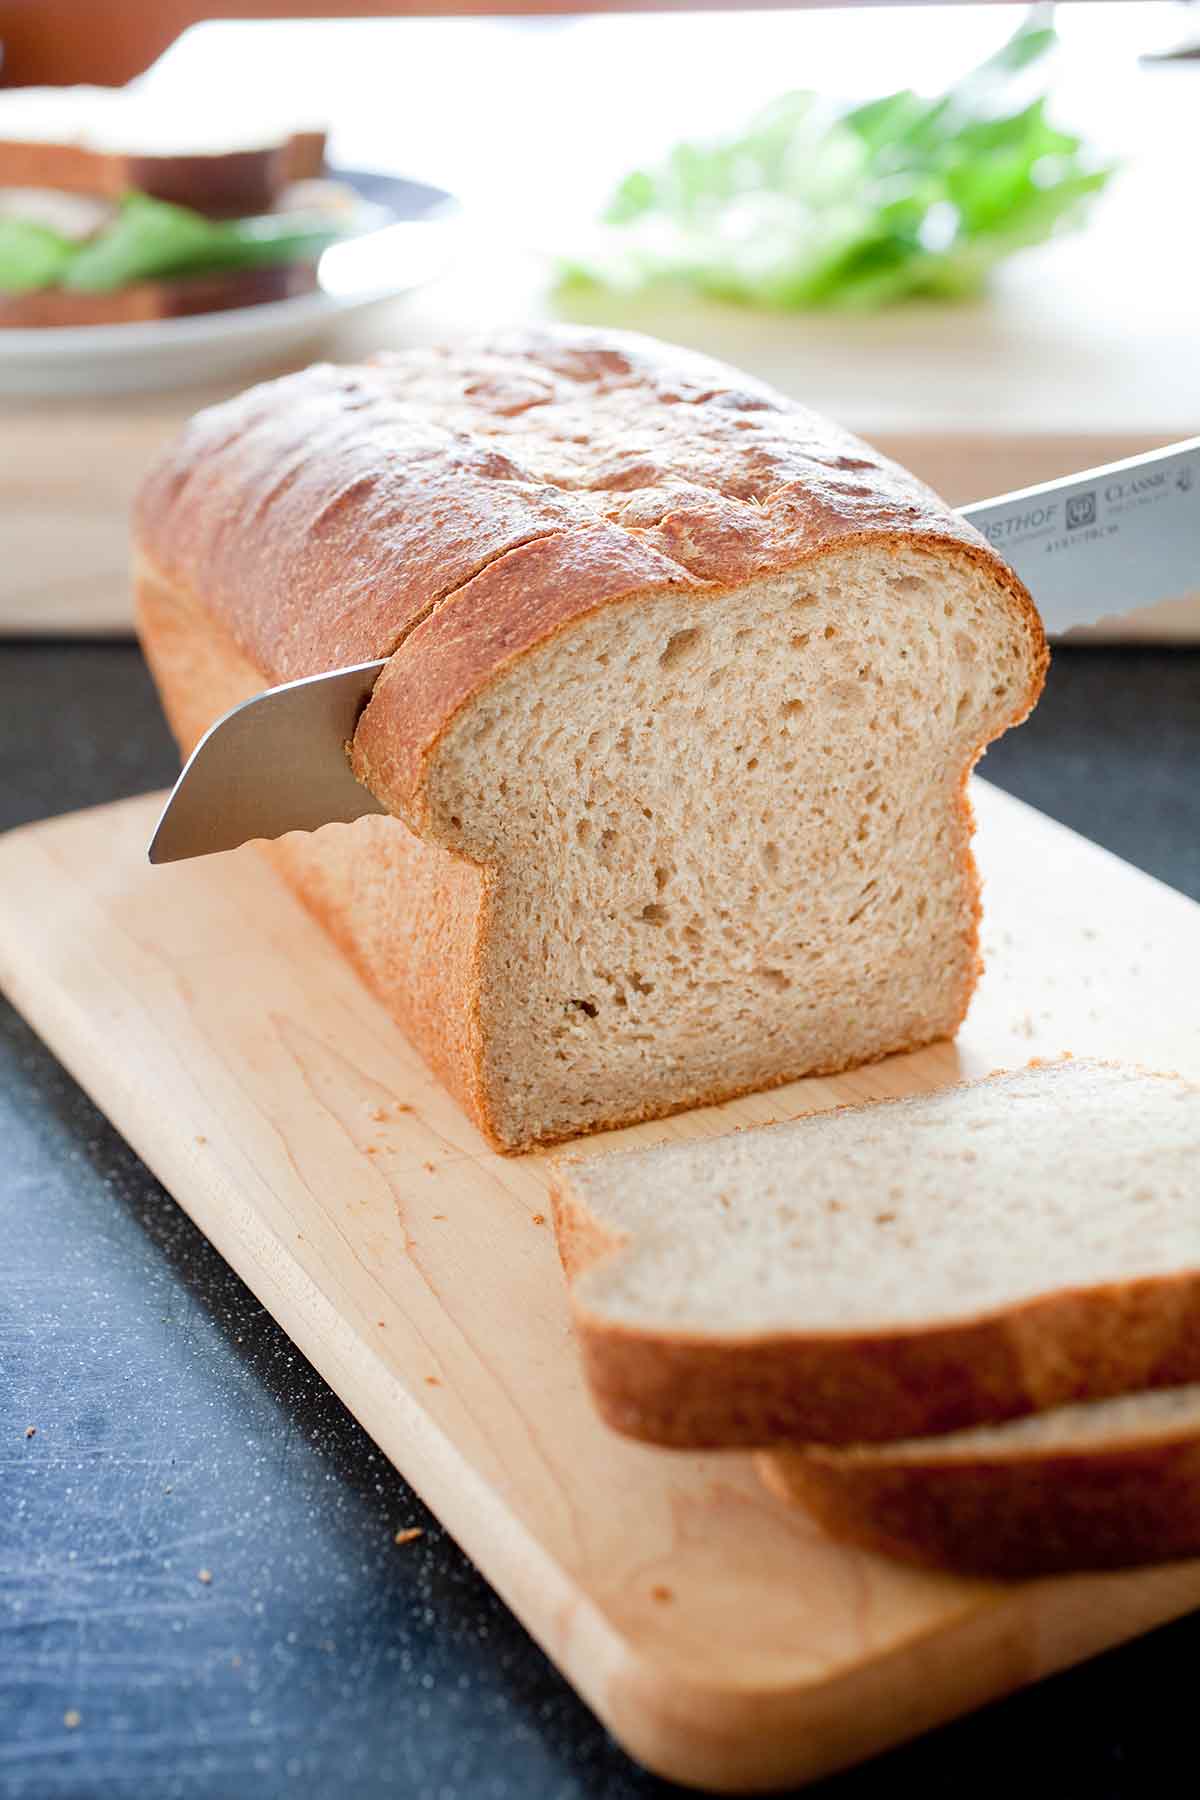
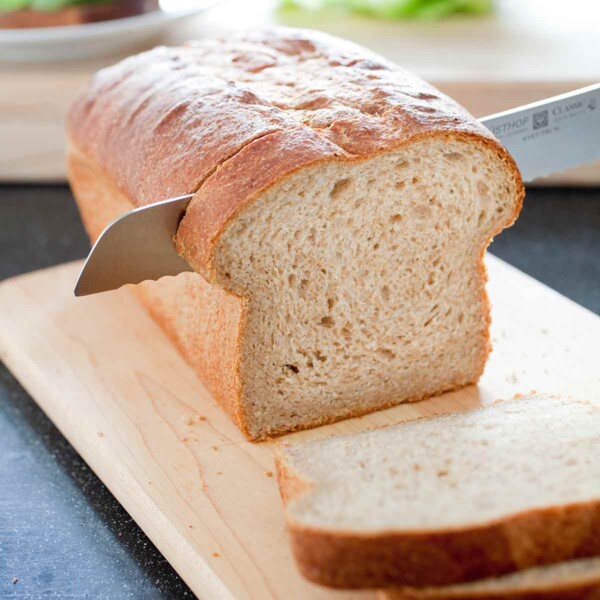
- Using a sharp serrated knife or a single-edge razor blade, make one 1/4-inch-deep (6-mm) slash lengthwise down the center of each loaf.
- Working quickly, pour the boiling water into the empty loaf pan in the oven and set the loaves on the baking stone. Immediately reduce the oven temperature to 350°F (177°C). Bake until the crust is dark brown and the loaves register 200°F (93°C) on an instant-read thermometer, 40 to 50 minutes, rotating the loaves front to back and side to side halfway through baking.
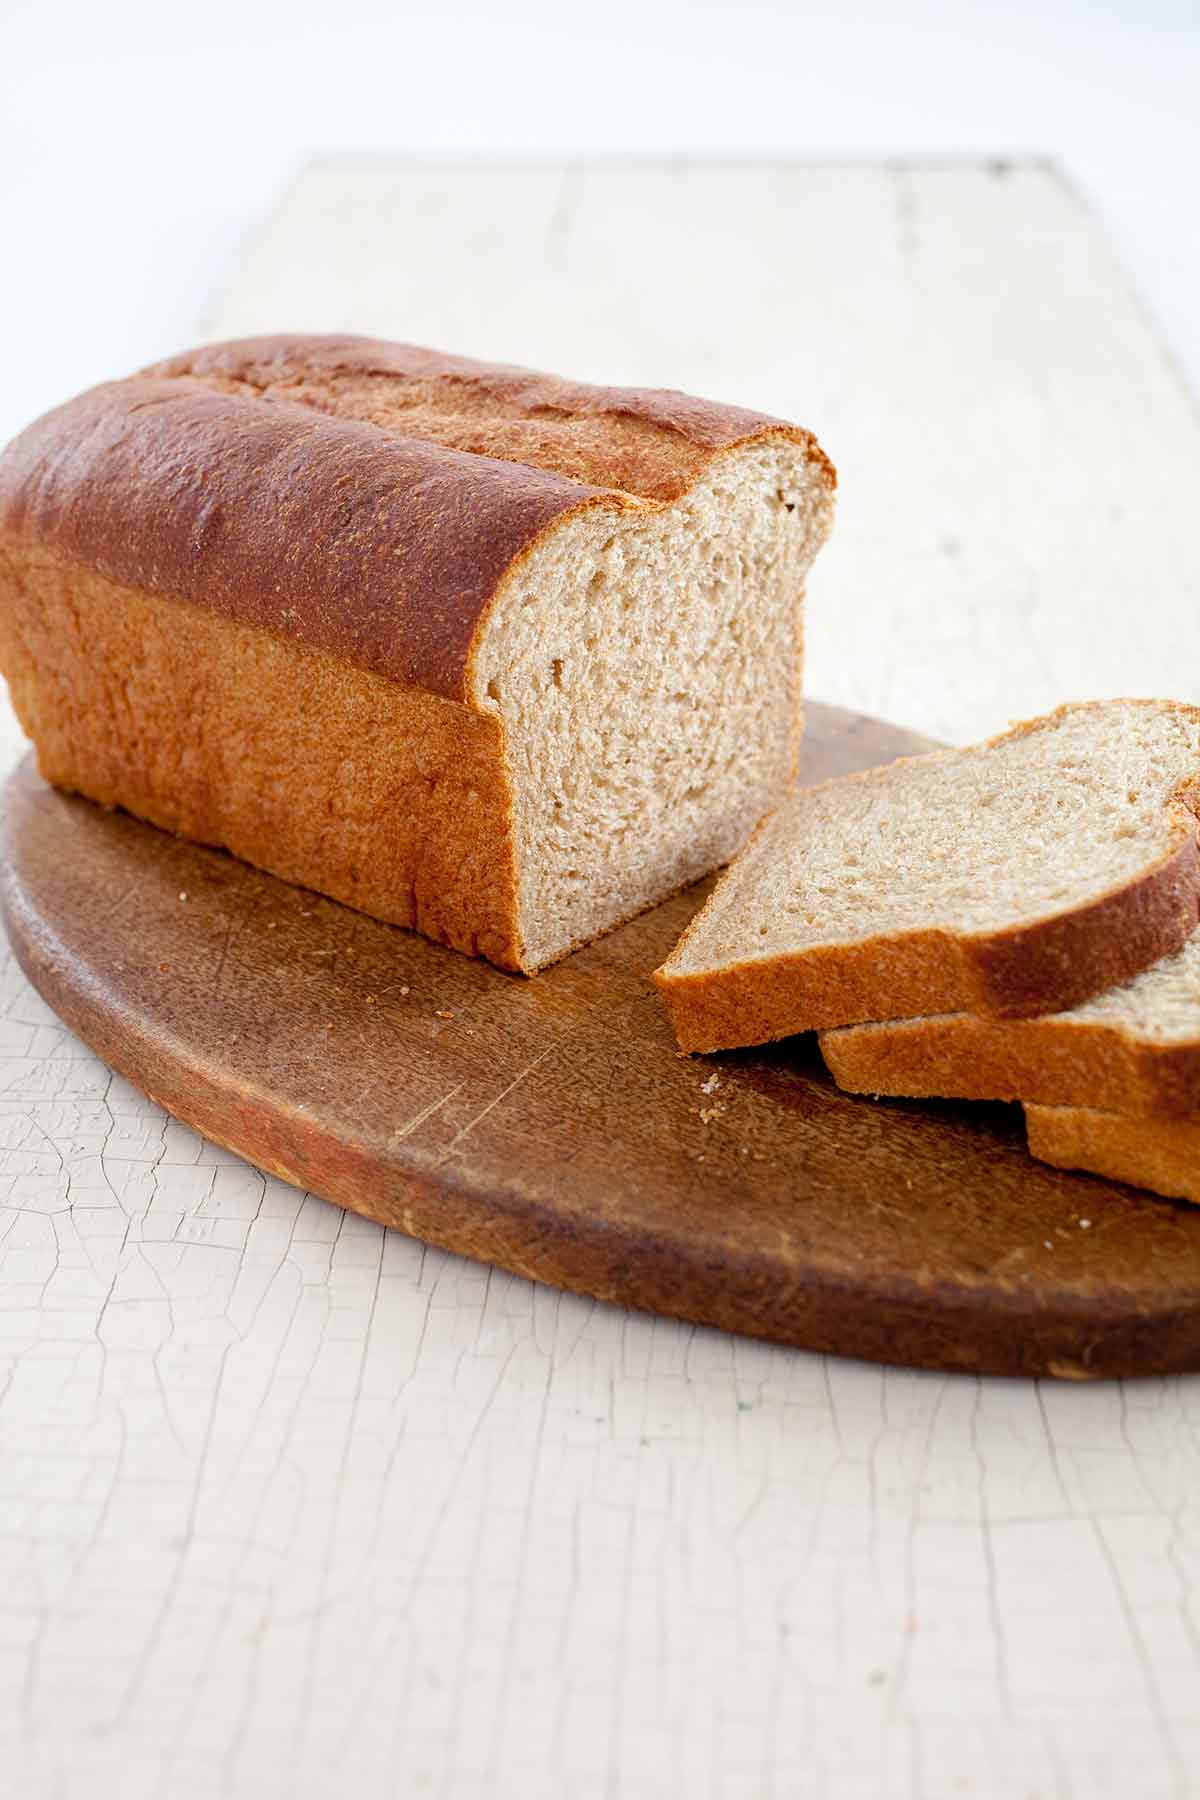
- Move the pans to a wire rack and let cool for 5 minutes. Remove the loaves from the pans, return to the rack, and let cool to room temperature, about 2 hours, before slicing and serving.
Notes
*What is wheat germ?
Wheat kernels contain three different edible parts—bran, germ, and endosperm. With these three elements, whole grains contain elements like fiber, complex carbohydrates, vitamins, minerals, fatty acids, and antioxidants. Wheat germ has a nutty and delightfully toasted taste and can be used as an addition to recipes to add nutrients, flavor, and texture. It’s the most nutrient-rich part of wheat and it adds an extra layer of toasty flavor to your bread.
Nutrition
Nutrition information is automatically calculated, so should only be used as an approximation.
Recipe Testers’ Reviews

I should probably start by saying that I am not a bread baker. I make a lovely white sandwich bread and different types of no-knead. This was my first time making whole-wheat sandwich bread and it turned out perfectly.
The sponge and the soaker came together within minutes. I did need to add 2 tablespoons of flour to the soaker in order to have a smooth dough in 3 minutes. My sitting time for both was 19 hours.
It starts as a fairly wet dough and it would have been nice to know that beforehand. While kneading the dough it kept crawling up the hook so I had to stop multiple times to scrape it down. I turned my back for a minute and it made its way into the spring. Good thing the dough was super elastic so it was easy to remove.
The first rise for 45 minutes only produced a slightly puffy dough but that was on the counter. I decided to use the proof setting on my oven for the second rise which was a good thing since it took 65 minutes for it to double. The last rise in the pan was fairly quick at 40 minutes.
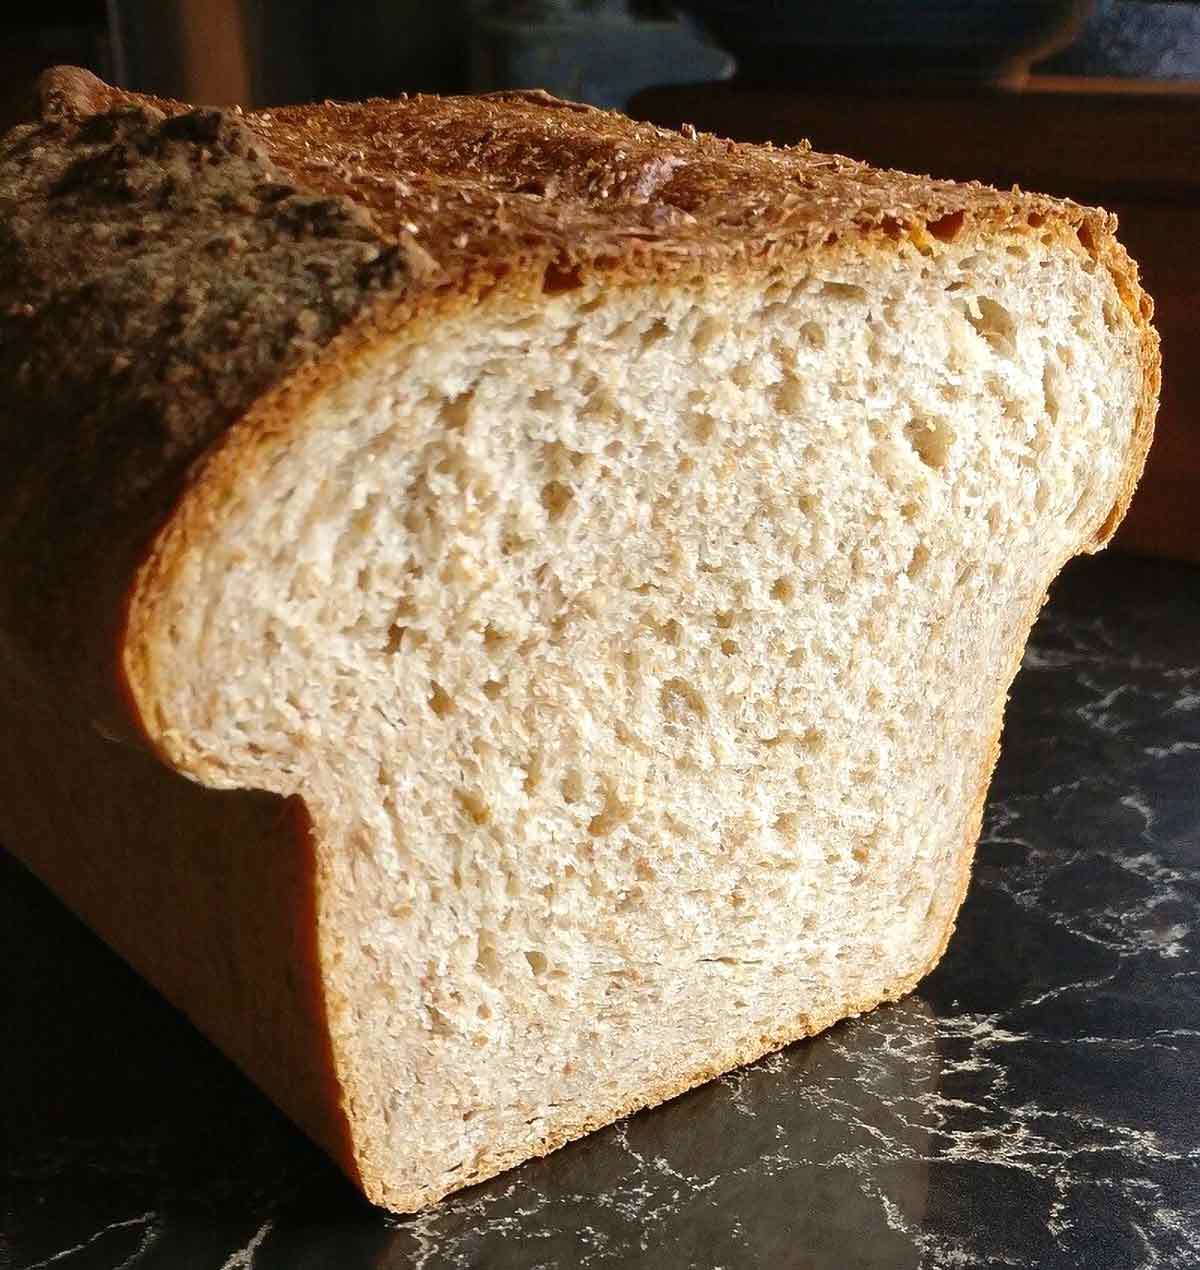
The finished product was moist and had a nice crumb. Very light texture but with a big punch of whole wheat flavor.

I’ll be completely honest—this isn’t the easiest loaf to make (it’s very hands on, time consuming, and a bit of a sticky mess) but the outcome is soft, nutty, and delicious, so well worth it. If you’re new to bread making, I may not encourage you to try this one first; but if you’ve got a little experience, you can certainly handle it. It requires a bit of advanced planning, but making your own whole-wheat sandwich bread is such a rewarding experience—this will give you two beautiful sandwich loaves that you can slice and freeze and enjoy throughout the week.
I didn’t need two sandwich loaves, I made one and used the rest of the dough to make hamburger buns—they were soft and wonderful. Overall, a very versatile bread recipe that I’ll make again. All my testers agreed that it was a delicious loaf, with lots of flavor, and nice and soft (the buns were perfect for turkey burgers).

This whole-wheat sandwich bread is delightful; the dough is easy to work with and the process is forgiving. I had taken the soaker out of the fridge to come to room temp when the day exploded out of my control. It ended up sitting on the counter for 3 1/2 hours before I got back to mixing the dough and the dough still came out beautifully. The aroma while baking was enticing and this bread has a nice nutty flavor and is the perfect texture for sandwiches. If you don’t have a baking stone you won’t need it; I baked these loaves without it and it was not an issue. I also did not use the boiling water on the rack below; when I poured the boiling water into my Pyrex pie plate it shattered, so I skipped that as well. Perfect loaves anyway! Tasty, easy, versatile bread. My morning toast for the next few days.
I’ve tried many whole-wheat bread recipes and they come out dry or dense. The process of this recipe was 100% different which drew me to it. My dough was so alive and active, it overflowed from the large bowl it was rising in! The soaker, in my opinion, made a huge difference. The bread came out moist, light, and airy- everything you want in a whole-wheat sandwich bread.
This whole-wheat sandwich bread was delicious. We loved the “wheaty” flavor the wheat germ imparted. It wasn’t dense, in fact it was quite light and moist. We don’t eat many sandwiches, but I think it would make a very delicious sandwich and will be way tastier than store bought with all the additives. We just finished a piece as toast with butter and strawberry jam for breakfast.
I would say that the end result justifies the time put into making this bread. After it cooled, I served it with soft butter. It’s the lightest fluffiest whole-wheat sandwich bread I have ever had…it’s like Wonder Bread, whole-wheat Wonder bread. It came out so tender and tasty.
My whole-wheat sandwich bread rose and fell, so it became a little sunken at the top crest and uneven. However, it tastes so darn good, and the crust color is perfect. It has a great smooth texture and grain flavor, so despite the appearance, I’d make it again to get a better shaped loaf. One of the few instances where I recommend overlooking my baking appearance flaw, because the remaining loaf actually is worth hanging onto.
Whole-wheat sandwich bread which meets the pickiness of my kids has been the bane of my existence as a bread maker until now! Why didn’t I think about the soaking step? I’m positive that is what makes all the difference in this wonderfully textured sweet-but-not-too-sweet whole-wheat bread. It has the close-grained “spongy” texture of store-bought sandwich bread but is made with ingredients I know and love and is definitely on my “to make frequently” list now!
This recipe DOES require you to prepare in advance as the total time is somewhere between 16-28 hours because of the overnight soaker/sponge step. The hands-on time is really only about an hour of this entire time though so it’s mostly hands-off.
I started the bread at 7 p.m. the night before I wanted to bake it, by creating the soaker and sponges. Because I’m a bread nerd and actually own a home grain mill, I ground my own hard winter wheat berries to make my whole-wheat flour. I think that depending on your wheat flour, your results may vary a bit as home ground fresh wheat tends to be a slight bit coarser than store ground wheat flour. (For my fellow nerds, I ground it on the middle of the dial setting on my Whisper Mill). I used instant yeast in this recipe since that’s what I keep stocked in my freezer. I combined both the soaker and the sponge with my Danish dough whisk and totally recommend that for this kind of dough. The sponge came together as the recipe directs but I did find that the soaker was a bit wetter than I expected, most likely due to the aforementioned home-ground wheat which, being coarser, may not have absorbed liquid as easily.
I let both soaker and sponge set for 15 hours before I proceeded with the recipe at which time the soaker was nice and solid and able to be cut into cubes easier than tearing it apart. Using my KitchenAid mixer, it took 10 minutes to knead into a smooth elastic ball which passed the windowpane test. I then allowed it to rise on top of the stove for 45 minutes. Next time, I’ll place it in my favorite rising spot, inside my oven with the oven light on. It only rose a small amount in the 45 minutes but I think that may have had more to do with my cool house than the dough itself. The dough scraper turning technique worked well and I let it rest the next 45 minutes with the oven on, preheating for some other baking and this time it rose much better, doubling with no problem. After preparing the loaves and putting them in the pans, I returned them to the stovetop and let them rise for 1 hour and 45 minutes until they reached the 1″ over the lip mark. My bread didn’t end up looking like the picture as much as I would have liked because I didn’t make my slit deep enough so it ended up looking more like a scratch than a nice divot. The loaves took 40 minutes to bake and came out beautifully golden. Next time, I might brush them with some egg wash to give them a better sheen but that didn’t hamper the wonderful taste at all. This is a great recipe and definitely will be made again.
This recipe for whole-wheat sandwich bread was easy to follow and produced a delicious finished product. One bonus of the pandemic has been the extra time to be creative and experimental in the kitchen and this is one of the best bread recipes that I have tried in the past weeks. It’s soft, but with a bit of a nice textural bite, and has a nice, but not overly aggressive, wheat flavor. We’ve loved this as our morning toast and are excited about the bonus loaf waiting for us in the freezer when we finish the first.
I don’t have a baking stone, so I used an overturned baking sheet on the lowest rack and it seemed to work well. I can’t compare to how it would work with a baking stone, but I was pleased with the final result on the baking sheet. This bread is a bit of a lengthy process, but none of the steps are particularly difficult and it was a pleasure to bake. A note—I was initially worried about how wet and gooey the dough seemed when I first started mixing the sponge, soaker, and other dough ingredients, but as it continued to mix, it came together into a perfectly lovely and elastic-y dough, so just be patient and it will work out.


I’m an experienced sourdough baker but I have wanted to venture into yeasted breads. The dough was way to wet to work with – I added up to 2 cups more flour to try to salvage it but it was still a wet soggy mess. 5 cups of liquid plus additional liquid oils is ALOT for 5 3/4 c flour. I’m sadly having to toss all these organic locally sourced ingredients in the compost. : (
Violet, I’m so sorry you had a problem with the bread. But it appears you misread the recipe. There are only 3 cups of water in the recipe. The remaining 2 cups are brought to a boil and added to a pan in the oven to create steam. I’d suggest trying it again with the proper amount of water. I think you’ll have a different experience!
Thank you so much for pointing out my error! I will definitely try it again.
Of course, Violet. And please let me know how it turns out. (I’m waiting with bated breath and hook!)
Help! I tried making this recipe, and my soaker seemed way too wet! Even with the addition of a few tablespoons more flour, I really couldn’t “knead” the soaker at all before its 8-24 hour rest. I read through all the tested reviews and I noticed that many people mention the soaker seems quite wet. I got nervous and ditched the whole batch! It was so wet, that I could not “tear the soaker into 1 inch pieces”. Even once I combined the soaker and sponge and remaining ingredients, it seemed way too most to knead at all. Has anyone tried using a bit less milk in the soaker? I want to give it another try but it just seemed too wet! Any help would be greatly appreciated!
Danielle, we did find that this was an exceptionally wet dough, but shouldn’t be unmanageable. If possible, use weights instead of volume measurements, and start with a little less liquid and see if the dough is more manageable.
‘
Thank you, yes I tried it again and got better results!
Wonderful, Danielle.
Can ground flaxseed be substituted for the wheat germ or will it have a negative effect on the texture & flavour? also can regular active dry yeast be substituted for the instant or fast rising yeast?
For steps 5 & 6 can a food processor be used as I don’t have a stand mixer?
Monica, yes, you could definitely substitute ground flaxseed for the wheat germ here, and you can use regular active dry yeast. You will need to let the yeast sit in the warm water for 5 minutes or so before mixing with the flour in order to activate it. As for using a food processor, I wouldn’t recommend it. The food processor blade doesn’t really replicate a kneading motion. You can, however, just knead the dough by hand. It will be a bit of a workout but should work fine.