Rolling out the perfect pie crust is more than just pulling out a rolling pin and going at it. Here are all of our best tips for getting your pie crust just perfect.
Rolling out pie dough is one of those things that sounds simple in principle but can be a bit more challenging in practice. The good news is that there are lots of things you can do that will have you rocking (and rolling) your pie dough like a pro in no time.–Kate McDermott
Start with cool (but not cold!) dough
If the dough is too cold and hard, it won’t roll easily. If it feels hard, place it on the counter for 30 to 60 minutes and check on it occasionally. When it is pliable, yet still cool, it is ready to roll. If it feels too warm and greasy at any time, stop, cover your work, and place it in the fridge for the fats to chill down. I like to roll my doughs out around 54°F (12°C). When it gets to 59°F (15°C) or above, the fat will soften up too much.
Place a pastry cloth, silicone rolling mat, piece of plastic wrap, or parchment paper on a flat surface that is a comfortable height for you and gives you enough elbow room for rolling. Sprinkle around some flour and place a disc of dough on top of it. Sprinkle a little flour on top of the dough, too.
Press down on the dough
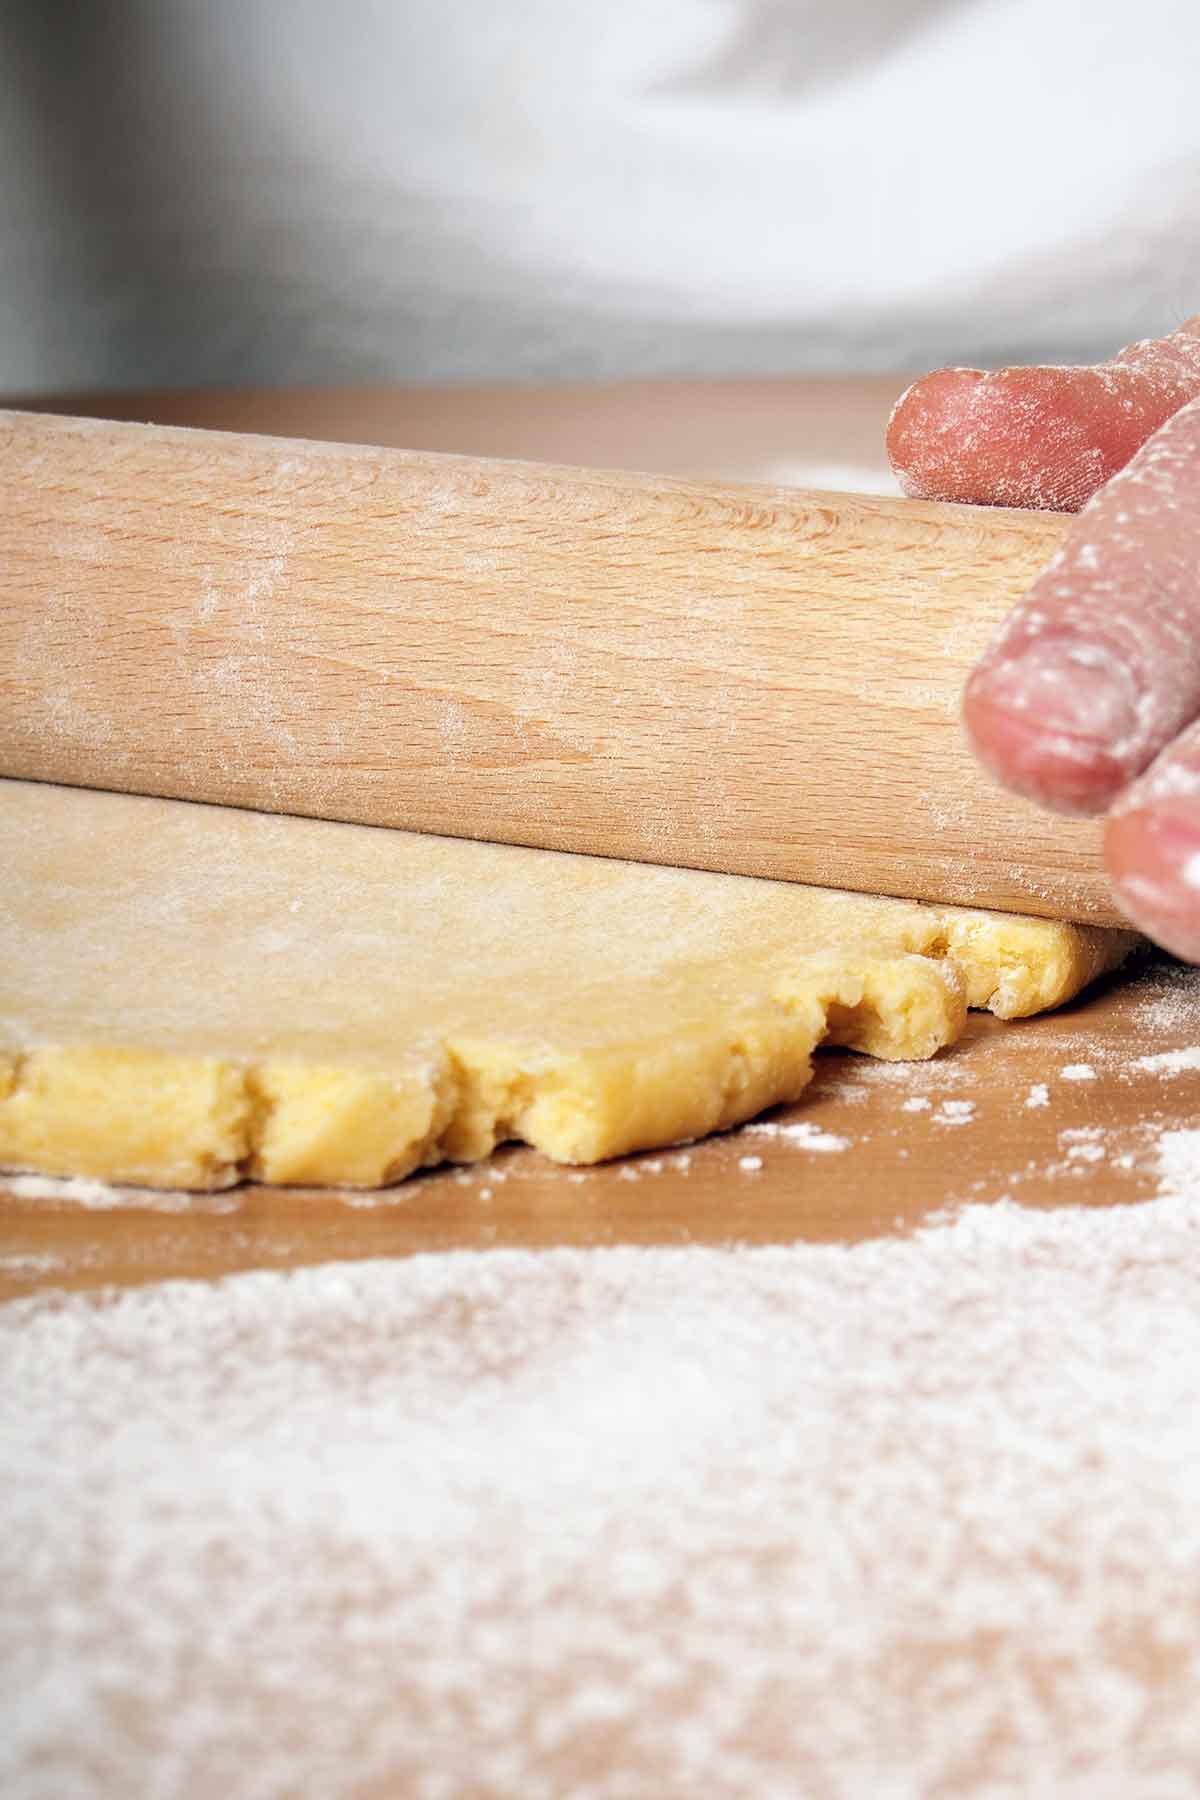
With a rolling pin, press down on the top of the dough in a few places like on the top of a peanut butter cookie. There should be some give, but not so much that your pin presses the dough right down to the rolling surface. If it does this, your dough is probably too warm, so let it chill for 10 minutes and try again.
Start rolling from the center
Always roll out the dough from the center. Position your hands on the pin so that they are over the dough and not off to the sides. This way you can feel what is happening directly under the pin as you press down and roll.
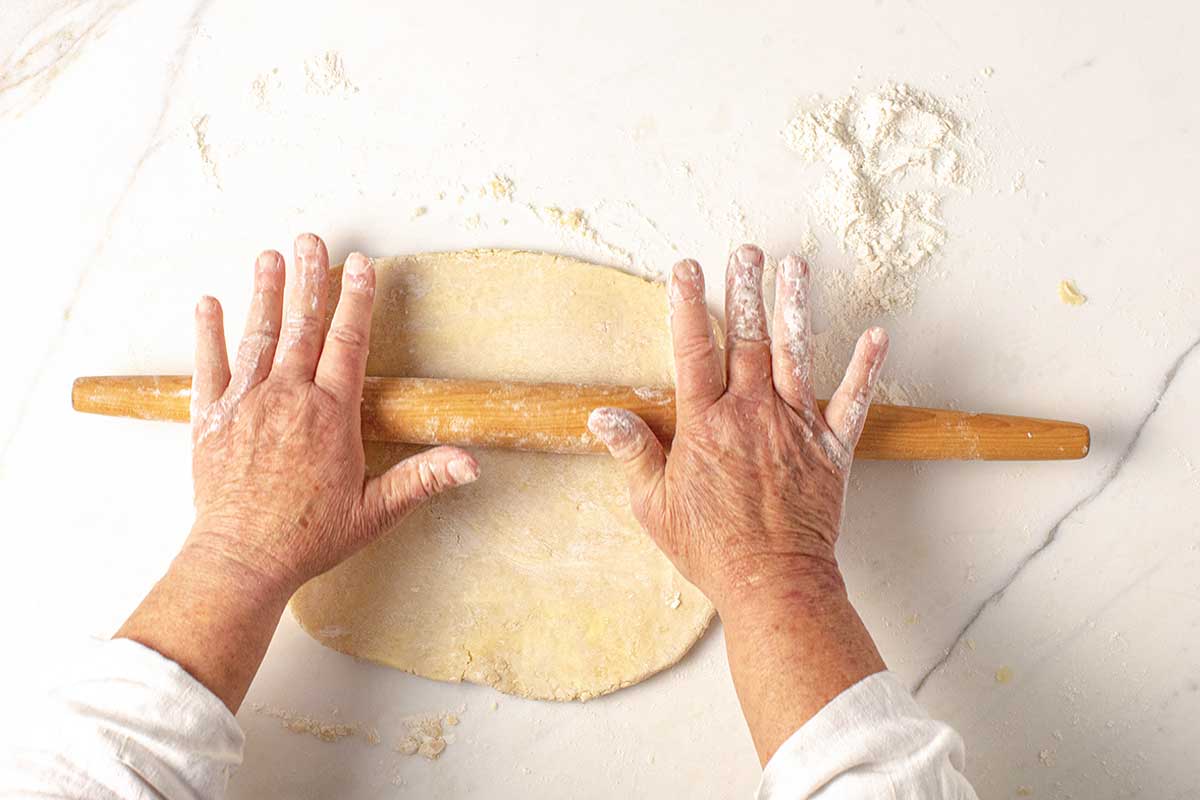
Roll, turn, repeat
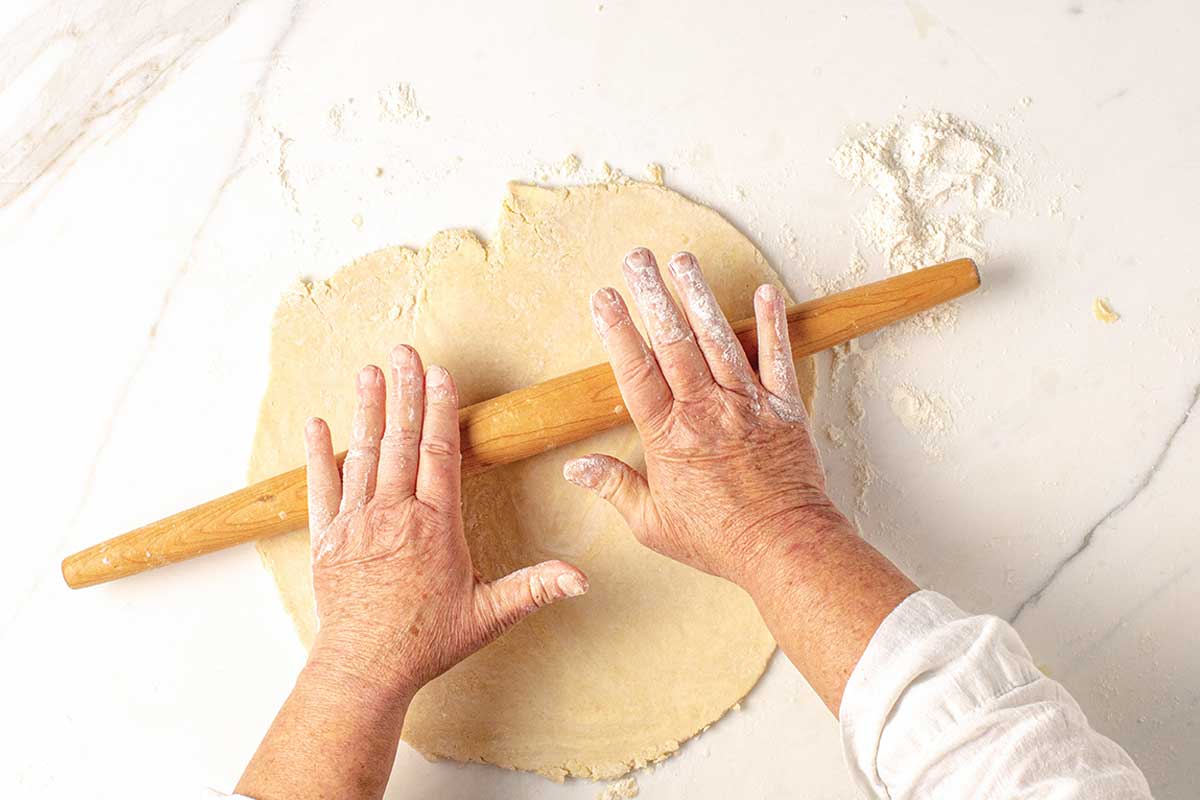
Your first pass will start at the center and move out toward 12 o’clock. So that the edges of the dough won’t get too thin and break, stop about 1 1/2 inches (4 cm) from the edge. Place the pin in the center and roll back to 6 o’clock. Give the dough a quarter turn and repeat rolling from the center to 12 o’clock, picking up the pin, placing it in the center, and rolling back to 6 o’clock. After each out-and-back roll, give the dough a quarter turn.
Make sure your dough is bigger than the pie plate
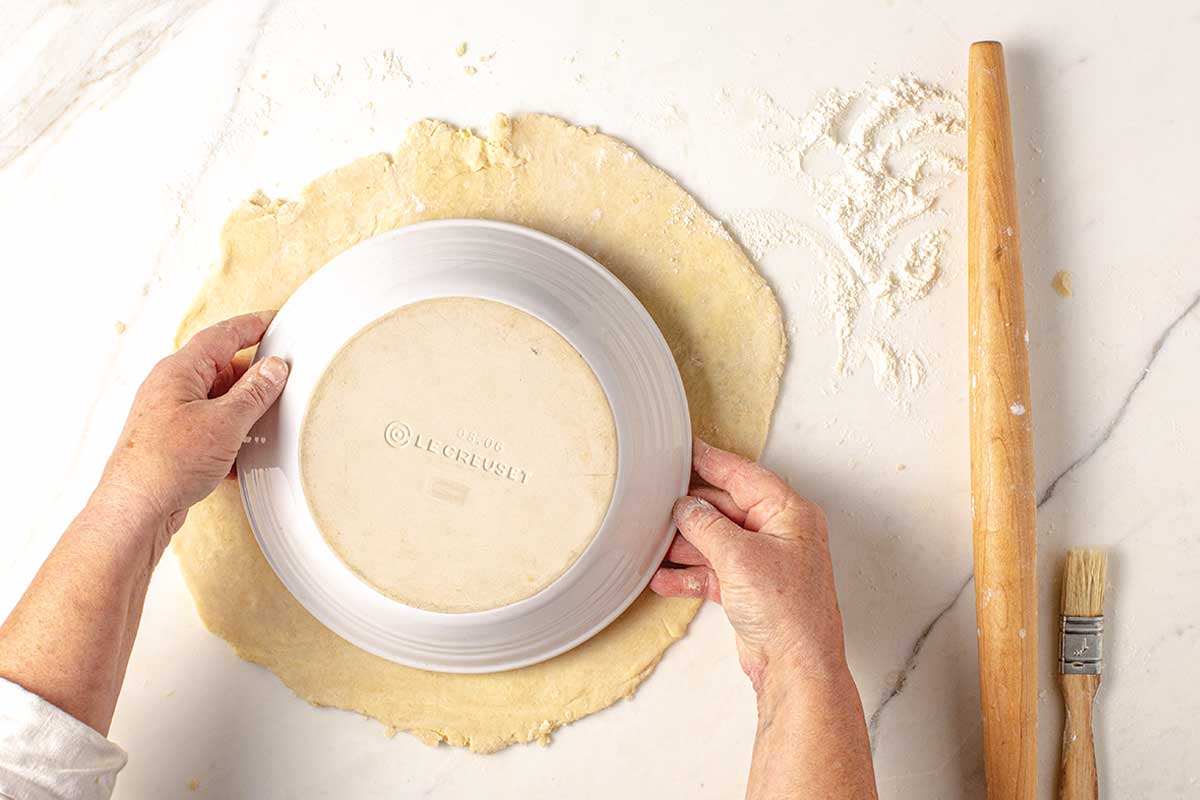
Continue to roll from the center until the dough is about 7 inches (18 cm) in diameter. Then roll all around the clock from the center until the dough is 2 inches (5 cm) larger than the diameter of the pie pan.
Brush off extra flour
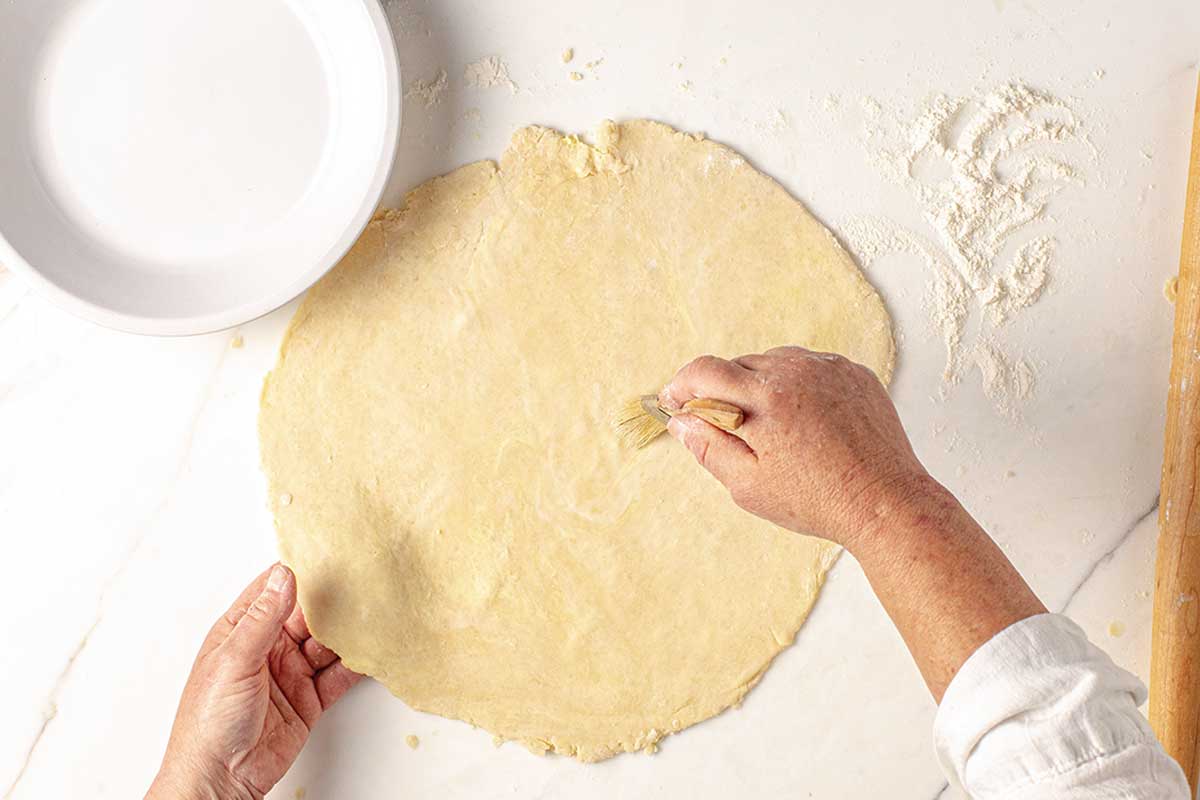
Brush off any extra flour from the top and bottom of the dough with a pastry brush.
Transfer the dough to the pan
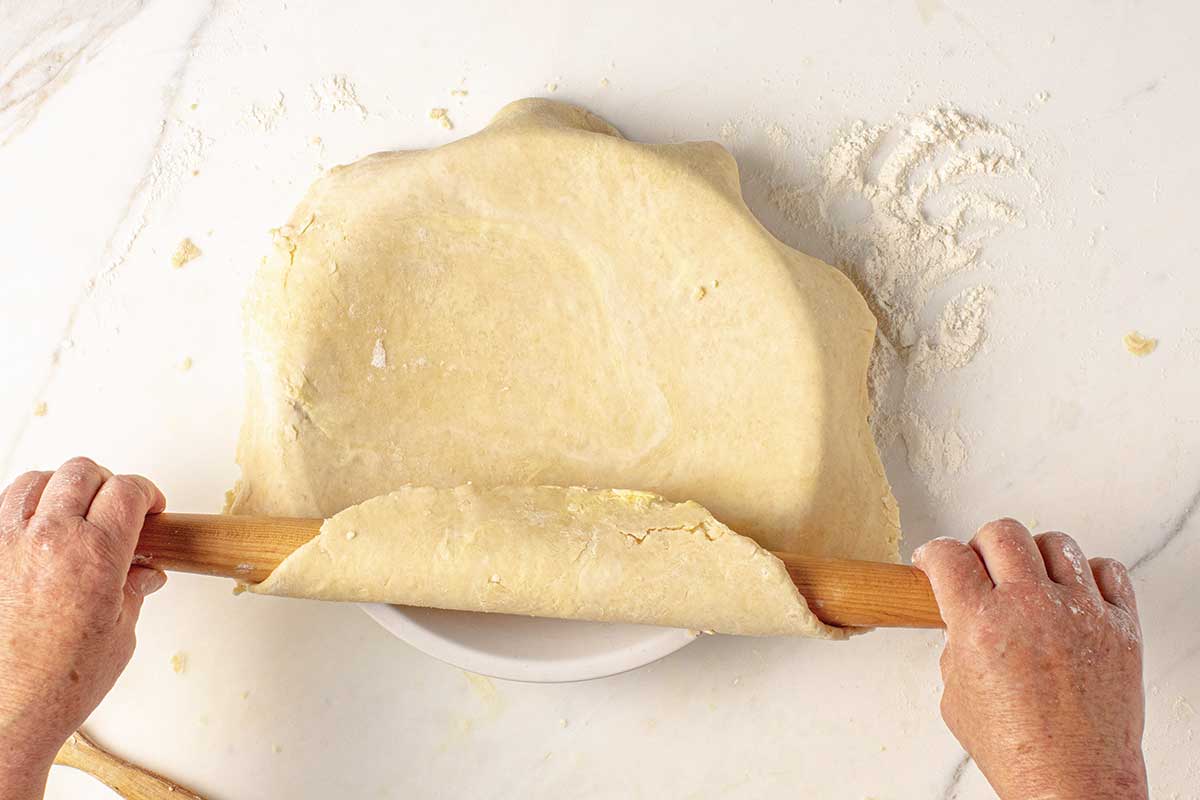
Drape the dough over the rolling pin. Lightly lay the dough-covered pin on the equator of the pie pan and, with a quick and deft flick of the wrist, roll the dough toward you.
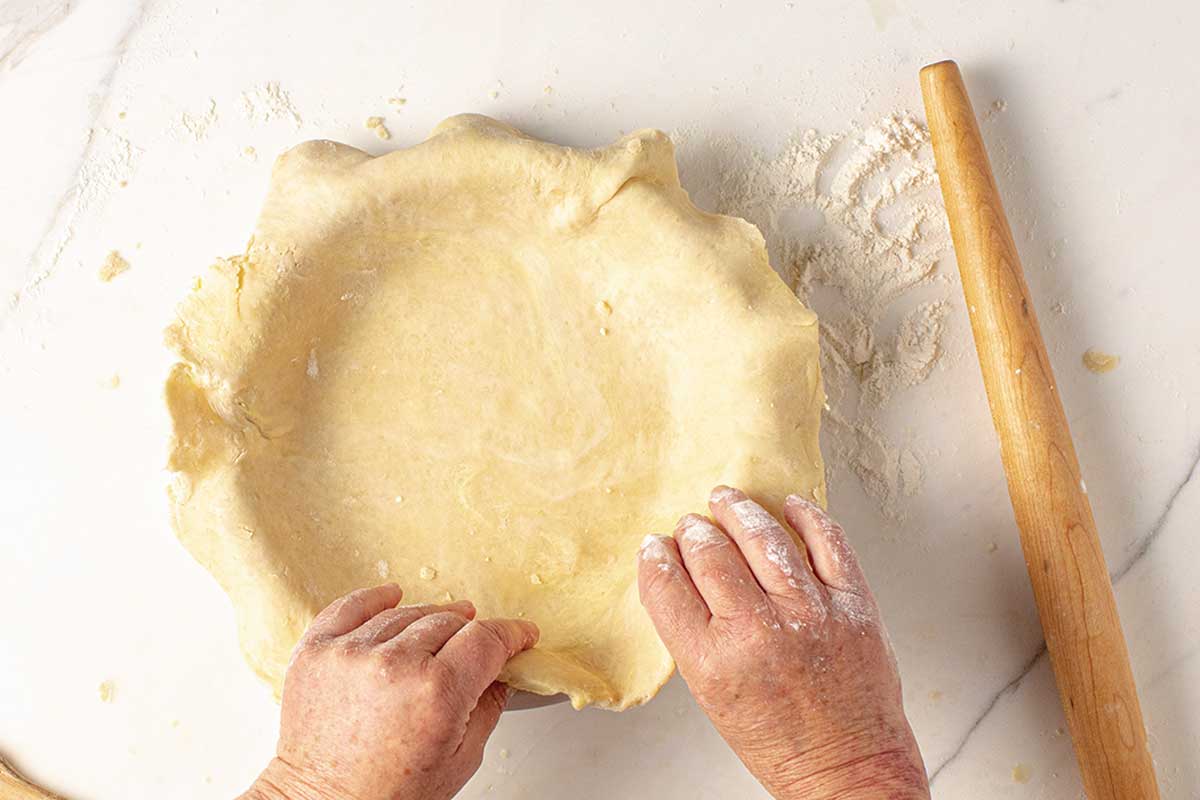
Adjust the dough in the pan as needed to center it, and then let the weight of the dough settle into the corners of the pan. If you push and stretch the dough, it’ll shrink back during the bake.
Trim
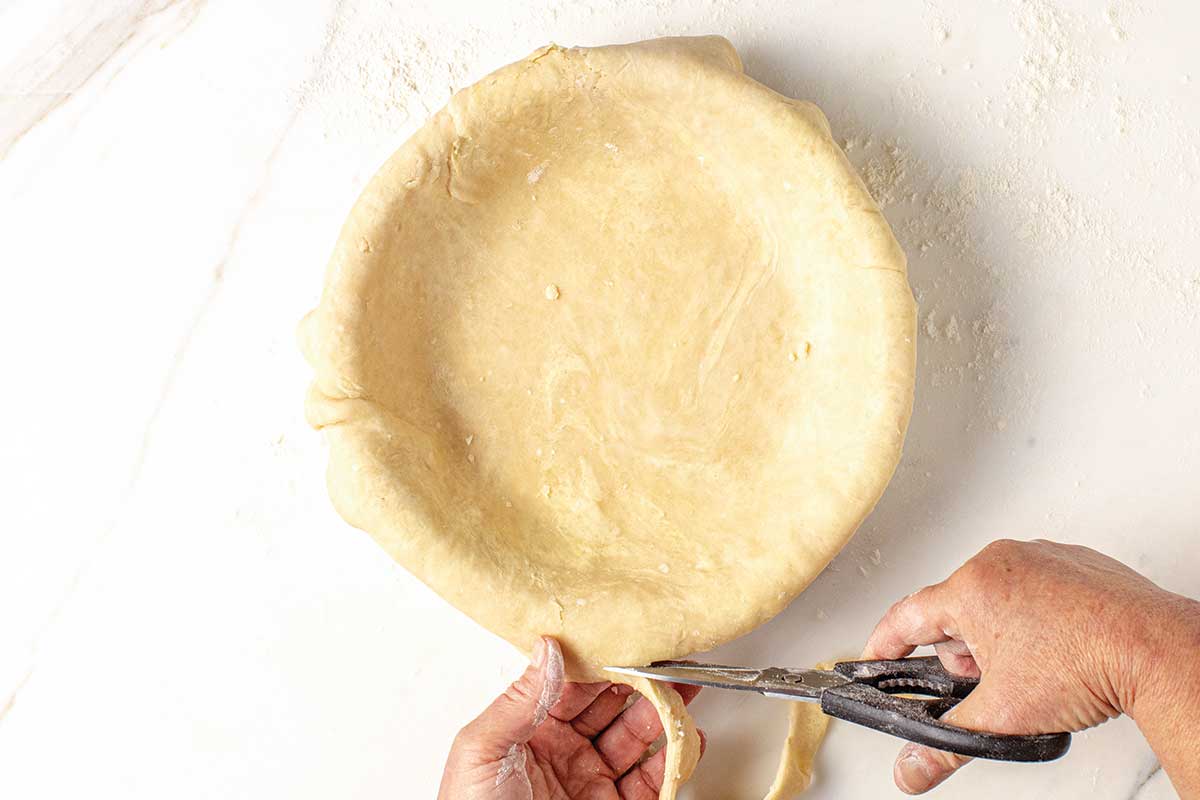
Trim the edges with scissors or a knife to about a 1-inch (2.5 cm) overhang. I use culinary shears to trim excess dough from pie edges. These shears break apart in two pieces for easy cleaning. A dedicated set of craft scissors will work, too.
Make the pie
At this point, you’ll either fill the pie or cover the dough with plastic wrap and place it in the fridge. Then you can decide what edge you would like to make.