

I was wondering what your experiences were with the No-Knead recipe? I feel it needs much more salt (about 2 tablespoons in total), but I was pleased with the rise and shape of Spawn Bread, and its crust was fantastic. I hope as Lexi gets older, it’ll develop more of a sourdough taste–still too adolescent for my taste.


David: Just seeing this now, after reading the no-knead bread recipes from the new Lahey book. I have been making this bread since the NY Times article came out and have been passing it around like a missionary, including to the restaurant where I worked, where they replaced it with the frozen bread they were buying from La Brea. I have lots of experience with this.
I think it’s fabulous that you can get this kind of a raise with just sourdough starter.
Here are my observations:
1. Yes, you need more salt. I use a generous tablespoon of kosher. While an on-going starter is fabulous, if you have it, most of us don’t. You can get a very “sour” taste by doing the following: Every time you make a batch, simply do not wash your bowl. Start the next batch of batter. Even though there might be only a couple of tablespoons of batter left, within two days of batches, you will start to taste the sourness. By the end of the week, it will be really sour (longer more than that, and it starts to get in the way).
2. I actually find the best size boule for the standard Dutch Oven uses 4 cups of flour, and my family likes 1 cup of that to be whole wheat. The amount of water will vary slightly with the age of the flour and the ambient conditions, but it will be at least 2 cups of water to 4 cups of flour. (I usually make two batches at a time; it never lasts.) I find no difference whether I use all-purpose or bread flour.
3. I find the working time quite flexible and forgiving; anywhere from 8 hours to 30 hours; though 18 to 24 seems to give the best flavor/texture. The best working/raising container for me are those huge covered Tupperware bowls.
4. The wetter the mixture (more batter-like), the larger the holes and more moist the bread will be. This is also the more tricky to handle in the towel-raising stage (will tend to stick even in a generously floured towel), and getting into the Dutch Oven. The dryer (more dough-like) it is, the tighter the crumb will be and the and easier it will be to handle. (I prefer the first).
5. I use antique cast iron pots, and haul it where ever I go (state to state). Both have their own ‘legs’—and one is perfectly round, giving me a true ‘boule.’ In my gas oven, I take out the oven racks, and place one or two of the Dutch ovens on a cookie sheet and place on the oven floor. In an electric oven, the cookie sheet with Dutch oven(s) on it, go on a rack on lowest position. The cookie sheet allow me easier access to the heavy Dutch ovens.
6. My whole grown family of five makes this bread (although they “say” they like mine the best), to the delight of their friends. It is the most welcome of host/ess gifts.
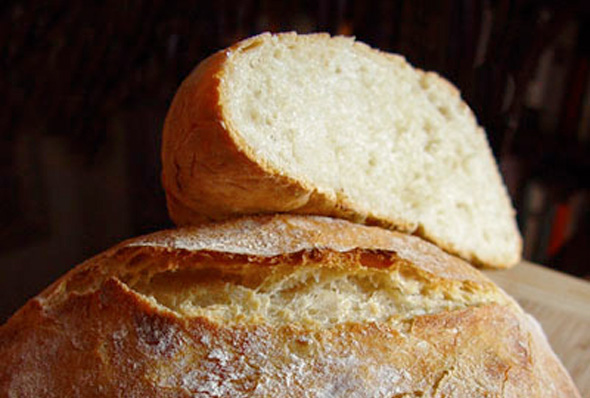
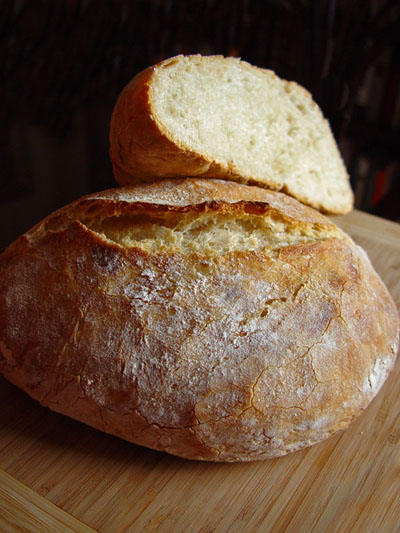
Finally the thing no one talks about, and I love, is the wonderful ‘cracking’ sounds that continue for about 5 minutes, when the bread comes out of it’s ‘oven’ and begins the cooling process.
I look forward to getting this new book! Thanks, Pamela
Pamela, Thanks for such a detailed reply. I will follow your instructions and see where it takes me!
thanks so much for sharing this…i can’t wait for my 7 and 10 year-old kiddies to come home from school so we can bake some bread together!
One, I agree about the salt.
Two, I think the best thing the Cook’s Illustrated redux offered was the use of a ‘sling’ to move the bread from second rise to hot pan. After the first riste place the dough on a large square of greased parchment paper in a skillet. When it’s time for the bread to go into the oven, gather the corners of the parchment and transfer the whole thing, parchment sling and all, in to the pot and bake.
Oh, and the beer makes a nice addition if you’re using whole-wheat flour—which this recipe takes very, very well.
Annie, Bingo! The sling solves the problem. I didn’t exactly have great aim when I plopped it into the pan.