Jump To
A sourdough starter is the key to developing unique flavor in your bread. It takes several days of patience to wait for it to develop but takes minimal effort. And when properly cared for, your sourdough starter can last indefinitely, providing you with bread for years to come. A gift that literally keeps on giving.–Angie Zoobkoff
HOW DOES A SOURDOUGH STARTER WORK?
How exactly does a sourdough starter work? Read on for this explanation from author Nick Barnard…
“Flour, water, yeast, and salt. That’s all you need. Of these, the yeast is your catalyst of fermentation, as it devours the sugars in the grain and creates carbon dioxide, which leavens, or expands, the dough. Yeast is a fungus, and wild strains have been utilized for thousands of years by bakers throughout the world. Over the past two hundred years or so commercial yeasts have been cultivated for both the baking and brewing industries.
“Wild yeasts, unlike commercial strains, are made up of a happy union of fungi and bacteria (lactobacillus), where the fungi digests all the sugars, except the maltose, and produces carbon dioxide (the rise), and the lactobacillus digests the maltose and other sugars, and produces glucose, which the fungi can digest. The lactobacilli act anaerobically, meaning in the absence of oxygen, and, in digesting the sugars, they produce lactic acid, lowering the pH, and so create the sour taste in the dough. The very best sourdough has just the right combination of sweet yeastiness with a hint of sour. Some sourdoughs are famous: San Francisco sourdough is renowned for its tangy flavor. The species of lactobacillus first found there is named after the city, Lactobacillus sanfranciscensis, and is cultivated commercially and sold to bakeries worldwide to replicate this distinctive sourdough flavor profile.
“Rather than buying commercially produced fresh or dried cultivated yeast, you can create and nurture your own happy union of wild fungi and bacteria, using only flour and water. All the fungi and bacteria you need are floating in the air around you. Once it comes alive, your wild yeast is known as a starter or mother. You will also be creating your very own and unique wild yeast. Your sourdough starter is energized by the combination of microorganisms present in the air in your kitchen and home, which means that she’ll be helping you to make bread with your own individual and special flavors. (Naming your starter is highly acceptable.)”
☞ LEARN MORE, READ: HOW TO DRY SOURDOUGH STARTER
Want to save this?

Sourdough Starter
Ingredients
- 1 2/3 cups whole wheat flour or whole spelt flour (165 g) or whole rye flour (172 g), depending on what sort of bread you want to make
- 1 1/4 cups freshly filtered water
Instructions
Day 1
- In a small to medium bowl, mix 1/3 cup flour and 1/4 cup freshly filtered water together thoroughly with clean fingers. Cover the bowl with a cloth or muslin and let it sit out at room temperature.
Day 2
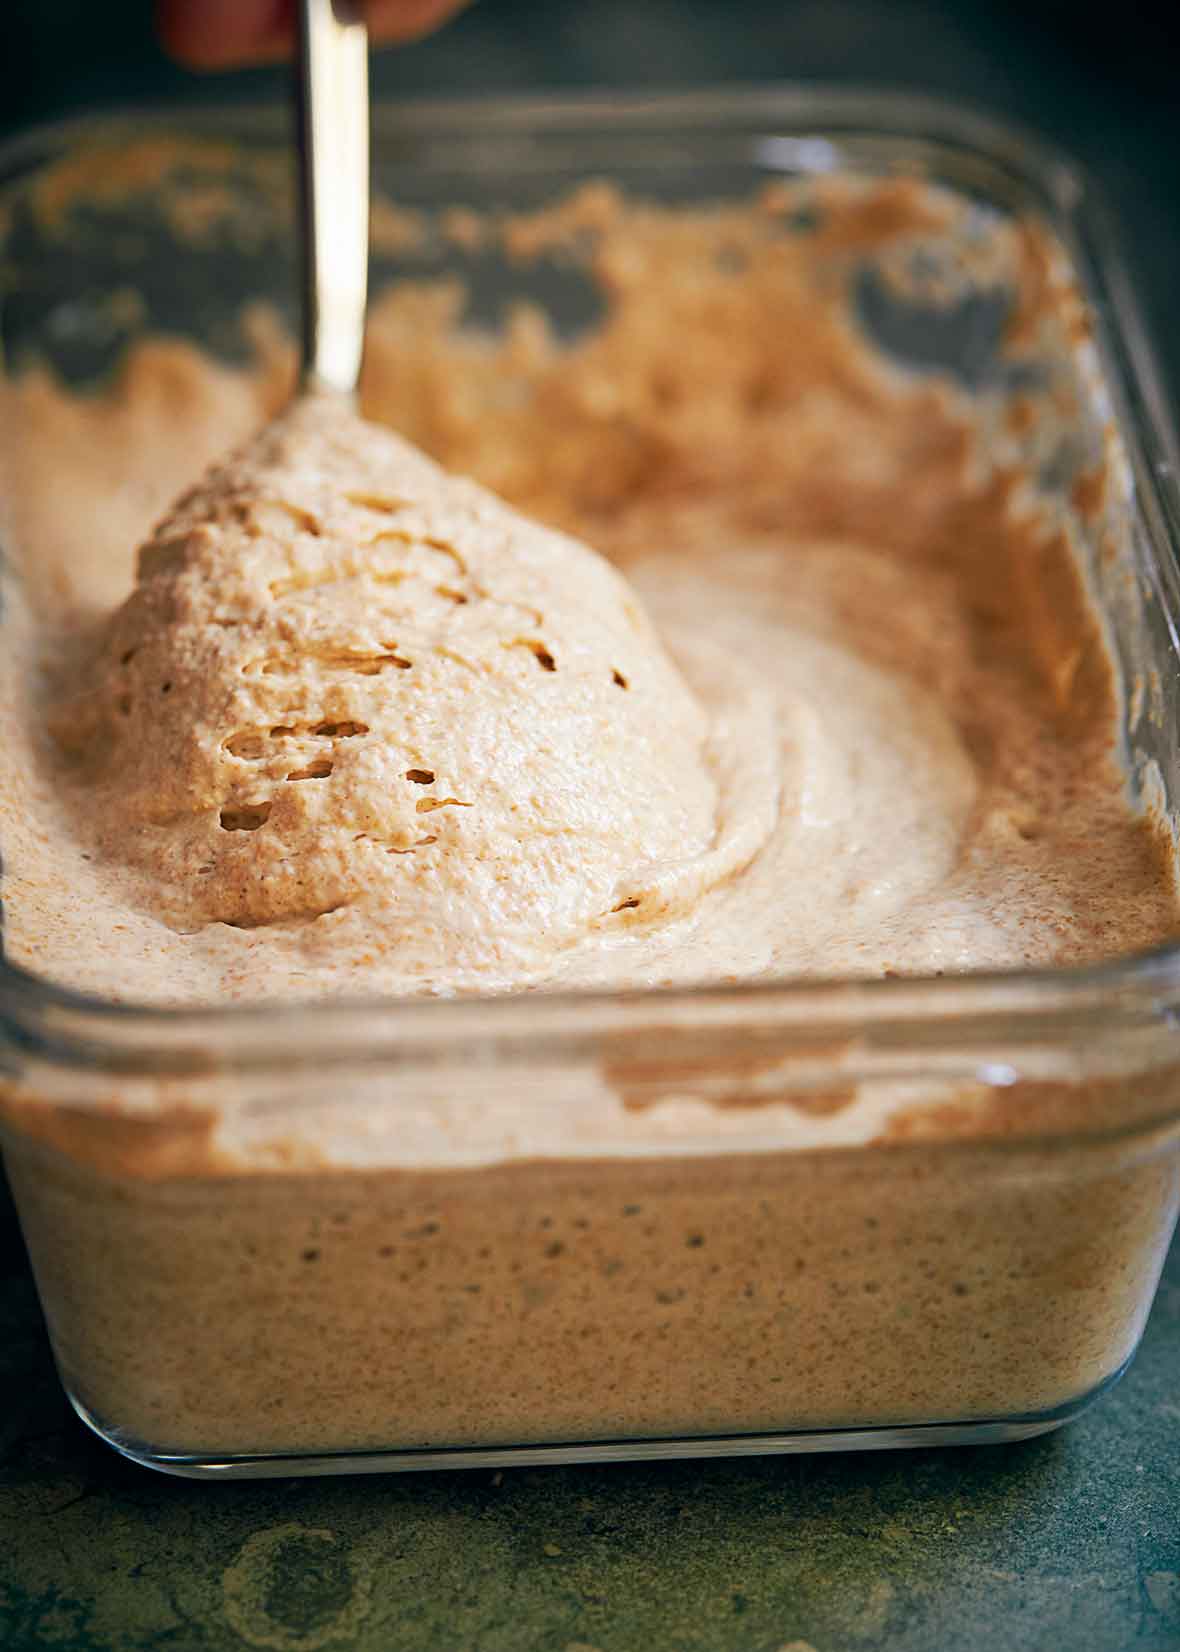
- Stir in 1/3 cup flour and 1/4 cup water as you did on day 1. The developing sourdough starter should have the consistency of pourable oatmeal.
Day 3
- Add 1/3 cup flour and 1/4 cup water and stir to combine. By now or by day 4, you may well need to move your sourdough starter to a larger container, which will become its permanent home.
Day 4
- Stir in 1/3 cup flour and 1/4 cup water. By now you should see your sourdough starter coming alive and forming a light crust, under which will be a sponge of gently bubbling activity.
Day 5 and Beyond
- Add 1/3 cup flour and 1/4 cup water as in previous days, but from this day forward cover the container and keep your sourdough starter in the fridge unless you are refreshing (feeding) her. The wild yeasts will stabilize at between 35 to 40°F (2 to 4°C) and as they slow down their activity they will live quite happily for about 2 weeks, undisturbed, before they run out of nourishment.
Feeding the sourdough starter and creating a starter for baking
- To ensure that your sourdough starter thrives, you need to feed her at least once every 2 weeks, and in doing so you can remove a portion of the starter for your bread making. It’s ok if you notice some grayish water collecting on the starter when it’s chilled; just pour it off and carry on with your breadmaking. At any time within the 2-week period, remove the mother from the fridge, and refresh with the same weight of flour that you will be removing as a wild yeast (sourdough) starter. So if your bread making requires 1 1/4 cups (150 g) sourdough starter, feed the starter with 1 1/4 cups (150 g) flour and 2/3 cup (150 ml) water, stir to incorporate fully, and then leave it out at room temperature for 8 hours before returning it to the fridge. If you’re unable to feed your starter beyond 2 weeks, freeze her. She’ll be up for coming back to life once thawed and fed again.
Notes
How to make a sprouted sourdough starter
Yes, you can create and nurture your sourdough starter with sprouted flour and make the most wonderfully flavorful and easily digestible wild yeasted breads. When you refresh your sourdough starter, you will notice a more rapid and lively reaction as sprouted flour, being naturally sweeter, will ferment more quickly. You will also need a little more water than the daily 1/4 cup used in the recipe to achieve a pourable oatmeal consistency in the developing starter.
Explore More with AI
Nutrition
Nutrition information is automatically calculated, so should only be used as an approximation.


I’m just interested to know why this recipe doesn’t remove 1/2 starter of the previous day like the other recipes i’ve seen. It looks a lot more practical for me to maintain then the other ones i’ve seen out there.
lindsey, you sourdough sleuth, you. What thoughtful question.
The accumulation method (this technique) and the traditional discard approach are two distinct philosophies, each with its own logic.
Most recipes ask you to discard half your starter before feeding to:
• Keep the volume manageable (instead of ending up with quantities that make you think, “Is this a starter or swimming pool?”),
• Reset the yeast and bacteria so each feeding is ample nourishment, and
• Keep the acidity in check so the yeast stays active and reliable.
This recipe—what I’d call a build-up phase—does away with daily discards for the first several days. It’s perfect for building confidence: You simply add small amounts of flour and water each day, let nature do its thing, and avoid the guilt of throwing anything away.
But here’s where it gets clever: Around Day 5, the process shifts. When it’s time to bake, you pull a chunk of starter out to use (which is essentially your discard), then feed what’s left so your starter stays strong for future bakes. Think of it as a two-act play:
Act I: Gentle, waste-free build-up → all about establishing your colony.
Act II: Smart maintenance → removing starter when you bake and replenishing well.
Try this approach, and you’ll see: the starter thrives, and you’re not wrestling with gallons of it. I’m thrilled that you’re exploring these methods with curiosity and balance.
Hope this helps—and if you bake, I’d love to know how it goes!
One more question, what day can I start using the starter for bread? Is day 5 ok?
Day 5 is fine, Dana, as long as your starter is active, bubbly, and consistently doubling after feedings.
Can I use rye in my starter? And if so, how much vs water? And should I continue with rye or can I add white as I grow her? I just want to try to add a little flavor, nothing dramatic.
Dana, once you get your starter established, you can swap in a little rye flour and play around with the amounts until you have a flavor you like. Just keep the total weight of flour the same as in the recipe.