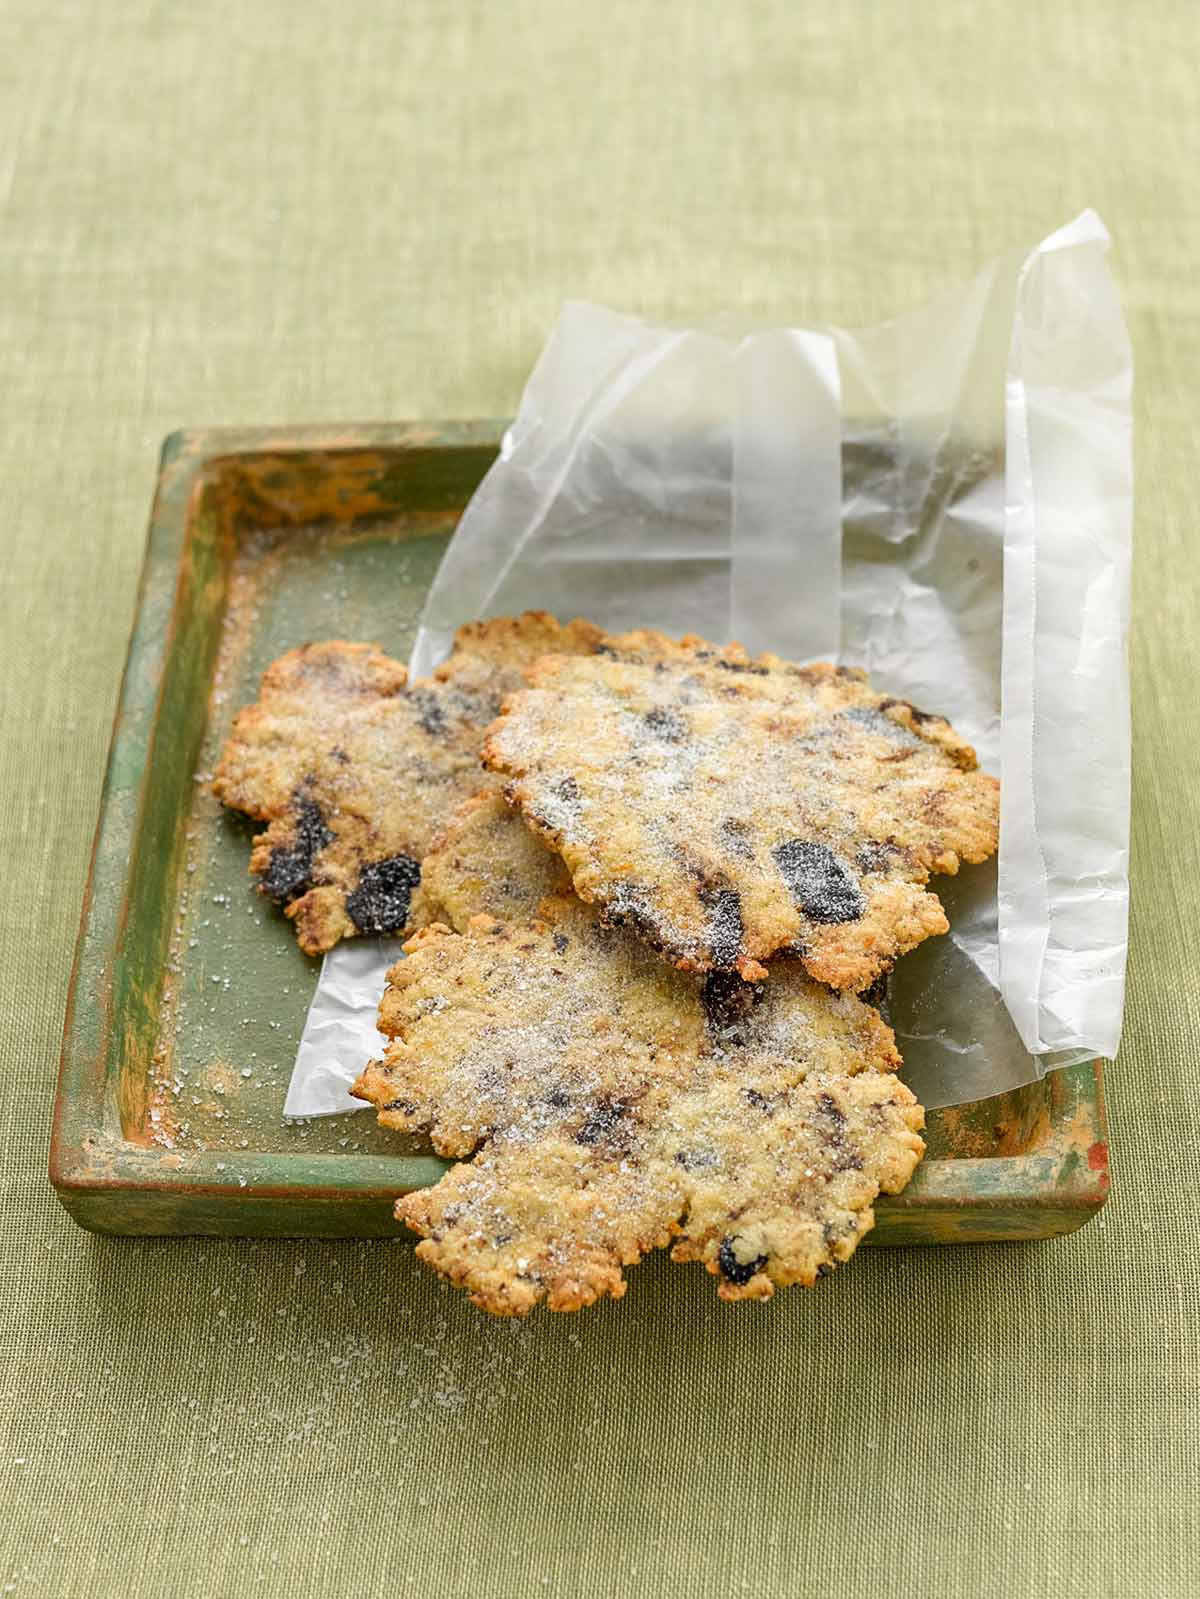
Cookies aren’t exactly a specialty of the Portuguese. Traditionally, they tend to be crumbly and plain, more like dunking biscuits.
One day at a dinner party, though, I had a sweet, thin cookie with a distinctive snap. I immediately made copious notes in my little black book, nibbling one cookie after the next so as to discern their many nuances. The only thing is, I never asked the hostess for the recipe.
Want to Save This?
I spent months trying to come up with a cookie that matched hers, and finally, I think I’ve done her proud. But I ratcheted up the recipe, adding two iconic Portuguese flavors to the mix: olive and lemon.
Serve these cookies alone, as an accompaniment to tea, or, my favorite, as a crunchy little something alongside a scoop of vanilla ice cream or lemon sorbet.

Portuguese Sweet Lemon-Olive Cookie
Ingredients
- 1 1/2 cups all-purpose flour
- 1/2 cup oil-cured black olives, rinsed quickly if particularly salty, pitted, and coarsely chopped
- 1/4 cup granulated sugar, plus more for coating
- 1/4 teaspoon baking powder
- 2 tablespoons grated lemon zest, preferably organic
- 1/8 teaspoon ground cinnamon
- Pinch of kosher salt
- 1/4 cup extra-virgin olive oil
- 1 large egg, beaten
Instructions
- Position a rack in the upper third of the oven and crank up the heat to 375°F (190°C). Cut 3 pieces of parchment paper cut to fit your baking sheet.
- Stir together the flour, olives, sugar, baking powder, lemon zest, cinnamon, and salt in a medium bowl. Whisk together the oil and egg, pour the mixture into the dry ingredients, and mix with your hands until the dough no longer looks dry and holds together when squeezed, 1 to 2 minutes.
- Fill a small bowl with sugar and set nearby. Pinch off 1 rounded tablespoon (about 1 ounce) of dough, roll it into a ball, and coat it well with sugar. Place the parchment paper on your work surface and place the dough ball near one corner of the parchment. Place another piece of parchment on top and, using a rolling pin, roll the ball into a 3 1/2- to 4-inch circle that’s a scant 1/16 inch thick. The edges of the cookie will be ragged; that’s how it should be. Repeat with 4 or 5 more wafers on the same sheet. Lift off the top sheet of parchment and slip the parchment with the cookies onto the baking sheet.
- Bake until the lemon-olive cookies are edged with brown and pebbled on top, 10 to 12 minutes. Slide the parchment onto a wire cooling rack. Repeat with the remaining dough, using a new piece of parchment for each. Once cooled, the cookies will keep in an airtight container for several days, but I doubt they’ll stick around that long.

Explore More with AI
Nutrition
Nutrition information is automatically calculated, so should only be used as an approximation.


I made these very successfully, though I had to add some oil to the batter because it was too dry even after mixing it thoroughly. I’m not an experienced baker but these are absolutely delicious! Will make them again.
Ellen!! I think this is the very first comment you’ve left on the site. I’m delighted you liked the cookies. Depending on how oily the olives and how you measure the flour, you might need an extra splash of oil. Did Mr. Pilot enjoy them?
Hi,
Do you know the Portuguese name of these cookies? Thanks!
Sere, it’s Biscoitos Doces de Azeitonas Pretas e Limão. But this is a recipe I created based upon a cookie I had at the home of a Lisbon matron who is a great cook.
Hi, David. Here in Brazil, the most easily available Olives are in salty, garlicky or orange water (“salmoura”). I wonder if one dries them with towel paper, gently squeeze the extra water out and give them a quick roast on the oven rinsed with olive oil (like toasting nuts) would produce the same result?
Jorge, we did a revision of the recipe for Lindsay for their brine-packed olives. You can find the recipe here. Please let me know how they turn out!
Hi David,
I made these ages ago and they were fine, tasty, and quite unusual. However, their “making-of” really got me to send a lengthy comment with some questions not only related to these biscoitos but to general baking and making doughs with olive oil. That is the reason of this late feedback.
I made two batches in a different way regarding cookie shaping. So lets start:
1 – The “toasting” of chopped salty water curated olives in the oven rinsed with olive oil worked nicely and it really does the job. This could be done in advance for a larger batch and the olives kept in oil for later use. I would have already ended-up baking more of these if this peculiar step might have been avoided.
2 – Clumpiness: I followed exactly the recipe on mixing ingredients and ended up with a ‘clumpy’ dough (see pic. 1) that after some resting in the fridge tended to fall apart and started sweating the olive oil and kind of ‘expelling’ the stir-ins (in this case olive chunks). This is not new for me, the first olive oil cookies I’ve made from recipes without eggs or milk ended up like this after resting (if the dough takes eggs beaten with sugar, or milk, cream, ricotta, etc.. it becomes a bit gelatinous and easy to scoop). I kind of solved this problem in the past by freezing the oil and rubbing it to the flours + sugar and sometimes diminishing the amount of oil (from 2/3 cup to ½ for a dough with around 200g of flour) and adding some liquid to get the dough come together and because butter has butterfat and water… adding the liquid also prevents too much crumbliness. Anyway… as you can see, having a clumpy dough didn’t prevent the cookies from being shaped and baked!
3 – Shaping, etc. I started using your method but got very irregular shapes (see 2 cookies on the left of pic. 2), then switched to making a ‘medal’ of dough, rolling it in the sugar, pressing it with the bottom of a mug (pic. 1) and finish the job with the rolling pin: this produced the other cookies on pic. 2. The second batch, because of dough lumpiness – I decided to give a try by shaping a medal and press only until they had like 1/4 inch, roll in sugar and bake. These produced nice cookies (pic. 3), but with a softer inside, so they weren’t entirely crunchy all over their surface.
I think that the next time I’ll use the ‘slice and bake’ frozen log method for obtaining a more cookie shaped piece and thin enough for 100% crunchiness.
Jorge, thanks for the detailed comments and the pictures, but I have to say I’m a bit confused.
1. The recipe doesn’t call for the toasting of the olives. They are simply drained and chopped. The recipe calls for oil-cured olives, not olives in brine.
2. The dough is meant to be used immediately, not refrigerated. The longer it sits, the more it will weep olive oil. The trick is to really work the oil into the dough. Now, you’re in Brazil, and the flour most likely is different there from the flour we have here in the States. I would hold back 2 tablespoons of the flour and see what the consistency of the dough is. If it can handle it, add another tablespoon and then the last, if you need it.
3. The shapes of your cookies are PERFECT! We always joke when making these, “I wonder what continent shape we’ll get with this one?” These aren’t meant to be nice round cookies with even edges. The shapes of all of your cookies are no different than mine. The thicker cookies, while fine, aren’t what these are meant to be. Perhaps chopping oil-cured olives finer will allow you to roll them out thinner.
Thanks for the tips! Over here we have limes, not lemons, and the local limes are not very strong flavoured, so the lemony taste doesn’t really show up in the baked goods. I now remembered that I added a bit of juice and that might have provided too much liquid. I’ve just made another fresh batch and this time the dough came out perfectly. Anyway:
1 – In our local supermarkets we have only brine olives, so I did the adaptation as advised above and that is why I’ll always have to do the previous ‘oiling’ of the olives for baking these.
2. OK now. This time I have used lime zest and just one tbsp juice. The lemony flavour is still missing. Next time I will try a local ‘wild lime’ that has orange coloured peel and a reputation of being quite sour. I have seen it in caipirinhas.
3. Some cookies batches end up in the Bird Lodge cookie jar, and I do have literally a ‘bottle-neck’ problem to fit these cookies in it, now I’m using the bottom of a large mug to press the cookies and it worked fine, I now have thin crunchy cookies that slip very well into the cookie jar!
Jorge, these look FANTASTIC! And forgive me: I forgot I linked off to the Lindsay Olives post about curing the olives in the oven.