I love to celebrate the power that food has to bring people together, to remember the immense joy it can bring, and, more than anything, bank those memories with our loved ones. To be in a loved one’s presence, to see their face light up, share memories and laugh out loud together, that’s what life is truly all about. And the joyful, amazing thing about food is that it can be anything you want it to be. It can nourish, sustain, help to heal, be fast or convenient, comforting, fun, surprising, or an adventure. But maybe, in its simplest form, it works as an excuse to bring the people you love together. This is about saying “I love you” through food.—Jamie Oliver
Garlic Pull-Apart Rolls FAQs
Jamie Oliver recommends taking half of the recipe and freezing it, and we feel quite confident following his advice. With the second pan of garlic bread, shape and proof for 45 minutes, then cover and freeze until needed. Simply bake from frozen for 25 minutes.
The beauty of this recipe is that you can start early or not so early. Start the dough the day before by making the bread up to step 7 and then letting it rest in the fridge overnight. However, if you can’t wait that long, let it proof on your counter for about 1 hour and bake from there.
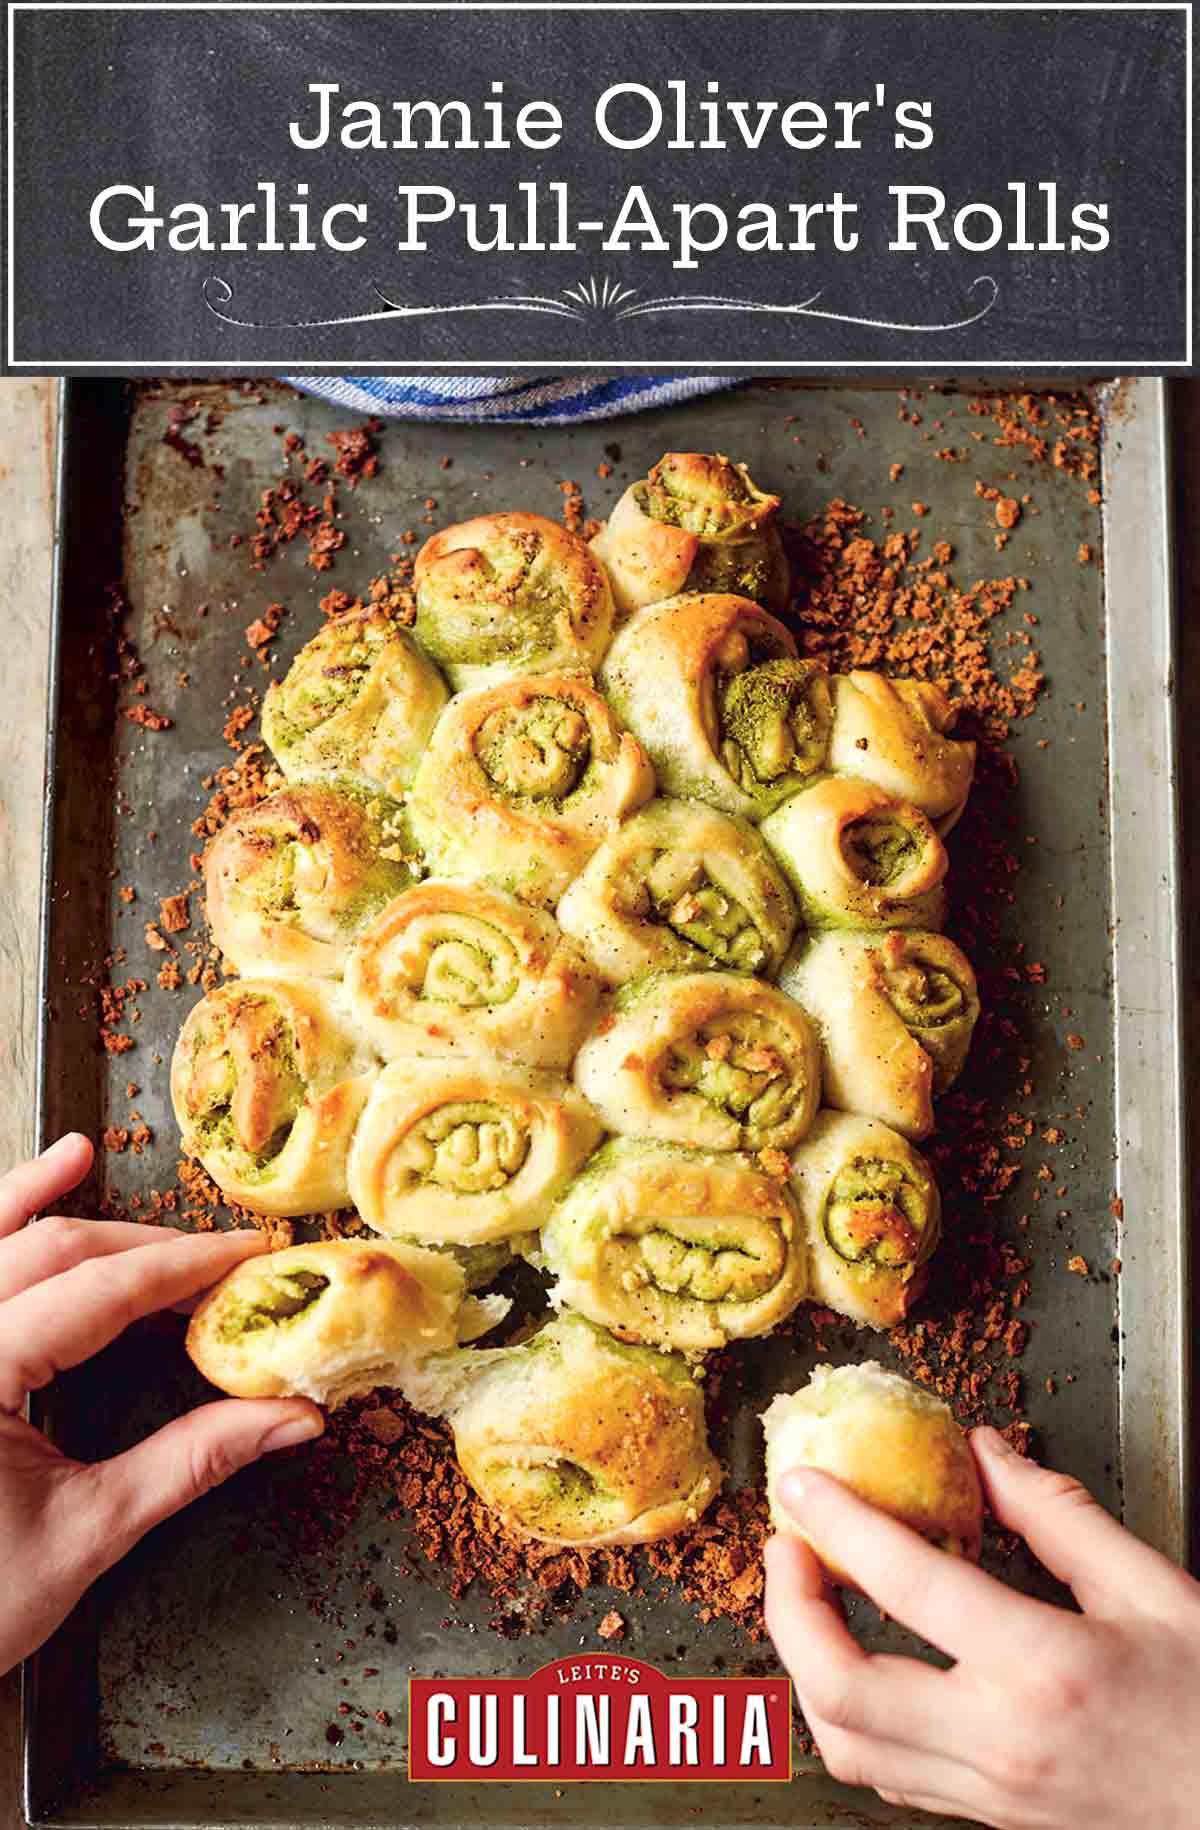
Jamie Oliver’s Garlic Pull-Apart Rolls
Ingredients
- 1 1/3 cups tepid water
- 1 packet (1/4 ounce) dry yeast (2 1/4 teaspoons)
- 3 1/2 cups bread flour, plus extra for dusting
- Sea salt
- 1 3/4 ounces white or whole-grain bread
- Extra-virgin olive oil
- 1 (2 ounces) big bunch of fresh flat-leaf parsley
- 7 cloves of garlic
- 1 lemon
- 7 ounces (a scant cup) cream cheese, preferably full-fat
Instructions
The day ahead
- To a large bowl, add the tepid water and yeast. Mix with a fork for 2 minutes.
- Add the flour and a good pinch of sea salt, mix with a fork until you can’t move it anymore. Next, using clean hands, bring it together as a ball of dough, adding more flour, if needed, to stop your hands and the dough from sticking.
- Dust a work surface with flour, then knead the dough until silky and elastic, about 5 minutes. Shape into a rough ball, place in a lightly oiled bowl, cover with a clean damp kitchen towel, and proof in a warm place until doubled in size, 1 to 1 1/2 hours.
- Meanwhile, tear the bread into a blender and blitz into crumbs. Rub two rimmed baking sheets with olive oil, then evenly scatter over the breadcrumbs.
- Tear the top leafy half of the parsley into the blender. Peel and add the garlic, then blitz until fine. Squeeze in the lemon juice, add the cream cheese, blitz again until smooth, then season to perfection, tasting and tweaking.
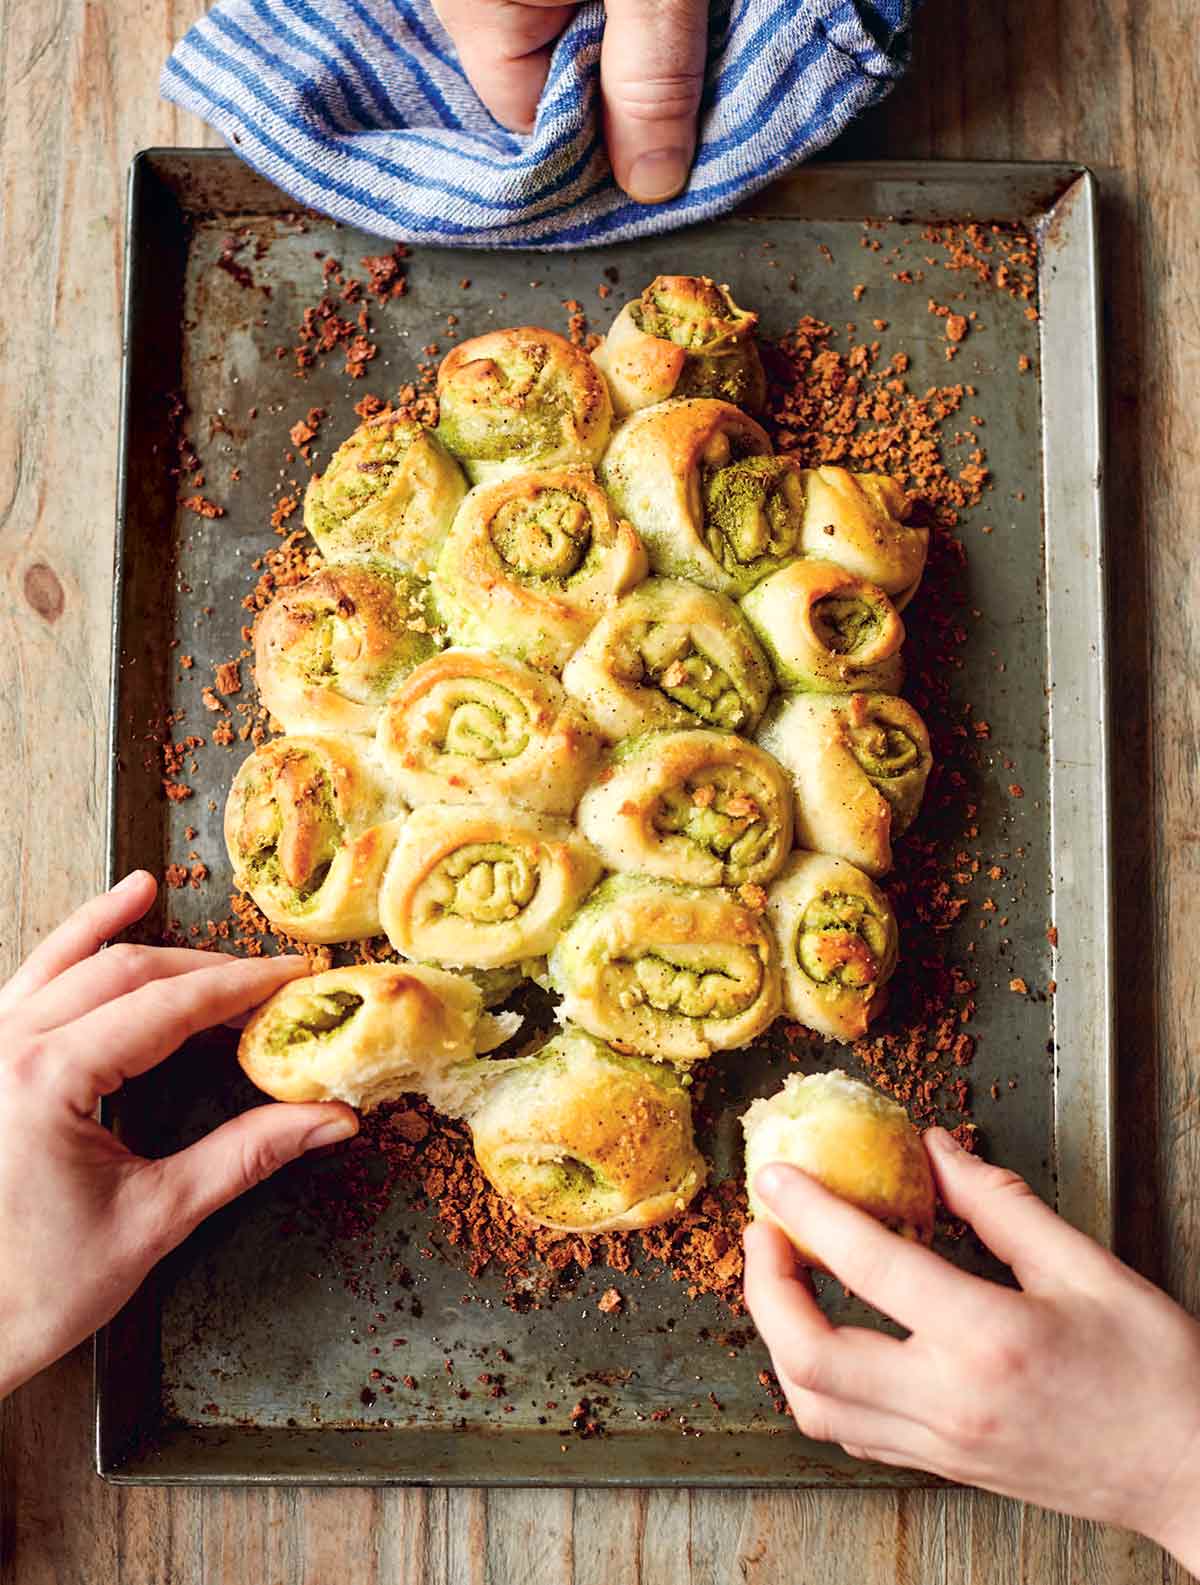
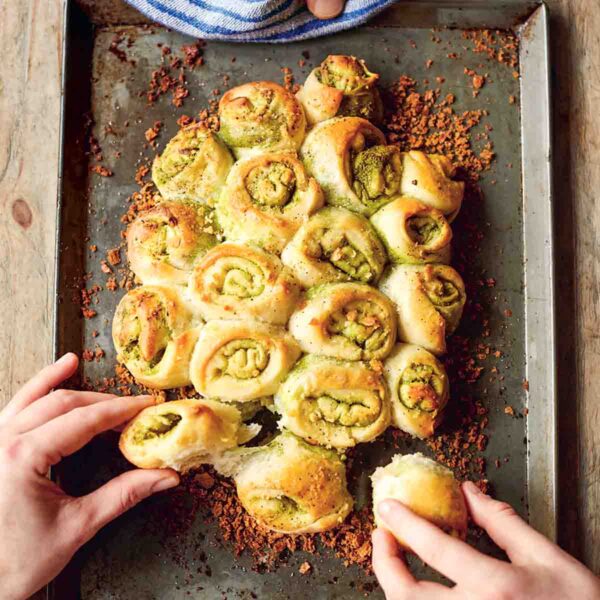
- Knock the air out of the dough by punching it with your fist, then divide it into two. One piece at a time, pull and stretch out on an oiled surface to 20-by-12 inches (50-by-30 cm). Spread over half the cream cheese mixture, leaving a 2-inch (5 cm) border along the longer side that’s farthest away from you. Now, take your time to roll up the dough, starting in front of you, so you end up with a long jelly roll shape.
- With a sharp knife, cut each roll into 18 pieces, then place on the baking sheets, swirl-side up, arranging them fairly close together. Cover and proof in the fridge overnight. If making the same day, proof at room temperature until doubled, about 1 hour. At this point, the rolls can be frozen on the baking sheet, covered, for future use, and can be baked from frozen.
- Preheat the oven to 425ºF (218°C).
- Uncover and bake on the top rack until golden, 20 to 30 minutes. Drizzle with a little extra virgin olive oil, to serve.
Explore More with AI
Nutrition
Nutrition information is automatically calculated, so should only be used as an approximation.
Recipe Testers’ Reviews
Did you know only 68% of the recipes we test make it onto the site? This recipe survived our rigorous blind testing process by multiple home cooks. It earned the Leite’s Culinaria stamp of approval—and the testers’ reviews below prove it.

These garlic pull-apart rolls are an interesting take on garlic bread. It’s a nice change-up from the traditional buttered baguette with garlic. They do bake up nicely from frozen as well, so a good make-ahead to have stashed in the freezer!

These garlic pull-apart rolls from Jamie Oliver were a fun treat. They baked up nicely from frozen as well, so I can see myself keeping a stash in the freezer for the holidays, particularly to take along to a holiday potluck meal. Take care when stretching the dough as it can become thin in spots.


