Jump To
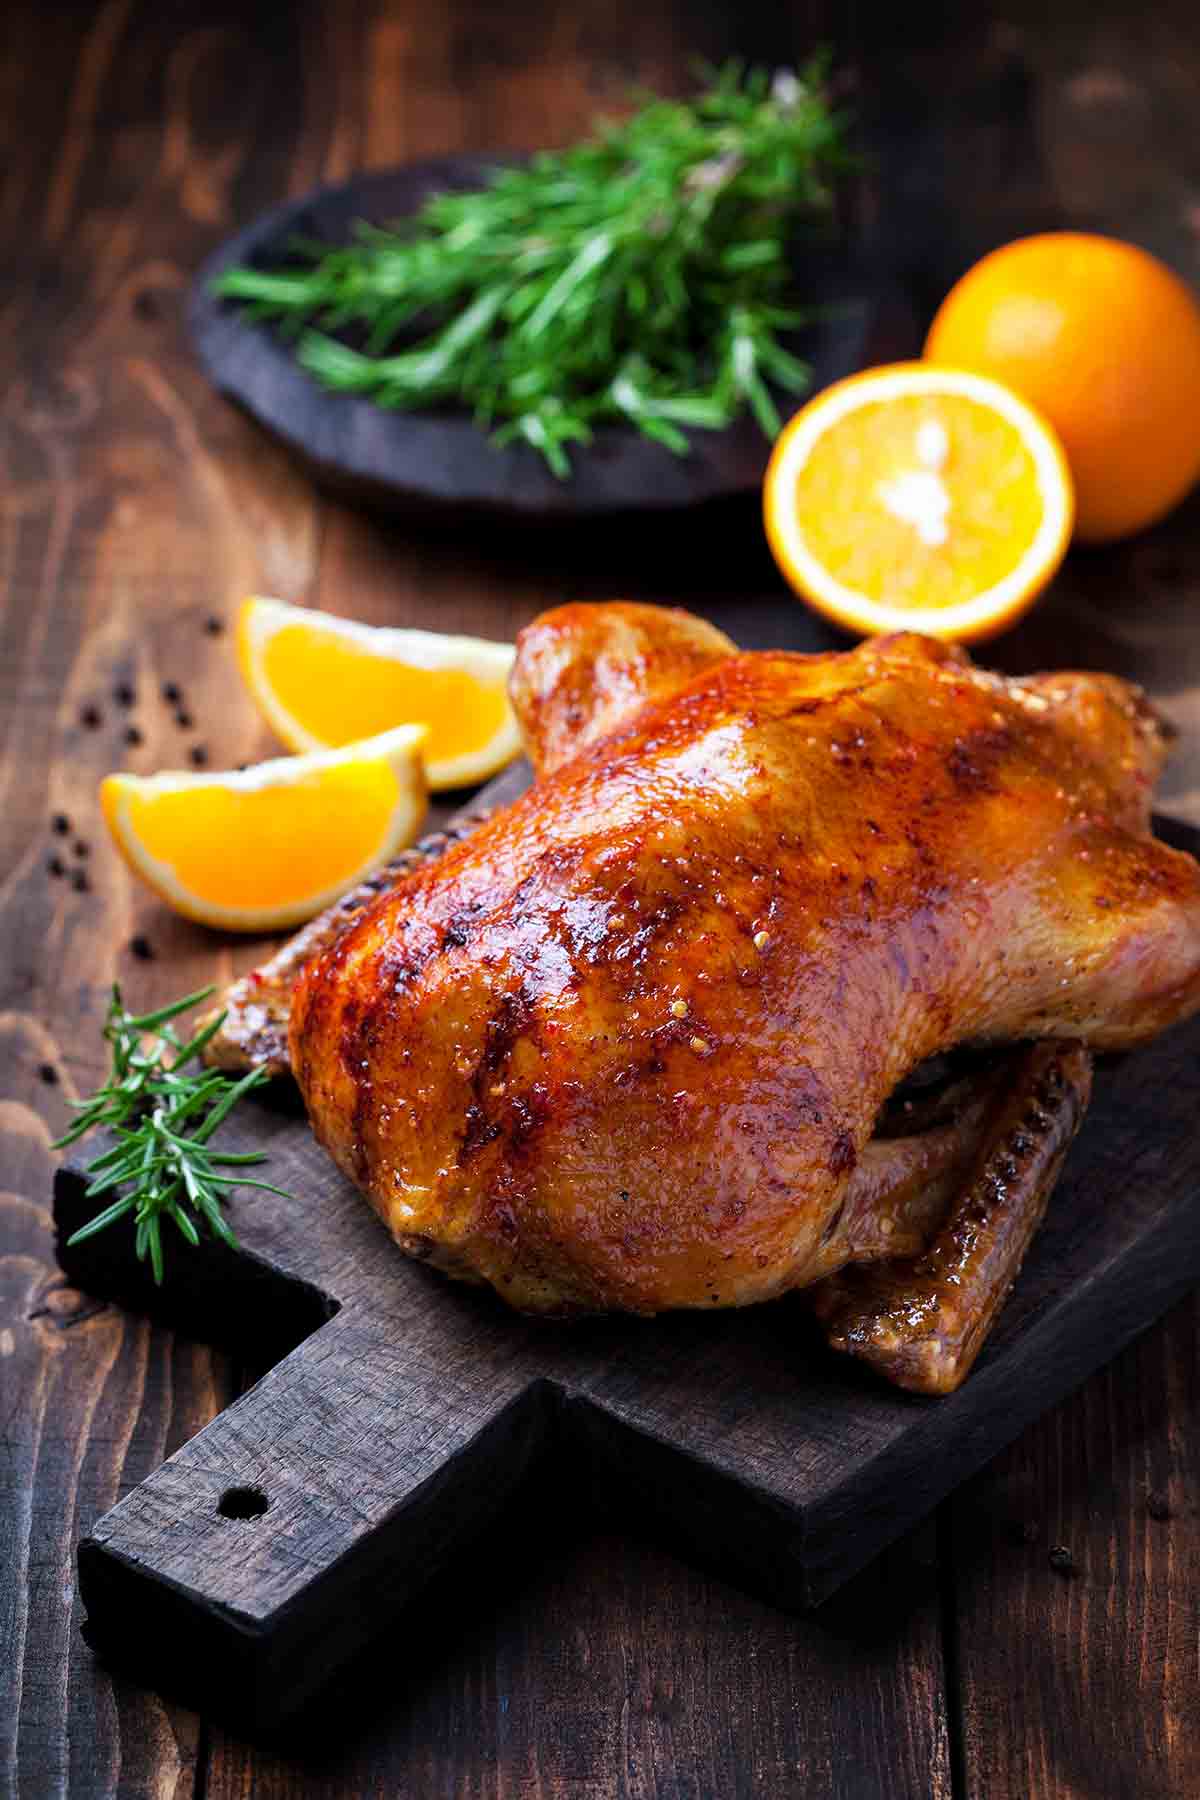
If you’ve only had oven-roasted duck, this recipe just may change your whole opinion of the bird. It comes out so crisp and delicious, with a deeply brown, burnished skin, it’s almost like Chinese roast duck. But to render the fat, you really have to prick the skin all over—fifty times, in fact. Count ’em!–Mario Batali
LC 50 TIMES NOTE
It seems 50 isn’t just the number of times one ought to brush one’s hair at night or the number of sheep one may count before becoming even remotely sleepy. It’s also the number of times one must pierce the skin of a duck prior to roasting. We’re not about to argue with any logic that turns out duck skin this crisp.

Spit-Roasted Duck
Ingredients
- 1/2 cup orange marmalade
- 1/2 cup fresh orange juice
- 3 tablespoons balsamic vinegar
- 4 garlic cloves, minced
- 2 tablespoons finely chopped rosemary leaves
- One (4 to 4 1/2 pound) duck
- Kosher salt and freshly ground black pepper to taste
Instructions
- Prepare a gas or charcoal grill for rotisserie cooking over indirect medium heat (or according to the instructions for your grill). Place the drip pan under the center of the spit.
- In a small saucepan, combine the marmalade, orange juice, balsamic vinegar, garlic, and rosemary and bring to a boil. Reduce the heat to medium-low and gently simmer for 5 minutes. Remove from the heat and let cool. Pour 1/4 cup of the sauce into a small bowl to use for basting the duck, and pour the rest into a small serving bowl for passing at the table.
- Meanwhile, remove all the excess fat from the duck. Wash the duck and dry it thoroughly both inside and out with paper towels. With a sharp metal skewer, prick the duck skin all over, especially the thighs, 50 times. Season the duck inside and out with salt and pepper to taste. Tie the legs together and brush the duck all over with a light coating of the orange-marmalade mixture.
- Place the duck on the spit and secure it with the clamps. Attach it to the rotisserie mechanism, cover the grill, and cook until the temperature in the thickest part of the thigh reaches 160°F (71°C), 1 1/4 to 1 3/4 hours, depending on the heat of your grill. About 15 minutes before the duck is done, brush it all over again with more of the orange sauce. When the duck is done, transfer it to a cutting board and let rest for 15 minutes.
- Carve the duck and pass the remaining orange sauce on the side.

Nutrition
Nutrition information is automatically calculated, so should only be used as an approximation.


Our duck was on the spit for 10 minutes and it was black. Completely ruined.
Angela, I’m so sorry to hear that. What kind of grill did you use? The recipe says that it should be over indirect heat. That would not burn the duck in 10 minutes.
We’re going to try this again tomorrow. I am an avid, advanced cook and I am determined to get this right, lol…will let you know how it comes out!
Keep me posted, Angela. Remember…indirect heat.
This duck was SO GOOD! My wife and I were both amazed at how delicious it was, considering I’m nothing more than an amateur cook!
I put potatoes and broccoli in the drip tray to make roasted duck fat potatoes. Those came out amazing too!
My one question for next time – I dry brined for 2 days, but the skin still wasn’t super crispy. I think it’s because of adding the sauce again with 15 minutes to go. Is there a way to get the sauce on with it still coming out with crispy skin? Any recommendations here?
Thanks for the recipe!
Wow, David, that looks phenomenal! I can only amazing how amazing your vegetables would have tasted, too. Thank you so much for sharing this with us.
Regarding the crispy skin, the sauce may be contributing to the softness, but the other factor is the drip tray. It’s valuable for collecting those delicious drippings and preventing flare-ups, but it does also prevent direct heat contact. Perhaps once most of the fat has rendered, around the time you add the sauce, you could remove the drip tray and see if that helps with crisping. The other option would be to skip the basting and serve the sauce on the side.
Thanks for the reply! I actually didn’t even use the lower burners, I only used the rear burner (my grill instructions say to only use that one when using the rotisserie). Maybe next time I’ll turn the rotisserie burner up to high for a few minutes at the end and see if that helps (though I don’t want to dry it out either). Either way, it was delicious!
That sounds like a good idea, David. Do let us know how it goes.
This looks great! Can I do it on the rotisserie in my electric oven? Thanks!
I think that would work fine, Louise! Do let us know how it turns out.