
Want to save this?
TL;DR (Quick-Answer Box)
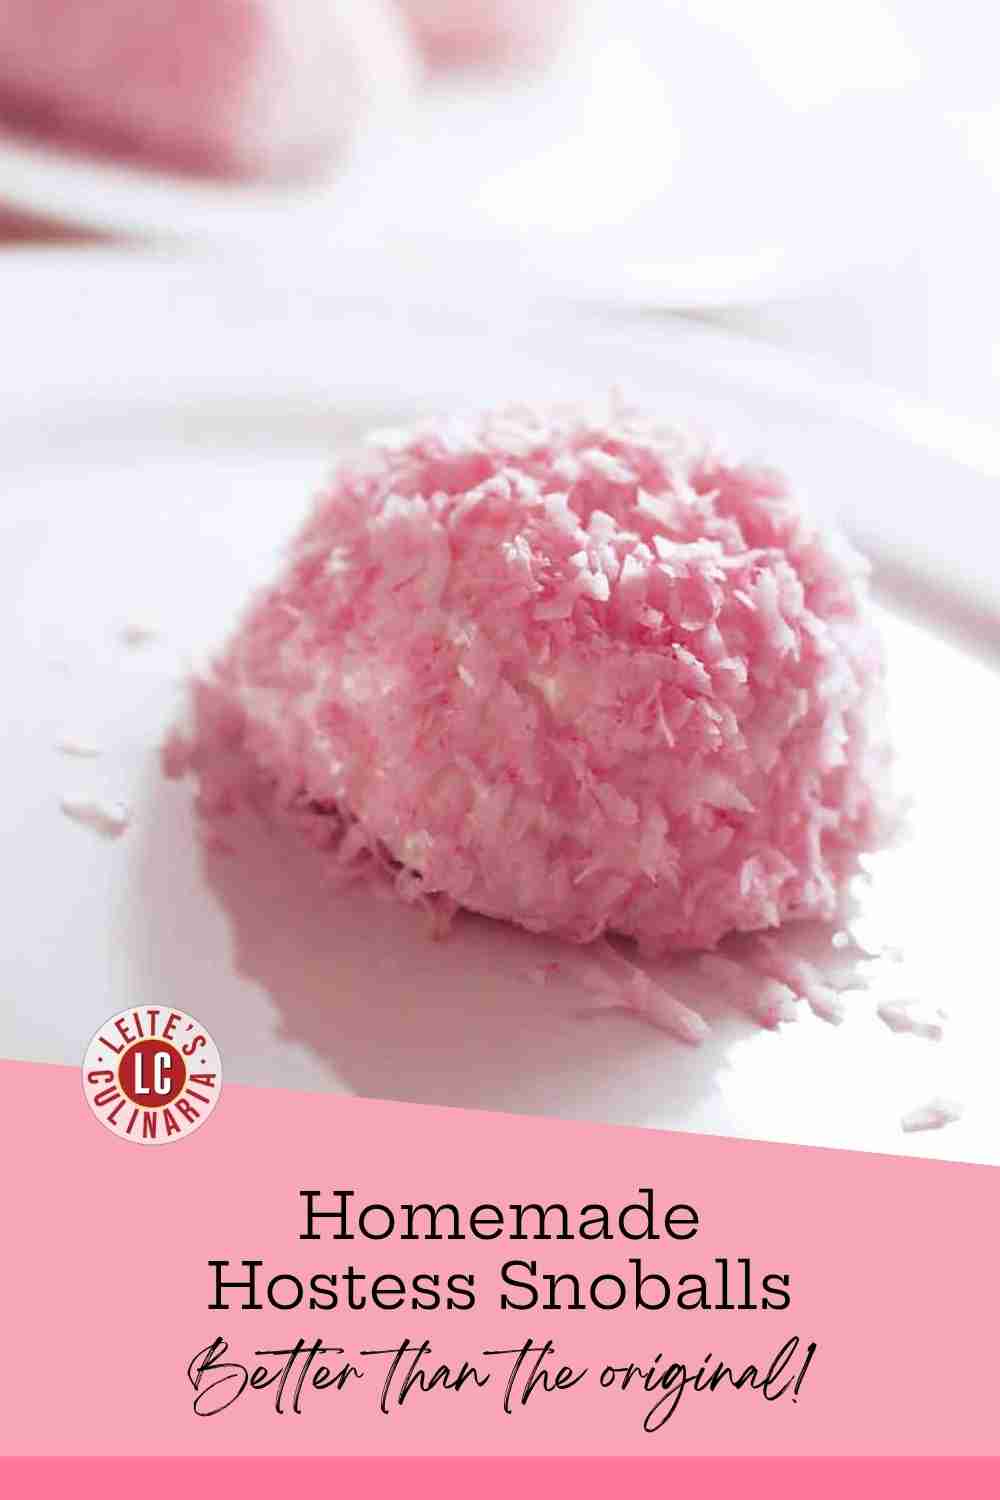
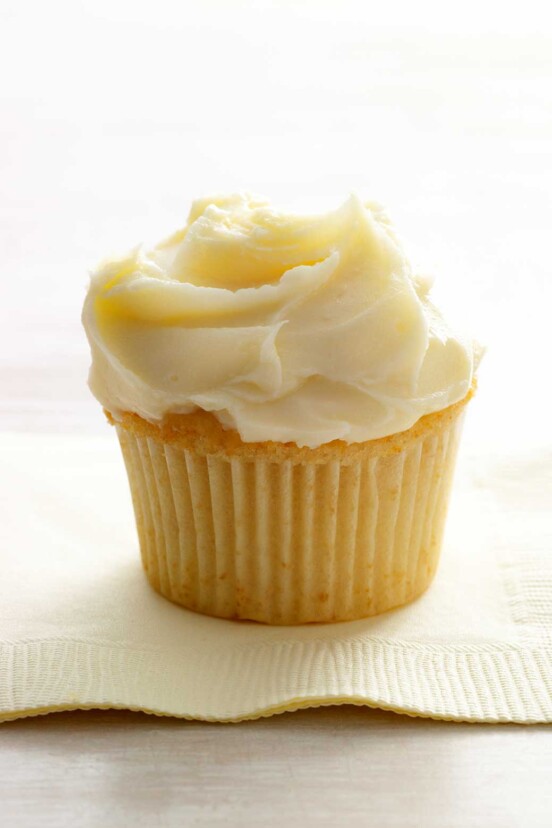
- What it is: A from-scratch domed chocolate cake filled with fluffy vanilla meringue, topped with pink meringue frosting, and coated in a sweater of pink sweetened coconut.
- Why you’ll love it: This nostalgic dessert captures the magic of the classic treat but tastes waaaay better thanks to fresh, quality ingredients.
- How to make it: Bake the chocolate cakes in domed molds, whip up a hot-sugar Italian meringue for the filling and frosting, assemble, and cover in tinted coconut.
Jump To
It took some tinkering before these sno balls of fuzzy Day-Glo pinkness became the Marilyn Monroe of the snack rack. Hostess Snoballs were originally chocolate cupcakes covered with ho-hum white marshmallow and shredded coconut, hence the name. But not long after, Hostess decided to jazz them up by tinting the shreds of coconut feather-boa pink. It wasn’t until 1950 that the icing on the cake, so to speak—that is the crème filling as well as frosting—was added.
Although Hostess’s Snoballs still turn heads after all these years, I’ve given them a facelift using a richer, moister, more sophisticated cake made from Dutch-processed cocoa that’s slathered with an ethereally light Italian meringue. Is it a copycat recipe? No, but I think it’s much better!
Chow,

Let’s talk about muffin tins
When I created this recipe for the Los Angeles Times, back in 2004 (aka the Stone Age of the internet), metal muffin tins with rounded bottoms were all the rage. Twenty-two years later, not so much. I see a straggler ever now and again on Etsy, that’s about it.
Instead, silicone molds are everywhere. You can find the perfect silicone mold at NY Cake—one of my favorite baking stores for three decades.
Does that mean you can’t make these little lovelies if you don’t want to shell out money for a specialty pan, er, mold? Absolutely not! You can use a standard muffin tin. Just make sure to butter and flour it very, very well. And take extra care to swirl the frosting into a snow-globe shape when decorating.
Your homemade Snoballs questions, answered
Sure. A regular cupcake pan with six wells will do the trick. Just make sure to swirl the frosting to make a dome shape.
Because the filling and frosting are Italian meringue, the sno balls will last up to 2 days light covered in the fridge. But we bet they won’t last that long.
Snoball pro tips & troubleshooting
☞ Steady does it
If you’ve never worked with silicone molds/baking pans, they’re flexible little devils. To keep your snoballs flat and even, place the mold on a rim baking sheet, then fill it. Transfer the baking sheet with the mold on it to the oven. You’ll thank me later.
☞ Make ahead
You can make both the cakes and the pink Italian meringue a day in advance and fill and frost the next day. Just make sure to keep both in a tightly covered receivable container in the fridge.
☞ Easy release
The great thing about using silicone molds is that they release beautifully. If you opt for a good ole metal muffin tin, make sure to butter and flour it well.
More craveworthy cupcake recipes
Write a review
If you make these homemade Hostess snoballs, or any cupcake on LC, consider leaving a review, a star rating, and your best photo in the comments below. I love hearing from you.–David
Featured Review
I made this recipe at work, where I’m a chef in an independent/memory care community. The recipe is well-written and explains things in detail. The end result was a really nice, moist chocolate cake with an outer Italian meringue, aka marshmallow frosting, covered in pretty pink coconut. We had the snoball dessert [with a] Barbie themed, since the residents had recently seen the Barbie movie. Great recipe, David!!!

Homemade Hostess Snoballs
Equipment
- One 6-well domed silicone mold (each 3 1/2 inches in diameter by 1 3/4 inches deep), or a standard muffin tin
Ingredients
For the cake
- 1 stick unsalted butter, at room temperature
- 3/4 cup all-purpose flour
- 1/2 cup packed dark brown sugar
- 1/4 cup granulated sugar
- 1/2 cup Dutch-processed cocoa
- 1/2 teaspoon baking soda
- 1/8 teaspoon salt
- 1 large egg
- 1 large egg yolk
- 1/4 cup sour cream
- 1/2 teaspoon chocolate extract, (optional)
- 1 teaspoon powdered instant coffee dissolved in 2/3 cup boiling water
For the filling and frosting
- 1 cup granulated sugar
- 1/3 cup water
- 4 large egg whites, at room temperature
- 1/8 teaspoon salt
- 1/2 teaspoon vanilla extract
- 6 drops red food coloring
- 2 cups sweetened shredded coconut, preferably Baker’s Angel Flake Coconut
Instructions
Make the chocolate cakes
- Heat the oven to 350°F (175°C). Place the silicone mold on a rimmed baking sheet to keep it even. If using a standard metal muffin tin, lightly butter and flour the wells. Set aside.
- Beat the 1 stick unsalted butter, 1/2 cup packed dark brown sugar, and1/4 cup granulated sugar in the bowl of a stand mixer using the beater attachment until fluffy, about 5 minutes.
- Meanwhile, whisk together 3/4 cup all-purpose flour, 1/2 cup Dutch-processed cocoa, 1/2 teaspoon baking soda, and 1/8 teaspoon salt in a medium bowl, and set aside.
- With the mixer running, plop the 1 large egg then the 1 large egg yolk, into the creamed butter-sugar mixture, scraping the bowl after each addition. Add the 1/4 cup sour cream and 1/2 teaspoon chocolate extract, if using, and mix until combined.
- Alternate adding the dry ingredients with the 1 teaspoon powdered instant coffee dissolved in 2/3 cup boiling water in 3 additions, beginning and ending with the dry ingredients.
- Divide the batter evenly among the molds (or muffin tin), filling them almost to the top.
- Bake until a toothpick inserted in the center comes out clean, 20 to 25 minutes. Set the mold on a wire rack and let cool for 5 minutes. Run the tip of a knife around the rim of each cake and lift out. Place the cakes, flat-side down, on the wire rack to cool completely.
Make the filling and frosting
- While the cakes cool, bring the 1 cup granulated sugar and 1/3 cup water to a boil in a small, heavy saucepan over medium heat. Cover and cook for 3 minutes. Uncover and continue to cook until the syrup registers 235°F to 240°F (112°C to 115°C) on a candy thermometer, about 3 minutes more. This is known as the soft-ball stage.
- Meanwhile, using a stand mixer fitted with the whisk attachment, whisk the 4 large egg whites on high until frothy. Add the 1/8 teaspoon salt and beat until the whites are glossy and hold soft peaks.
- When the syrup reaches the target temperature, carefully pour it down the side of the bowl in a very thin stream into the egg whites. Continue to whisk until the mixture cools, 8 to 10 minutes.
- Beat in the 1/2 teaspoon vanilla extract. Scoop out and reserve about 3/4 cup of the meringue. Add 3 drops of red food coloring to the remaining meringue in the stand mixer bowl and mix until evenly pink.
- Place the 2 cups sweetened shredded coconut in a food processor fitted with a metal blade, add 3 drops food coloring, and pulse 15 times. Turn the coconut into a large bowl.
Assemble the snoballs
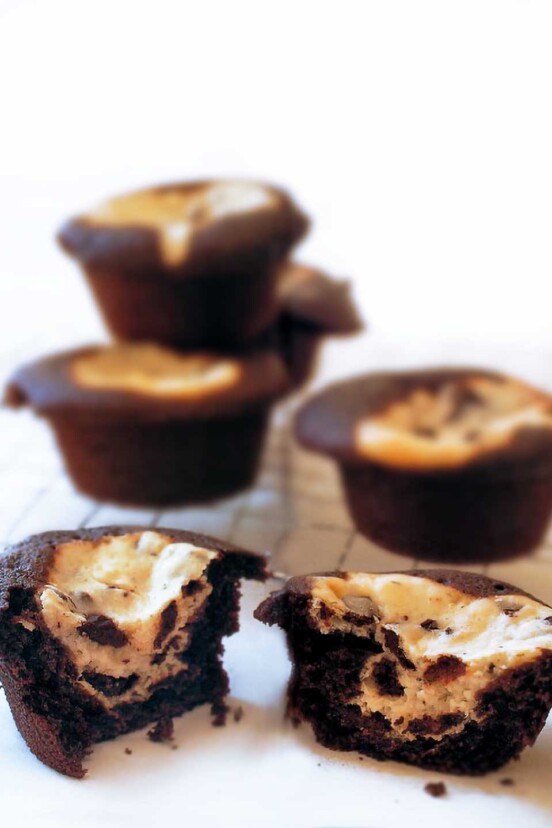
- Using a serrated knife, carefully slice off the top third of each cake, keeping each top alongside its cake. Pinch about a tablespoon and a half of cake from the inside center of each cake and set aside for nibbling. Fill the hole with a dollop of the reserved white meringue and replace the top. Thickly frost the top of the cakes with the pink meringue. Then generously sprinkle each cake with coconut until completely covered. Tamp down the coconut gently to maintain the domed shape.
- Serve, giggle, and eat.

An LC Original
View More Original RecipesExplore More with AI
Nutrition
Nutrition information is automatically calculated, so should only be used as an approximation.
Recipe Testers’ Reviews
Did you know only 68% of the recipes we test make it onto the site? This recipe survived our rigorous blind testing process by multiple home cooks. It earned the Leite’s Culinaria stamp of approval—and the testers’ reviews below prove it.

These homemade snoballs were hands-down delicious. All three components—cake, filling, and frosting—are good on their own and together. Each component isn’t difficult to make. And everything comes together very quickly.
This is a really long, detailed recipe. It’s definitely a weekend project if you want to eat the cupcakes fresh, but you can also make parts of the recipe ahead, which would cut down on the feeling of how long it takes.
The snowball cakes were so tender that they seemed to squish a little when I started taking them out of the molds. So I left some cupcakes in the molds until they were mostly cooled. This worked better than removing immediately.
I honestly loved the filling so much that I’d like to see more of it in the cupcake. You could get more coconut flavor by adding coconut flavoring along with the vanilla.
You could easily make the sno ball cakes the day ahead and refrigerate them. In place of using a pastry bag and tip to fill, you could use a knife, cut a small hole in a cone-like shape into the sno balls, remove the round, fill, and replace.


I finally found the recipe for that seemingly wonderful cake—-I say seemingly because I have never eaten that cake! I am Brazilian and live in Brazil where these sweets are not sold, nor are there recipes for it. One day I was eager to try these cakes and started looking for the recipe and finally found it! Thank you, thank you, guys. Now I will be able to prove to my friends what delights these American sweets are…
Bruna, we’re thrilled to hear that we helped you find such a long sought-after recipe! Do let us know what you think of these bright pink cakes!
These sno balls look and sound amazingly delicious! Will have to try this week. I was wondering if they could be made in cupcake pans? Have you tried them in this particular pan? Thanks!
Hi Lisa, the domes are really just rounded cupcake pans. I think they could be made in cupcake tins, but the shape would be different.
I love the internet! Today I was thinking about these sticky sweet cakes we used to get from the american px when passing through to austria. And now i found your recipe. Thank you so much and also that you used “normal” ingredients which are sold in every “normal” store in germany. I’ve got a question though… what kind of sugar did you use? Normal white, castor or confectioners?
Greets from Germany
Emma
Greetings, Emma! Sooo pleased we could be of service in your time of need…as for sugar, we use standard granulated sugar, as noted in the recipe. I guess that’s “normal white” in German!