
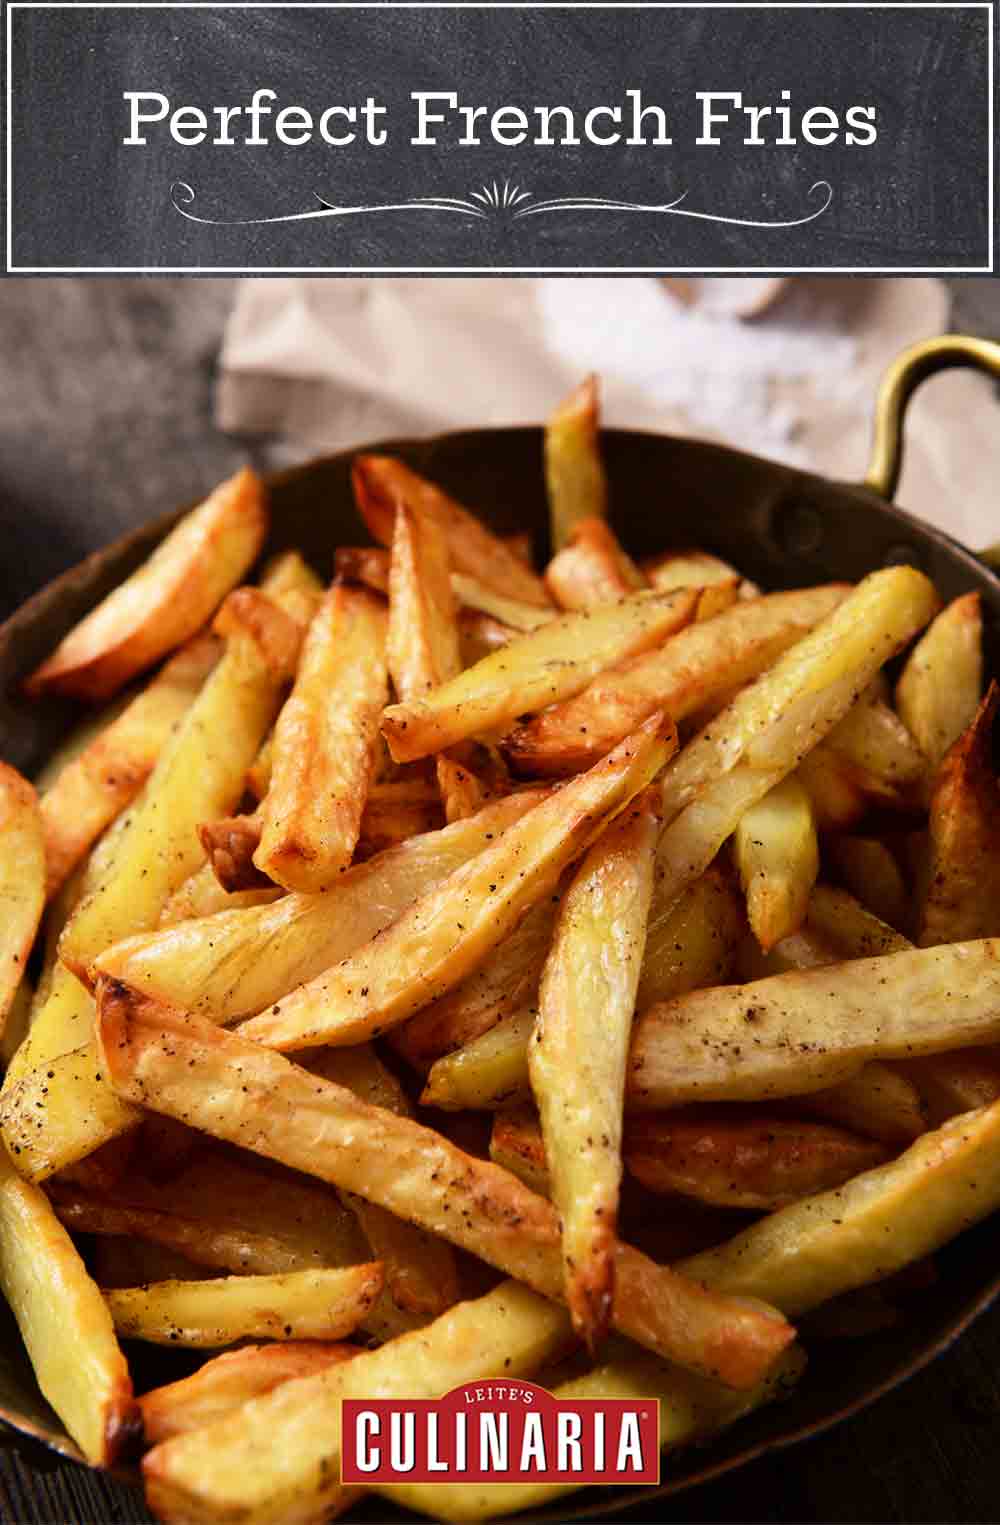
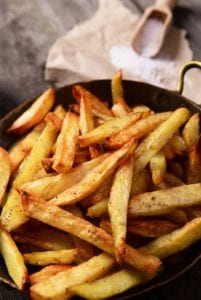
Perfection takes time. Three days, in fact. A long, luxurious soak in cold water leaches the starch from the potatoes so they turn golden and crisp on the outside, tender and fluffy on the inside. Depending on how you choose to cut your potatoes, you can make fat or skinny fries, wedges or shoestrings. Skin on or off, your choice.–Hubert Keller and Penelope Wisner
Perfect French Fries
Ingredients
- 4 large (about 2 pounds) potatoes, preferably russets, peeled, if desired
- 6 to 8 cups vegetable or sunflower oil, for deep frying
- Coarse sea salt
Instructions
- Place the potatoes in a pan of cold water to cover, then let them soak overnight, refrigerated.
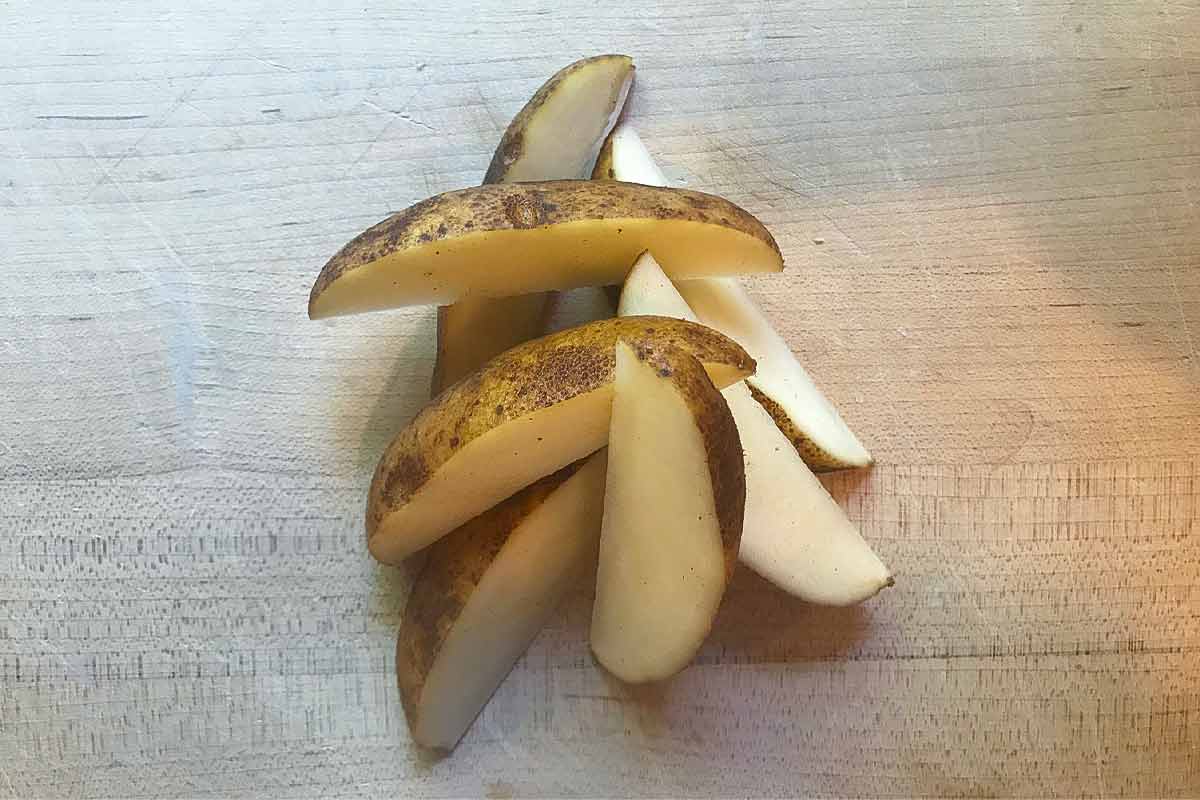
- The next day, drain the potatoes. Then cut them:For skinny fries, cut the potatoes lengthwise into 1/4-inch-thick slices, then cut these lengthwise into 1/4-inch-thick strips.For fat fries, cut them lengthwise into thick slices, then cut these lengthwise into thick strips.For steakhouse-style wedges, cut the potatoes lengthwise in half, then cut them lengthwise again into wedges. If the potatoes are quite fat, you may need to cut a lengthwise slice out of the middle of the potato and either discard it or cut it into fat fries.For shoestring fries, use the julienne blade of a mandoline and cut the potatoes into very fine strips.However you cut them, place the fries in a bowl, cover with cold water, and let them soak overnight again, refrigerated.
- When ready to fry, drain the potatoes well and pat them completely dry with paper towels or a clean kitchen towel. Cover a baking sheet with several layers of paper towels or a brown paper bag. Pour 2 cups of oil per potato into a deep, heavy pot or deep fryer. The oil should fill the pot at least 1/3 full. Heat it to 250°F (121°C). Working in batches, fry the potatoes until they're tender and cooked through but remain almost white in appearance, about 5 minutes. Dump them on the prepared baking sheet and spread them out to cool. The fries may be prepared up to this point several hours in advance. Cover and refrigerate until needed.
- Just before serving, heat the oil to 360°F (182°C) and line a baking sheet with fresh paper towels or a new brown paper bag. Working in batches again, fry the potatoes until they're golden and crisp. The timing will depend on the size of your fries, but figure about 3 minutes for skinny fries and more—up to 7 minutes—for fatter fries. Drain them briefly on the baking sheet and sprinkle liberally with salt. Scoop them into a serving bow of some sort or just snatch them from the heap on the baking sheet and serve immediately.
Explore More with AI
Nutrition
Nutrition information is automatically calculated, so should only be used as an approximation.
Recipe Testers’ Reviews
Did you know only 68% of the recipes we test make it onto the site? This recipe survived our rigorous blind testing process by multiple home cooks. It earned the Leite’s Culinaria stamp of approval—and the testers’ reviews below prove it.
As the recipe title, suggests these are absolutely the best French fries. Not difficult to make, but you do need to plan ahead for the 2 days of refrigeration. My family loved these fries and have asked me to make them again.
Make sure the potatoes are completely submerged in water. I tried to pack the potatoes in a container that just barely fit and the potatoes not covered by water did discolor, lesson learned for next time. One other issue I had was keeping the oil hot enough during the second fry. I started on my medium-size burner but should have used the large burner for frying to keep the temp up. It just took a few extra minutes to get the fries brown and crisp.
And another lesson, don’t overcrowd the pot, I sometimes try to rush. I made these French fries with the Big Macher Burger and everyone was very happy and content after dinner.
As the recipe title suggests these are absolutely the best French fries. Not difficult to make but you do need to plan ahead for the 2 days of refrigeration. My family loved these fries and have asked me to make them again. Note, make sure the potatoes are completely submerged in water. I tried to pack the potatoes in a container that just barely fit and the potatoes not covered by water did discolor, lesson learned for next time. One other issue I had was keeping the oil hot enough during the second fry. I started on my medium sized burner but should have used the large burner for frying to keep the temp up. It just took a few extra minutes to get the fry brown and crispy. And another lesson, don’t overcrowd the pot, I sometimes try to rush. I made these French fries with the Big Macher Burger and everyone was very happy and content after dinner.

These fries were, indeed, pretty perfect. I experimented with all different cuts and sizes of potato. The steakhouse-style wedges were the winner in my household. They had a golden-brown exterior with a creamy center and didn’t even need a fancy kitchen tool to slice. Bonus!
The cook times varied on the second fry. Skinny fries took 3 minutes, medium cuts took 4 to 5 minutes, and steak wedges took 6 minutes.
Needless to say, anytime you fry, it’s going to get a bit messy. This recipe was no exception. But I took advantage of the hot oil and made some chicken nuggets to go along with the fries. I whipped up a quick dipping sauce and dinner was done. We got our fast food fix and didn’t even have to leave the house!

These french fries are really good. Like, REALLY good. But they should be for the amount of advance prep and planning that it takes to make them. These are definitely better than average fries, for sure. They’re not something that you’re just going to whip up on a Tuesday night but not every recipe needs to be fast and easy. Sometimes you want something extra—and these fries are it. I would have been so very disappointed if they turned out to be just average fried potato slices.
I used 4 large potatoes—2 russet and 2 Yukon gold—because I wanted to see the difference. I sliced them into the “fat fries” option. They were about half an inch thick.
The instructions and timing were all accurate and very easy to follow. I rate these highly, even though 2 days seems like a bit of a faff for french fries. Frying them partway and then frying them again does make a difference in ensuring that the center is fluffy and the outside is crisp.
This served 4 but just barely. To be fair, though, I didn’t serve anything else with them and a lot of fries were eaten right out of the oil. No one had much to say about the difference between the potatoes— the Yukon gold were a little fluffier but I would say the soaking is the key to making most potatoes a brilliant French fry.
I usually serve my French fries with something called Joppie, a Dutch dip made with mayo, curry, and caramelized onions. But for these fries, I wanted to up the game to something befitting the wait. I covered them shaved black truffle and pecorino Romano and garlic aioli on the side. Over the top? Yes, of course. Worth it? Absolutely yes.
Nothing beats a great French fry—hot, crisp, meaty, and fresh tasting. Theses fries hit all those high notes and weren’t a lot of work although you do have to plan ahead. Better than any restaurant, hands down. In fact we laughed as the dog won’t eat any French fries but he was totally smitten with these.
Since they have to be soaked for 2 nights, they aren’t a “let’s have fries” impulse recipe. I used 6 medium russet potatoes as that’s what I buy. I used almost one 24-ounce bottle of peanut oil and it filled my 2-quart pot 1/3 of the way. I choose peanut oil for its ability to handle high heat and the taste was very good. It didn’t overplay the potato flavor at all.
The pot was small enough to do a nice size batch with the fries submerged in the hot oil. I temp tested the oil for both frying and even taste-tested the fries after the first frying. They were cooked enough to be edible. I would say 4 to 5 mins is accurate for the first fry. I cut my fries almost to 1/2 inch by 1/2 inch fingers and didn’t use a mandoline. I didn’t peel them and dried them well with paper towels and the second batch with a towel. I thought the paper towels were much more effective in getting them dry. Expect the water to be quite red after soaking them for 2 days.
I actually never got to brown during the second fry but they were crispy. The first batch was pulled out at 7 mins and the second was much crisper at 10 mins. But still not the color I would have expected for that length of time in hot oil. I had my largest burner on the gas stove set at high and tested the temp to be 360°F.
I think the end product was very satisfying but perhaps using a fry baby or similar item might be a faster cook. I used paper towels to drain them and tossed them with fine sea salt and fine black pepper.
I would make them again.


Well I could sure deal with a batch of these perfect french fries right about now! Thanks for sharing my Thai Spiced Baked French Fries too 😉
You are quite welcome, Marla. Let us know how you like our fries!
The ultimate french fry is fried in beef fat—twice!
1) Choose an Idaho Russet potato. Russet Burbanks if you can get them.
2) Condition the potato by storing in a 70 degree environment for a couple of weeks (potatoes coming out of cold storage need time to convert sugars back to starch).
3) Cut the potatoes into the desired fry size, like the fast food places do.
4) Soak the cut potato strips in room temperature water for at least 8 hours, overnight is good (this soaking plumps up the cells within the potatoes to result in an improved texture). DO NOT USE ICE WATER OR REFRIGERATE!
5) Dry the potato strips and fry in 300 degree oil until just cooked inside and limp, fry time is dependent on the thickness of the fry strip. Let cool.
6) Bring oil to 375 degrees and fry until golden brown and crispy.
7) Of course, use beef fat. Properly twice-fried fries will not soak up fat.
What’s the point of endeavoring to produce the very best french fry and then compromising the taste with a neutral tasting fry oil.
8) Important, work in controlled sized batches that doesn’t drop the frying temperature significantly. Maintain the fry temp or the fries will absorb fat.
9) Rice Bran Oil is the best alternative to those that have a aversion to beef fat.
In & Out restaurants are noted for excellent fries, they fry in Rice Bran Oil.