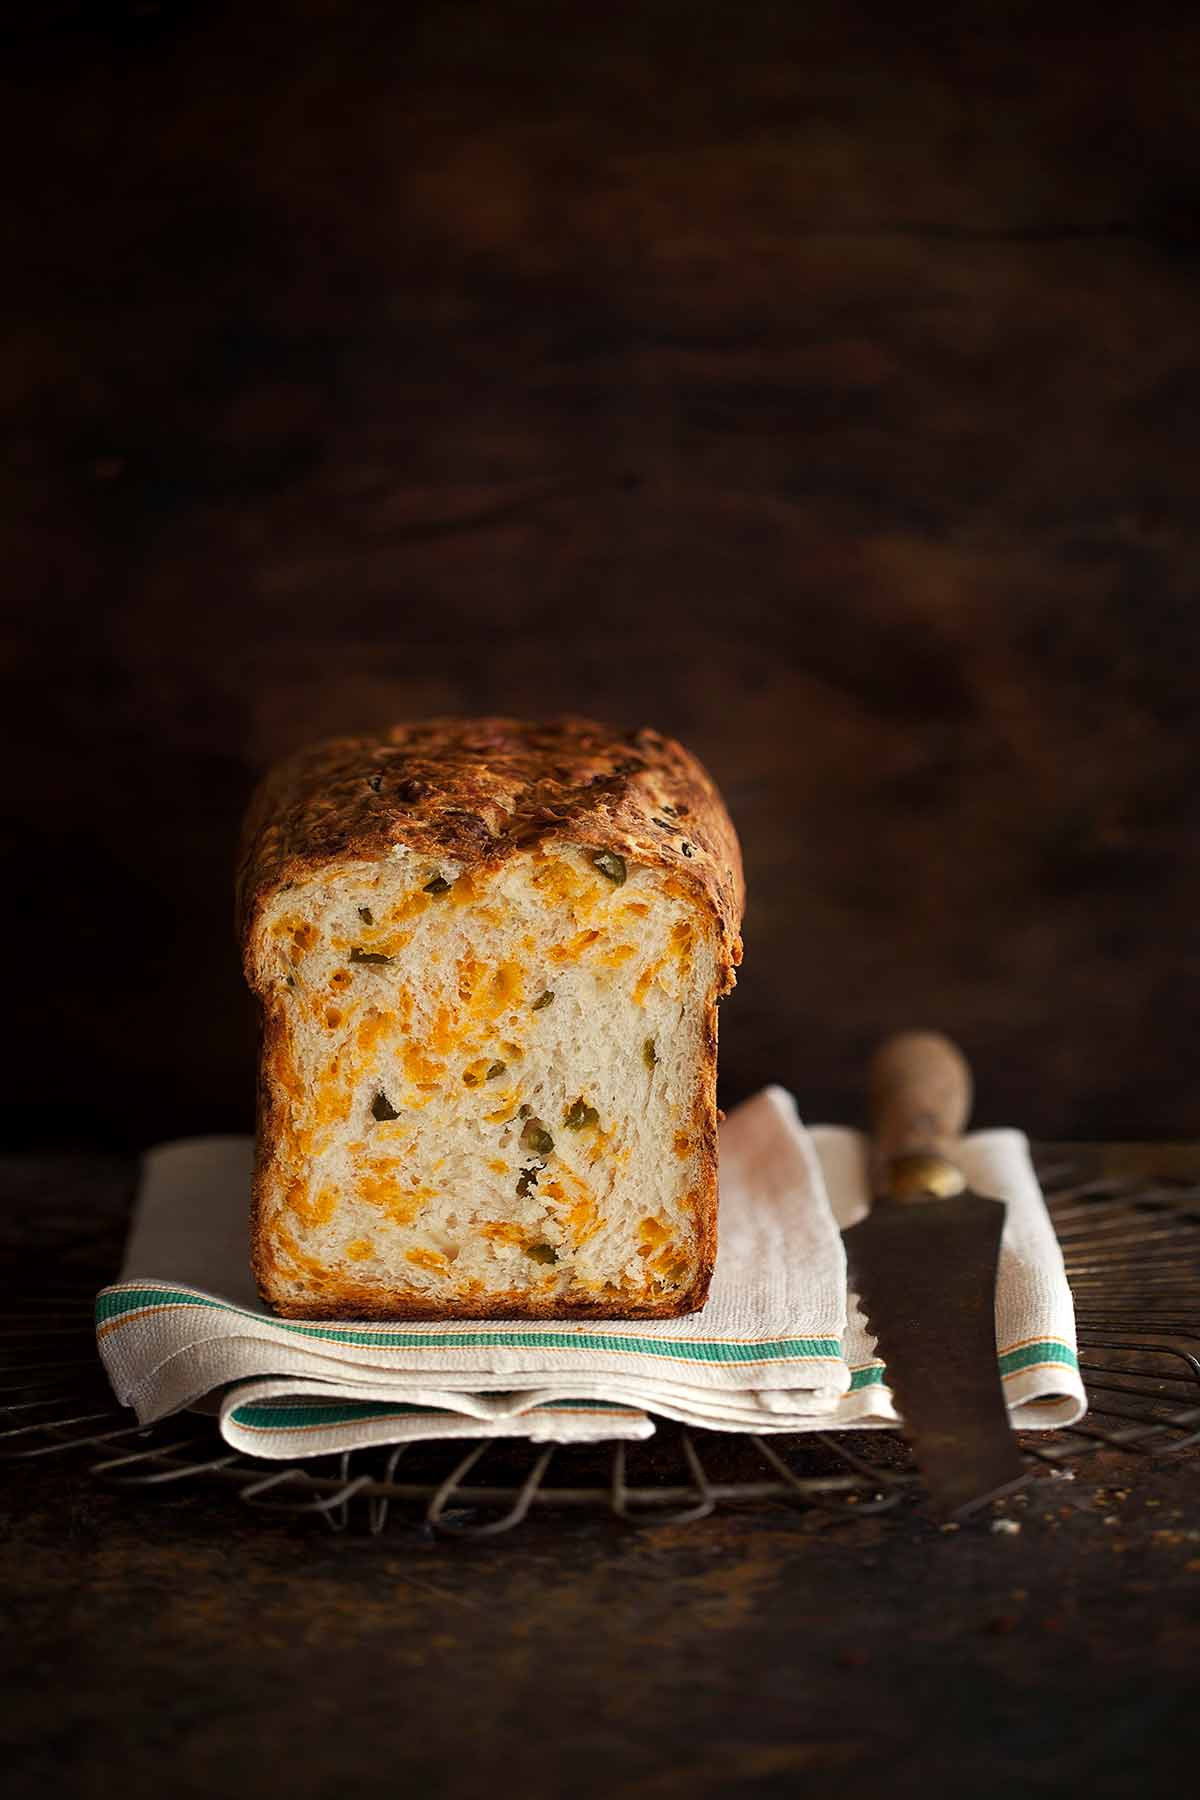
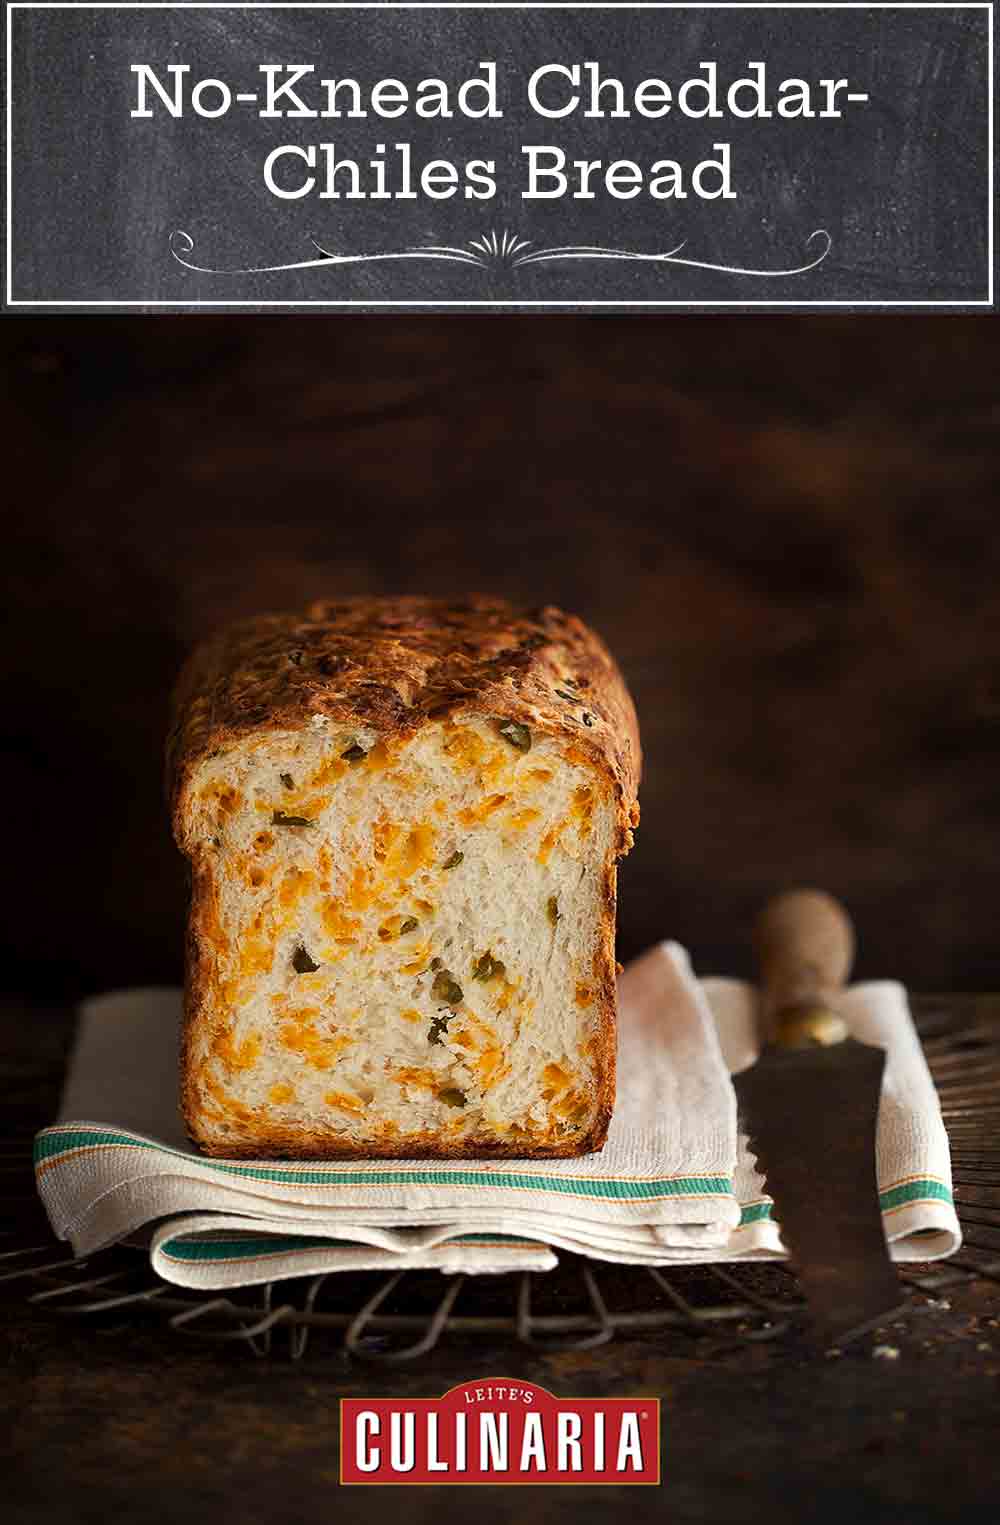
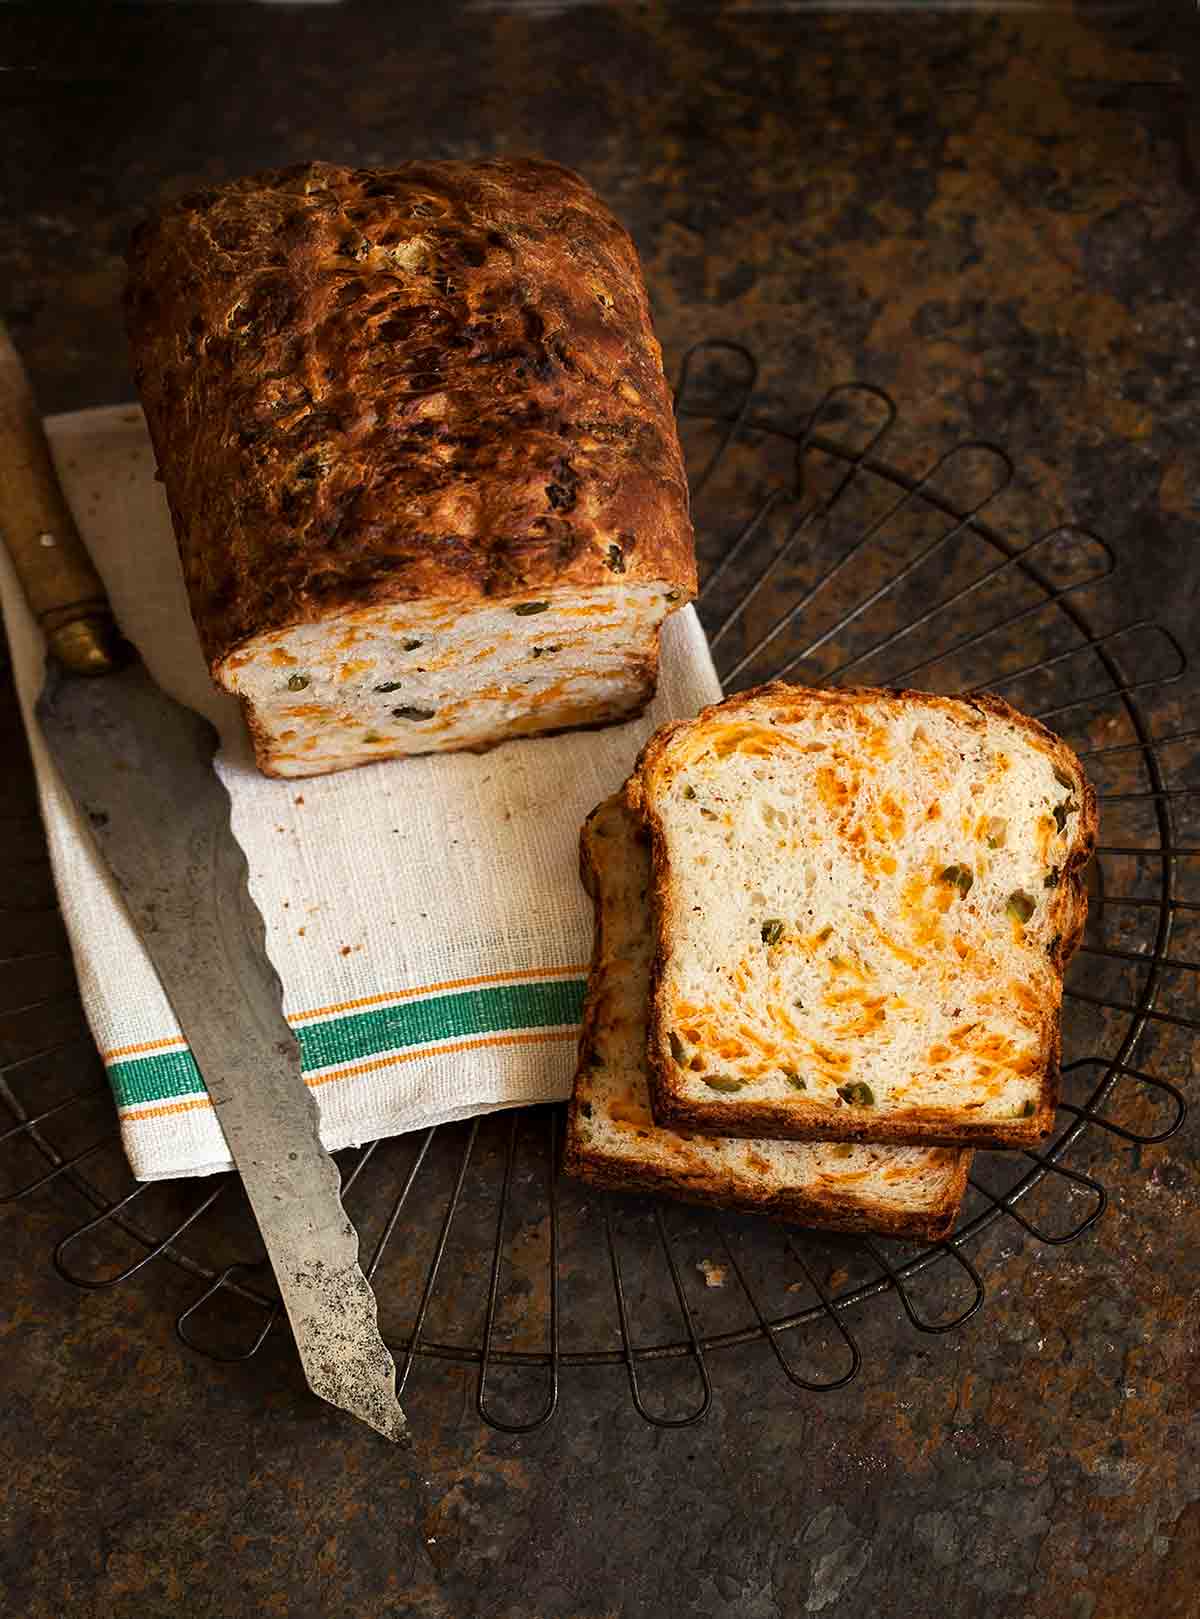
The Hispanic influence on American culture over the past decades has been pervasive and shows up not only in the popularity of Mexican and Tex-Mex fare, but also in the widespread availability of ingredients like assorted chiles. Once found only in ethnic communities and markets, green chiles turn up in everything from soups and quiches to corn casseroles and both quick and yeast breads. (If you aren’t familiar with canned green chiles, note that they are just slightly piquant; they are not the same as jalapeños.) The loaf is shot through with Cheddar cheese and green chiles and the crust is golden brown. It’s great with chili, soups, and bean dishes; it also makes an unusual but very appealing sandwich bread.–Nancy Baggett

No-Knead Cheddar Chiles Bread
Ingredients
- 3 1/2 cups (17.5 ounces) unbleached white bread flour, plus more as needed
- 1 tablespoon granulated sugar
- 1 1/2 teaspoons table salt
- 1 teaspoon instant, fast-rising, or bread machine yeast
- 2 tablespoons vegetable oil, plus extra for coating dough top and baking pan
- 1 2/3 cups ice water, plus more if needed
- 8 ounces (3 lightly packed cups) coarsely grated very sharp Cheddar cheese
- 1/2 cup very well drained and patted dry chopped canned green chiles
Instructions
For the first rise
- In a large bowl, stir together the flour, sugar, salt, and yeast. In another bowl or measuring cup, whisk together the oil and water. Gradually and thoroughly stir the oil mixture into the bowl with the flour, scraping down the sides of the bowl until the ingredients are thoroughly blended. If the mixture seems too dry to incorporate all the flour, a bit at a time, stir in just enough more ice water to blend the ingredients; don't over-moisten, as the dough should be stiff. If necessary, stir in enough more flour to stiffen it.
- Brush or spray the top of the dough with oil. Cover the bowl with plastic wrap and let the dough rise at cool room temperature for 15 to 20 hours. If convenient, stir the dough once partway through the rise. (If desired, for a more robust flavor or simply for convenience, you can instead refrigerate the dough for 3 to 10 hours.)
For the second rise
- Vigorously stir the dough, gradually sprinkling it with the cheese and chiles and incorporating them into the dough. Fold them in very thoroughly to ensure they are evenly distributed. If necessary, thoroughly stir in enough more flour to yield a very stiff dough.
- Using a well-oiled rubber spatula, fold the dough from the edge of the bowl towards the center, working all the way around the bowl. Invert the dough into a well-greased 9-by-5-inch loaf pan. Evenly brush or spray the top of the dough with oil. Using well-oiled kitchen shears or a serrated knife, make a 1/2-inch-deep slash lengthwise down the center of the loaf. Cover the pan with plastic wrap slicked with oil or spray oil.
- For a 1 1/2- to 2 1/2-hour regular rise, let the dough stand at warm room temperature. For a 1- to 2-hour accelerated rise, let the dough stand in a turned-off microwave along with 1 cup of boiling-hot water. For an extended rise, refrigerate the dough for 4 to 24 hours then set it out at room temperature and continue to let the dough rise until the dough nears the plastic. Remove it and continue until the dough reaches 1/2 inch above the pan rim.
Preheat the oven
- Fifteen minutes before baking time, adust a rack to the lower third of the oven for cooking the bread, and place an additional rack below it. Preheat the oven to 425°F (220°C). Place a foil-lined baking sheet on the lowest rack to catch any drips of melted cheese.
Bake and cool the bread
- Reduce the heat to 400°F (200°C). Bake for 30 to 40 minutes, until the top is nicely browned; cover the top with foil as needed. Continue baking for 20 to 30 minutes longer, or until a skewer inserted in the thickest part comes out with just a few particles clinging to the bottom (or until the center registers 204° to 206°F (98° to 99°C) on an instant-read thermometer). Then bake for 5 minutes more to be sure the center is done.
- Cool in the pan on a wire rack for 10 minutes. Turn out the loaf onto the rack and let it cool completely.
- Cool thoroughly before slicing or storing. Store airtight in plastic or aluminum foil. The bread will keep at room temperature for 2 to 3 days, and may be frozen for up to 2 months.
Nutrition
Nutrition information is automatically calculated, so should only be used as an approximation.
Recipe Testers’ Reviews
This loaf of Cheddar and chiles bread was without exception the best I have ever made. I took the long route of 10 hours in the fridge followed by a 15-hour cool rise. For the second rise, I actually went for 20 hours in the fridge. The result was a dough standing 3/4 of an inch above the top of the loaf pan. Upon baking, it rose another 3/4 inch, finishing with beautiful overhanging edges on each side. The taste was superb and the crunchiness of the crust, on all sides, likewise, was wonderful.
This bread was awesome! I haven’t always had the best luck with no-knead breads, but this one turned out great, with a good crust and crumb. Easy to make and easy to customize. Highly recommended.
I was really surprised by how tasty this Cheddar and chiles bread was, especially the crunchy crust. The texture of the bread was soft and dense with really good flavor. The grated cheese pretty much disappeared into the bread, but it worked really well with the flavor of the mild green chiles.

This bread did take a little waiting, and I wasn’t sure it’d be worth it, but it sure was. We enjoyed some as soon as it cooled and then toasted a few slices for sandwiches the next day, and it was good both ways. I think this is one I’ll make again the next time we’re craving chili.


I have enjoyed many of your recipes. I’m going to try the green chile cheese bread soon!
Thank you!
I hope you enjoy it, Cheryl!
Outstanding results. Delicious and crunchy on the outside; lots of flavor. Add instructions to place the pan on a lined baking sheet while baking the bread. Some of the cheese melted on the oven floor.
Thanks, Sandra. Great suggestion! We’ve updated the post to include that.
I’m a cheesecake maven, but for the life of me I cannot make a loaf of bread without my breadmaker. Are there any modifications I should make to use my trusty robot machine for this recipe?
Sharlene, we’ve never tried making this in a bread maker, so we can’t offer any suggestions. If you do have success with it, please let us know what worked!