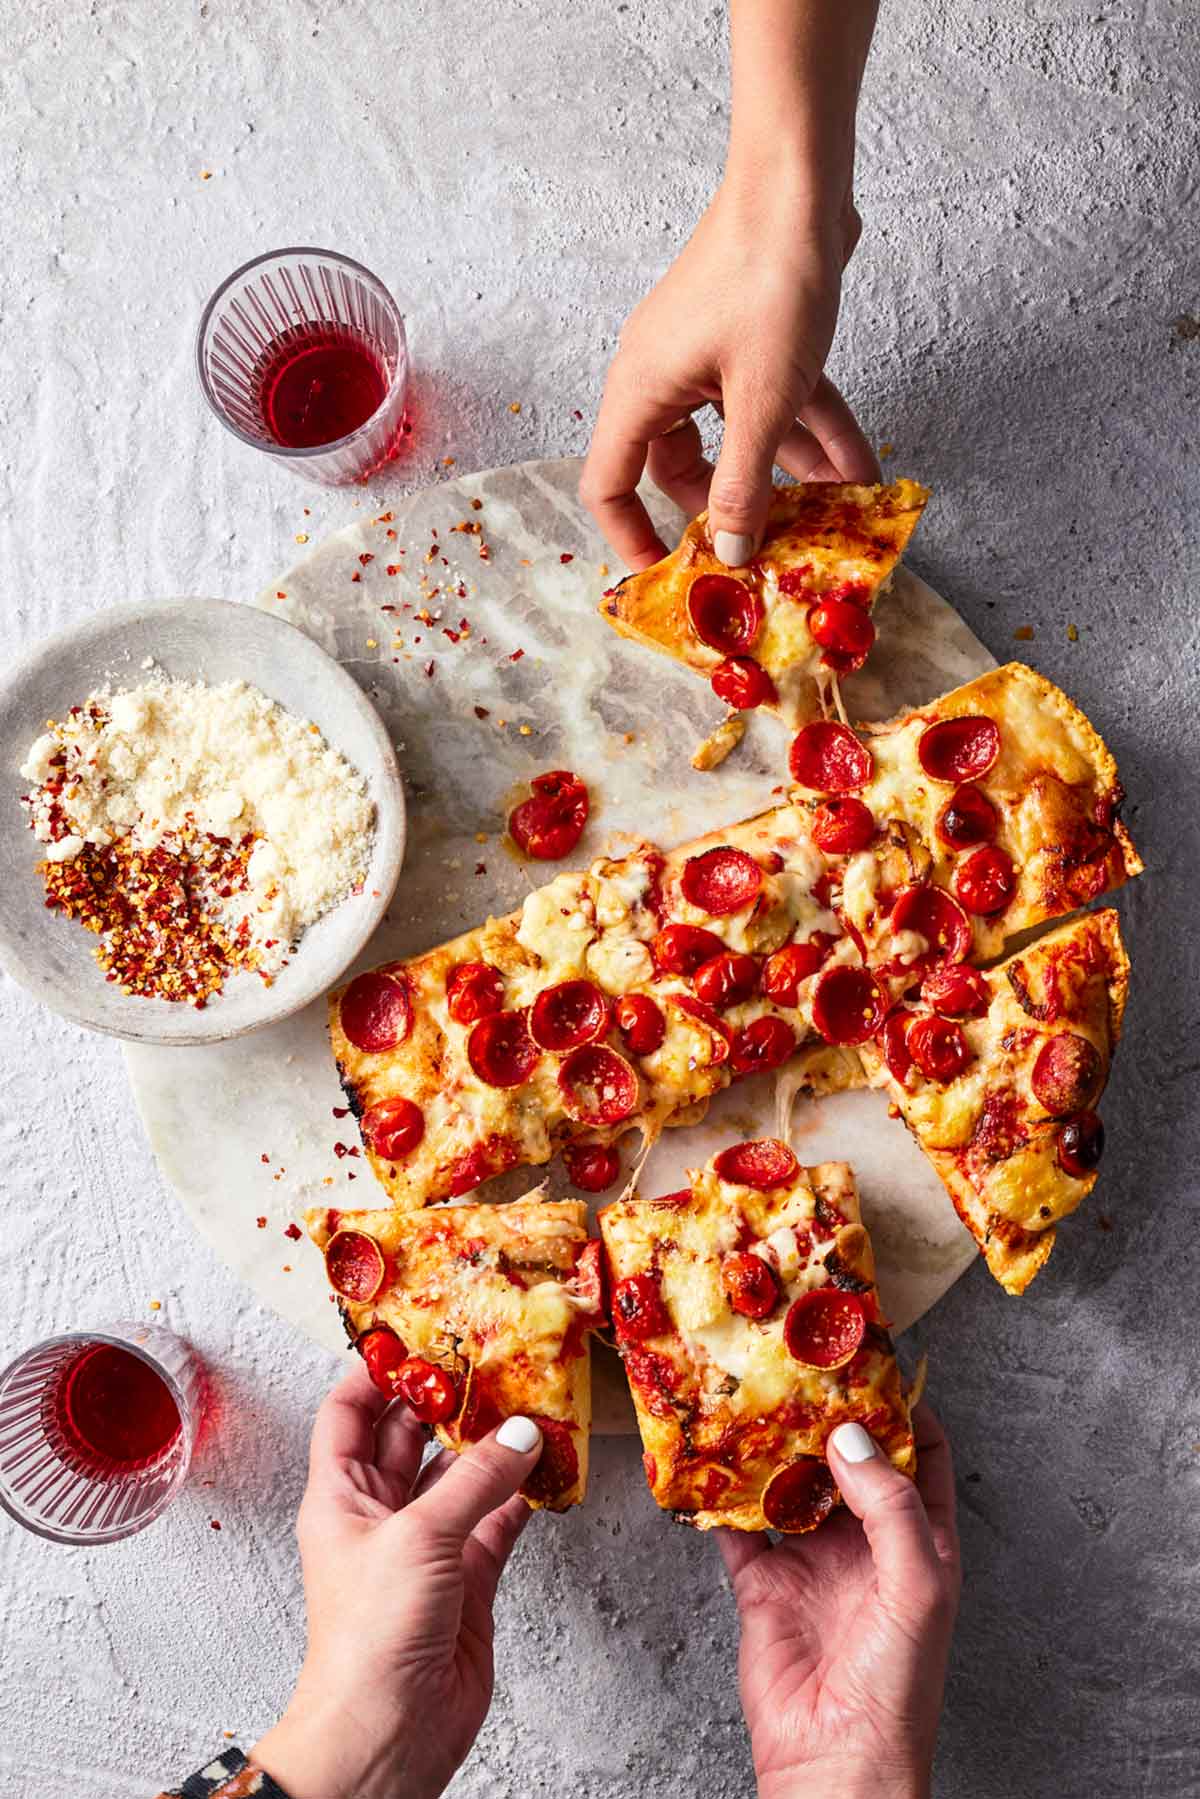
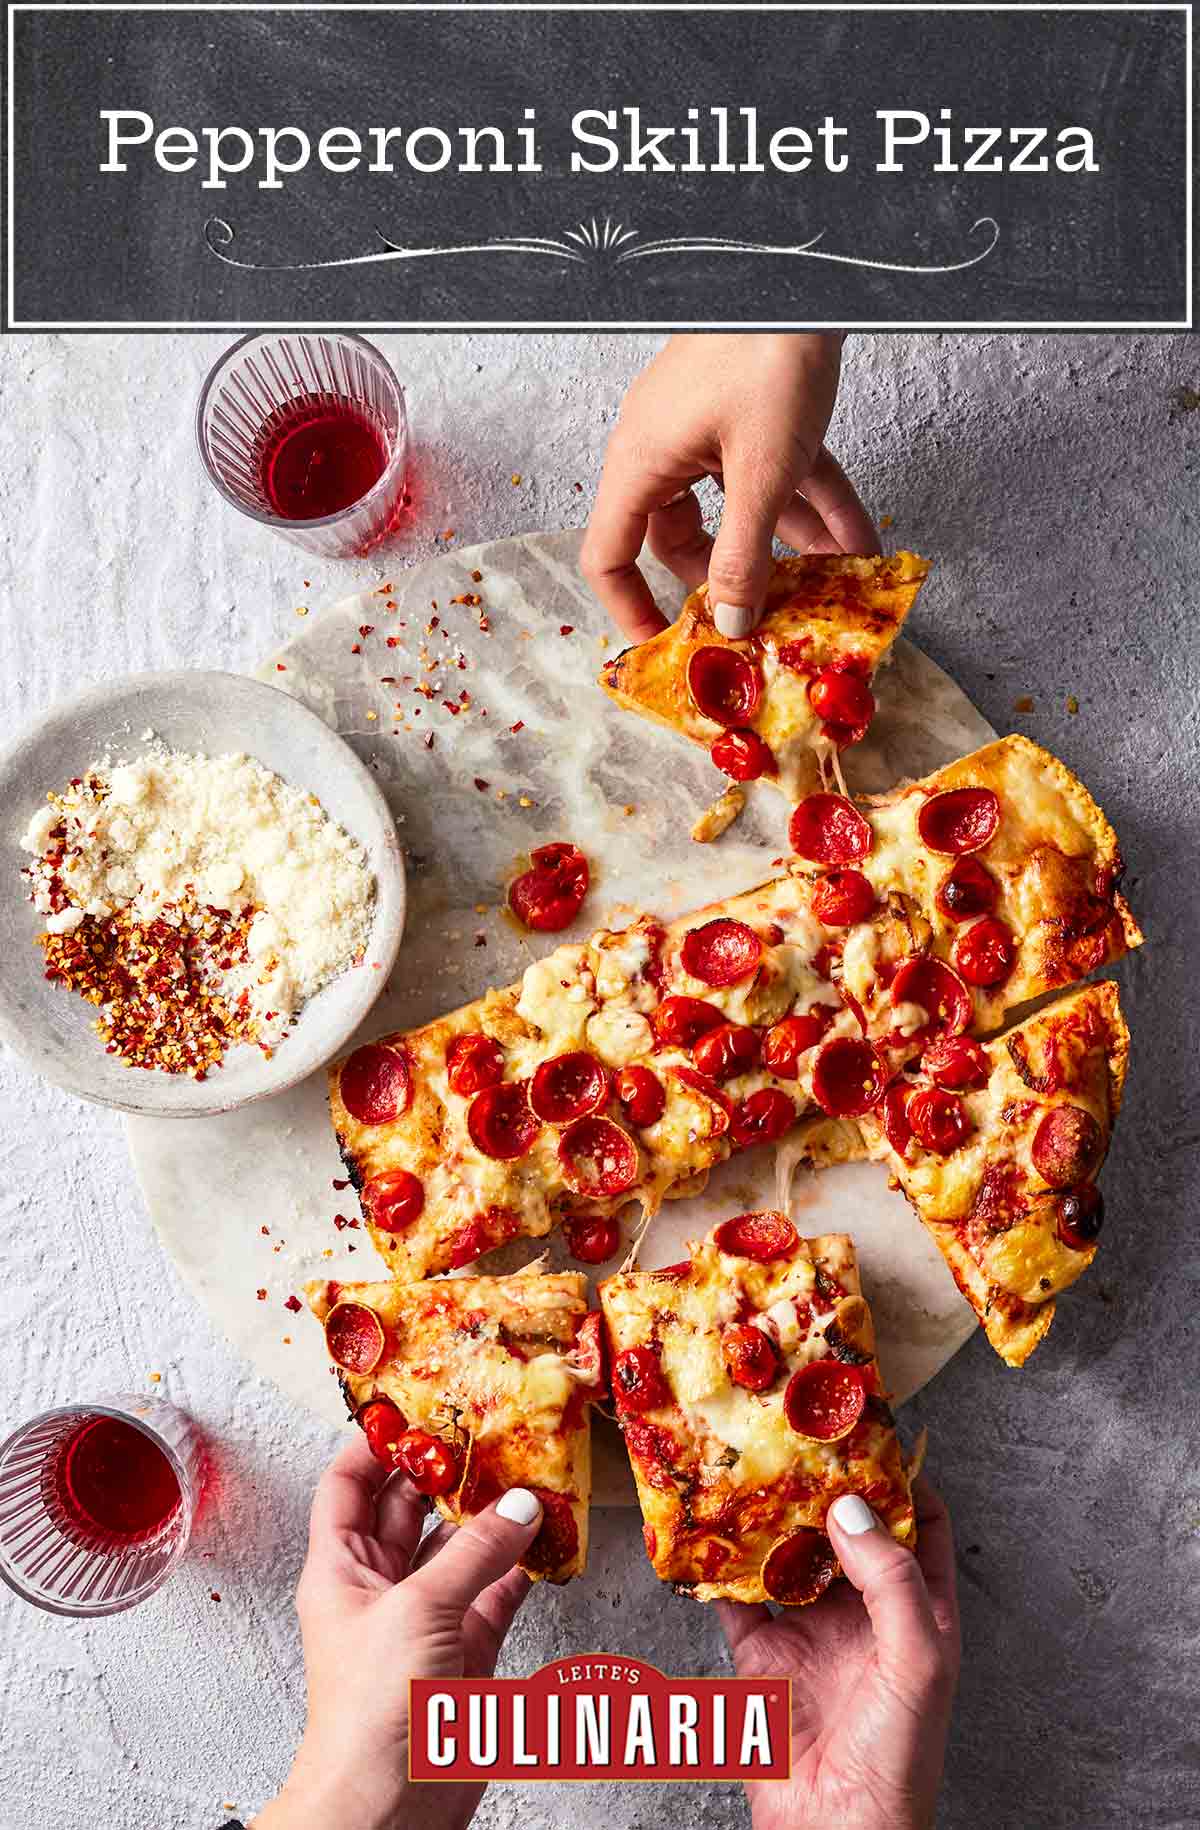
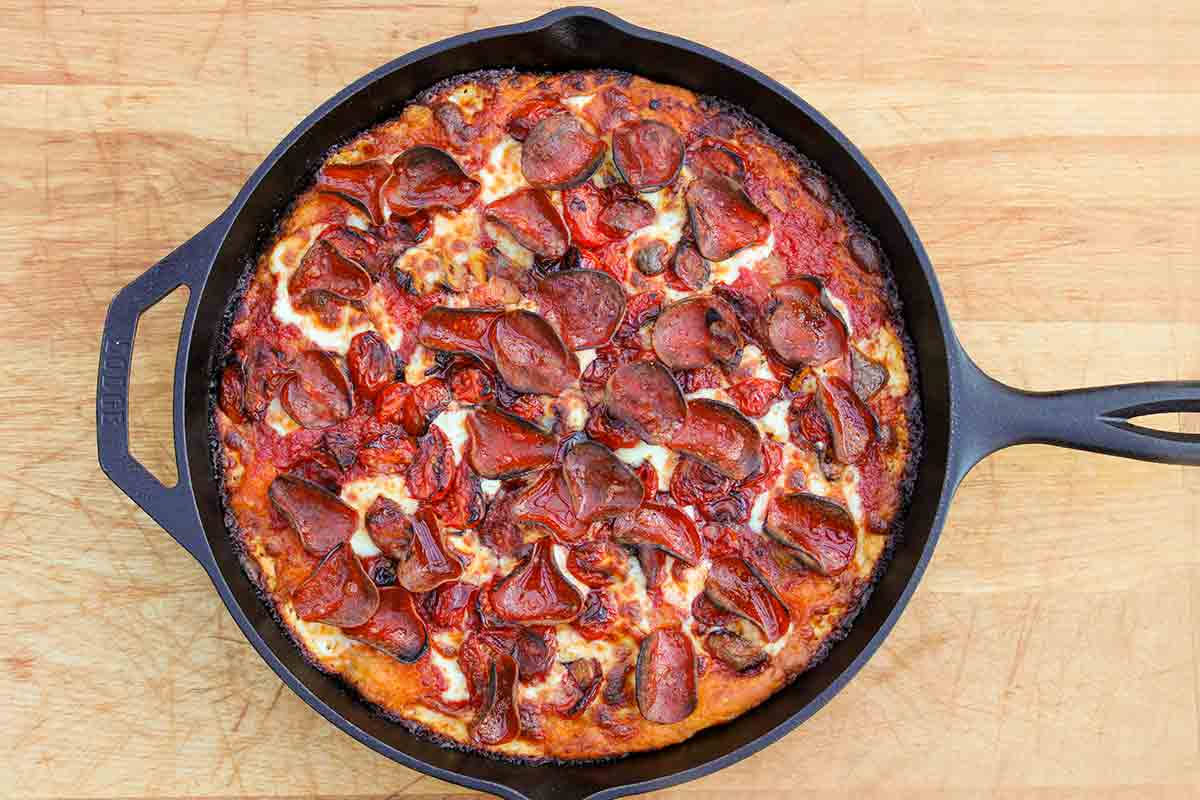
As longtime fans of wood-fired pizza’s bubbly, thin crust, we never thought we’d have room in our hearts to love hefty pies, too. But then we fell for Detroit-style pizza—and we fell hard. While traditionally it’s rectangular, we created a skillet version to bring this chewy, cheese-loaded, focaccia-like base within easy reach for making at home.
When you’re assembling the pizza, be sure to get the cheese cubes—yes, cubes; we didn’t change that tradition—dotted right to the edges of the pan. As it bakes, the fat oozes out of the cheese and flows down the sides of the dough to make the crust dark, crispy, and ultra-buttery. While we call for 550°F, we know some ovens top out at 500°F, so just crank yours all the way up.
We like to knead the dough by hand, but if you prefer, feel free to do it in a stand mixer fitted with the dough hook.–Holly Erickson | Natalie Mortimer
Skillet Pepperoni Pizza FAQs
Anything, really. Pizza is often a meal in itself, and that’s enough. But, there are nights when we crave a simple side salad or plate of assorted roasted veggies (onions, jalapenos, more tomatoes, zucchini, mushrooms, you name it) that we can nibble along with bites of pizza. (Or you could put those ON the pizzas.) Then there are nights when there are not enough carbs in the world, and in those instances, we love fresh garlic bread or on the side.
If you’re looking at your microwave, please consider other options. The first is the oven: For a thick crust pizza like this one, preheat your oven to 350°F (180°C). Put a sheet of aluminum foil a little larger than your pizza directly on your oven rack, then put the pizza on the foil. Bake until your cheese is melty and starts to brown again. Another option is the stovetop. Really. Reheating pizza in a skillet on the stovetop helps to retain the crispy crust while melting the cheese and heating the toppings thoroughly. The trick is to add a little water to the pan, then cover it, creating a steamy sauna that will ensure the toppings aren’t cold and gross. Heat your skillet over medium heat. Add your pizza and cook it without the lid for a couple of minutes. Then, add a bit of water to the side of the pan (not on top of the pizza, don’t be a monster) and pop your lid onto the skillet, cooking until your cheese is melted. Enjoy!
Skillet Pepperoni Pizza
Ingredients
For the crust
- 1 1/2 teaspoons instant yeast
- 1 cup warm water (110°F to 115°F or 43°C to 46°C)
- 2 1/4 cups all-purpose flour, plus more for kneading
- 1 1/2 teaspoons sea salt
- 2 tablespoons extra-virgin olive oil for the skillet, plus more for greasing the bowl
For the sauce
- One (14.5-ounce) can crushed tomatoes
- 1 tablespoon extra-virgin olive oil
- 5 fresh basil leaves, roughly chopped
- 1 teaspoon fine sea salt
For the blistered tomatoes
- 1 cup cherry tomatoes, halved
- 1 tablespoon extra-virgin olive oil
- 1/2 teaspoon fine sea salt
- 2 garlic cloves, thinly sliced
For the toppings
- 6 ounces mozzarella cheese, cut into 1/2-inch (12-mm) cubes
- 2 ounces mini pepperoni slices
- Freshly grated Parmesan cheese, for serving
- Red pepper flakes, for serving
Instructions
Make the crust
- In a small bowl, sprinkle the yeast over the warm water. Stir briefly, then set aside to proof for 5 to 10 minutes. You will know the yeast is proofed when it is creamy in color and tiny bubbles have formed.
- In a large bowl, whisk together the flour and salt. Pour in the yeast mixture and, using your hands, mix until a shaggy dough forms. Let rest for 10 minutes.
- Slick a large bowl with olive oil. Turn the dough out onto a floured surface. Knead the dough with floured hands until smooth, about 10 minutes. Alternatively, knead the dough in a stand mixer fitted with the dough hook until smooth, about 10 minutes. If the dough is very wet, work in more flour 1 tablespoon at a time until the dough is manageable.
- Form the dough into a ball, place it in the oiled bowl, cover with a kitchen towel, and set aside until doubled in size, about 2 hours.
- Preheat the oven to 550°F (288°C) with a rack positioned in the lower third.
Make the sauce
- In a medium skillet over medium heat, stir together the crushed tomatoes, olive oil, basil, and salt. Bring to a simmer, then reduce the heat to low and cook, stirring often, until the sauce thickens, about 15 minutes. Remove from the heat.
Stretch the crust
- Brush a 12-inch (30-cm) cast-iron skillet with the 2 tablespoons olive oil, coating well. Turn the dough out into the skillet and use your hands to stretch the dough to the sides of the pan, being careful not to tear it. Cover the dough with a kitchen towel and set aside to rest for 20 minutes. Uncover the dough and again stretch it to the sides of the pan.
Make the blistered tomatoes
- In a medium nonstick skillet over medium heat, combine the cherry tomatoes, olive oil, and salt. Cook, undisturbed, until the tomatoes are blistered, 3 to 5 minutes. Add the garlic and cook until fragrant, about 1 minute more. Transfer the tomatoes and garlic to a plate.
- Spread about 1 cup of the pizza sauce to the edges of the pizza dough. Dot the sauce evenly with the mozzarella, all the way to the edges to ensure a lacy, crispy, cheesy crust. Top with the pepperoni, blistered tomatoes, and garlic, dispersing the toppings evenly.
- Bake the pizza until the edges are dark brown and bubbly, 15 to 20 minutes. Run a knife around the rim of the pizza to loosen the crust from the skillet. Carefully transfer the pizza to a cutting board.
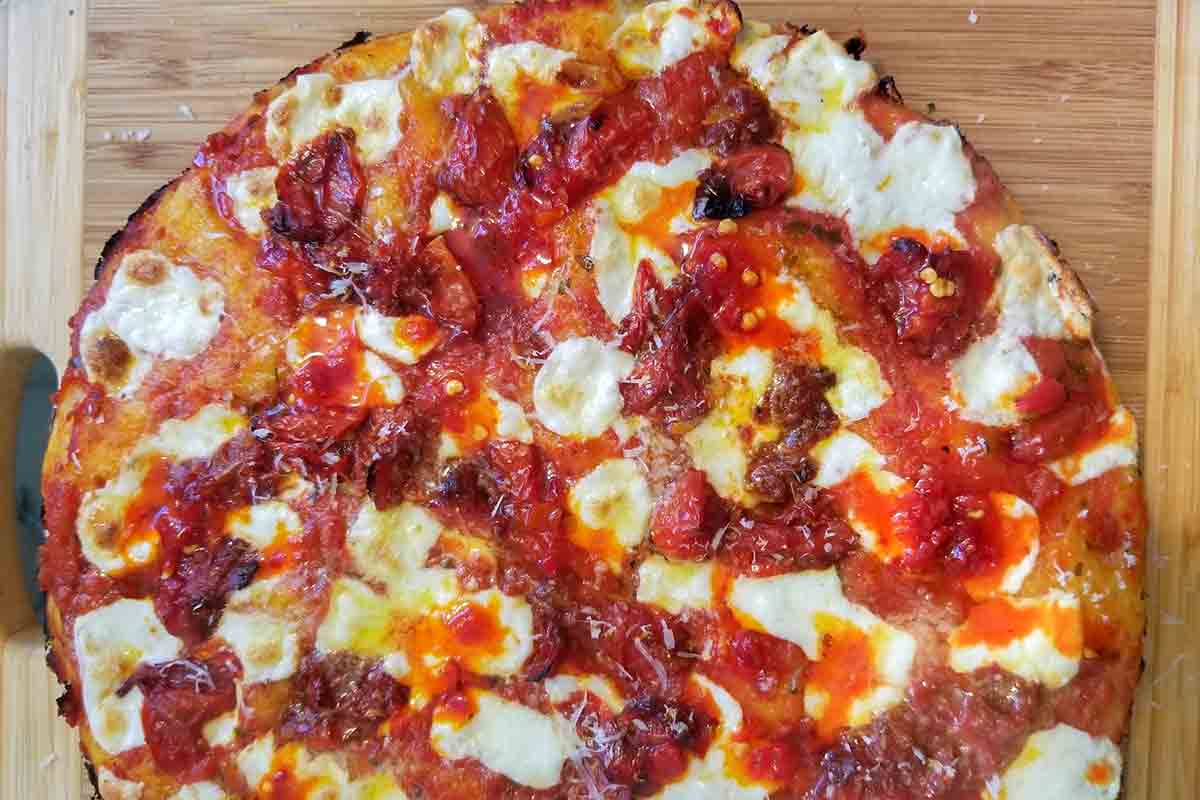
- Sprinkle the pizza with Parmesan and red pepper flakes. Cut into 9 squares or 8 slices and serve with any remaining sauce alongside for dipping.
Explore More with AI
Nutrition
Nutrition information is automatically calculated, so should only be used as an approximation.
Recipe Testers’ Reviews
Did you know only 68% of the recipes we test make it onto the site? This recipe survived our rigorous blind testing process by multiple home cooks. It earned the Leite’s Culinaria stamp of approval—and the testers’ reviews below prove it.

As a Chicagoan, I take my pizza very seriously. Here, the tavern pizza reigns supreme and the only point of debate that arises is pie cut or squares (the answer is squares, of course).
Having said all this, I loved this Detroit-style skillet pepperoni pizza! The crust was pillowy, more like a focaccia with toppings than a true pizza and the cheesy, crispy edges were fabulous! The blistered tomatoes and garlic were a flavorful addition.
As for the dough, I used a stand mixer rather than kneading by hand and I’m glad I did because the dough was very wet (I had to add 2 additional tablespoons of flour); the dough cleared the sides of the bowl but stuck to the bottom. It would have been challenging to knead by hand without adding too much flour.
Once I had the dough in the pan, I pressed it gently rather than stretching and found that the dough was perfectly willing to fill out the skillet without snapping back. I served this with a simple salad and glass (or two) of Chianti. Delicious!

Deeelicious! This skillet pepperoni pizza is delicious and the recipe is uncomplicated. The dough consistency is very much like a homemade pizza, not only because it’s no-frills and simple to make, but in its chewy, air-like texture. Any first-time pizza maker can and should make this. I doubled the recipe and made one in my 10-inch cast-iron without pepperoni and one in a cookie sheet that had veggies on it.
The pizza in my 10-inch cast-iron looked a lot like Barese focaccia or Sicilian pizza. Since the pan is a little smaller than what was called for, my dough was thicker, and I had no problems with that because its texture reminds me of home. The dough in the cookie sheet cooked beautifully as well, it was much thinner but still chewy. Both cooked perfectly and in 15 minutes, as specified. That’s why this pizza is a true homemade pizza to me, it’s very forgiving and adaptable.
I didn’t have pepperoni on hand but I didn’t feel the need to put them on the pizza because the blistered tomatoes, which were beautifully jammy and charred, were such a lovely topping on their own. I mixed Calabrian chili and honey together and drizzled that all over my pizza after I took it out. The sweet and spicy combination of that went so well with the sauce and blistered tomatoes. This is a great pizza recipe to keep on hand, I’ll be sure to make this again.
This pizza was very good, a nice thick pizza with lots of toppings. We especially liked the blistered tomatoes, they added another level of flavor. I think the blistered tomatoes on pizza without sauce would be a nice variation.
We usually make a much thinner crust pizza on a stone or the barbeque so this was different. My only issue was the dough was not quite done in the middle, it was lightly browned, would have liked it a little more crisp like the edges. The edges were perfect and the cheese also but the center needed more time. My oven was at 500 degrees, maybe a slightly lower temp and longer cooking time. Also could move the oven rack to the lowest level. Overall a nice pizza recipe with the blistered tomatoes and garlic.
I love the contrasting textures of the toasty cheese edges, the crunchy bottom crust, and soft, bready, cheesy middle. I am a texture person, so this hits all the notes I’m looking for in a good pizza. It was easy to prepare and I feel like there’s a lot of bang for your buck in terms of amount and quality of the food relative to the effort spent. I could see prepping everything in advance and letting the dough ferment in the fridge overnight for a relatively quick weeknight dinner. I will definitely be trying that in the future for a cozy pizza night in!


Did anyone have trouble with sticking? I’ve made a 12 inch skillet pizza (not this recipe) and although crisp and delish parts of it stuck to pan, bottom and sides. We love skillet pizza, is there a foolproof trick for non-stick? I was thinking a circle of parchment or non-stick foil but afraid that would cause sogginess.
Den, did you use a cast-iron skillet last time? If the skillet is properly seasoned, it shouldn’t cause sticking. I’m concerned foil or parchment won’t allow for that marvelous crunch on the bottom of the pizza.
We have made this several times now. It is excellent! My husband loves it. It is worth the time and the effort. It is one of my specialties now!
Can you make the dough a day ahead of time?
Thanks, Dawn! Yes, you could make the dough ahead of time. The dough may be placed in the refrigerator for a slow rise and then brought to room temperature before making the pizza. If you try it, please let us know how it turns out.
This was absolutely fabulous. Made it in a 12 inch cast iron skillet. Added fresh mushrooms while blistering the tomatoes. Baked for 16 minutes and should have given it the full 20 as the center crust could have used a bit more time. Will be making it again and again and again. Thanks for a great recipe!
Fantastic, Patty! We’re so glad you enjoyed this.