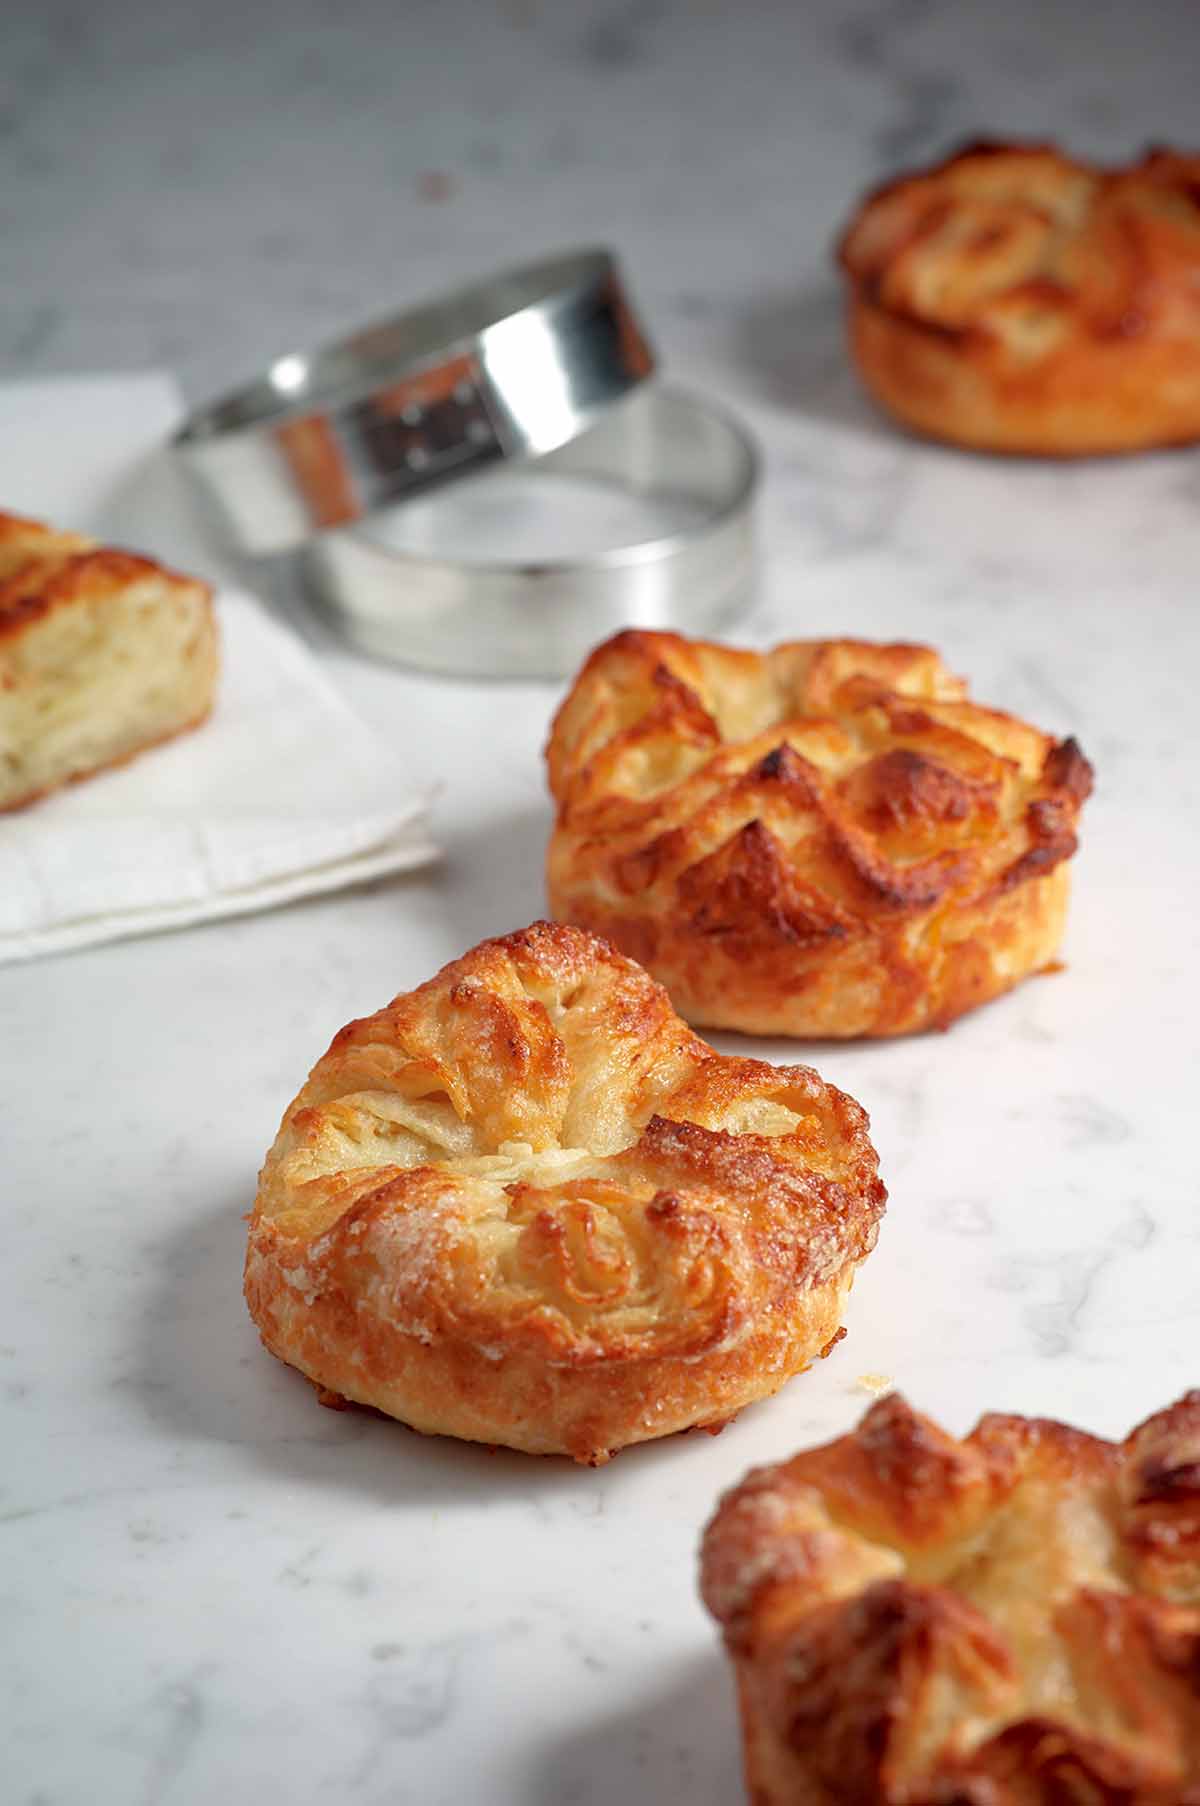
I’ve long considered the sticky bun to be my number one pastry in the world, but that was until my friend Marko Gnann, a world traveler and inveterate sweet tooth, told me about kouign amann (pronounced keh-WEEN ah-mahn), a butter and sugar rich yeast pastry from Brittany. It is actually very similar to a croissant, but with less butter and a lot more sugar. The interior is made up of soft and open-crumbed layers of dough that capture pockets of sugar syrup, all encased in a crisp shell of golden brown caramel bliss.
The dough takes about 6 hours from start to finish, including baking. The actual hands-on time is very short, because the dough does most of the work, but it is necessary to follow the time schedule strictly. Using a stronger, higher protein flour; giving the dough fewer turns (“folds”), and adding the sugar only to the final turn makes a formerly undoable became easily manageable. High-fat butter and high-protein bread flour are ideal to keep the butter layers from breaking through the dough.–Rose Levy Beranbaum
LC No Pastry Rings? No Problem! Note
Tempted to make these crackly yet tender bombs of butter and sugar deliciousness known as kouign amann but got no pastry rings? No problem. Just follow the easy peasy instructions below the recipe to fashion your own. Oh, and don’t worry, we can’t pronounce the name of these little lovelies, either. As if it matters, seeing as we’re too busy cramming the pastry into our pieholes to say anything.

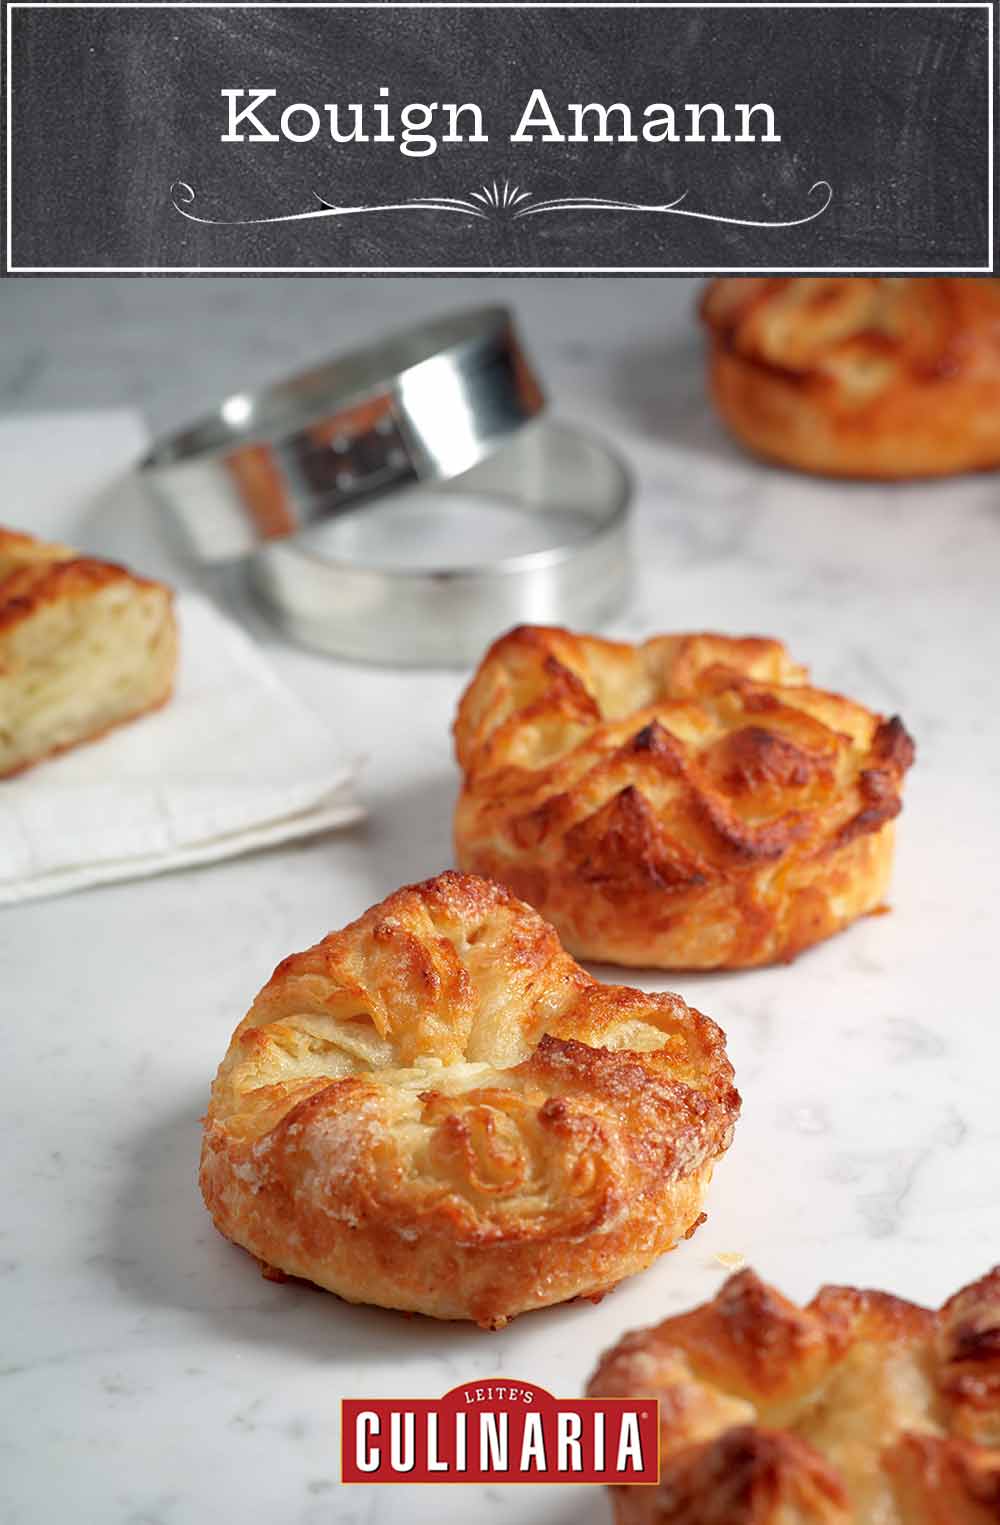
Kouign Amann
Equipment
- Eight 4-by-3/4-inch pastry rings*
Ingredients
- 3 cups minus 1 1/2 tablespoons bread flour, lightly spooned and leveled off
- 2 teaspoons instant yeast
- 1 3/4 teaspoons fine sea salt
- 1 cup water, cool room temperature
- 2 tablespoons (1 oz) unsalted butter, melted and cooled
- 2 sticks (8 oz) unsalted butter, preferably high butterfat, 60° to 70°F (16° to 21°C), plus more for the rings
- 1 cup granulated sugar, preferably superfine (or just blitz granulated sugar in a blender until finely ground but not powdery)
Instructions
Make the dough
- In the bowl of a stand mixer fitted with a hand whisk, mix together the flour, yeast, and then the salt. Add the water and the melted butter.
☞ TESTER TIP: Because sugar increases browning, the milk and egg used in Danish dough are replaced with water here in order to prevent excessive browning or burning.
- Attach the dough hook and, starting on low speed, mix until the flour mixture is moistened, scraping down the sides of the bowl as necessary. Continuing on low speed, beat for 4 minutes. The dough will be silky smooth and have cleaned the sides of the bowl, but it will stick to the bottom and be very soft and slightly sticky to the touch.
- Cover the bowl and let it rest at room temperature for 30 minutes.
Make the butter square
- Meanwhile, prepare the butter square. Place the softened butter on a large sheet of plastic wrap and wrap it loosely. If the butter is cold, pound it lightly with a rolling pin to flatten and soften it. Then knead it together using the plastic wrap and your knuckles to avoid touching the butter directly. Shape the butter into a 5-inch square (it will be about 3/4 inch high). At this point, the butter should be firm but workable—68° to 70°F (20° to 21°C). Use it at once or set it in a cool area.
☞ TESTER TIP: Maintaining the correct temperature of the butter is critical. The butter should be the same consistency as the dough before they're rolled together or it will break through the dough and not distribute evenly.
Make the dough package
- Roll out the dough on a well-floured surface to an 8-inch square.
- Place the plastic-wrapped butter square diagonally in the center of the dough square and lightly mark the dough at the edges of the butter with the dull side of a clean ruler or a knife. Remove the butter and roll each marked corner of the dough into a flap. The dough will be slightly elastic.
- Unwrap and place the butter on the dough. Wrap the butter by stretching the flaps slightly to reach across the butter square. Brush off any flour on the first three flaps before stretching over the fourth flap to wrap the butter square securely. It will form a 5 3/4-inch square dough package. Pinch together the seams to seal it well.
Make the first turn
- On the well-floured surface, keeping the dough seam side up and lightly floured, gently roll the dough package into a 13-by-7-inch rectangle. It will be about 1/4-inch thick. Roll into the corners and use a bench scraper or a ruler to maintain an even rectangle. If the dough blisters, gently press the blister down. If the butter breaks through, dust the area lightly with a little flour before brushing off all excess flour from the surface of the dough.
- Fold the dough into thirds as you would fold a business letter. This is the first turn. Wrap the dough package with plastic wrap and refrigerate it for 1 hour. The dough should weigh about 2 pounds (900 grams).
Make the second turn
- Before each turn, move the dough so the closed end is facing to the left. Repeat the same process of rolling and folding as for the first turn, but every once in a while, flip over the dough to keep the seams aligned. (The upper part tends to roll more than the bottom.) Cover the dough with plastic wrap and refrigerate for another hour.
Make the third turn
- Clean the work surface and sprinkle with about 1/2 the sugar in a rectangle the width of the dough. Set the dough on top and sprinkle most of the remaining sugar on top of it.
- Roll the dough again into a 14-by-8-inch rectangle, flipping it over from time to time. Scrape sugar from the work surface and sprinkle it and some of the remaining sugar on top of the dough until all but 2 to 3 tablespoons of the sugar have been rolled into the dough. With a bench scraper, form the dough into an even rectangle.
- Fold the dough into thirds, wrap it with plastic wrap, and freeze it for 30 minutes. Then move it to the refrigerator and leave it there for 30 minutes.
Prepare the rings and pan
- Line a 17 1/4-by-12 1/4-by-1-inch half sheet pan with aluminum foil, dull side up. Set the pastry rings on the foil and lightly coat the insides and bottom with butter.
Roll and shape the dough
- Spread the remaining sugar on the work surface in a rectangle. Set the dough on top of the sugar and roll it from the center to the edges, then as necessary to form a 16-by-8-inch rectangle. It will be about 3/8-inch thick. Cut the dough into 8 equal pieces. Each will be about a 4-inch square with an average weight of 5 ounces (140 grams). The dough will now be somewhat sticky as the sugar becomes syrupy.
- Roll 1 of the squares into a 5 1/2- to 6-inch square. Bring up the 4 corners to the center and press down firmly over the top of the dough.
- Cup the dough square into the palm of your hand to support it and keep the 4 corners together. Repeat folding, bringing up the corners to the center a second time. This will be more difficult because the dough is now thicker, but simply press it down in the center (if necessary, dip your fingertip in sugar) and push it together as well as possible.
- Place the dough in a prepared pastry ring on the sheet pan. Repeat with the other dough squares. Each one will open up slightly and take its own shape, which is part of the charm.
Let the dough rise
- Cover the shaped dough with an 18-by-12-by-2-inch sheet pan, or loosely with plastic wrap that has been lightly coated with butter, and let it sit in a warm place [ideally at 75° to 80°F (24° to 27°C), but no higher than 80°F (27°C)] for 30 to 50 minutes, or until the dough has risen about 1 1/2 times and most of the dough touches the sides of the rings.
☞ TESTER TIP: Once the dough is shaped, the baking time can be delayed for up to 2 hours by lightly covering the kouigns with plastic wrap and refrigerating them. The rising time, once the kouigns are removed from the refrigerator, will take about 45 minutes to an hour, but the baking time will be the same and the results comparable. Do not refrigerate the dough for more than 2 hours, as this prevents the dough from rising.
Bake the dough
- At least 30 minutes (or longer) before baking, set an oven rack at the middle level. Preheat the oven to 400°F (200°C).
- Bake for 12 minutes. For even baking, rotate the pan halfway around. Continue baking for 8 to 15 minutes, or until the pastries are caramelized and the edges are deeply browned and an instant-read thermometer reads a minimum of 212° to 215°F (100° to 102°C). Be certain to check the pastries often toward the end to avoid overbrowning.
- Set the pan on a wire rack. Use tongs to lift off the pastry rings and a pancake turner to lift each kouign onto another wire rack that has been lightly coated with butter and set over paper towels to catch any leaking butter. (About 2 tablespoons of butter will have leaked from the kouigns onto the aluminum foil.) If any of the kouigns cannot be removed from the rings, return them to the oven for a few minutes to soften the caramel.
- Let the kouigns cool for about 10 minutes. The texture is softest and the kouigns most delicious when eaten just baked and while still warm. Store any leftover kouigns in a paper bag at room temperature for 2 days. To reheat, warm it for 8 to 10 seconds in a microwave or 3 to 5 minutes in a preheated 350°F (175°C) oven.
Notes
*How To Make Your Own Pastry Rings
You can easily fashion disposable pastry rings from heavy-duty aluminum foil or make reusable rings from aluminum flashing (available at most hardware and home improvement stores). To make a disposable aluminum foil pastry ring, cut a 14-by-4-inch strip heavy-duty aluminum foil. Mark the foil along its length at 7/8 inch. Fold the foil lengthwise along the markings. Fold the foil lengthwise 2 more times to form a 14-by-1-inch strip with 4 layers of foil. Repeat for each ring. Wrap each ring around a 4-inch diameter can. Use 2 small paper clips to secure the overlapping ends to form a ring. Remove the ring from the can and adjust it to be as round as possible. To make a reusable aluminum flashing ring, use metal shears or sharp utility scissors to cut a 14-by-1-inch strip of aluminum flashing. Repeat for each ring. Wrap each ring around a 4-inch diameter can. Use 2 small paper clips to secure the overlapping ends to form a ring. Remove the ring from the can and adjust it to be as round as possible.Explore More with AI
Nutrition
Nutrition information is automatically calculated, so should only be used as an approximation.
Recipe Testers’ Reviews
Did you know only 68% of the recipes we test make it onto the site? This recipe survived our rigorous blind testing process by multiple home cooks. It earned the Leite’s Culinaria stamp of approval—and the testers’ reviews below prove it.

This kouign amann recipe is not for the faint of heart nor the novice baker. That said, the recipe is so detailed, it could be used by less experienced bakers as a first foray into making a pastry based on a laminated dough. You absolutely need 6 full hours to make this recipe from start to finish. At the first turn, my dough package weighed 851 grams, slightly less than the 900 grams stated in the recipe. If you follow the recipe exactly as written, the rolling and folding will go very smoothly.
Another important factor is to make sure that the butter and dough are the same consistency to ensure that the butter distributes evenly when you are rolling and folding. Shaping the squares before placing them in the pastry rings is going to take “the courage of your convictions,” to quote Julia Child. The dough needs to be pressed down as you are bringing the corners together. It may not look all that perfect and they may open up slightly, but as Rose states, that is part of the charm of these pastries.
The instructions for making your own disposable pastry rings out of aluminum foil work perfectly and are a really great way to avoid buying another kitchen item that you’ll probably only use once in a while. The baking time was an initial 12 minutes and another 8 minutes after rotating the pan. That may have been a few minutes too long in my preheated oven, as the bottoms of the pastries got very dark and needed to be scraped a bit after they cooled. Next time, I may lower the oven temperature to 375°F and slightly reduce the baking time. These pastries are delicious anytime—for breakfast, as a dessert, or with a cup of tea or coffee any time of day. They are buttery, sweet, flaky, and unlike any other pastry I know. Highly recommended!

Wow. This is the most successful I’ve ever been at making a laminated dough. All the time and effort were worth it for the amazing pastry you get at the end. The kouign amann are buttery and salty-sweet, and the sugar on the outside is caramelized while the inside is slightly gooey. I definitely think using superfine sugar and adding it on the last turns keeps the sugar from cutting through the layers.
I took the butter out of the fridge after I made the dough, wrapped it in plastic, and beat in into shape with a rolling pin, and by the time the dough was ready, the butter was at the right temperature and consistency. When I rolled it into a 13-by-7-inch rectangle, it was about 3/8 inch thick. The second rolling was about the same. I did need to keep turning it to get it to remain in an even rectangle. I had trouble rolling the 8 squares evenly since the cut edges rolled out farther than the folded edges. I ended up cutting about a 1/4 inch off the folded edge of each square, and it worked much better.
The last few squares were very sticky from the melting sugar. I left the squares on the counter to shape them, as I found it easier than cupping in my hand. When they got sticky, I used a little sugar. The shaped pastry opened up a little bit as they rose, some more than others. I used English muffin baking rings that are 3 3/4 inches in diameter, and they worked well. My dough took 50 minutes to rise.
I baked the pastries for 30 minutes but should have taken them out a little sooner. I’m definitely glad I covered the sheet pan in aluminum foil. Holy burnt sugar! The pastries lifted out of the rings easily and didn’t leak much butter. They’re definitely best the first day but were still very good when heated in the microwave over the next couple of days.

Let me start off by saying that this is not an “easy” recipe. It’s not something you come home and decide to simply whip up. It needs some time and a bit of skill to complete. That being said, it is very much worth the effort and the final result is such a special and unique treat that it validates all the time, effort, and rolling of dough! Usually Kouign-Amann is more of a single large cake that you slice into wedges and serve, but here it’s baked in individual muffin cups and the little cakes end up with a brilliant texture. The outside is crispy crunchy and caramelized and the inside is sweet, soft, and rich. I also love that the author provides proper weights for the recipe and not just inaccurate volume measures.
I made the cakes for breakfast thinking that we’d have a few left for an after-dinner dessert with some whipped cream and berries. No such luck. They were all devoured before noon.
A few helpful points to keep in mind when attempting to this:
Read the recipe carefully. It’s long but you need to follow the instructions carefully. Unless you have a lot of experience with laminated dough, you really should not improvise when making this Kouign-Amann for the first time.
When the butter is spread on the dough, it’s really helpful to leave a 1/4 inch or so of butter-free dough so that the 2 layers can seal better.
When you roll the dough and the edges aren’t exactly straight, I like to (based on a croissant recipe I make) trim those edges to straight lines. This way when the dough is folded everything matches up and the dough is easier to roll. The extra dough that might be trimmed can be incorporated back in.
Kouign-Amann is usually made with salted Brittany butter. It really will make a big difference in the final balance of the recipe if you sprinkle a bit of salt on the butter layer or use all or half salted butter. The cakes are sweet and some salt is a great addition.
The recipe is very forgiving when it comes to rest times in the fridge. I was making it throughout the day and ended up putting the folded dough in the fridge several times. Just make sure to let it warm up a little bit before rolling for the next fold.


The perfect recipe for kouign amann! But could a recipe from Rose Levy Beranbaum be anything less? David, you really do know how to choose the best of the best. This is a pastry I’ve long wanted to try and I’m so glad I finally did… sugary, buttery, crispy and delicious, it’s worth every minute it takes to make. And with the clear and detailed instructions the recipe wasn’t all that difficult. And the good news is it freezes perfectly and reheats beautifully so perfect for weekend guests!
Holy moly, Emily, those look amazing! And I agree, anything Rose creates is always perfect. I hope you have a lovely weekend with your guests perfect
Question—are all the turns book folds?
Sorry—my misunderstanding!
No problem, K. Is the process clear to you now?
Thank you for reply. Process clear but could Not get internal Kouigns to minimum suggested bake temp.
My oven temp is accurate.
Suggestions?
Thanks
K, the internal temperature in the recipe is suggested by the author, but it is higher than what is needed to ensure the pastries are cooked all the way through. As long as you are reaching at least 190°F, they should be fully cooked.
Thank you!
190* is more like the results I had
You’re welcome, K. I’m glad it worked out for you.
I’m so thrilled to see my recipe on Leite’s Culinaria! We worked so hard on it, and the big breakthrough was adding the sugar toward the end rather than earlier where it would compromise the dough. Also very happy you praised Woody’s making your own pastry rings. And most of all that you did such a perfect rendition–the photos and the finished photo are exemplaire! And thank you all for your detailed comments. ❤️ ❤️ ❤️
P.S. We were beyond thrilled that our publisher HMH dared to put this recipe on the cover of “The Baking Bible,” which was a leap since at that time mostly no one had heard of it but it was such a great photo no one cared what it was–they just wanted to dive in!!!
Thank you, Rose, for your kind words, though we are the ones honored to be able to share such an amazing recipe!