☞ Learn More, Read: How to Dry Sourdough Starter

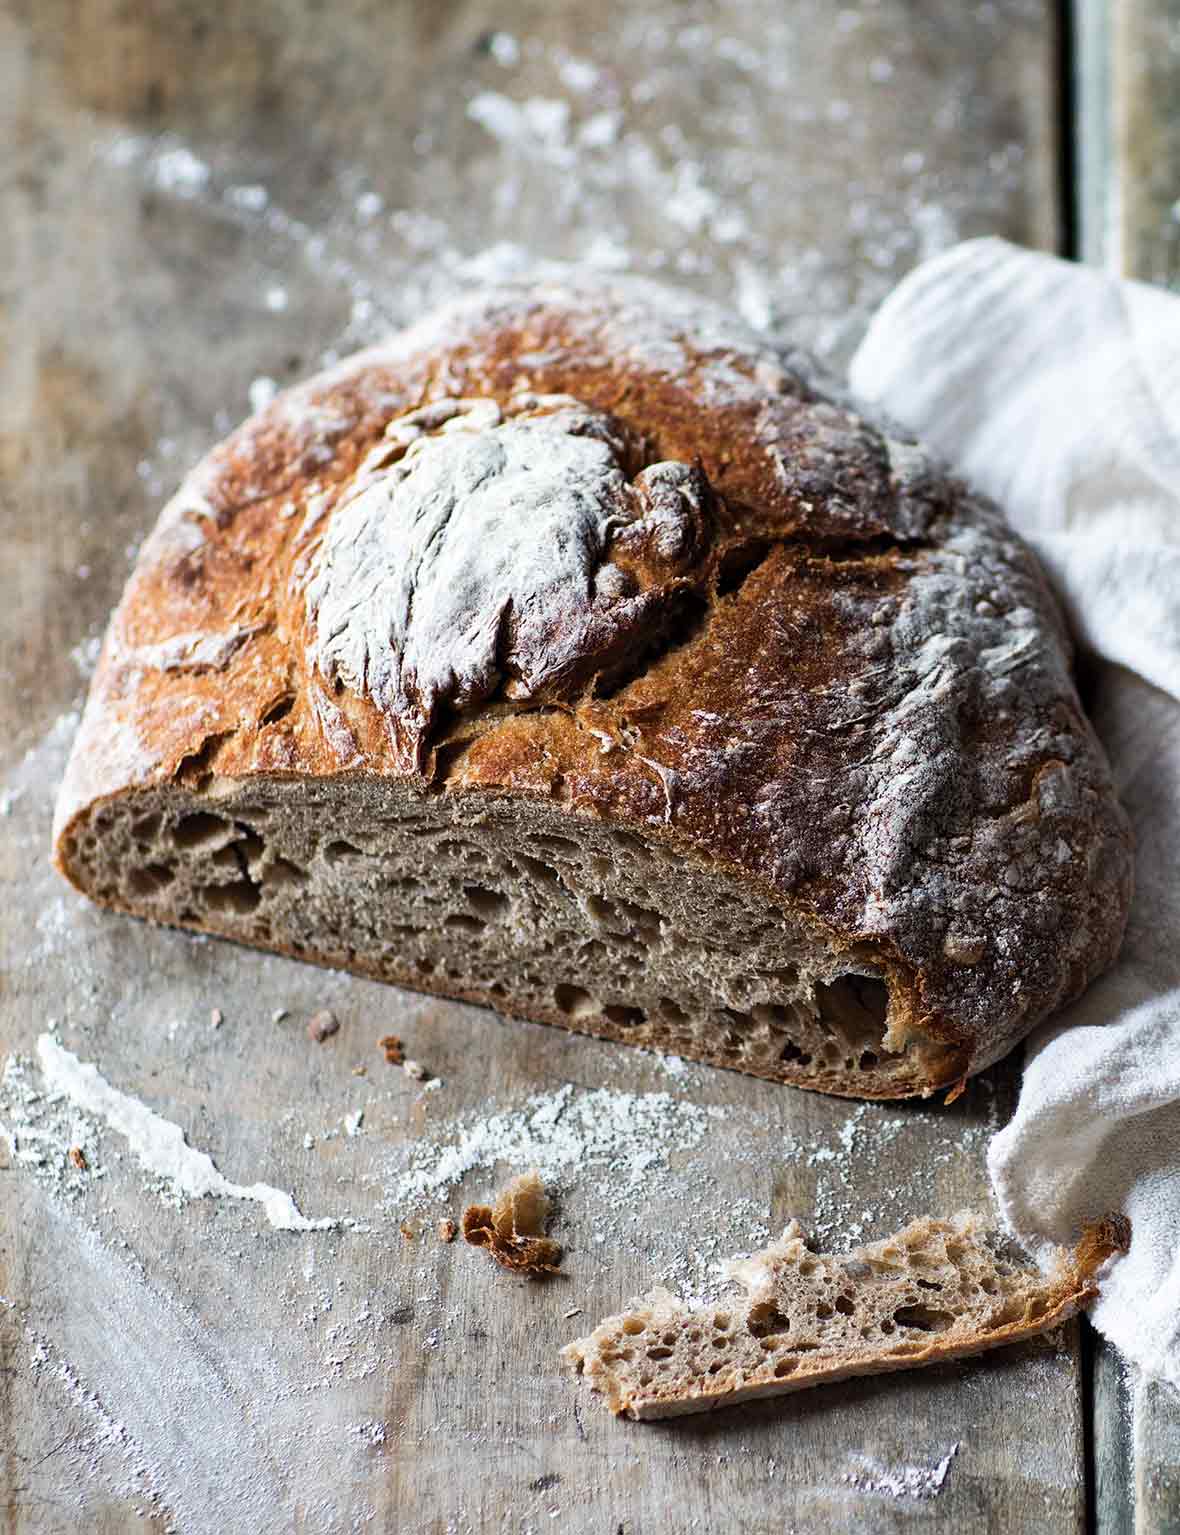
Sourdough Rye Bread
Ingredients
For the rye bread sponge
- 6 ounces medium rye flour
- 6 ounces water
- 0.6 ounces rye sourdough starter
For the rye bread dough
- 10 ounces water, at room temperature
- 10.6 ounces bread flour
- 1 recipe rye bread sponge (see above)
- 2.3 ounces medium rye flour
- 1 1/2 teaspoons salt
- 1/3 teaspoon instant yeast
- Flour, for the work surface
Instructions
Make the rye bread sponge
- In the bowl of a stand mixer, mix the sponge ingredients by hand until incorporated. Cover and let ferment at room temperature (68 to 72°F or 20 to 22°C) overnight or for 10 to 12 hours. The sponge will be very bubbly, have a clean sour smell, and will have doubled in volume.
Make the rye bread dough
- Add the water and 1.8 ounces (50 grams) bread flour to the sponge and mix by hand until it forms a slurry, 1 to 1 1/2 minutes. Add 8.8 ounces (250 grams) bread flour and the rye flour and use the paddle to mix at low speed until the dough is evenly hydrated, 2 to 4 minutes. Cover the dough and let it rest at room temperature for 15 to 20 minutes.
- Add the salt and yeast to the bowl with the dough and mix with the dough hook of your stand mixer on low speed until the gluten is very well developed, 30 to 35 minutes. The dough should be sticky and very stretchy. Cover and let ferment at room temperature until doubled in volume, 2 to 2 1/2 hours.
- Preheat the oven to 430°F (220°C) with an oven rack adjusted to the middle position and a second rack in the lower position with a steam pan on it. [Editor’s Note: A steam pan is simply a pan filled with some water. You’ll want to use a pan with relatively high sides and only fill it partway with water as you’ll need to remove the pan from the oven when the water is very hot and you don’t want it sloshing all over you or your oven.] If using a baking stone, place it on the middle rack.
- Turn the dough onto a generously floured work surface and gently form it into a ball by folding it toward you, rotating 90 degrees, and repeating until the bottom surface is smooth. Flip the dough. If a traditional Galician rye bread shape is desired, pinch a golf ball-size piece of dough from the center of the loaf and carefully stretch it upward without separating it from the loaf, then form a depression in the dough and nestle the ball of dough inside the depression. Place the dough on a parchment-lined baking sheet or, if using a baking stone, on a well-floured peel. Cover and proof at room temperature for 10 minutes.
Bake the rye bread
- Bake the rye bread for 15 minutes.
- Remove the steam pan from the oven, quickly shut the oven door, and lower the temperature to 390°F (200°C). Continue to bake the bread until the crust is golden brown, the loaf thumps when tapped with a finger, and the internal temperature is at least 198°F (92°C), 15 to 25 minutes more.
- Transfer the loaf to a wire rack and let it cool completely before slicing.
Explore More with AI
Nutrition
Nutrition information is automatically calculated, so should only be used as an approximation.
Recipe Testers’ Reviews
Did you know only 68% of the recipes we test make it onto the site? This recipe survived our rigorous blind testing process by multiple home cooks. It earned the Leite’s Culinaria stamp of approval—and the testers’ reviews below prove it.
Loved, loved, loved this sourdough rye bread recipe! It was perfect! This is an excellent recipe for those who love their classic sourdough rye bread. It turned out absolutely beautiful with a nice golden brown crust and a complex sourdough flavor. I am very, very pleased with this loaf and will definitely be making it again!
My crust wasn’t like some of the other rye bread recipes that I’ve made—it was a little softer and didn’t break your teeth.
My sponge started to really grow at around 6 hours and doubled at about 10 hours. The description was very good—it was indeed bubbly with a clean sour smell. If you’ve never made a rye sourdough like this before, it might be a little bit tricky since the dough is so wet, but you’re doing it right. It should be just a little thicker than pancake batter. And be very careful to not punch it down at any point once you’ve kneaded it with the dough hook for 30 minutes as this will help create an airy bread with an open crumb.
Want to save this?
My loaf was beautiful!
This sourdough rye bread is a higher hydration dough, which was supposed to give it a nice open crumb. I didn’t achieve that, but it still had a nice flavor. It was a very mild sourdough rye bread and could go with many different foods.
I would be curious to try this recipe with less mixer time and some folds incorporated into the bulk fermentation. It was a difficult dough to work with. It will take practice for anyone to get the hang of but it was a fun challenge.


A better attempt than my last. Similar process to my previous. Slightly less bulk fermentation as i could see it was running away with itself. It seemed scarily slack, so I did the pre-bake rest in a floured cloth lined bannetone
More gentle with the handling and a spritz or two of water before it went under the cloche. 30 mins at 240c fan on, covered. 20 mins or at 240c fan off uncovered (until the colour I wanted.
Inside is still not as airy and I think I need more strength in the dough. But I’m loving working with this recipe and refining it for my own kitchen
and this is the inside
That is one gorgeous loaf of bread, Aiden! I love that you are perfecting it to make it work so well for you.
Hi David,
My first couple of attempts at making this were great. I baked seam side up under a cloche and got a really nice burst through the top and lovely crust. My last two have gone a bit awry with the crust and I can’t work out what has changed.
It doesn’t appear to be underproofing (I think), as there are no blowouts. Inside is fine, but the crust seems to be brittle and is cracking all over during the spring.
Is it a proofing issue? Shaping, too much tension, too much flour? An oven temp issue? Needs to sit a bit longer before the bake?
any help greatly appreciated.
Thanks,
Aidan
Aiden, rye is known to crack a lot, as the loaf isn’t scored. And a crackly crust is often prized–at least to me. You may have overtightened the loaf in shaping. Try a little less shaping and really, really getting as much moisture in there are possible. But, honestly, there is no such thing as an ugly loaf of bread!
Awesome, thanks David. That’s good to know and I wasn’t quite sure what to expect from it.
I’ll try less shaping. I forgot to add a picture but this is how it turned out.
Aidan, to be honest: I’d be completely happy if that were my loaf. It’s great looking!
Thanks David!
I’m not massively experienced with Rye yet and it looked so different to the headline pic. I wasn’t sure what to expect and this one so was very different to my earlier efforts. However, I’m definitely going to keep baking this one and embrace the cracks!
But my oh my its absolutely delicious; an amazing bread!
Thank you for the recipe and the feedback!
Aidan, you’re more than welcome. The loaf in the top image looks like the top knot (my term) spread a bit and cause that wonderful craggy surface. Did you try the top knot? That kind of pre-creates weakness in the doughs cloak so it can spread a bit.
Hi David, On this one I did. It’s the clump on top. I think I’d overtightened by that point. And gave an extra bit after the knot so probably piled on some extra weakness. I know I haven’t mastered the knot. I think I’ll try another with the knot, then one scored then another seam side up for a natural ‘burst’. I’ll report back in due course!
Excellent, Aidan. Keep all the notes and photos coming!
Hi David. Eric again. Can you help with step 5? The dough is so wet after the 2 hour proof. My dough rose nicely, so I think the yeasts were working fine, but I had trouble with the wetness. I used a dough scraper to lift the dough and fold it, as directed, but I don’t think the dough was stiff enough to hold its shape. I was scrupulous in my weighing and measuring, so I think I did that correctly. How many times do you turn the dough in step 5? What dough texture should I aim for? Thanks
Eric, the dough texture won’t really change much. By folding, you’re creating a tighter skin. Take a look at this video. Starting at the 3-minute mark–that’s what you want to do. You can do it as many times as you need to shape the loaf. Also, try lightly sprinkling flour as you fold. That may help.
This issue with bread is that it’s alive and is different every time. Wetter, drier, springer, denser, etc.