
TL;DR (Quick-Answer Box)
- What it is: A traditional rye sourdough starter made from scratch with just two simple ingredients: whole-grain rye flour and water, plus time.
- Why you’ll love it: A vibrant and active sourdough starter that’s a snap to make and a fantastic way to enjoy healthier, homemade bread.
- How to make it: Mix flour and water, then feed it daily for a week, incorporating a portion of the previous day’s starter into the daily feeding. After a few days, it will bubble and develop a sour smell. Use it in your favorite sourdough bread recipe.

Jump To
It’s not hard to make a rye sourdough starter from scratch. Some sourdough starters rely on wild yeasts that live in the air, others on acid-producing bacteria present in buttermilk, yogurt, pineapple juice, and the like, and still others start with commercial yeast or store-bought starters.
☞ Learn More: How to Dry Sourdough Starter
Fact is, none of these additives is necessary. All it really takes to build a delicious and robust rye sour culture, or starter, is some whole-grain rye flour, water, a warm place, and patience.
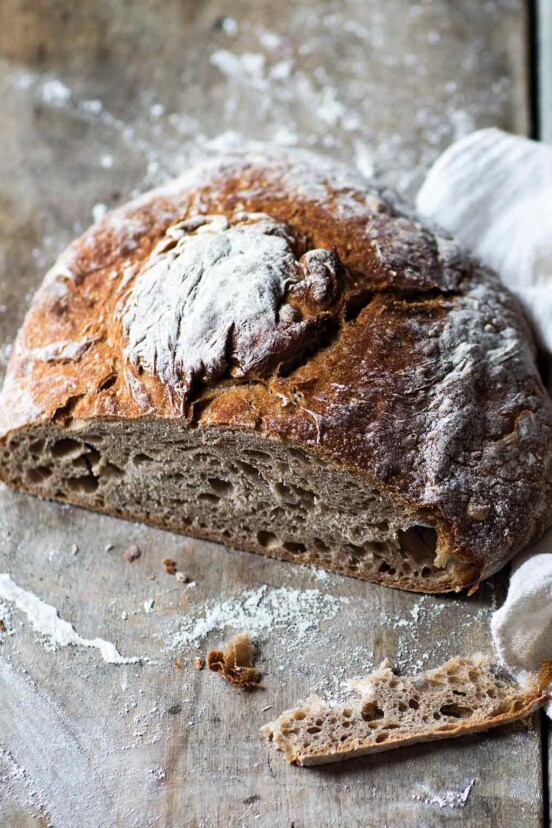
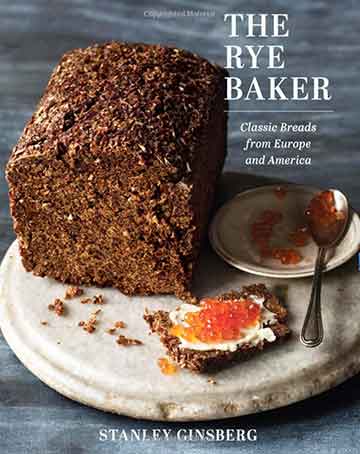
And when your traditional rye sourdough starter is complete, the very first thing you’re going to want to do is use it to make this Galician rye bread.
More Great Sourdough Recipes
Write a Review
If you make this recipe, or any dish on LC, consider leaving a review, a star rating, and your best photo in the comments below. I love hearing from you.–David
Featured Review
Hi, guys. Finally have my rye sourdough starter working really well in and out of the fridge. Baking rye and white loaves every two weeks. My wife says the rye is just like she use to buy in Germany. Happy Days!
Joe

Rye Sourdough Starter
Equipment
Ingredients
Day 1: Make the Rye Sourdough Starter
- 2.5 ounces whole grain rye flour, preferably organic
- 2.5 ounces warm water (105°F or 41°C)
Days 2 to 7: Refresh the Rye Sourdough Starter
- 2.5 ounces whole grain rye flour, preferably organic
- 2.5 ounces warm water (105°F or 41°C)
- 2.5 ounces Sour Starter from the preceding day
Days 8 and Beyond: Maintain the Rye Sourdough Starter
- 2.5 ounces medium or whole-grain rye flour, preferably organic
- 2.5 ounces warm water (105°F or 41°C)
- .25 ounces rye sourdough starter
Instructions
Day 1: Make the rye sourdough starter
- Start with equal amounts of organic rye flour and water by weight. Dump them in a nonreactive (glass, porcelain, stainless-steel, plastic) container, mix by hand into a stiff paste, cover, and let stand at room temperature (68 to 72°F or 20 to 22°C) for 24 hours.
☞ TESTER TIP: Occasionally the yeast normally present in whole grains fail to establish itself in a new culture; if, after 3 or 4 days, the culture darkens, develops a mold, or smells bad, dump the whole batch and start over. After a week, the culture, or sourdough starter, will be ready to use or to be stored refrigerated in an airtight container for a couple days. [Editor's Note: If storing the sourdough starter for more than a couple days, you'll need to maintain it, which we explain how to do just below.]
Days 2 to 7: Refresh the rye sourdough starter
- The next day, discard all but 2 1/2 ounces (70 grams) of the culture and mix the remainder with the refresh ingredients, cover, and let stand. Repeat each day, discarding all but 2 1/2 ounces (70 grams) of the preceding day’s culture.
☞ TESTER TIP: The most important point to remember at the early stages is to feed the sourdough starter daily. Even when it shows no apparent fermentation, the yeast is busy multiplying and consuming nutrients at a very high rate. By the second or third day, it will swell, show bubbles, and give off a clean sour smell. Over the next few days the activity will become more and more vigorous and the smell more intense.
Days 8 and Beyond: Maintain the rye sourdough starter
- In a perfect world—or in a working bakery—sourdough starters are refreshed daily. That said, daily feedings demand both a degree of dedication and abundant flour supplies that are impractical for all but the most committed home bakers. You can get by refreshing your starter every 36 hours or so.
- Mix the rye flour, water, and rye sourdough starter by hand until incorporated. Cover and ferment at room temperature (68 to 72°F or 20 to 22°C) overnight or for 10 to 12 hours. The sponge will be very bubbly, have a clean sour smell, and will have tripled in volume. Store refrigerated in an airtight container and it will last indefinitely.
Explore More with AI
Nutrition
Nutrition information is automatically calculated, so should only be used as an approximation.
Recipe Testers’ Reviews
Did you know only 68% of the recipes we test make it onto the site? This recipe survived our rigorous blind testing process by multiple home cooks. It earned the Leite’s Culinaria stamp of approval—and the testers’ reviews below prove it.
The rye starter was easy to make and quick. It took about 5 minutes each of the 7 days. Mine smelled great and seemed consistent after the week of feedings. I switched to the refresh amounts after that and it stayed nice and healthy.
During the buildup, you end up tossing about 2/3 of it away. I definitely recommend a scale versus just using volume measurements.


Hi David! I am about to feed my starter. I have kept it in my fridge for 6 days now. Is it really only 7 grams of starter? It seems so little. 🙂
Thanks,
Maria
Hey, Maria! Yep, only 7 g. Do you want to give the starter a lot to eat!
Hi. I am on the last day of building my starter. On day three, I noticed some proofing and a pleasant sour smell that reminded me of the sourdough rye crackers I typically buy. After that, however, there has been less proofing (it seems to stay as a paste). There is a nice sour smell in the morning, so I don’t think it’s spoiling. Just that it doesn’t seem to be doing very much. Our house is cool. 68 during the day and cooler overnight. What should I do at this point? I’m worried the starter won’t proof the bread.
Eric, the temperature is too cool, that’s the problem. Sixty-eight is the lowest it should be. Do you have a “proof” setting on your oven? If so, use that. If not, you can do a few things that should help. Turn on the oven light and let the starter live in there. Or slide a roasting pan in the oven and pour boiling water in it. Then let the starter sit in the steam bath. You need to get the temperature up for the yeast to start munching,
OK. I started from scratch on April 15. I rigged up a slow cooker on “keep warm” setting, with the bowl with the starter sitting atop. The bowl is a nice warm temp, but not hot. I am using stone ground organic rye flour and following the direction. The mass smells pleasantly sour, but it has not really bubbled or risen. I’m getting frustrated and unlikely to try a third time. I’m tired of wasting rye flour for something that doesn’t work.
Eric, in solidarity with those who are beginning a starter, I started a new one. My old one is in the fridge in a state of suspended animation. My new one is not bubbling or rising very much either. I’m just going to keep feeding it. Eventually I know it will show signs of multiplying. But, it’s a living thing. And my only advice is it has to go in its own speed. I understand about wasting flour, especially at this time.
Eric, I was just thinking: Do you know the exact temperature in the slow cooker? Also, how is your water? Is it chlorinated? Is it hard or soft? Is the starter in a bowl or glass jar? I think it would be hard to detect any rise in a bowl, as it flares out as it goes up.
Hi, I just started my starter a few minutes ago – my question Is when your starter is all ready to go and healthy can u just use some of the discard for your recipe or does it need to be fed the night before u would be using the discard in a recipe. deb
Deb, as you make your starter, you’ll see it rise and fall predictable. You want the starter to be as strong as possible. Use it when it reaches the peak of its rise in the jar. So most likely it will need to be fed the night before.
What is the maximum temp that you want the starter exposed to?
Thanks, Deb
Deb, as the recipe says, 72°F (22°C). Between, us, I have gone as high as 78°F (26°C).
Then I have probably killed mine because I followed what u said to Marnie because my starter was behaving similarly to Marnie’s.
“Marnie, a few tips. Feed your starter more often, like every 8 hours. (I know, a pain in the ass, but it’s just for now.) Also, make sure the temperature is between 70° and 85°F. I have a proofing feature on my oven, but before I did, I’d turn the oven on low for 30 seconds just to warm it. Then I put the starter in. It usually worked.”
Deb, are you saying that it died because it was too hot? Eight-five degrees isn’t too high. (Yeast itself will die at 140°F.) I suggested it to Marnie because hers was sooo sluggish. I was trying to help it along. If you would like to have a phone call, send me an email, and we can talk this through.
Okay, I’m glad to hear that, that’s great. Mine was sluggish too – I had put mine in the oven too because my house was cold and I had one day of really great action and then the next two days have been nothing and I still kept it in the oven with the door slightly ajar–and it’s reading at 84 degrees–when I tried it with the oven door closed it was almost 100 degrees but that was the one day that I had the really great action from it.
I’ve had the same thing happen to me, Deb. When I turned on the oven lights and forgot about the starter, it got up there in temp. But it was perfectly fine.
Another thing to consider is water. Some folks find hard water to be hard on a starter. Our water’s not to bad, but if your is hard, consider filtered or spring water.
Thanks for the tip regarding water – I have well water at my house, it tastes wonderful but it has a very high degree of hardness. I’ll get some bottled water. Deb
You bet, Deb.
Hi – once i stopped using my tap water which mine is from our well and is extremely hard water and started using bottled water and i kept mine in the oven with the oven light on and the door only slightly ajar- i used a towel to keep it that way; because the first stop in the opening the door was too wide making the inside of the oven too cool – everything is bubbling and rising nicely. Today i am going to start to make the “leaven” for Sarah Owens Table Bread recipe. Thank u David for your help!!!
Deb, thank you so much for your help!
Well, yesterday I used my rye sourdough starter to make a leaven for Sarah Owens sourdough table loaf, and today I started on the bread, WOW. A lot of time involved for bulk fermentation and shaping, etc.–not hard just a lot of steps. It’s in the refrigerator right now. I’ll bake tomorrow in a preheated Dutch oven. If I ever do this recipe again, I’ll do about four loaves at a time, otherwise it’s too labor intensive waiting to do the next step. We will see tomorrow how it goes. Everything looks and feels right so far.
Deb, I don’t know Sarah’s recipe, but most of these types of bread take time, but that’s the good part, in away. It’s meditative. If you want something fast, try the no-knead artisan bread.