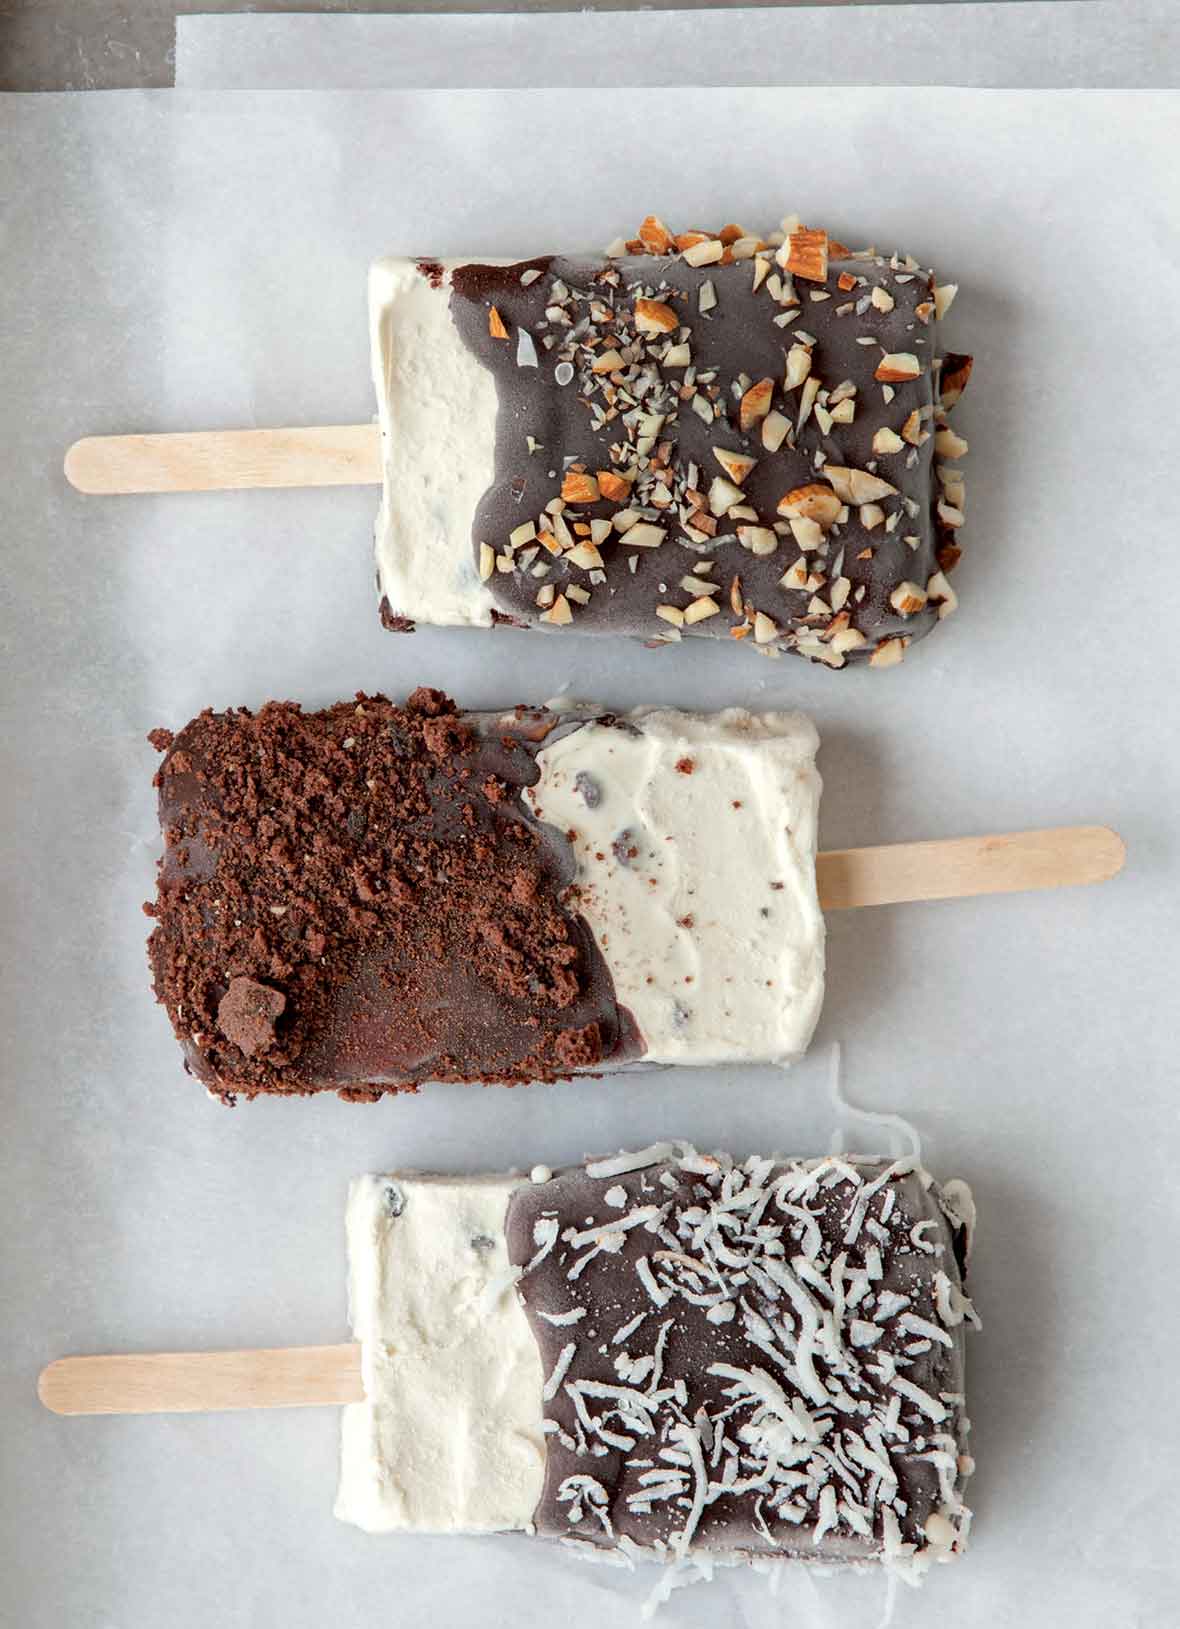
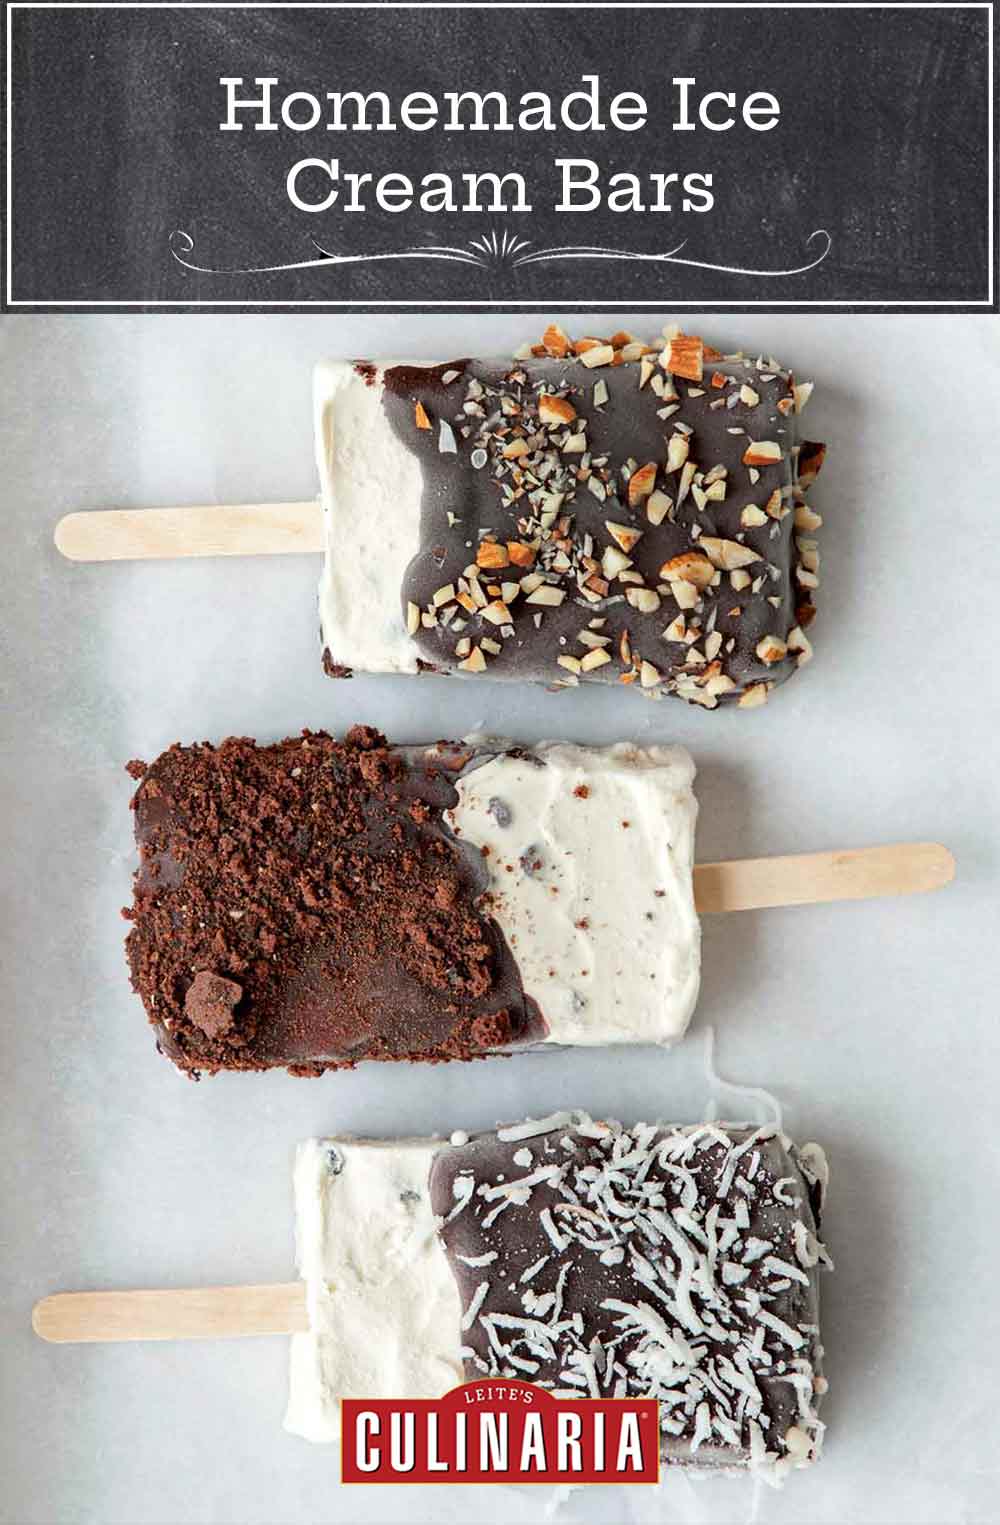
Homemade Ice Cream Bars
Equipment
- 8 wooden craft sticks
Ingredients
- 1 quart your favorite store-bought or homemade ice cream, softened
- 1 1/4 pounds bittersweet or semisweet chocolate, chopped
- 2 tablespoons mild olive or vegetable oil
- Chopped almonds, cookie crumbs, shredded coconut, crushed English toffee, jimmies, funfetti, or toppings of your choice
Instructions
- Line a 9-inch (23-cm) square metal baking pan with plastic wrap, allowing the wrap to hang over about 4 inches (10 cm) on 2 opposite sides. Smooth the plastic wrap so that it fits the contours of the pan and is as unwrinkled as possible.
- Using a rubber spatula, spread the softened ice cream in the prepared pan, smoothing it evenly. Fold the overhanging plastic wrap over the ice cream, then wrap the pan securely with more plastic wrap. Freeze until firm, at least 2 to 3 hours.
- Line a baking sheet with parchment paper. Remove the pan from the freezer and unwrap the outer layer of plastic wrap. Using the overhanging plastic wrap, lift the slab of ice cream out of the pan and place it on a cutting board.
- Grab a long, sturdy knife and cut the ice cream into 8 equal rectangles. Use a metal spatula to separate the rectangles and transfer them to the prepared baking sheet, spacing them at least 2 inches (5 cm) apart. Insert a wooden popsicle stick into a short side of each rectangle. Cover the baking sheet with plastic wrap and freeze until firm, at least 2 to 3 hours.
- In a heatproof bowl, combine the chocolate and oil. Place over but not touching a pan of barely simmering water and heat, stirring gently, until the chocolate melts and the mixture is smooth. Remove from the heat and let cool, stirring occasionally, until the mixture is barely lukewarm, 15 to 30 minutes.
- Place your desired toppings in separate bowls. Remove the ice cream bars from the freezer. Working quickly, lift 1 bar by its stick. Dip the ice cream bar in the chocolate, turning to coat the ice cream partially and letting any excess chocolate drip back into the bowl. Sprinkle with the topping. Return the bar to the baking sheet. Repeat with the remaining ice cream bars.
- Freeze the ice cream bars, uncovered, until the ice cream and coating are firm, at least 2 to 3 hours. Consume immediately or wrap each bar individually in plastic wrap and return to the freezer. Originally published August 30, 2016.
Notes
*What You Need To Know About The Best Type Of Ice Cream For
Homemade Ice Cream Bars If using store-bought ice cream, you want to select a hard, dense ice cream rather than one that has a lot of air whipped into it and, as a consequence, is super soft. We’ve found Breyers and Edy’s brand ice creams to be a little too soft to set up properly as ice cream bars. In terms of the best FLAVOR of ice cream for your bars, that means different things to different people. To some, ice cream bars mean creamy vanilla ice cream cloaked in either dark or milk chocolate. To others it means something a little more creative. What we’re trying to say is ice cream bars are a very, very personal thing. Which is exactly why we love this easy homemade ice cream bars recipe, which essentially allows us to make whatever combination of ice cream, chocolate, and coating we fancy. So go on. Recreate the ice cream bar of your childhood. Create the ice cream bars of your dreams. Or do both. And then kindly let us know in a comment below which creative collision of ice cream, chocolate, and coatings you concocted.
Explore More with AI
Nutrition
Nutrition information is automatically calculated, so should only be used as an approximation.
Recipe Testers’ Reviews
Did you know only 68% of the recipes we test make it onto the site? This recipe survived our rigorous blind testing process by multiple home cooks. It earned the Leite’s Culinaria stamp of approval—and the testers’ reviews below prove it.

Well, I think I was just chosen as Grandmother of the Year with these homemade ice cream bars! What a simple treat to make and keep in the freezer.
For a speedier product, I used store-bought vanilla ice cream. All of the freezing times after pressing the ice cream into the pan, cutting the ice cream into bars, and dipping them in chocolate should definitely be observed. My ice cream took at least 2 to 3 hours to refreeze after each process. I pulled the plastic wrap out of the pan and cut the pops on a cutting board. Work fast! I used chopped nuts and sprinkles on the chocolate.
I think next time I’ll do more than 1 quart of ice cream to make the pops thicker. I feel the sticks will stay in place better if the ice cream is a little thicker. This is a fun treat for the summer months!


I tried this recipe and it did not go over well. I used Eddy’s slow churned ice cream flavors and the ice cream remained too soft after each step and didn’t feel confident in dipping the bars in chocolate. Even with waiting an additional 2 hours (total of 4 between each steps) the ice cream didn’t get firm. My suggestion when choosing ice cream is one that is not soft when you pull it straight out of the freezer! That’s definitely my fault for not thinking that through but they were my fathers favorite ice cream flavors.
Audra, it sounds like you found your solution. Thank you for the reminder that some ice creams are simply softer than others. Am so sorry that the ice cream wasn’t firm enough but I’m suspecting the flavors were lovely enough to scoop everything in a bowl and grab a spoon. So sweet of you to find your father’s favorite flavors!
Simple but brilliant! How can the commercial ice cream bar not be improved by honest quality ingredients and the creative custom touches of your favorite flavors and toppings?!
I’m going to do this with Alton Brown’s scrummy banana ice cream and the banana split ingredients I usually throw into it on the outside instead of embedded in the ice cream.
Naturally you’re working on the calorie-free version, no? I’m nominating you for the Nobel Prize for Ice Cream but if you work out this no-fat alternative I’m sure you’d be a shoo-in!
Hah! Lovely to hear, Rainey! Love your humor. And your idea for banana split ice cream bars. Brilliant!
Is there any company who makes plain vanilla bars. I am looking for plain vanilla bars for business purpose.
Regards,
Sam
Sam, I’m sorry, no, I don’t have any companies for you as we specialize in making your own recipes at home. Best of luck to you.