
TL;DR (Quick-Answer Box)
- What it is: A traditional rye sourdough starter made from scratch with just two simple ingredients: whole-grain rye flour and water, plus time.
- Why you’ll love it: A vibrant and active sourdough starter that’s a snap to make and a fantastic way to enjoy healthier, homemade bread.
- How to make it: Mix flour and water, then feed it daily for a week, incorporating a portion of the previous day’s starter into the daily feeding. After a few days, it will bubble and develop a sour smell. Use it in your favorite sourdough bread recipe.

Jump To
It’s not hard to make a rye sourdough starter from scratch. Some sourdough starters rely on wild yeasts that live in the air, others on acid-producing bacteria present in buttermilk, yogurt, pineapple juice, and the like, and still others start with commercial yeast or store-bought starters.
☞ Learn More: How to Dry Sourdough Starter
Fact is, none of these additives is necessary. All it really takes to build a delicious and robust rye sour culture, or starter, is some whole-grain rye flour, water, a warm place, and patience.
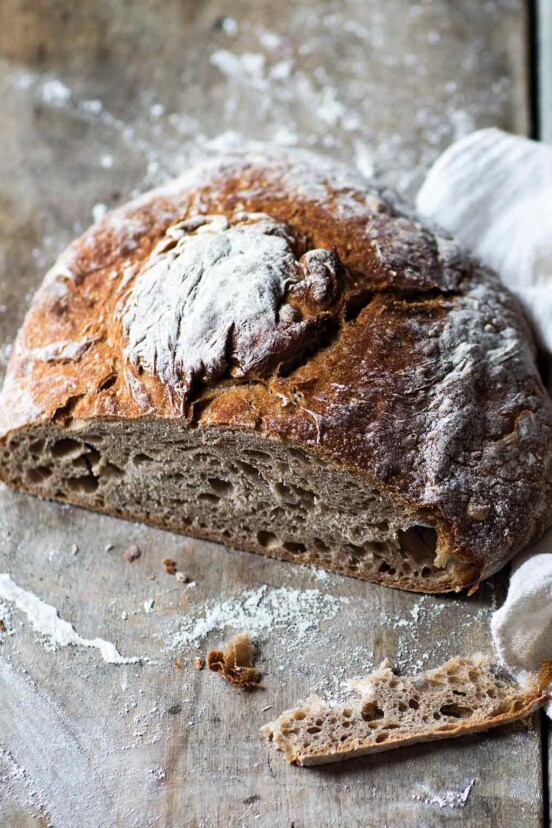
And when your traditional rye sourdough starter is complete, the very first thing you’re going to want to do is use it to make this Galician rye bread.
More Great Sourdough Recipes
Write a Review
If you make this recipe, or any dish on LC, consider leaving a review, a star rating, and your best photo in the comments below. I love hearing from you.–David
Featured Review
Hi, guys. Finally have my rye sourdough starter working really well in and out of the fridge. Baking rye and white loaves every two weeks. My wife says the rye is just like she use to buy in Germany. Happy Days!
Joe

Rye Sourdough Starter
Equipment
Ingredients
Day 1: Make the Rye Sourdough Starter
- 2.5 ounces whole grain rye flour, preferably organic
- 2.5 ounces warm water (105°F or 41°C)
Days 2 to 7: Refresh the Rye Sourdough Starter
- 2.5 ounces whole grain rye flour, preferably organic
- 2.5 ounces warm water (105°F or 41°C)
- 2.5 ounces Sour Starter from the preceding day
Days 8 and Beyond: Maintain the Rye Sourdough Starter
- 2.5 ounces medium or whole-grain rye flour, preferably organic
- 2.5 ounces warm water (105°F or 41°C)
- .25 ounces rye sourdough starter
Instructions
Day 1: Make the rye sourdough starter
- Start with equal amounts of organic rye flour and water by weight. Dump them in a nonreactive (glass, porcelain, stainless-steel, plastic) container, mix by hand into a stiff paste, cover, and let stand at room temperature (68 to 72°F or 20 to 22°C) for 24 hours.
☞ TESTER TIP: Occasionally the yeast normally present in whole grains fail to establish itself in a new culture; if, after 3 or 4 days, the culture darkens, develops a mold, or smells bad, dump the whole batch and start over. After a week, the culture, or sourdough starter, will be ready to use or to be stored refrigerated in an airtight container for a couple days. [Editor's Note: If storing the sourdough starter for more than a couple days, you'll need to maintain it, which we explain how to do just below.]
Days 2 to 7: Refresh the rye sourdough starter
- The next day, discard all but 2 1/2 ounces (70 grams) of the culture and mix the remainder with the refresh ingredients, cover, and let stand. Repeat each day, discarding all but 2 1/2 ounces (70 grams) of the preceding day’s culture.
☞ TESTER TIP: The most important point to remember at the early stages is to feed the sourdough starter daily. Even when it shows no apparent fermentation, the yeast is busy multiplying and consuming nutrients at a very high rate. By the second or third day, it will swell, show bubbles, and give off a clean sour smell. Over the next few days the activity will become more and more vigorous and the smell more intense.
Days 8 and Beyond: Maintain the rye sourdough starter
- In a perfect world—or in a working bakery—sourdough starters are refreshed daily. That said, daily feedings demand both a degree of dedication and abundant flour supplies that are impractical for all but the most committed home bakers. You can get by refreshing your starter every 36 hours or so.
- Mix the rye flour, water, and rye sourdough starter by hand until incorporated. Cover and ferment at room temperature (68 to 72°F or 20 to 22°C) overnight or for 10 to 12 hours. The sponge will be very bubbly, have a clean sour smell, and will have tripled in volume. Store refrigerated in an airtight container and it will last indefinitely.
Explore More with AI
Nutrition
Nutrition information is automatically calculated, so should only be used as an approximation.
Recipe Testers’ Reviews
Did you know only 68% of the recipes we test make it onto the site? This recipe survived our rigorous blind testing process by multiple home cooks. It earned the Leite’s Culinaria stamp of approval—and the testers’ reviews below prove it.
The rye starter was easy to make and quick. It took about 5 minutes each of the 7 days. Mine smelled great and seemed consistent after the week of feedings. I switched to the refresh amounts after that and it stayed nice and healthy.
During the buildup, you end up tossing about 2/3 of it away. I definitely recommend a scale versus just using volume measurements.


Hello, I’m using your recipe to create my first sourdough starter. I am using an organic non GMO dark rye flour. My question is regarding maintenance. I see your instructions saying in an ideal world we could continue daily maintenance feedings or at a minimum every 36 hours.
I have read in many other articles that once it is established (after day 7 I presume) you can place it in the refrigerator and feed weekly. Is that the case with this starter as well? I would prefer to store in the fridge if possible and have a less demanding way of maintaining the starter.
Thank you!
Yes, that will be fine, Rachelle. Make sure that it’s well established before putting it in the fridge and remember to feed it at least once per week.
Thank you. Any suggestions on what to look for to ensure it is well established? I’m on Day 6 and it seems flat. It was rising with airy pockets but not the last two days. Thanks again!
Rachelle, when it is bubbly and doubling or tripling after feedings, then it is considered ready to use. I’d give it a couple more days to see if it starts bubbling. If not, you may need to start again. Make sure that the temperature you’re storing it at isn’t too cold and use distilled water, if possible. Chlorinated water has been known to kill starters.
How do I find the metric ingredient amounts? For the maintenance starting Day 8 and after, it says .25 ounces of starter. Is that intentional, or should that also be 2.5 ounces?
Rob, you can view the metric weights of the ingredients by selecting the metric button on the right side of the ingredients list. The amount of maintenance starter is correct. You want to use 0.25 ounces or 7 grams.
I’m new to making starter, and your recipe is the first I’ve tried. After Day 2, it started to mold. I discovered that when you say “cover,” perhaps you should qualify that a bit more specifically, because I found out elsewhere that the developing mother has to “gas off” so “cover” does not mean use the tight fitting sealing lid that comes with the jar, but rather cover with a paper towel held with an elastic band. Correct? Also, it would be helpful if your measurements were consistent throughout the entire recipe, as either ounces or grams, but not both. Thanks for the recipe, though.
Beverlie, I’m sorry you’re having trouble with this.
Regarding the consistency of metric and imperial measurements, you’re right: it should be consistent throughout the entire recipe. I will fix that.
About covering the starter, I grow mine in a Mason jar with with a screw-top or a glass lid. I don’t cover it with paper towel and elastic band. It’s never molded.
Mold needs oxygen to develop. Did you have a tightly sealed container?
Also, it can happen if the water or flour is contaminated with fungi.