This dessert was inspired by an incredible dessert my husband, Grant, and I had on a trip to Colorado. Everyone will think it’s a restaurant dessert when you serve it, but you won’t have to spend all day in the kitchen to pull it off.—Stephanie Simmons
Salted Chocolate Peanut Butter Tart FAQs
If any of the chocolate pieces didn’t melt, you can microwave the bowl of ganache for 8 seconds at a time, stirring in between, to get rid of any lumps.
We recommend that you go with lightly salted cocktail-type peanuts. Honey roasted peanuts would be good as well, just sweeter.
⛰ Baking at High Altitude? When baking above 3,500 feet, you often need to tweak recipes a bit for stunning results. If that’s you, take a look at our guide to high-altitude baking before beginning!

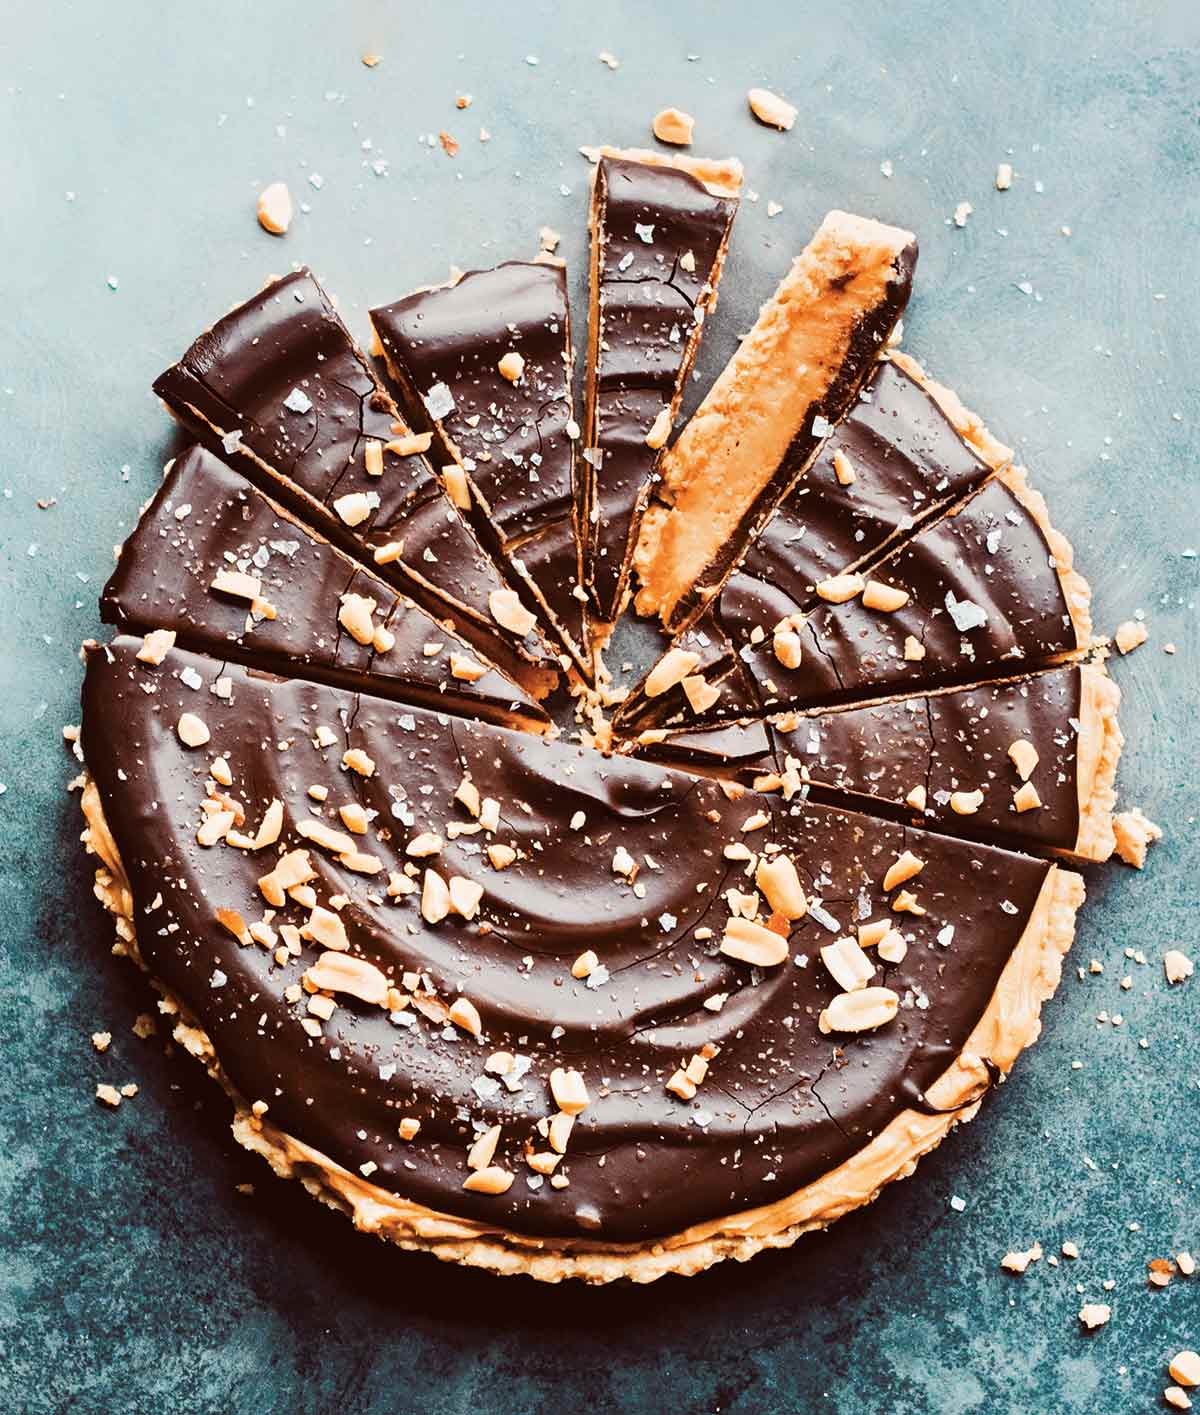
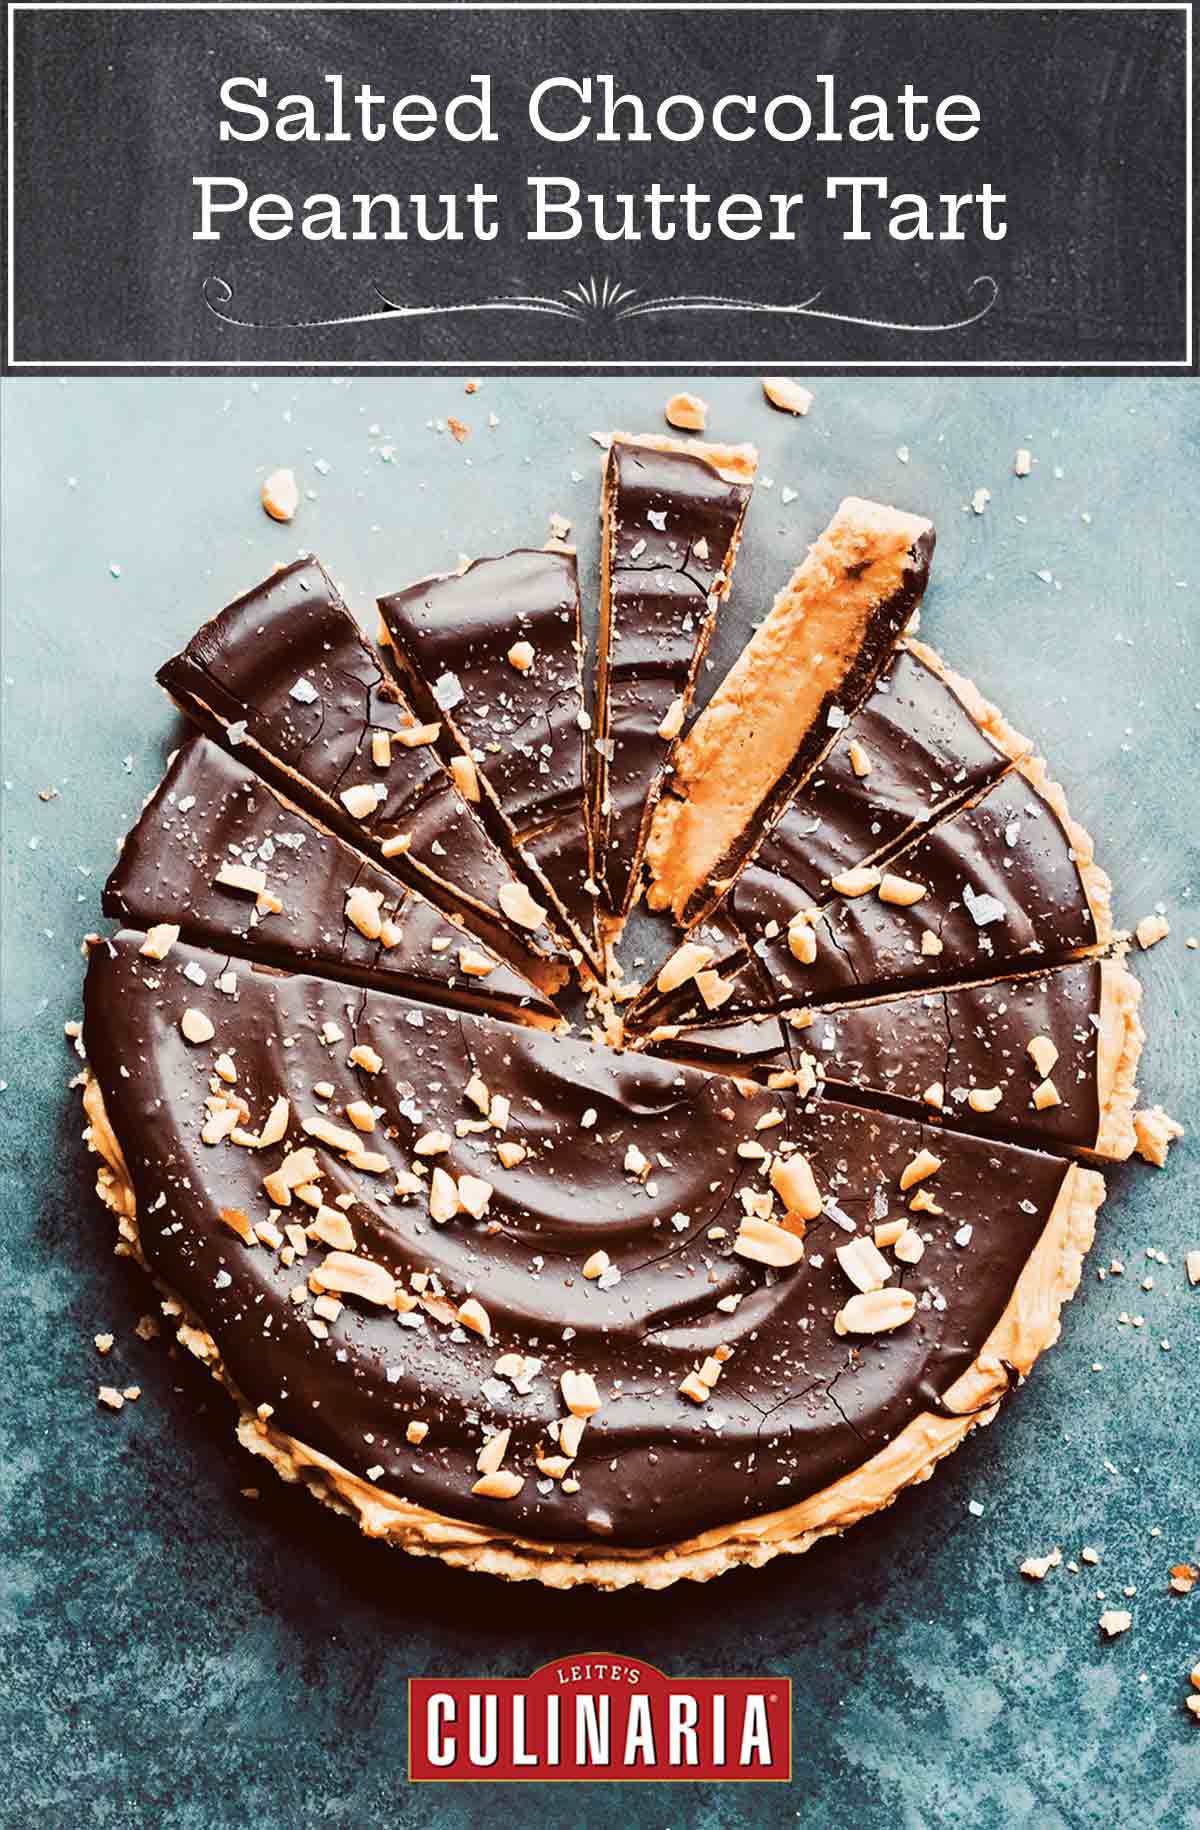
Salted Chocolate Peanut Butter Tart
Ingredients
For the crust
- Non-stick baking spray
- 1 1/2 cups peanuts
- 1 stick (4 ounces) salted butter
- 3/4 cup all-purpose flour
- 1/8 teaspoon table salt
- 2 tablespoons granulated sugar
- 1/2 teaspoon baking powder
For the filling
- 3/4 cup cold heavy cream
- 4 ounces cream cheese (full-fat), at room temperature
- 1 cup creamy peanut butter
- 1/2 cup granulated sugar
- 2 teaspoons vanilla extract
- 1/2 teaspoon table salt, plus an extra pinch
For the chocolate ganache
- 8 ounces semisweet, milk, or dark chocolate, finely chopped
- 1 cup heavy cream
For the topping
- Chopped peanuts
- Flaky sea salt
Instructions
Make the crust
- Preheat the oven to 350°F (180°C).
- Spray a round 9-inch (23-cm) tart pan or cake pan with non-stick spray. (I like to use a tart pan here because the removable bottom makes it easier to cut and serve neat slices, but you can, of course, use a cake pan if that’s what you have.)
- In a food processor, pulse the peanuts just until they’re roughly chopped. Don’t let it run too long or you’ll make peanut butter.
- Place the butter in a medium bowl and microwave in 15-second increments until the butter is melted. Stir in the peanuts, flour, salt, sugar, and baking powder. Scrape the bowl really well to get all the crust bits out and press the crust evenly into and up the sides of the tart pan. Bake until the crust is a light golden color and smells fragrant, 10 to 20 minutes. Let cool completely while you make the filling.
Make the filling
- Give the bowl a quick wipe with a kitchen towel if there are still crust pieces in it. Pour the heavy cream into the bowl. Using an electric hand mixer, beat the cream on high speed just until softly whipped, about 2 minutes.
- Pour the softly whipped cream back into a glass measuring cup (it can be the same one you used for measuring). Pop this in the fridge while you finish making the filling.
- Add the cream cheese to the same bowl, and beat on high speed until creamy, about 1 minute. Add the peanut butter, sugar, vanilla, and salt, and mix until well combined. Add about one-third (just eyeball it) of the whipped cream into the bowl with the filling and mix until just combined. Add the rest of the whipped cream and gently fold it in with a silicone spatula until completely combined.
- If the crust is still cooling, cover the bowl with a kitchen towel and pop it in the refrigerator until the crust is cool.
- Spread the peanut butter filling into the cooled crust. Chill while you make the ganache.
Make the chocolate ganache
- To a clean, dry bowl, add the chopped chocolate, making sure there’s enough room to add the heavy cream on top.
- In a small saucepan over medium heat, warm the heavy cream until it just begins to simmer. Remove from the heat and pour over the chocolate in the bowl, and let it sit for 5 minutes. Then, stir until it smooths out—you should have a smooth, creamy ganache. Cool for a few minutes.
Assemble the tart
- Pour the chocolate ganache over the tart. You may have more ganache than you need.
- Let the tart chill for at least 6 hours or overnight before serving. Serve with a sprinkle of peanuts and flaky sea salt. Store leftovers in an airtight container in the fridge for 5 or 6 days.
Explore More with AI
Nutrition
Nutrition information is automatically calculated, so should only be used as an approximation.
Recipe Testers’ Reviews
Did you know only 68% of the recipes we test make it onto the site? This recipe survived our rigorous blind testing process by multiple home cooks. It earned the Leite’s Culinaria stamp of approval—and the testers’ reviews below prove it.
Alas, in 2021, long-lasting marriages are becoming a rare commodity. Well, not true with one of the best amalgamations known to the culinary world: chocolate and peanut butter. It has stood the test of time and continues to be enjoyed, and now enhanced with fancy salt!
How great not to have to roll out pastry, and the press in peanut dough was terrific, kind of like a cookie! I served this indulgence after enjoying a leanish dinner that was pretty much carb-free (save the wine), and so we didn’t feel too guilty diving into this delicious salted chocolate peanut butter tart. It’s quite rich and we were all happy with smaller slices.

If you’re looking for a quick but impressive dessert this salted chocolate peanut butter tart can do the job. With a few tweaks, this decadent little dessert would be perfect for any dinner party.
First, I will warn you though, it’s very rich. So rich in fact that one slice between two people would be enough, which is very reminiscent of a restaurant dessert in that sense.
I used a rolling pin and a Ziploc bag to smash my peanuts, it’s an easy way to do this process without having to do all the dishes that come with using a food processor, and a good way to avoid making peanut butter. If you want to be eco-friendly just wash the bag afterward, too!


Hello! I was curious. Theres no mention of if the crust requires pie weights or not. Would you suggest using them?
Alexis, great question! No pie weights needed here. This is a press-in crust, not a traditional rolled pastry, so it holds its shape beautifully on its own. Just press it firmly into the pan and pop it in the oven. Easy peasy!
Thank you very much!
My pleasure, Alexis!
Ok, I have to ask…regarding the amount of butter…I know some packages are 4 ounce sticks, but the vast majority are 8 ounces. Just would like clarification on the #of ounces of butter. Thanks!
Kathy, you will need 4 ounces of butter for the recipe. If you make it, please do let us know how it turns out.
Thanks! I will make this as well as the shortbread cookies.
Fantastic, Kathy! A perfectly sweet day in your house.