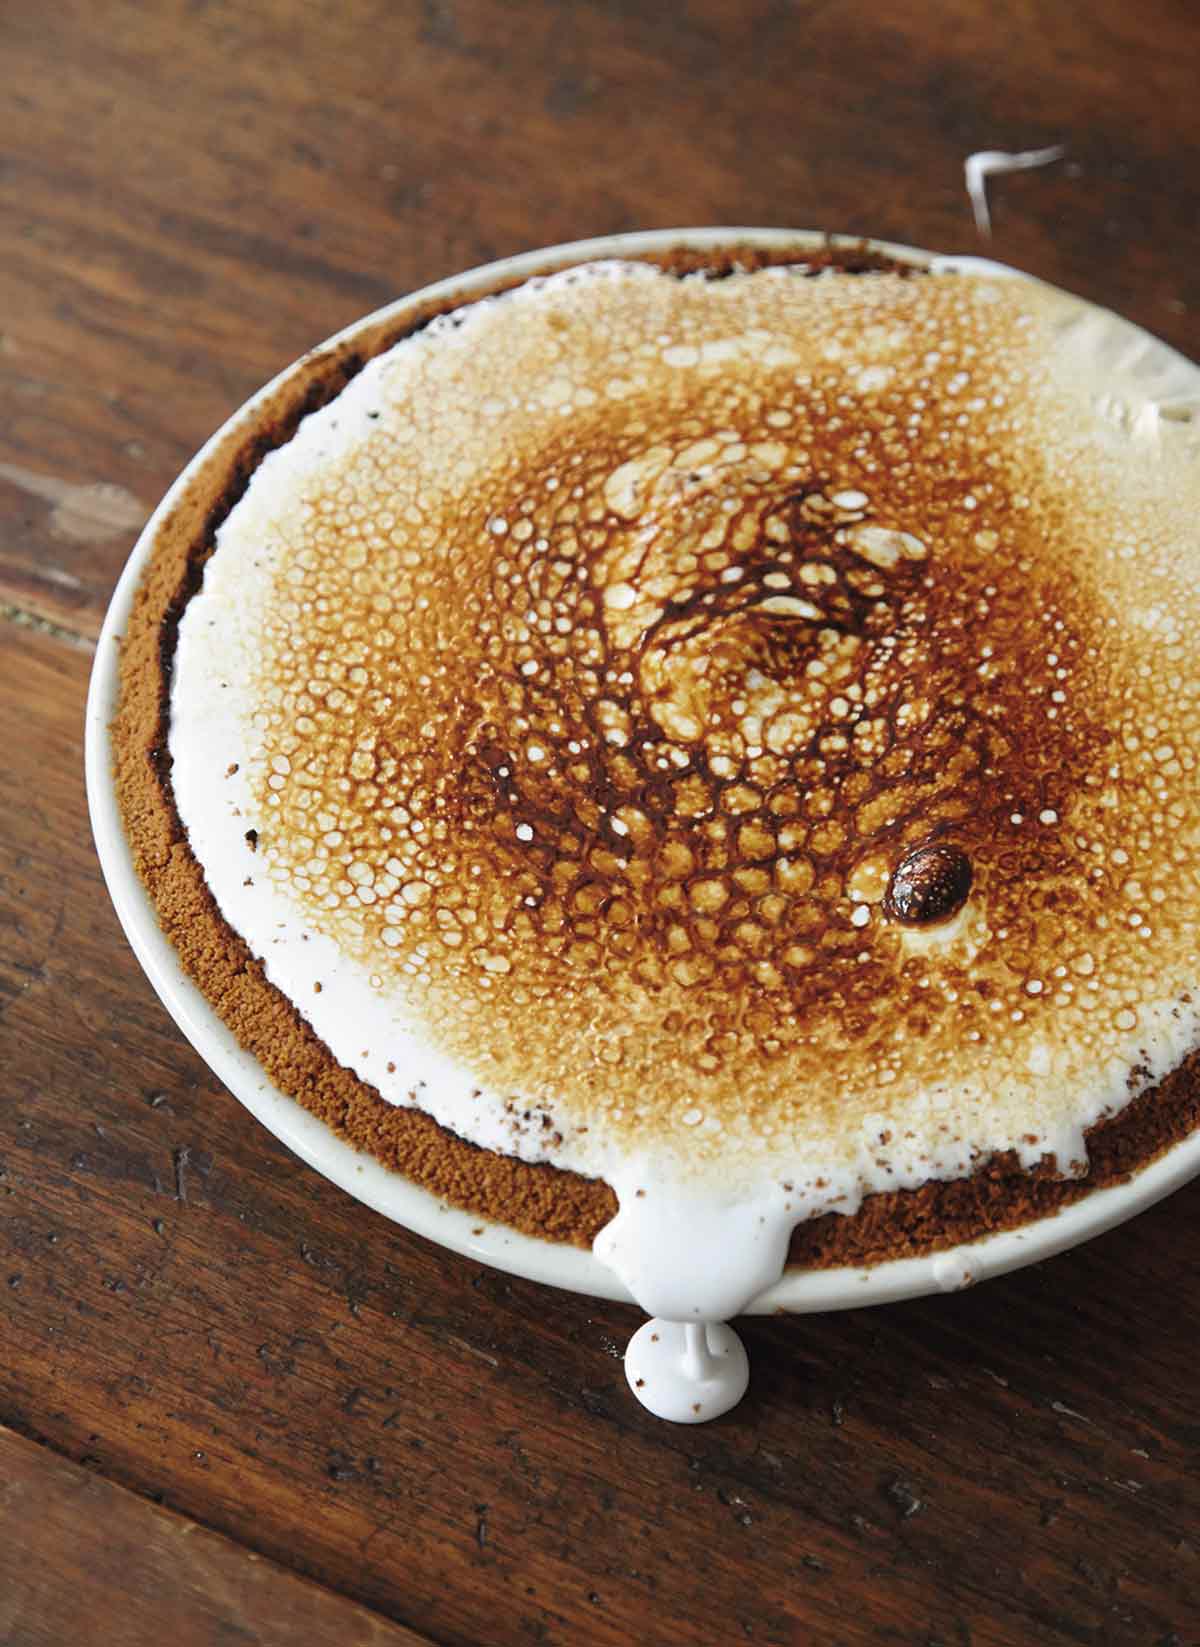
This s’mores pie is a conversation-stopping version of the campfire classic. Its graham cracker crust, chocolate fudge brownie filling, and marshmallow fluff topping is causing quite a commotion among those who’ve tried it, inspiring them to say things like, “If I could make only one pie in my lifetime, this would be the one.” Indeed. If you take it upon yourself to make the DIY marshmallow fluff topping in the recipe below, you’re in for a real treat, not just in terms of the taste and texture but because of the ample amount of oozy gooey marshmallowy goodness you’ll have left over that you can put to other use—say, standing at the kitchen counter and indulging in it by the spoonful. And if you don’t have the time to make the marshmallow fluff topping from scratch, no worries. Just grab some store-bought marshmallow fluff or mini marshmallows. It won’t be quite the same as marshmallow fluff, but as the author says, “…on what planet could toasted marshmallows be bad?” Indeed. –David Leite

S’mores Pie
Equipment
- Hand or stand mixer, candy thermometer, culinary torch (optional but recommended)
Ingredients
For the graham cracker crust
- Graham Cracker Crust, (for one 9-inch pie)
For the chocolate fudge brownie filling
- 1 cup heavy cream
- 8 ounces milk chocolate, (chips or chopped)
- 1 large egg, at room temperature
- Pinch to 1/4 teaspoon salt, (optional)
For the marshmallow fluff topping*
- 1 tablespoon unflavored gelatin
- 1 1/3 cups cold water
- 2 cups granulated sugar
- 2/3 cup light corn syrup
- 1 teaspoon vanilla extract
Instructions
Make the graham cracker crust
- Preheat the oven to 350°F (175°C). Place the pie plate containing the graham cracker crust on a rimmed baking sheet.
Make the chocolate fudge brownie filling
- In a saucepan over medium-high heat, warm the cream until it’s scalding (that is, until teensy tiny bubbles just begin to form along the edge of the pan).
- Meanwhile, dump the chocolate in a heatproof bowl. When the cream is scalded, pour it over the chocolate and let it stand for 1 minute. Then whisk the chocolate and cream thoroughly until the chocolate melts and the mixture is glossy. Whisk in the egg and salt until they’re fully incorporated. Pour the chocolate filling into the graham cracker crust and bake for 20 to 25 minutes, until the filling has just set but still seems slightly wobbly in the center. Let the pie cool completely.
Make the marshmallow fluff topping*
- In the bowl of a stand mixer or in a large heatproof bowl, sprinkle the gelatin evenly over 2⁄3 cup of the cold water.
- In a clean, heavy saucepan, combine the sugar, corn syrup, and the remaining 2/3 cup cold water. Cook the sugar mixture over medium-high heat, stirring only at the beginning, until the sugar has dissolved. Let it boil until it reaches the hard-ball stage of candymaking which is when it registers 260°F (130°C) on a candy thermometer, about 23 minutes. [Editor’s Note: No candy thermometer? Drop a bit of the sugar mixture into a glass of cold water. If it forms a hard little ball, it’s ready.]
- When the sugar is close to reaching the hard ball stage, turn on the stand mixer with the softened gelatin or quickly beat the gelatin with a hand mixer to blend.
- Once the sugar has reached the hard ball stage, turn the stand or hand mixer to low speed and slowly pour the hot syrup in a steady stream into the gelatin while mixing. Try to avoid pouring the mixture onto the sides of the bowl; instead, aim for the space between the beater and the sides of the bowl. When all of the syrup has been incorporated, gradually increase the speed to high to avoid splashing and continue to beat until the mixture is very thick and has tripled in volume, 5 to 10 minutes. Add the vanilla and beat for 1 minute more.
Assemble the s’mores pie
- Spread the marshmallow fluff topping over the pie. You want the topping to cover the surface of the pie, stretching all the way to the crust. (You may not need all of the fluff—totally depends on your personal preference. If you have extra, well, just grab a spoon and scrape out the bowl and indulge.) Allow the topping on the pie to cool at room temperature or place the entire pie in the fridge until it has set, about 30 minutes.
- If you’re using a torch (the preferred method), make sure the area you’re working in is clear of any plastic, paper, or other flammable items and that the surface you’re working on is fireproof (steel, marble, etc.). Slide a baking sheet under the pie to protect your countertops. Light the torch and lightly toast the surface of the pie, going as toasty as you prefer. When the pie is perfectly brûléed, turn off the torch and let the pie cool for 10 minutes.
If you’re torchless, you can toast the marshmallow fluff topping under the broiler, but keep a close eye on the pie and bear in mind that this technique requires patience, watchfulness, and speed. You’ll need to preheat your broiler, slide the pie on a baking sheet, and use foil or a pie shield to cover the crust edges. Broil the pie about 3 inches from the heat source, rotating it to ensure even toasting, until the topping is the desired shade of toasted goodness. It burns very easily with this method, so watch closely! It’s best to keep the oven door cracked open so you can keep a watchful eye on the pie, rotating it as needed, the entire time. Remove the pie from the oven and let it cool for at least 10 minutes. - Your s'mores pie is now ready to serve. (In theory, you can cover the pie and stash it in the fridge for up to 1 week. You'll want to lightly slick a sheet of foil or plastic wrap with oil and place it, oil side down, over the pie to prevent it from sticking to the topping.) For easier slicing, run your knife under hot water first to prevent the marshmallow fluff from sticking to the blade.

Nutrition
Nutrition information is automatically calculated, so should only be used as an approximation.
Recipe Testers’ Reviews
This s’mores pie recipe was amazing. If I could make only one pie in my lifetime, this would be the one.
The crust needed 5 tablespoons of melted butter to hold it together. I baked the crust for the full 10 minutes. It was lightly golden. The filling took 5 minutes to get the cream to scalding. The whisking of the chocolate and cream went as directed, with no problems adding the egg or salt. I baked the filling for 23 minutes, which was perfect. For the topping, I used the only fluff I could find in my grocery store—the inexpensive store brand marshmallow fluff. I thought this was going to be a huge detriment to the flavor of the pie, but I was wrong. Everybody loved this pie. It was an instant favorite, and will be made again and again in my house. Using the kitchen torch gave this pie a lovely, luxurious look. While I wanted to make my own marshmallow fluff, I just didn’t have the time. Maybe someday I’ll get to make the marshmallow from scratch, but for now, it’s good to know I can make this pie anytime I want with the store-bought stuff.
I took just about every shortcut I could while making this s’mores pie (I needed it urgently), yet it still turned out pretty darn good. The chocolate filling tastes like fudge—salty fudge but fudge nonetheless. I went with chocolate chips. The only change I’d make here is to reduce or omit the salt. Milk chocolate is totally the way to go! Now, this is where I fully take the blame for a bad decision. I used marshmallows—the regular sized ones. Don’t do that. When I used my trusty kitchen torch to scorch those marshmallows, they fused together but didn’t fuse to the chocolate filling. They just sat on top of the pie, making it very hard to cut and even harder to eat. The flavor combination of the crust, filling, and marshmallows was divine, though. I’d just use smaller marshmallows or a jar of fluff next time.


This is an amazing recipe. I have made this twice, and both times made the marshmallow from scratch—the author is correct, it is so worth it. I have a digital food thermometer, so I was able to gauge when the mixture was hot enough. I even tested it to see if it would form a ball, but it didn’t, so I always rely on the thermometer. Watching the marshmallow come together in the mixer is great; it doesn’t start off white or fluffy, but the metamorphosis is really amazing. The recipe is extremely easy to follow, which is a testament to the author. The second time I made this I actually broke up the graham crackers into pieces that I scattered throughout the layers. I put it in a square casserole dish and put graham crackers on the bottom, followed by chocolate, more graham crackers, marshmallow, and repeated until all of the ingredients were finished, ending with graham cracker crumbs on top. This method gives it more of a s’mores classic taste. When I made the original pie, the amount of chocolate and marshmallow obscured the taste of the graham crackers, but it was still divine. This recipe is a keeper! Thanks.
Terrific, terrific insights, Brooke! Many thanks for taking the time to share them. And yes, this recipe is phenomenal, so glad you like it as much as we do.
I LOVE this recipe, and have tried many variations with success. I use the whole 8 tbsp of butter and don’t bother baking the crust beforehand; chilling the pie, however, before eating makes the crust less sweet (i.e., tastes less like cheesecake crust). Milk chocolate is definitely better than using semisweet chocolate; I prefer Ghiradelli chips to Hershey chips because the former has whole milk. The homemade fluff is divine, particularly after chilling the pie, but I have also successfully used full-sized marshmallows: cut them in half horizontally, arrange on pie, and broil (low) for about 2 minutes with the pie on the middle rack.
Terrific, Leslie Ann! We love when readers take a recipe and make it their own. And I have to say, I’m completely with you on the milk chocolate. Completely.
Are there any tricks to spreading the homemade marshmallow toppin? I was really struggling to spread it nicely while it was completely sticking to the spatula, spoon, icing knife – everything I tried. Was it too cool by the time I tried to spread it or something? I was able to successfully cover the pie to the crust, but it was just a lot harder than I anticipated!
Hi Kelmac, I’d use the same trick as mentioned in the recipe for cutting the pie- a knife run under hot water or slicked with a bit of oil.
KelMac, so sorry to hear you had problems with the topping. (BTW, congrats on making the homemade version–most cooks wouldn’t.) A few things:
1. The topping could have been too cool when you went to spread it.
2. Did you use a torch? That can help melt away any problems.
3. Lightly buttering the spatula before using it to spread the topping can help. (I do that when I use my serrated knife to cut the top of bread dough before baking.)
Does that help?