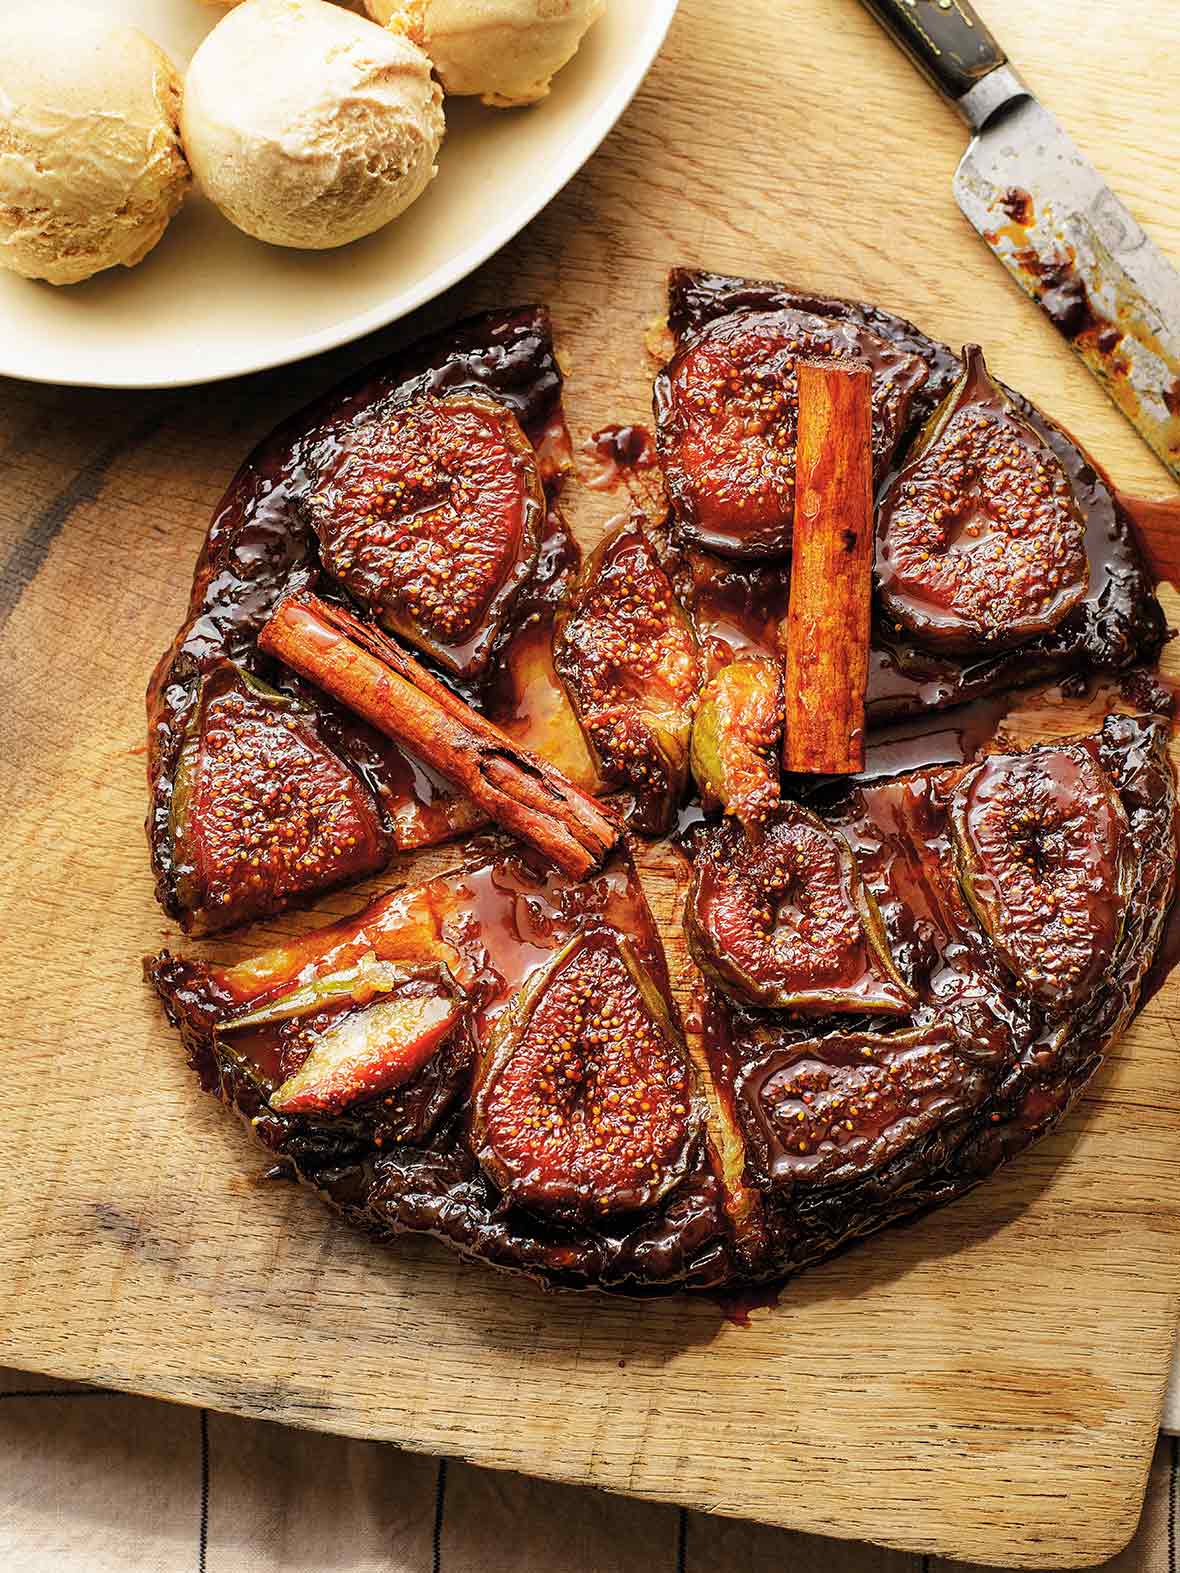
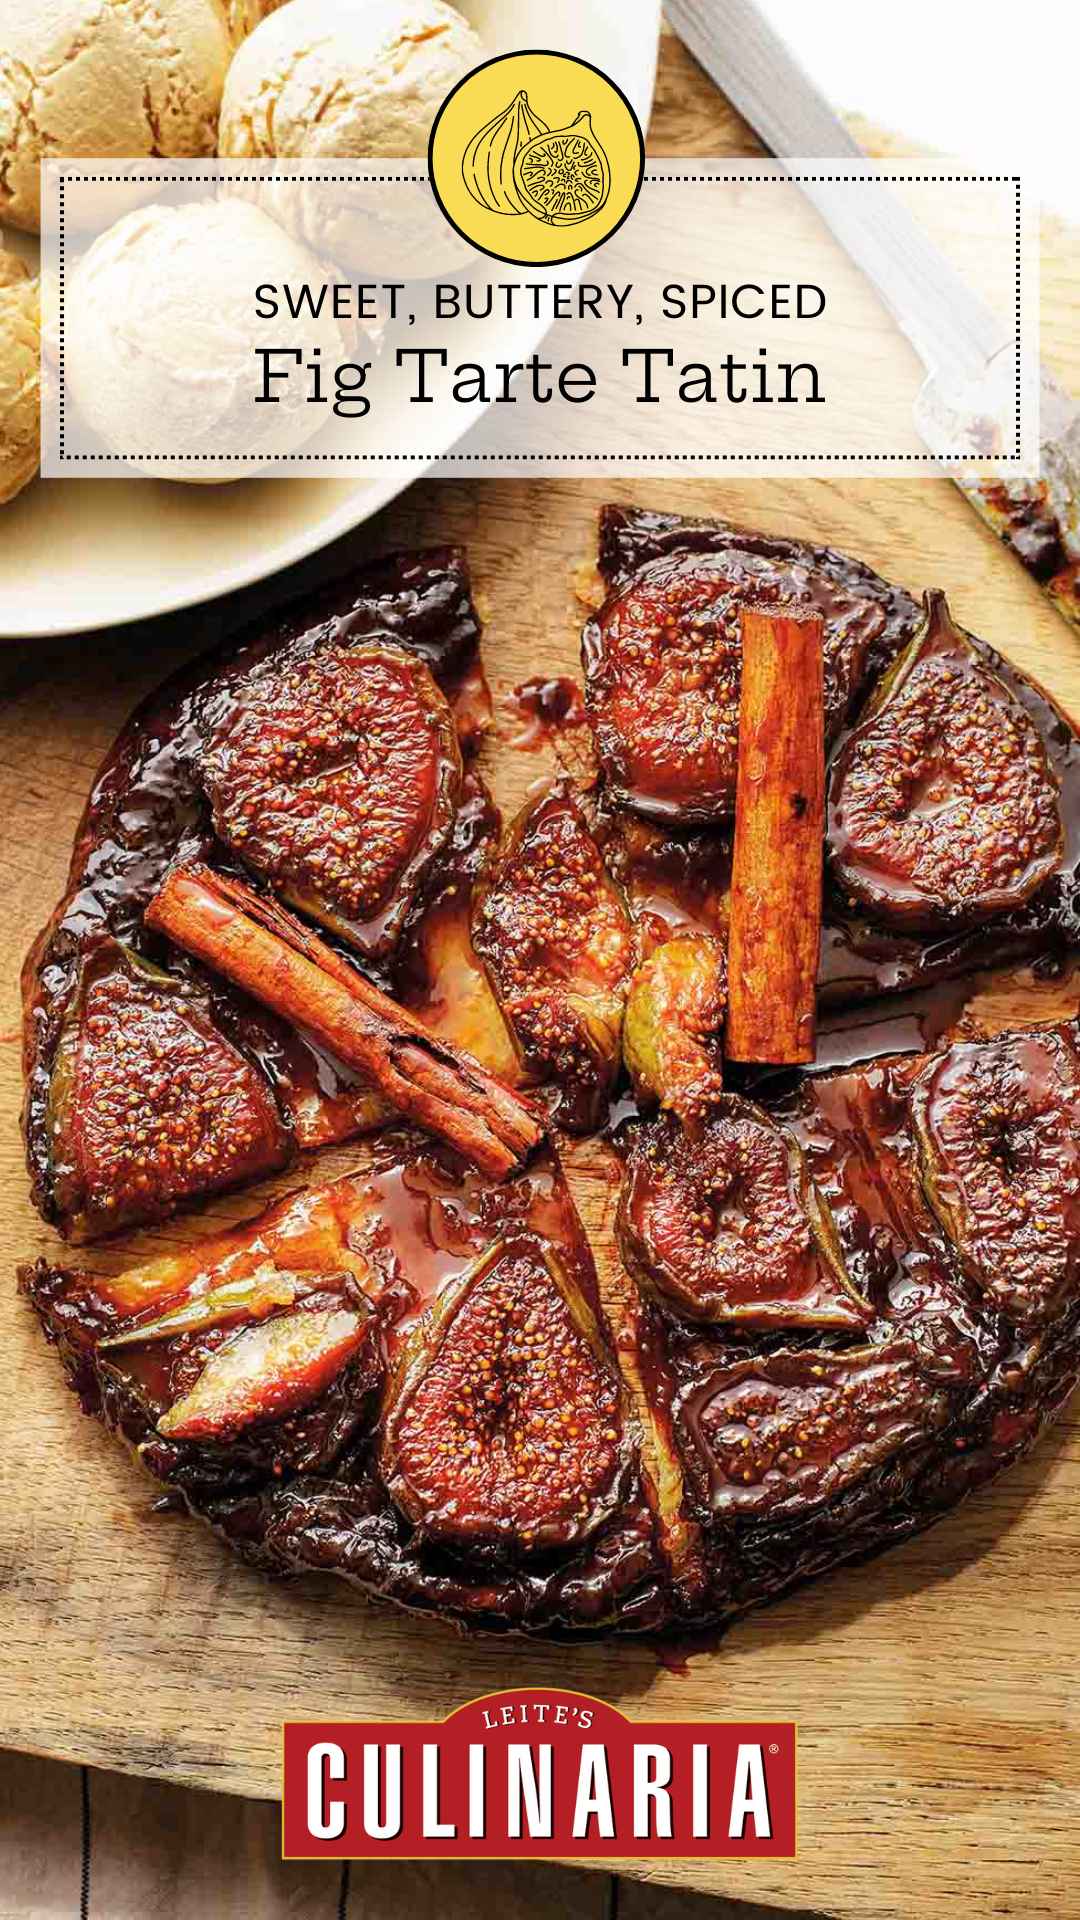
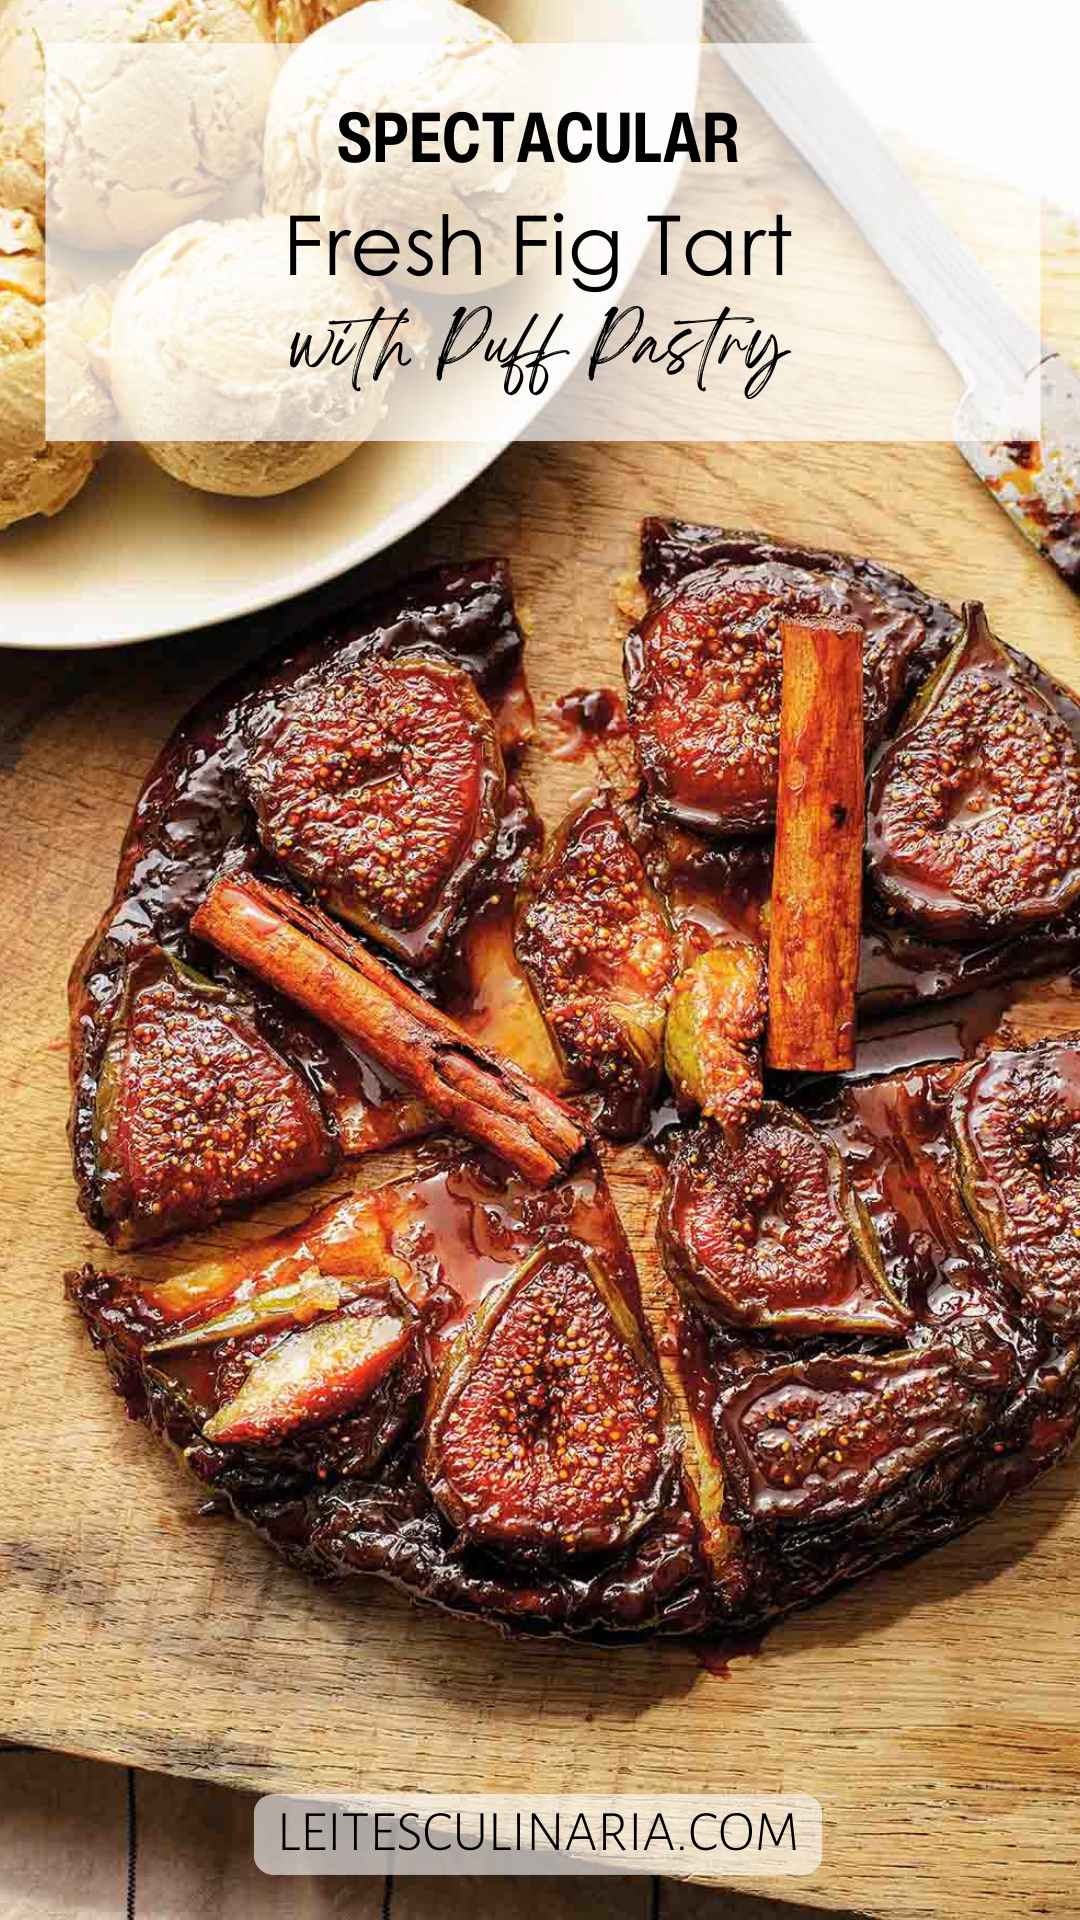
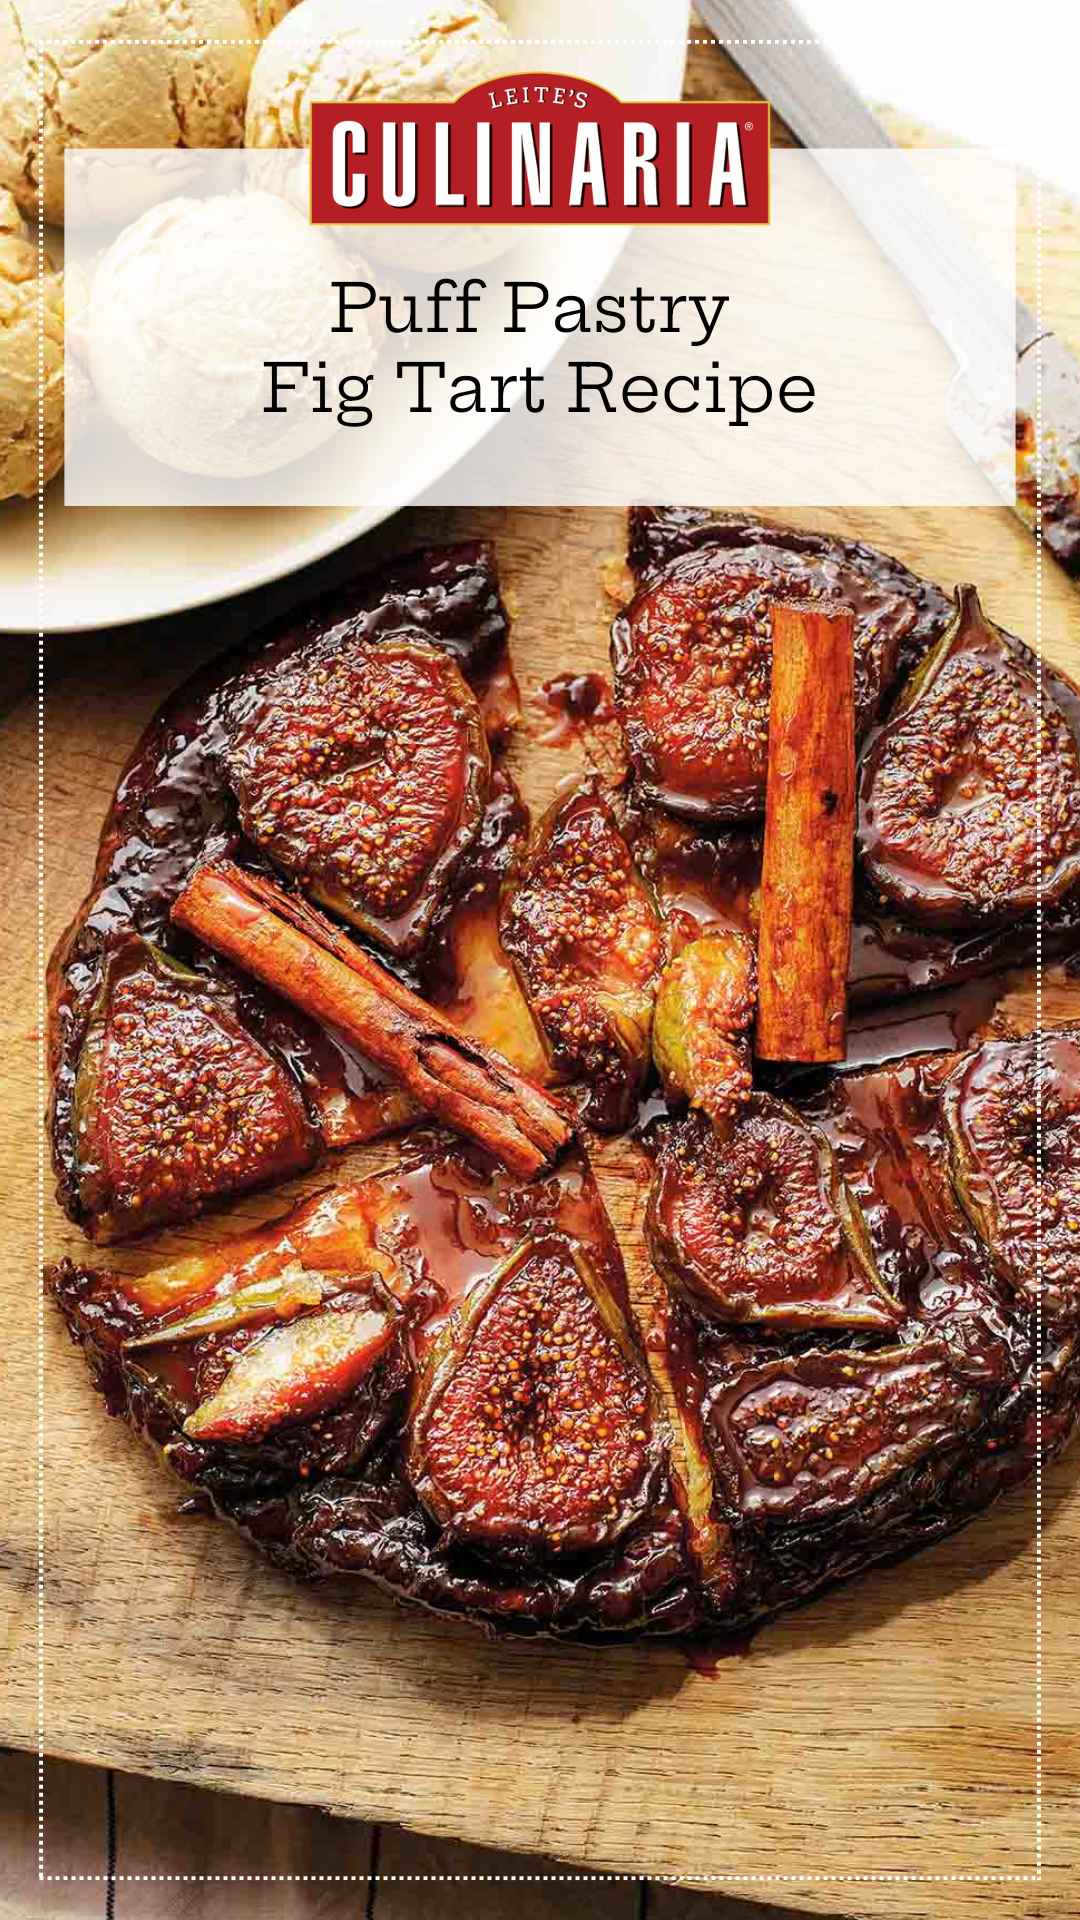
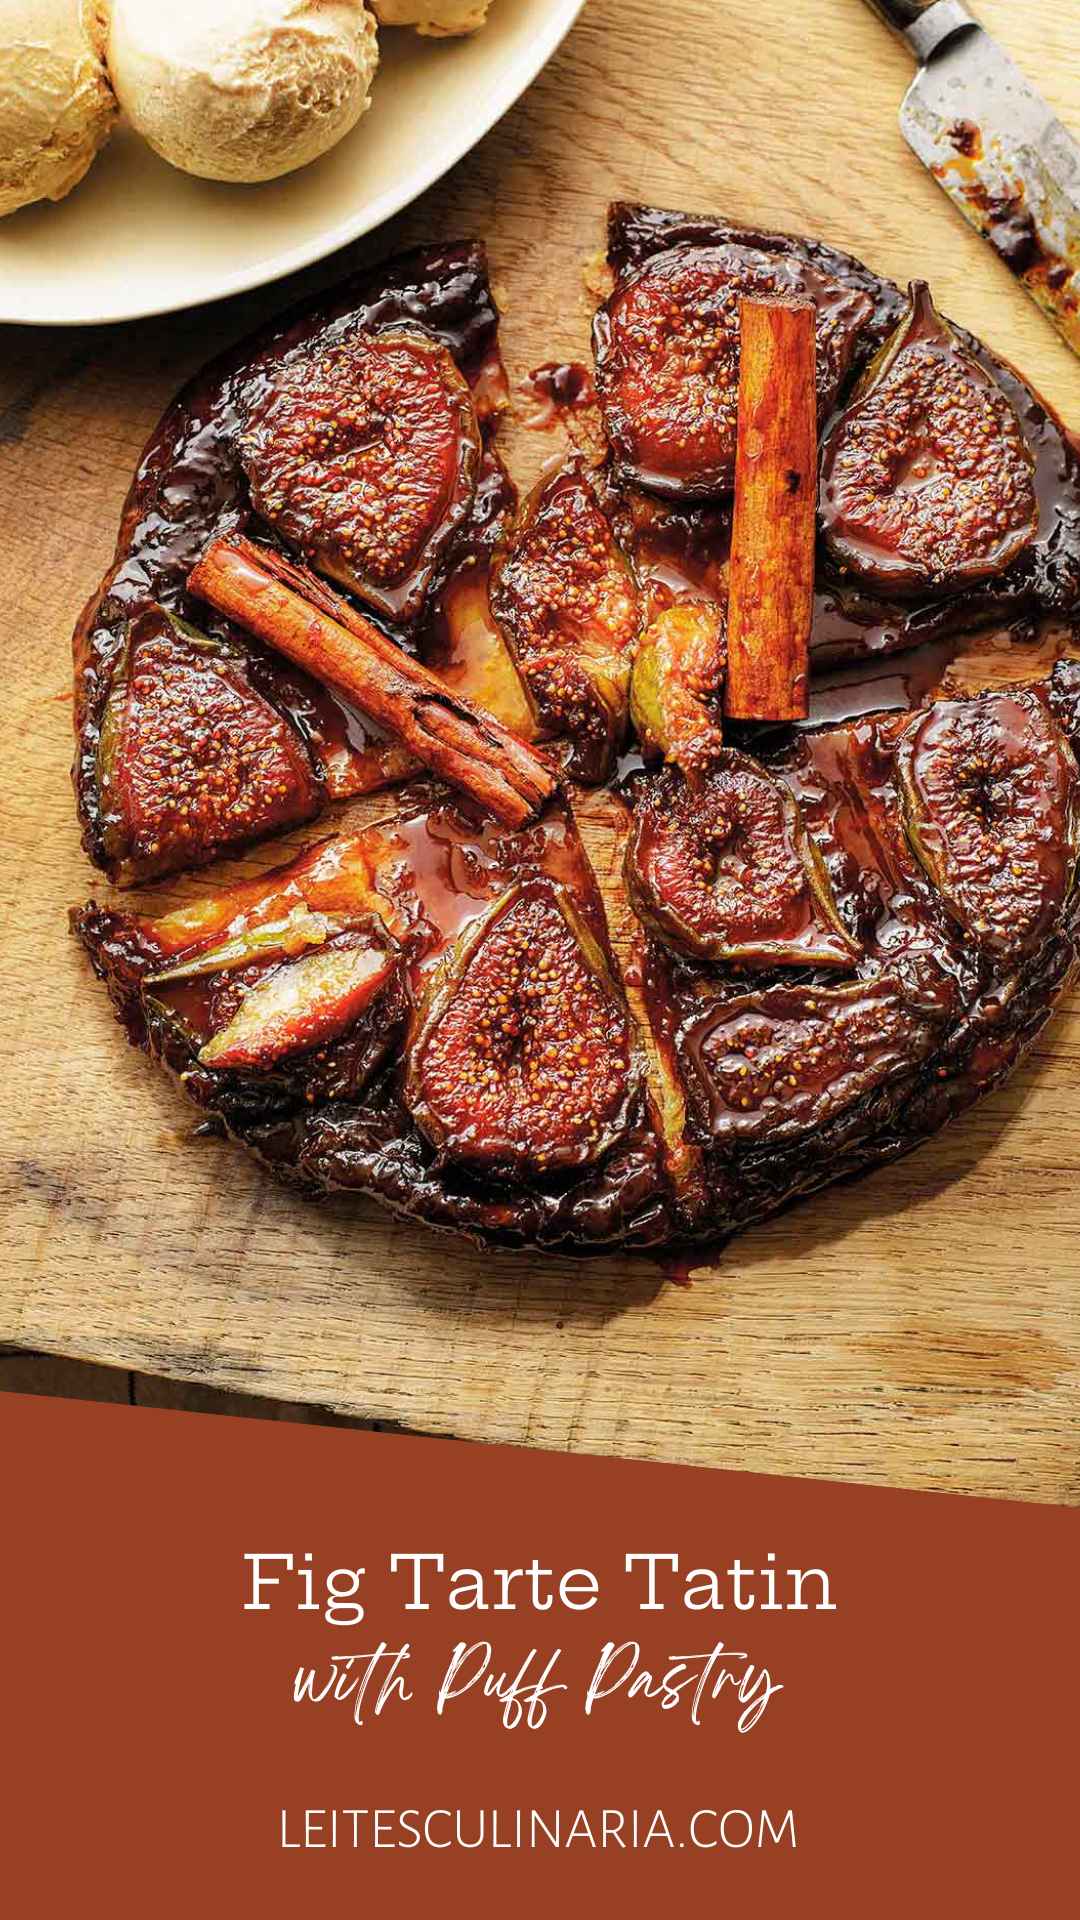
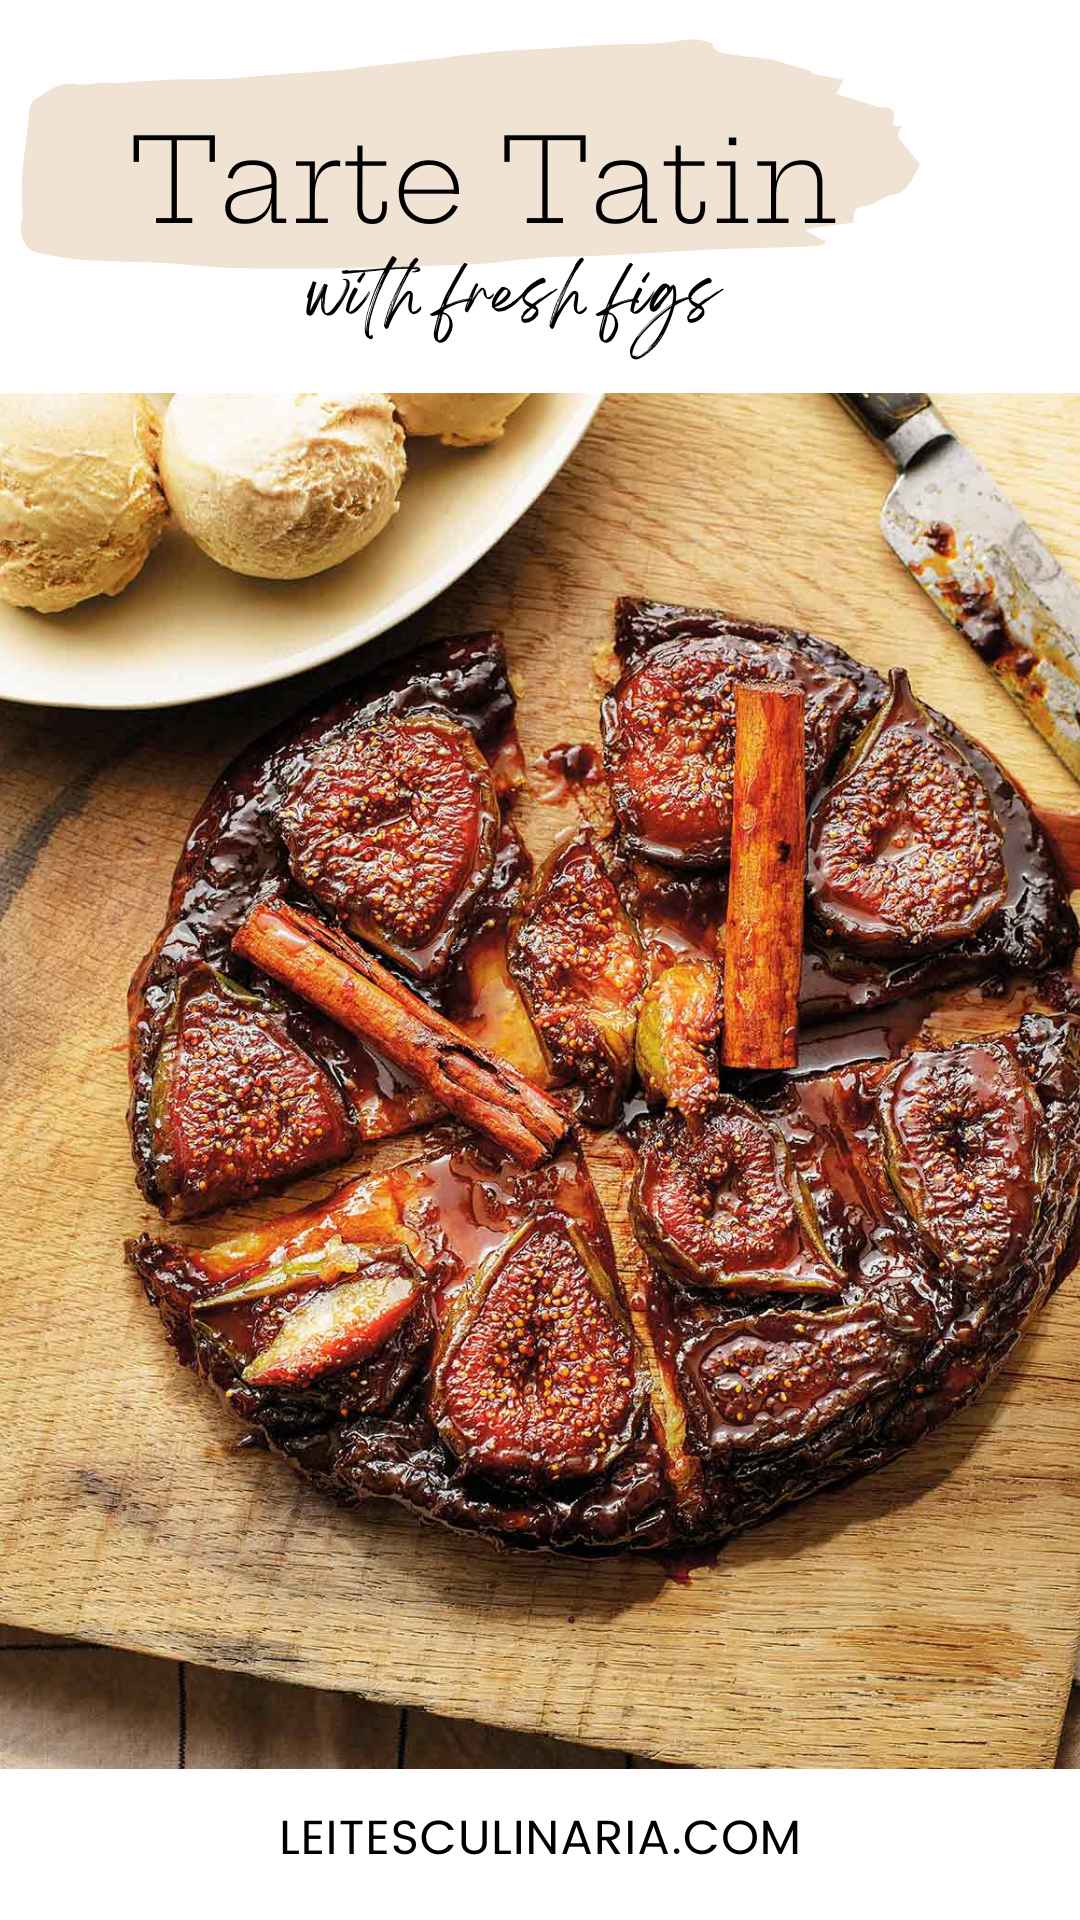
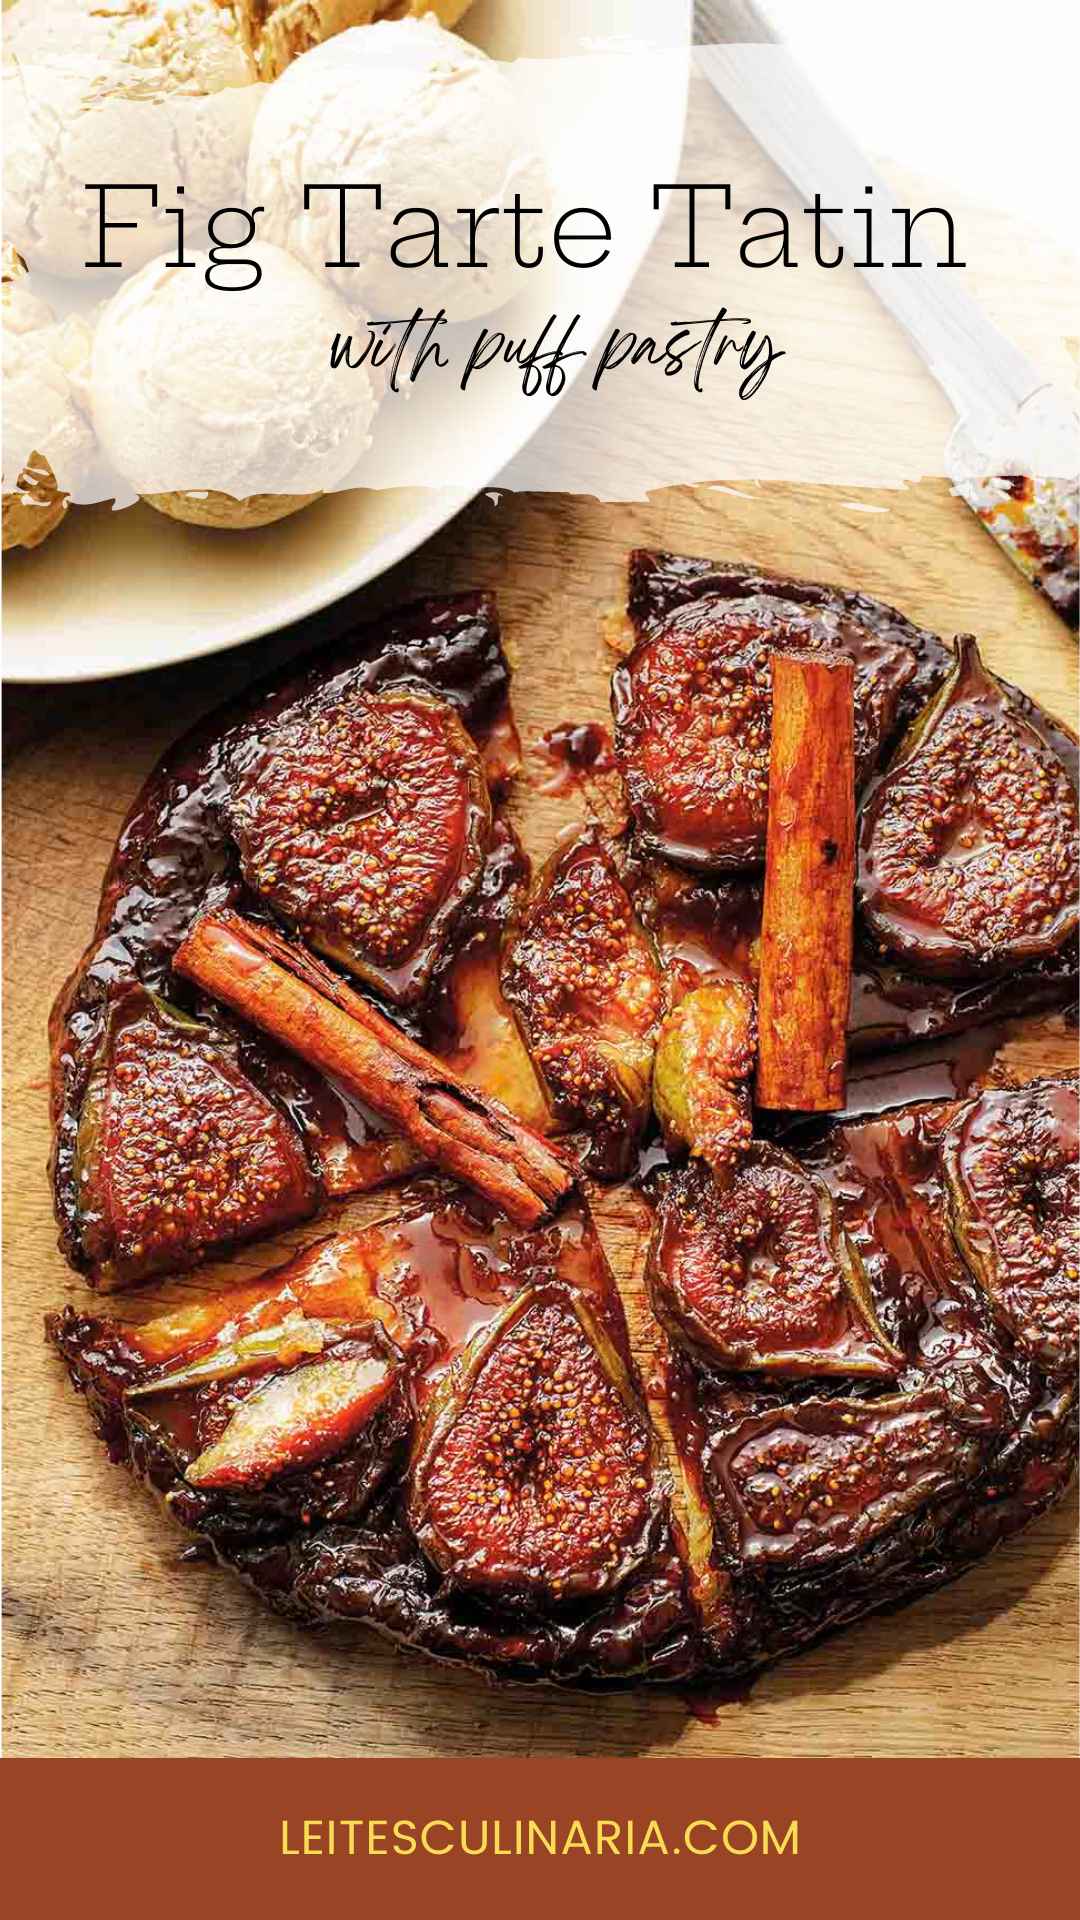
In the Middle East, figs and anise are often cooked down to a jam. I thought this combination would be beautiful in a classic fig and goat cheese tart. The pistachios add a gorgeous nuttiness, and I love the combination of sweet and savory here. I use my favorite tart crust recipe, but feel free to use store-bought if you are in a time pinch.–Aliya LeeKong

LC Fig Frenzy Note

Ever find yourself in something of a frenzy for figs? You know, purchasing obscene amounts of this most ephemeral vixen of summer fruits? Even worse, stealing figs from unsuspecting neighbors? We understand. We’re not certain whether it’s an affliction or a way of life, but we understand. This fig and goat cheese tart puts some of that lovely excess to swell—and swanky—use.

A cooked rectangular fig tart with goat cheese and pistachios in a tart pan

Fig Tart with Goat Cheese and Pistachios

5 / 2 votes
This fig tart with goat cheese and pistachios is a perfect recipe to make the most of the summer fig window. Drizzled with honey and flecked with pistachios, it's a gorgeous dessert.
David Leite
CourseDessert
CuisineAmerican
Servings8 to 10 servings
Calories394 kcal
Prep Time45 minutes
Cook Time55 minutes
Resting Time3 hours 30 minutes
Total Time5 hours 10 minutes

Equipment

  • 9-inch round tart pan

Ingredients 

For the crust

  • 1 1/2 cups all-purpose flour, plus extra for rolling
  • 1 teaspoon salt
  • 1/2 teaspoon granulated sugar
  • 1 stick unsalted butter, cold, cut into small cubes, plus more for the tart pan
  • 1 large egg
  • 1 to 3 teaspoons ice cold water

For the filling

  • 2 large egg yolks
  • 1/2 cup heavy cream
  • 8 ounces fresh goat cheese
  • 1 1/2 tablespoons fresh lemon juice
  • 1 teaspoon grated lemon zest
  • 3/4 teaspoon ground aniseed
  • 1/2 teaspoon salt
  • 2 to 3 tablespoons pistachios, shelled and roasted
  • 10 fresh figs, preferably Black Mission, halved
  • Honey or balsamic vinegar, for drizzling

Instructions 

Make the crust

  • In a food processor, pulse together the flour, salt, and sugar. Scatter the cold cubes of butter over the dry ingredients and pulse until the mixture looks sandy or like coarse meal.
  • In a small bowl, lightly beat the egg and 1 teaspoon water. Add the egg mixture to the processor in increments, pulsing as you go, until the dough sticks together. There will still be a lot of crumbly bits that haven’t been incorporated and that’s okay. (If the dough still looks dry and doesn’t hold together when pinched, pulse in another 1 to 2 teaspoons water, a little at a time, until it does hold together. We didn’t need the extra water, though.)
  • Turn the dough out onto a work surface or a piece of parchment paper. Lightly knead the dough to make sure everything is incorporated. (Literally just press it together a bit.) Wrap the dough in plastic wrap and create a flattened disk. Refrigerate for a minimum of 2 to 3 hours (and up to a day).
  • Let the refrigerated dough rest on the counter at room temperature for 15 minutes. Butter a 9-inch round tart pan or a 13 3/4-by-4 1/2-inch rectangular tart pan. On a floured work surface or in between lightly floured pieces of parchment paper, carefully roll the dough with a rolling pin in the shape of the tart pan until about 1/4 inch thick. Carefully transfer the crust to the buttered tart pan and gently press the dough against the bottom and sides of the pans, being careful not to stretch the dough at all. Trim any excess dough hanging over the edges and prick holes all over the surface of the dough with the tines of a fork. Wrap the tart pan in plastic wrap and freeze for at least 30 minutes.
  • Preheat the oven to 375°F (190°C) and adjust the oven rack to the middle position.
  • Remove the tart pan from the freezer and discard the plastic wrap. Place the tart pan on a rimmed baking sheet, fit a piece of parchment paper snug against the surface of the dough, and weight the parchment with dried beans or baking weights. Bake for 20 minutes. Remove the baking weights or beans and parchment paper and bake for another 10 minutes or until lightly browned. Let cool slightly.

Make the filling

  • Turn the oven temperature down to 350°F (177°C). In a small food processor (or with a spoon and a strong arm), process the egg yolks, heavy cream, goat cheese, lemon juice, lemon zest, aniseed, and salt until uniform and smooth. Transfer the cheese mixture to the tart and smooth the surface so it evenly fills the crust. Scatter the pistachios on top and then arrange the fig halves across the surface.
  • Bake the fig and goat cheese tart for 25 minutes. Serve warm or at room temperature, drizzled with a bit of honey or balsamic.
Exotic Table Cookbook

Adapted From

Exotic Table

Buy On Amazon

Nutrition

Serving: 1 portionCalories: 394 kcalCarbohydrates: 32 gProtein: 11 gFat: 26 gSaturated Fat: 16 gPolyunsaturated Fat: 2 gMonounsaturated Fat: 7 gTrans Fat: 0.5 gCholesterol: 129 mgSodium: 558 mgPotassium: 234 mgFiber: 3 gSugar: 11 gVitamin A: 1057 IUVitamin C: 3 mgCalcium: 91 mgIron: 2 mg

Nutrition information is automatically calculated, so should only be used as an approximation.

Tried this recipe?Mention @leitesculinaria or tag #leitesculinaria!
Recipe © 2013 Aliya LeeKong. Photo © 2013 Aliya LeeKong. All rights reserved.

Recipe Testers’ Reviews

This fig and goat cheese tart—a cheese plate encased in a pastry crust—has it all. It has a tart but rich cheese filling, crunchy nuts, and sweet figs. And the icing on the cake—or rather, the crust beneath the tart—is the buttery golden pastry. I will definitely be making this again. We enjoyed it for dinner alongside a salad. It would also be lovely sliced into thin wedges and served with drinks before a dinner party. I used a round 9-inch tart pan. I only needed 1 teaspoon water in the crust. I did not have any dry bits after adding the egg and water mixture. I chilled the dough for 2 hours. If I had to do it over again I would make the crust a day ahead of time, as it required a bit of planning and a work-from-home job to get it all done in time for a weeknight dinner. I needed to let the dough rest on the counter for about 15 minutes before it was pliable enough to roll out. I planned to roll the crust out to an 11-inch diameter. I got obsessed with rolling out an even circle and ended up rolling it to 13 inches plus some and about 1/4 inch thick. I had lots of dough left over after I fit it into the tart pan. The leftover crust made a lovely top crust for a small apple pie the next day. The crust was thick enough and sturdy enough that we could have picked up the tart and eaten it out of hand (not that we would do that, but if we wanted to, we could have). I finagled the parchment paper just a bit to get it to fit into the tart pan without messing up the pastry: I folded the paper in half, then in quarters and then several more times. I put the corner in the middle of the empty pan and creased it at the corner of the bottom and side. When I unfolded the paper, I had a parchment mold for the inside of the pan. I forgot to account for the crust’s thickness, so I had to fold it again when I was actually putting it into the crust. Worked like a charm. I left the extra parchment hanging over the edges to help when I wanted to remove the pie weights (dry beans in my case). After 20 minutes of baking with the parchment and weights, the crust was set on the bottom and just starting to turn golden brown on the edges. 10 more minutes without the weights browned the edges and baked the middle to a beautiful golden that was approaching golden brown. I was afraid the edges of the crust would get too brown when I baked it with the filling, but they were perfect.

I used the food processor to make the filling right after mixing the crust without washing the food processor. I figured it would save on dishes. It worked beautifully, mixing the filling to a luscious creaminess. Since the crust still needed to chill and par-bake, I chilled the filling until the crust was in the oven for the blind baking. I stirred in the lemon juice right before I filled the tart shell because I wasn’t sure if the long rest in the fridge would allow the lemon juice to curdle the cream. It all worked like a charm. Yay for fewer dishes!

I put the figs face down on the filling. They sank into the filling just a bit when I put them on and the filling puffed up around them as it baked, but not in a bad way. 25 minutes was the perfect baking time. I served the tart warm from the oven, but I think we would have preferred it closer to room temperature. I cut the tart into 8 pieces for a dessert-sized portion. Half that, or even smaller, would be perfect for an appetizer.

We had some tart left over. I rewarmed a wedge in the toaster oven for about 3 minutes on the toast setting and it was almost as good as it had been the first night. Dangerous to have those leftovers in the fridge! We would have preferred more pistachios, maybe another tablespoon more. I used dried figs after visiting three stores and not finding any fresh ones. I decided to soak the dried figs in boiling water for 30 minutes before using them. I cut them in half before I soaked them. They worked well, but were chewier than fresh figs would have been. I used only half the salt called for in the filling and I’m glad I did. I think it would have been too salty for us if I had used the full amount of salt. My family dislikes anise with a passion, so we left it out. The filling tasted strongly of lemon, which was a nice contrast to the rich cheese, the sweet figs, and the crunchy nuts.

For this fig and goat cheese tart recipe, I toasted raw pistachios, unsalted. My figs were most likely Black Mission (the carton wasn’t specific but I don’t think they were brown Turkey figs). I made the crust using a food processor, pulsing very briefly and using only the teaspoon of water added to the egg. The dough came together nicely and was very firm after 2 1/2 hours in the refrigerator. After rolling the dough out to a long rectangle, it ended up being about 1/8 inch thick. Although I was very careful to not stretch it, there was slight shrinkage at the short ends, but this didn’t present a problem with the filling overflowing. There was a surplus of trims from the dough, but I don’t think that can be avoided. This was a lovely dough to handle, though it seemed very firm at first when rolling it out between sheets of lightly floured parchment. Since I had the food processor out, I used it for the filling. The goat cheese mixture was very smooth in less than 30 seconds. I would not have had a problem with my hand mixer, and in a pinch, the dough and filling parts could be done without power tools. I had set up my measured ingredients while the dough was freezing and baking, so the egg and cheese had a chance to come close to room temperature.

How well the figs fit will depend greatly on how large they are. I had a mixture of medium and small ones and had 3 whole excess figs. They were firmly ripe. It might work better for some tastes to use very ripe figs, where the sugars have developed more. If you wanted each serving to have two halves, I’d suggest interlocking smallish figs like yin and yang, but I was trying to see how many I could fit. I placed them cut side up, perhaps expecting they might caramelize a bit.

I usually place tart pans and other bakeware with removable bottoms on a baking sheet for handling in and out of the oven and in case of spillovers. It did not seem to affect the baking time. I checked it at 20 minutes, and the center looked a little less cooked. At 25, it was set, although the figs were just starting to give up a little liquid. I didn’t want to overcook the crust, so I took it out and let it cool to room temperature. The figs were still firm, and had not caramelized. Perhaps they would not have done without additional sugar, or unless they were extremely ripe.

I served it two ways since there were two of us and the drizzle of honey or balsamic can happen on a per serving basis. The honey worked a bit better than the somewhat ordinary balsamic. What really shined was a slight drizzle of a dark balsamic passionfruit vinegar (a posh gift someone kindly gave us). That was deeply syrupy and worked better for me, although my other taster liked honey. The contrast of the savory cheese and aniseed with the sweet figs was very nice and made a great dessert for a small dinner party. I think 8 to 10 servings are possible with the rectangular shape, and they’ll look more uniform this way. They plate up very nicely, especially since everyone SAYS they want only a small portion. I think that speaks for this shape versus the round, which I can never make neat when cutting through a crust. I think I might consider a parchment piece folded, cut & buttered, to sit just on the bottom, not up the edges, so the tart can slide off the bottom for serving on a pretty maple board or platter at the table as performance dessert. The pistachio nuts are a subtle player, and the colors are lovely. The recipe is a good use for that really special honey or syrupy balsamic you splurged on.

I was inspired to make this tart when a friend gave me some fresh ripe green figs from her tree. The presentation of this tart is stunning. I quartered the figs from top to bottom with the skin on and placed them face up on the tart. It also may be nice to reserve some pistachios to sprinkle on top of the tart as a garnish. This preparation does take some time. Leave time to chill the dough and prebake the dough. I enjoyed this tart warm the evening I made it, but I enjoyed it even more cold, straight out of the refrigerator, the next morning with a cup of coffee. The dough came together quickly and easily with 1 teaspoon water, although it was difficult to roll out after 2 hours refrigeration. I used an 11-inch tart pan and had no leftover dough with 1/4-inch thickness. I made this a second time since it was such a huge hit with my family and friends. I did make some changes, and I liked the final outcome better. First, I found this dough slightly tricky to work with the first time so I decided to add a total of 1.5 tsp of water, and it made the dough a little more workable. I rolled the dough out right away and plopped it into the tart pan, trimmed the excess dough on the edges, and it went straight into the fridge to cool for 2 hours. Parchment paper or a light dusting of flour will make it much easier to release from the rolling surface. I then put the tart pan into the freezer for 30 minutes prior to baking. This method was much easier for me and eliminated an extra step. I also played around with the filling. I substituted 1/4 cup heavy cream for half-and-half and could not detect a difference. I love lemons and pistachios, so I doubled the lemon juice, added a 1/2 tsp more zest, and 1 tablespoon more pistachios. I microwaved aged balsamic vinegar and honey till it bubbled a bit for a quick glaze to drizzle on the tart after it was finished baking. This is definitely a show-stopping tart. I love this recipe and will surely make it again.


About David Leite

David Leite has received three James Beard Awards for his writing as well as for Leite’s Culinaria. His work has appeared in The New York Times, Martha Stewart Living, Saveur, Bon Appétit, Gourmet, Food & Wine, Yankee, Los Angeles Times, Chicago Tribune, The Washington Post, and more.


Hungry For More?

Caramel Apple Pie

Classic apple pie just went next level with the addition of sweet caramel on top.

5 hrs

Whole Wheat Pie Crust

There are pie crusts, and there’s this crust–nutty, crisp, buttery, and oh-so-perfect for your favorite pie–sweet or savory.

1 hr 5 mins


Leave a comment

Your email address will not be published. Required fields are marked *

Recipe Rating


4 Comments

  1. 5 stars
    Can I use cream cheese instead of goat cheese and I will use this tart to serve it as dessert.

    1. The flavor will be slightly different, Nasrien, but I think you could substitute cream cheese for the goat cheese here. Do let us know how it turns out!

  2. 5 stars
    This stunner of a tart does justice to fresh figs–the prized ephemera of summer (even more so than sour cherries, which can be frozen for later use) both in taste and presentation. I baked mine in a 9″ tart pan, and chopped the pistachios, and quartered the figs. Mine took 30 minutes to bake. For drizzling, I decided to enjoy the best of both honey and balsamic vinegar by combining them and reducing the mixture until syrupy

    Fig-Goat Cheese Tart with Pistachios

    1. Chiyo, your tweaks to the drizzle for the fig tart recipe are as inspiring as your photo of it! We so appreciate you sharing both!