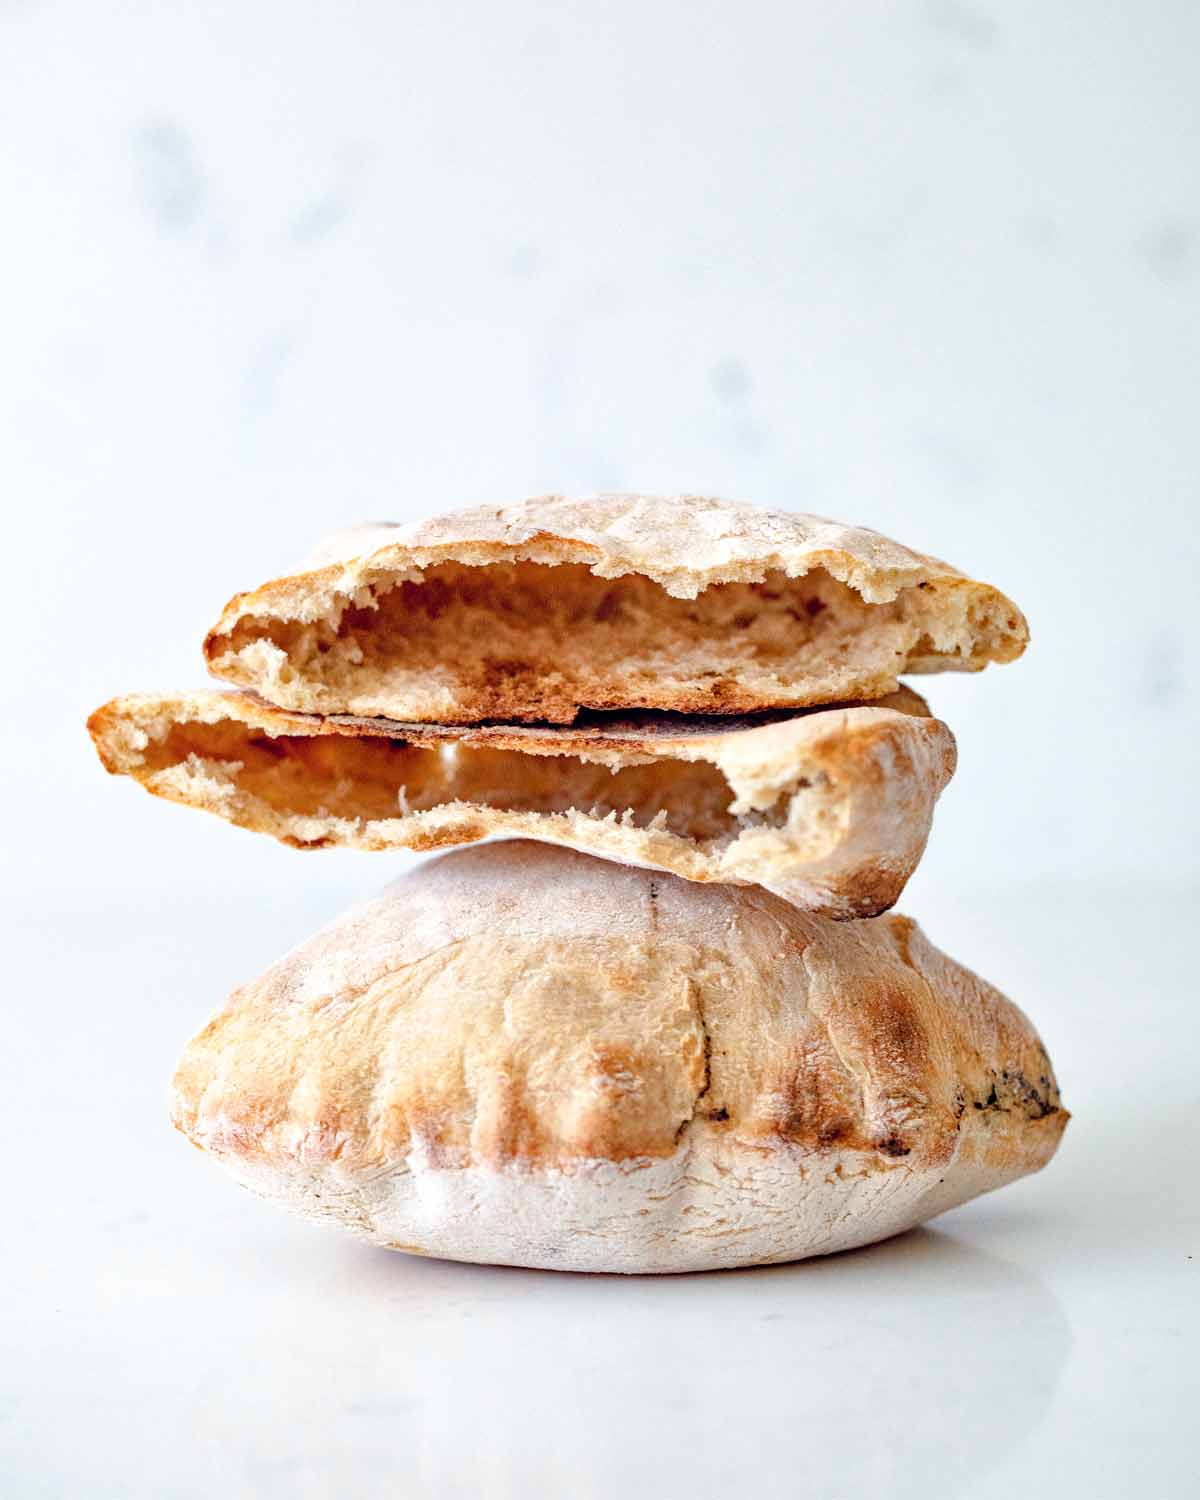
My first experience with pita bread was that of confusion, as I was under the impression I was about to eat a tortilla. Then, my friend took a knife and sliced through the bread to expose a perfectly hollow interior. Soon, mixed greens, meats, and veggies were stuffed into it and a little bit of oil and vinegar was drizzled on top. As I got older, however, I realized how normal and abundant pita bread is. You can find it everywhere, and for good reason. It is a light bread that is designed specifically to hold various fillings. At the same time, you can also rip warm pita to bits and dip it into delicious spreads such as hummus. Adding whole grains and sourdough starter was an obvious choice to add to my repertoire and I can’t wait for you to try this version.–Bryan Ford
☞ LEARN MORE, READ: HOW TO DRY SOURDOUGH STARTER
Whole Grain Sourdough Pita
Ingredients
For the levain
- 1 3/4 ounces mature sourdough starter
- 3 1/2 ounces bread flour
- 3 1/2 ounces (scant 1/2 cup) warm water, (just warmer than your fingertips [100°F | 38°C])
For the sourdough pita
- 9 ounces (about 1 3/4 cups) bread flour
- 1 3/4 ounces (about 1/3 cup) spelt flour
- 7 ounces (about 1 2/3 cups) whole-wheat flour
- 1 1/3 cups water
- 3 1/2 ounces levain
- 2 teaspoons fine sea salt
- Oil, for rubbing
- All-purpose flour, for rolling
Instructions
Build the levain
- In a tall jar or medium bowl, mix the mature starter, flour, and warm water until incorporated. Cover with a lid or clean kitchen towel and leave in a warm place until doubled in size, 3 to 5 hours. You can use your levain immediately, or refrigerate it for up to 12 hours to use later or the next day.
Make the sourdough pita
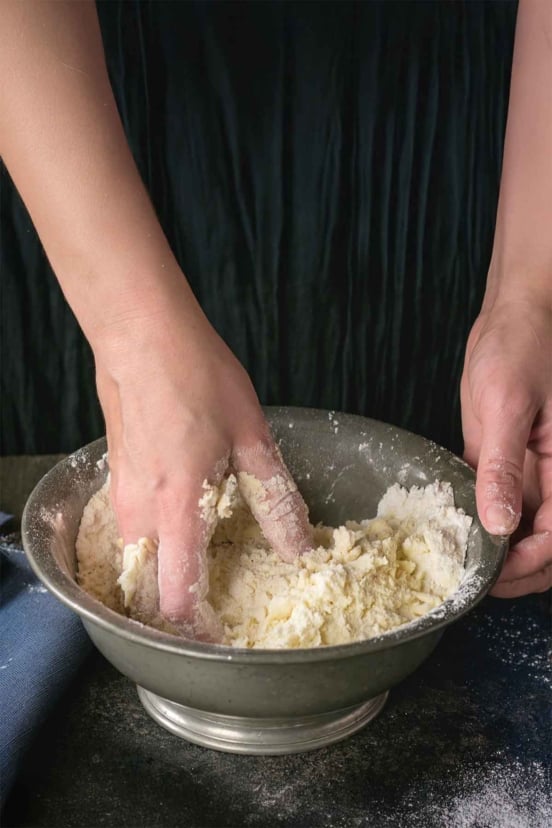
- In a large bowl, mix the flours, water, levain, and salt. Using your hands, squeeze everything together and then turn the dough out onto a work surface.
- Knead the dough using the palm of your hand to push it forward, and then your fingers to pull it backtoward your hand. Repeat this process until you have a smooth surface, 5 to 8 minutes. Don’t be afraid to rip this dough while you knead with your palm and then bring it back together again.
- Cover the dough with a bowl or plastic wrap and let ferment at room temperature for 6 hours.
- Divide the dough into 8 pieces and pat each dough piece down flat. Take 2 opposing corners and bring them to the middle. Take the other 2 corners and do the same. You can repeat this until the dough is too tight to repeat anymore and there are no more corners.
- Flip the dough upside-down and use the palm of your hands, on the side of the dough, to tighten the dough gently with a circular motion. Make sure you don’t tear the dough on the surface, as this will affect the quality of the baked bread. Repeat with remaining pieces.
- Gently coat each ball of dough with oil and place on a rimmed baking sheet. Cover the dough with plastic wrap and refrigerate overnight, or up to 12 hours.
- Place a cast iron skillet, pizza stone, or baking sheet in the oven and preheat the oven to 500°F (250°C) for at least 30 minutes.
- Flour your work surface. Place a ball of dough on it and, using a rolling pin, roll into a very thin circle, about 1/8 inch (3 mm) thick and 6 inches (15 cm) in diameter. Repeat with the remaining dough balls.
- Working in batches, place your pitas onto the skillet, pizza stone, or baking sheet and bake until puffed and nice even brown spots appear, 2 to 3 minutes. Flip the pita and bake until golden, 1 to 2 minutes more.
☞ TESTER TIP: If you find it tricky to transfer the sourdough pita to the oven, place them on parchment and slide the parchment directly onto your skillet, pizza stone, or baking sheet.
- The pitas are best enjoyed shortly after making as they will firm as they cool.
Nutrition
Nutrition information is automatically calculated, so should only be used as an approximation.
Recipe Testers’ Reviews
This was a really fun, satisfying recipe. I think it would be a great one to do with kids that are beginning to show an interest in cooking and baking. Hands down, these sourdough pita are delicious. I love that there’s a mix of crackery crispness and light chewiness. I love how dramatic looking they are with their giant puffy pocket that reminds me of some kind of sea creature. The tang of the sourdough really comes through after the cold fermentation in the fridge, but the whole grains balance the tang with a nutty sweetness. I would imagine that this taste is fairly authentic to the way pita would have tasted when they first started being made 1000s of years ago, since they would have been made with wild yeast starter and ancient varieties of wheat like einkorn, spelt, and emmer.
I rolled my dough balls out into 11-inch (28-cm) circles that were about 1/8 inch (3mm) thick, so they were pretty large (I think maybe larger than the ones on the photo by about an inch, but because the recipe specified *very thin* I took it at its word). It’s not easy to transfer a floppy 11-inch piece of dough onto a 500-degree pizza stone with your bare hands. So the first one stuck to itself just a bit and didn’t puff up quite as much as the others. Also, because my dough circles were 11 inches, I could only bake one at a time. This turned out to be fine since there were only four dough balls, (I actually think these could easily be divided into 8 balls; they would still be a nice individual size for fillings and they’d be much easier to handle). With the remaining circles I got smart and placed them on parchment after they were rolled out which made transferring to the pizza stone MUCH easier.
Mine were in for a total of 8 minutes (flipped them after 4 minutes) and had nice golden brown spots but still retained some chew.
I’m doing a keto diet right now to preemptively attempt to get myself a bit more sleek before the holidays, but these pitas, hot and puffy right out of the oven, proved to be irresistible and busted me right out of ketosis. Let me just say, it was worth it!
These sourdough pita are tasty and the instructions for building the dough are simple, easy and clear.
It took 4 hours for my starter to double and I used it immediately. After mixing the flours, levain, water, ,and salt, I kneaded the dough for 3 minutes, and then left it for 20 minutes. Then I returned to knead again for another 3 minutes or so. I did this because it allowed the flours to absorb the water more fully and there was already more smooth elasticity to the dough when I returned for the second kneading.
When it came time to divide the dough, I realized that 4 pieces would mean the pitas were about the size of a quarter of an entire loaf of bread- which seemed pretty aggressive to me. So I divided into 6 balls and shaped. It took only 1 minute for each shaping.
For baking I used a pizza stone, which I preheated for an hour at 500°F. I rolled the first ball into a massive and very thin circle as instructed and it was still too large in my mind for true pita… more like a 12 inch pizza! I baked it anyway for 3 minutes and flipped it for 30 seconds to brown. It puffed magnificently! For the remaining dough balls I decided to split them each into quarters. So I ended up with less perfectly round pitas, but they still puffed beautiful and were more like 6 inches in diameter. It took 2 minutes and 30 seconds to cook them, and I was able to put in pairs of 2 at a time on the large pizza stone.
The aroma and flavor are just amazing from these breads. They are beautiful fresh out of the oven and soft. I froze the remaining pitas and will defrost them for future enjoyment by wrapping them in a hot damp kitchen towel to steam them into softness—they did harden up once cool, which I believe is to do with how thinly I rolled them. In the future, I will try rolling them slightly thicker and might make 18 instead of 22. I will also divide up the balls into that many pieces before the cold fermentation in the fridge for better-rounded shapes!
I think it could reasonably make 18 pita that were rolled a touch thicker if preferred.
As an avid bread baker, these sourdough pita were a really fun project! This recipe was very easy, so not to worry if you’re not experienced with bread. Hands-on time is quite minimal—the hardest part is planning ahead! This recipe makes 4 large (10-inch) pitas, so my recommendation is actually to divide the dough into smaller pieces and make 8 pitas instead—they will be much more manageable, both in terms of baking and eating! Watching them puff up in the oven was incredibly entertaining, so clean your oven door in advance so you can watch the show.
They only take 4 minutes to bake, so this is a great recipe when you want to impress guests and have warm pitas on the table for dinner. I served my pitas with a roasted eggplant salad and chickpeas and turned them into Mediterranean sandwiches. This made 4 large pitas that could feed 8 people (cut in half).
I used an existing, healthy starter. I would recommend decreasing the levain recipe so you make what you need, or at least less so there is less waste (e.g. 25g mature starter, 50g flour, 50g water would be enough to give you your levain and 25g extra as back up/fed starter to use for next time).
My levain had not quite doubled in 3 to 4 hrs so I left it for a total of 5 1/2 hrs and used it immediately. I kneaded my dough for 5 minutes. I let my dough rest at room temp for exactly 6 hours. I don’t understand the point of lining the sheet pan with parchment – the next day, the dough was quite stuck to the parchment and it took some work to coax it off the paper…had the dough just been right on the pan, I could have easily used my bench scraper to pick it up. I would not line my sheet with parchment again.
These instructions to divide and shape were very clear. I pulled my dough from the corner to the center about 4 to 5 times for a tight ball. I refrigerated my dough overnight, and actually left it longer than 12 hours—baked them up for dinner so the dough was in the fridge for closer to 20 hours total (9pm to 5pm the next day)—and there were absolutely no issues with leaving it longer.
My pitas cooked 2 to 3 minutes per side, but the ones that I cooked 2 minutes each side were better. When they started to brown a little, they became crisp and less soft.
I just made my first pita bread a month ago and it was quite the rewarding experience. When I saw this recipe for sourdough pita, I jumped at the opportunity to relive the satisfaction of watching thin dough puff up like magic. Not only that, but another opportunity to play with my sourdough and to use the healthier alternative of whole grain flour. As I am preparing my ingredients, I realized that my spelt “smelt”… it’s a thing! My mom taught me to always smell the flour before using and I’ve done this for as long as I can remember. This was only the second time when I knew I didn’t want to use the flour in baking due to the “off” smell. Thanks, Mom! It was a great tip. This was a whole grain pita and I had other whole grain flour. I decided to use rye flour. I wasn’t concerned about too strong of a flavor as the recipe only called for 50 grams. I had my own sourdough starter so the levain was a cinch.
This is not a fast recipe, though. Trust me when I say that it’s worth the wait. Just like all other sourdough projects that just require some pre-planning before the big reward.
In terms of instructions, the recipe worked as described and was easy to understand. The dough was also pretty easy to work with. What I had a bit of problem with was the dividing the dough into only four balls. It was exciting to be able to roll the dough into 1 mm thickness rounds. The problem was that the 34 cm diameter thin dough circles were a bit unwieldy to maneuver into the oven as a perfect round (I may just be a bit of a type A).
I tried 3 different transferring methods. First, I picked the up the dough draped over my hands and wrists and deposited round on baking steel. The edges landed wrinkled and folded over upon landing on the cookware. My second method was using a dough peel but this also resulted in folded edges of the dough that extended beyond the peel edges. My third trial was draping the dough round over the rolling pin as if it were a pie crust. This was better except the rolling pin fell in the oven in the process and the edge became square-ish versus round. The last trial, just like for Goldilocks, was the best. I used an upside-down sheet tray with a sheet of parchment paper that accommodated the entirety of the dough round and shimmied dough and parchment onto my baking steel in a perfect round shape.
My pitas were puffy and golden after 2 minutes on first side and 1 to 2 minutes on the second side. This recipe made 4 very large pitas yielding 2 servings each. Ultimately, my suggestion would be to divide the dough into 6 portions from the start to make it more manageable for cooking and also improve the presentation of the filled 1/2 pita. With these tweaks in timing and portion size, I believe this recipe merits a TC designation. The flavor and texture warrant this! My next comment is that this recipe is an “eat fresh” pita. The leftover went dry rather quickly. However, another 5 minutes in a 350F oven turned the leftovers into tasty chips by brushing with olive oil and breaking into crispy shards.
There is a hummus vendor at our farmer’s market that makes and sells great pita bread. I love that pita bread, but as someone who loves to bake, I wanted to find a great pita recipe that I could make myself. For the past several months, I have made a number of different pita recipes, looking for “the one” that would compare. These whole grain sourdough pita come as close as any I have tried to date. I loved the nutty, slightly sweet flavor that the spelt flour gives this pita. I also loved that the dough, while a bit tacky, was fairly easy to work with. All the pieces of dough puffed in the oven, which I have never had happen before with any other pita recipe.
I let the levain ferment for an extra hour (5 total). After 4 hours, it didn’t appear to have doubled. I refrigerated the levain overnight to use the next day. I kneaded the dough for 10 minutes. The instructions call for covering the dough, but don’t say with what. I covered the dough with a kitchen towel, which caused it to get a little crusty. I would turn a bowl upside down over it next time to see if that works better.
When shaping the dough, I folded 8 “corners” into the center. Due to circumstances beyond my control, I was unable to bake the pita 12 hours after placing the dough in the refrigerator. It was actually closer to 24 hours before I was able to do it. I used a cast iron skillet that was placed on top of a baking steel to bake the pita.




Can you knead using a dough hook in a stand mixer?
We didn’t try it with the dough hook, Lee, but I think it would work ok.
Shocked that you wouldn’t tell those using the recipe to steam their hard-baked pitas, by wrapping them all in a tea towel as they come out of the oven, which makes them soft.
Great tip, Adrien. Thanks!
Thanks for that, Adrien. Much appreciated!