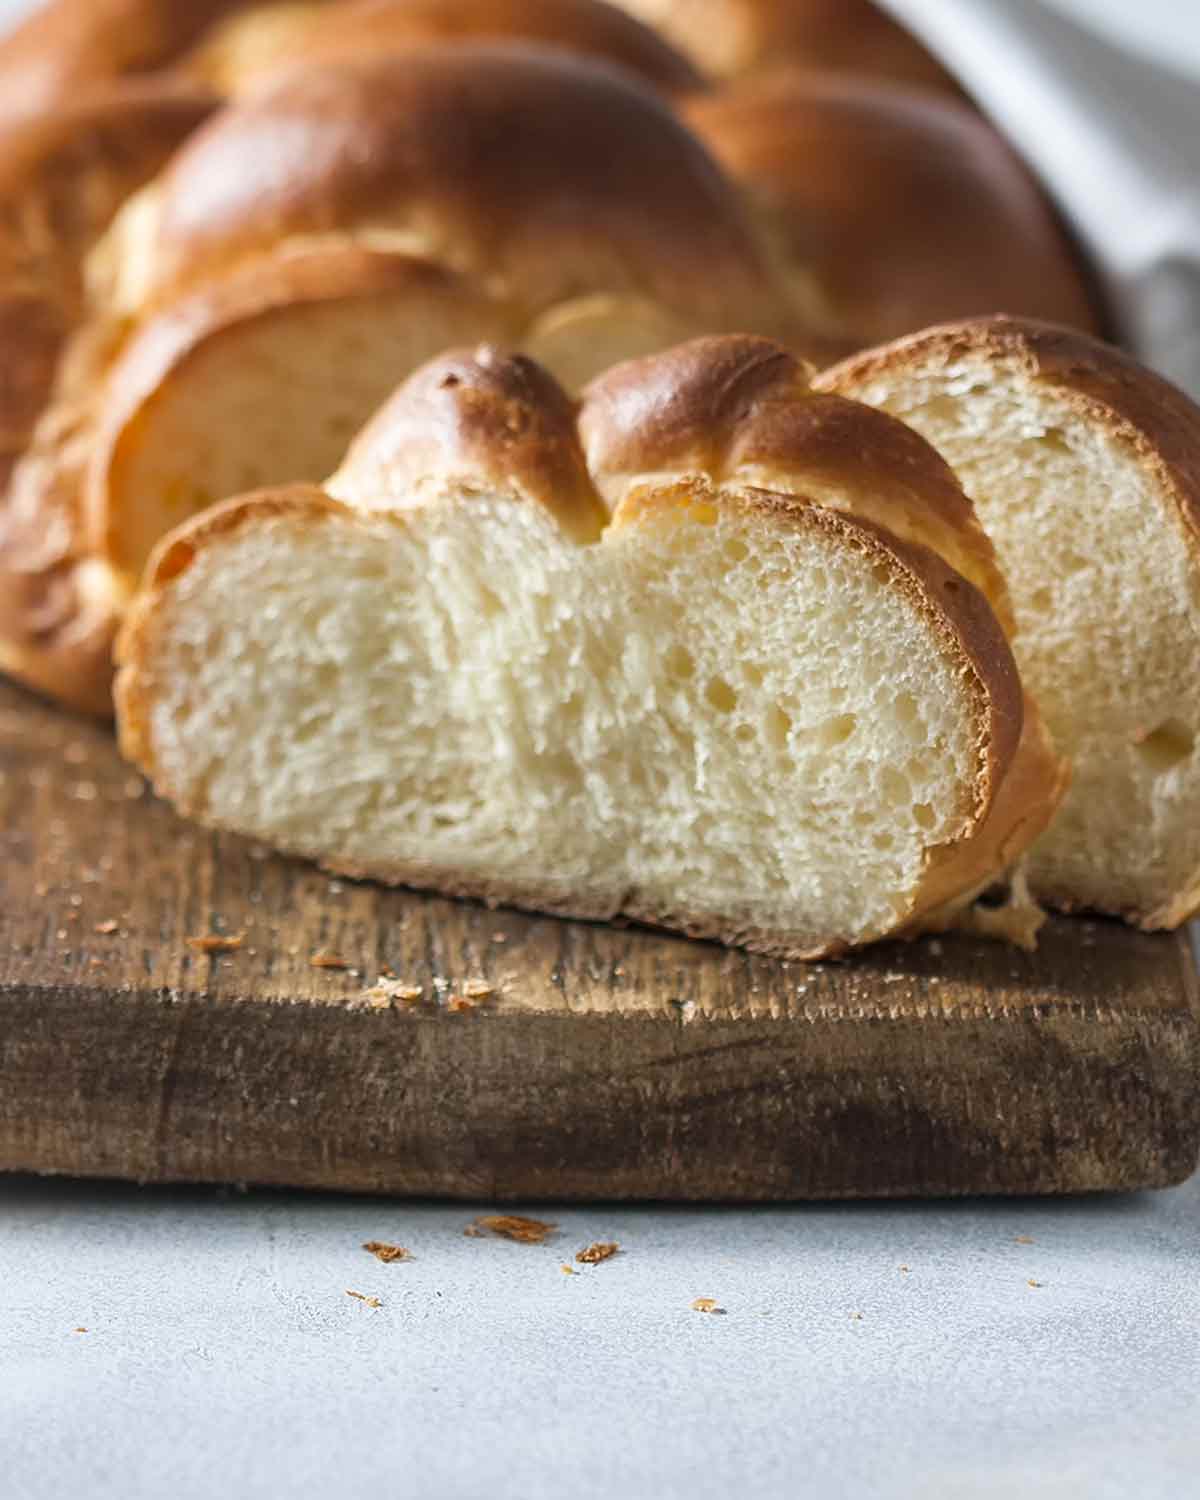
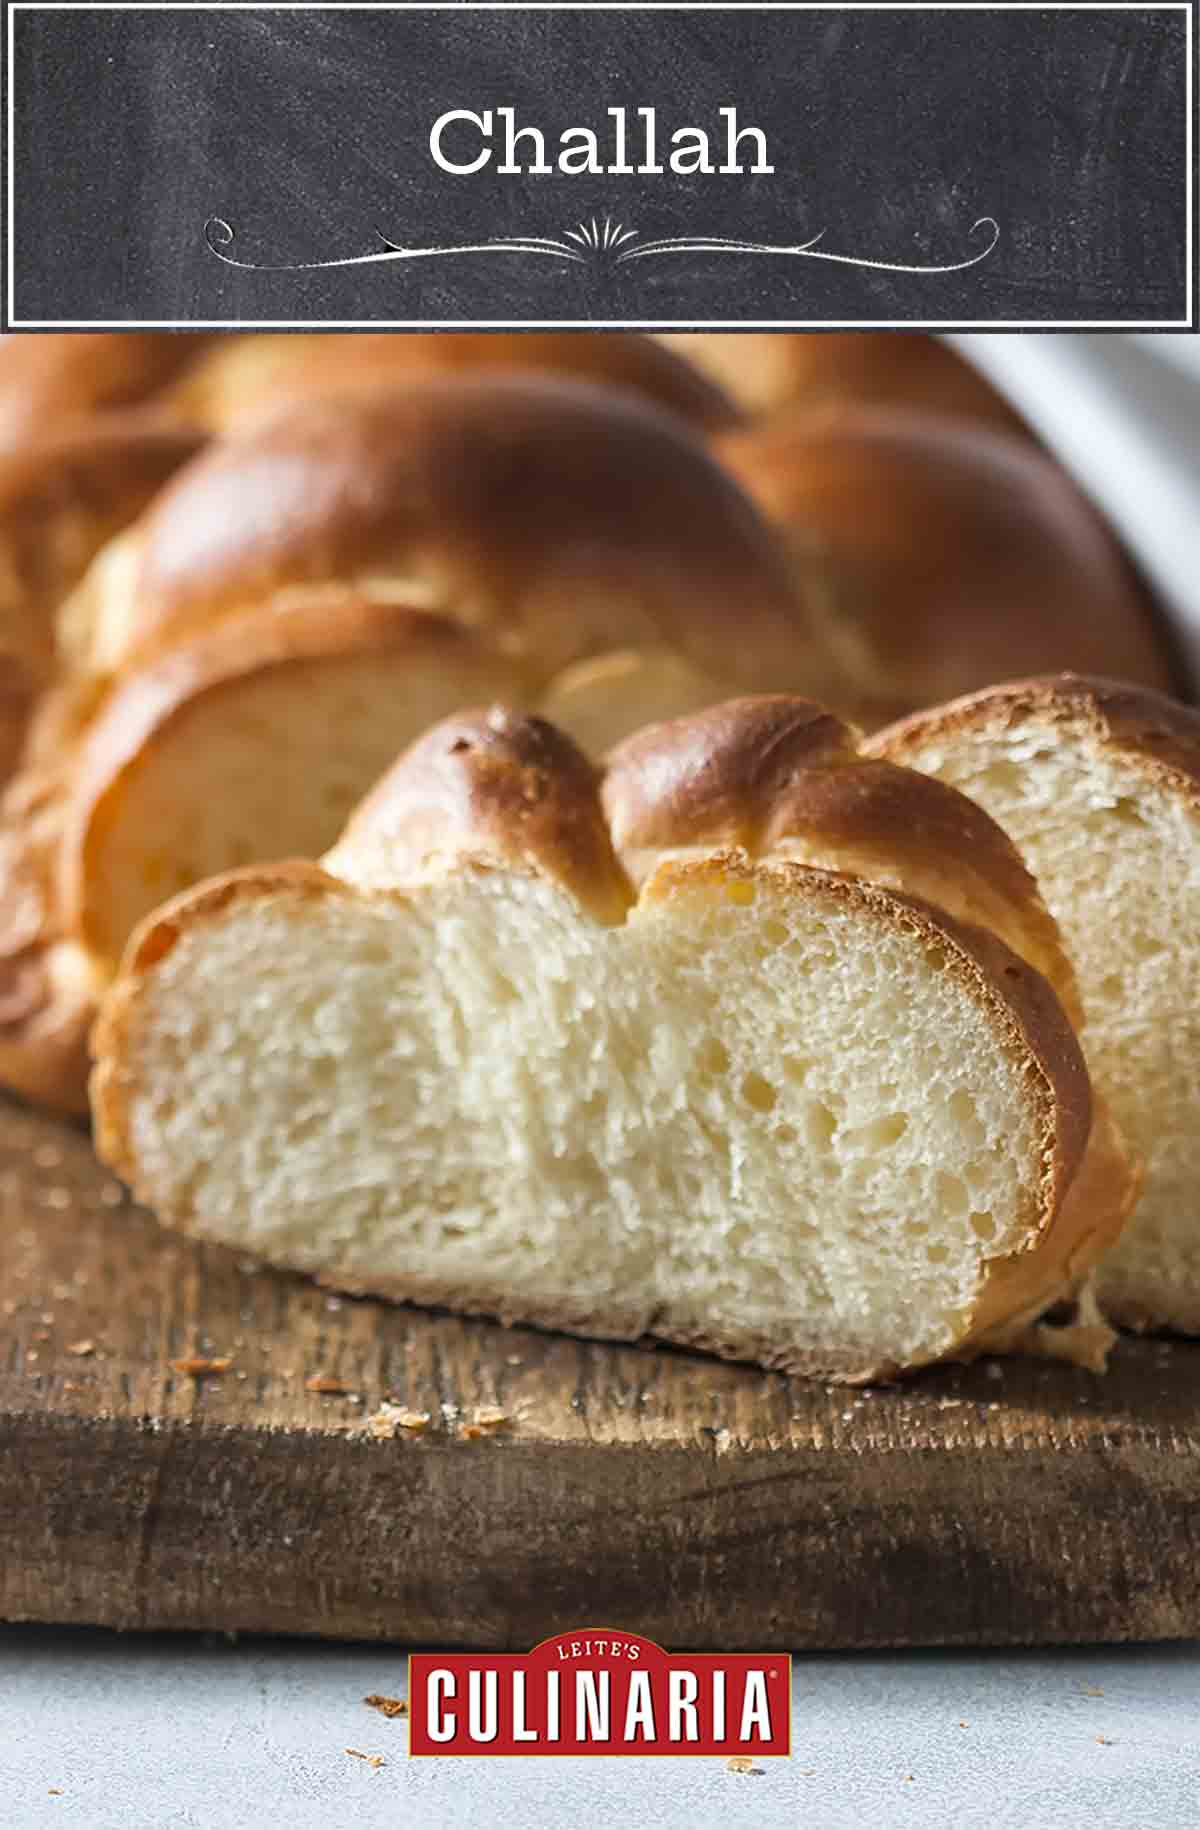
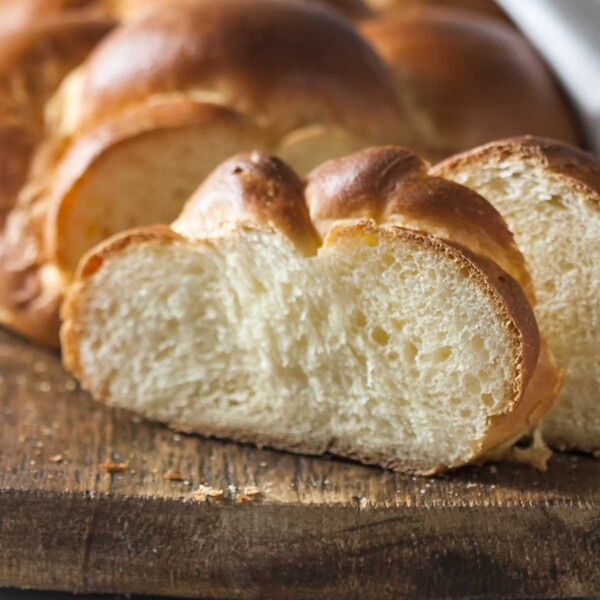
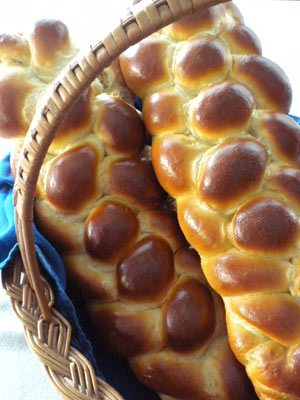
Challah is one of the most important Jewish foods. A yeast bread enriched with eggs and oil, it is similar to French brioche, and it is the special loaf for the Sabbath and for many other important meals and occasions.
For the Sabbath, Orthodox families usually prepare two loaves of challah, a reminder of the double portion of manna received each Friday during the forty years wandering in the desert. Each of these challah loaves are braided with six ropes of dough coming to tapered ends. These two loaves then represent twelve loaves, recalling a miracle that took place in both the sanctuary carried in the desert and in the ancient Temple in Jerusalem. (Don’t ask. It’s very complicated.)
At weddings and bar and bat mitzvah receptions, before anyone takes a bite of food, a ceremonious bread cutting and blessing is conducted with a giant challah, big enough for everyone at the reception to have a piece.
On Rosh Hashanah, the Jewish New Year, challah is shaped in a round coil to symbolize eternal life, or the soul’s ascension, depending on whom you ask. There are actually many folkloric forms of challah, each with a spiritual story to back up its shape.
For everyday meals, you can also buy challah baked into a rectangular loaf, like sandwich bread. Challah has become so assimilated in New York City that it’s carried in every supermarket. Restaurants make French toast with it. Diners, which are often owned by Greeks, acknowledge the New York Jewish tastes of their customers, even if they are not Jewish, by always putting challah in their bread baskets. Challah is one of the many ethnic foods that have gone through the immigrant experience.
Traditionally, challah was baked only once a week, on Friday, for that evening’s Sabbath dinner and the next day’s lunch. (It is also baked for some other special holy days.) Many kosher bakeries still sell challah only on Thursdays and Fridays, and many observant Jewish homemakers still bake their own challah for the Sabbath, which can be quite a project, as Orthodox families are large and the customary two loaves need to be very large. With today’s health consciousness, challah is often made with whole-wheat flour, too.–Arthur Schwartz
Challah FAQs
Yes, of course you could buy this at a local bakery. But where’s the satisfaction in that?
As if it weren’t already rich and special enough in its original egg, sugar, and oil-enriched form, commercial bakers now make it with so much sugar and fat that it might as well be cake. Typically, very yellow commercial challah loaves are even artificially colored to give the impression that they are loaded with eggs. You know how many eggs it would take to make a loaf of bread that yellow?
There are also honey-laced challahs and those studded with raisins, especially for Rosh Hashanah, when we eat sweet foods to ensure a sweet New Year. Chocolate-laced and chocolate-chip challah are new phenomena.
Can you freeze challah bread?
Definitely. After baking, let the bread cool completely, wrap well in plastic, taking care to fully seal it. Well-wrapped, the bread will keep for up to 3 months in the freezer.
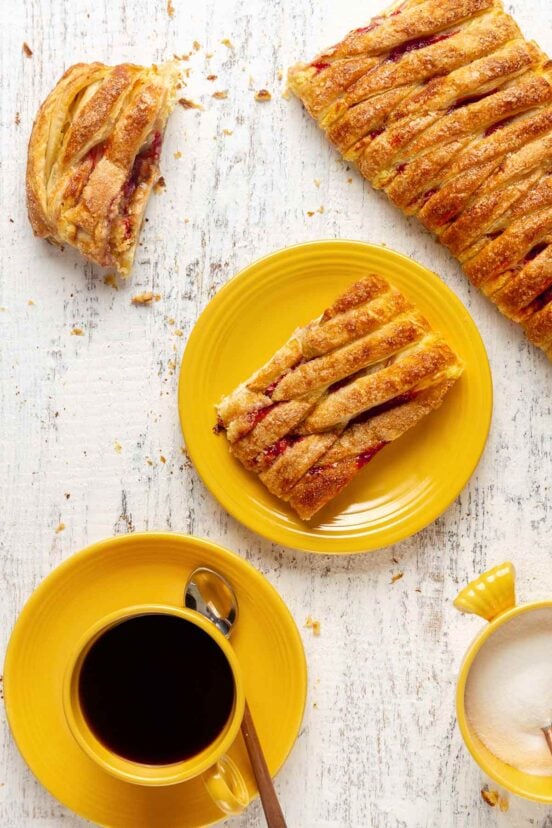
The richness of challah lends itself particularly well to breakfast dishes, like this challah French toast with strawberry jam, or dessert, such as bread pudding. We also love using it for decadent grilled cheese sandwiches.
Challah
Ingredients
For the dough
- 1 package (2 1/4 teaspoons) active dry yeast
- 1 cup warm water, (no more than 110°F [43°C])
- 1/3 cup sugar
- 4 1/2 to 5 cups bread flour, or 5 1/2 to 6 cups all-purpose flour
- 3 eggs
- 1/4 cup mild vegetable oil
- 2 teaspoons salt
For the egg wash
- 1 egg
- 1 teaspoon granulated sugar
Instructions
Make the dough
- In the bowl of a stand mixer fitted with the dough hook, combine the yeast and the water on low speed. Mix for a minute or so to dissolve the yeast.
- Add the sugar. Mix again for a few seconds, then add about 1/2 cup of the flour. Mix again.
- Add the eggs. Increase the speed slightly and mix again. Once the eggs are well incorporated, add 1 more cup of flour. On medium-low speed, work in the flour, then add the oil and salt.
- Turn off the machine and add 3 cups of the remaining flour (a total of 4 1/2 cups). At medium speed, continue to work the flour into the dough, shutting the machine off once or twice to scrape down the sides of the bowl.
- Let the machine knead the dough for about 15 minutes, again turning the mixer off every few minutes to scrape down the bowl, if necessary, and to let the motor rest (with such a dense dough, the motor can overheat if it runs continuously). After a few minutes, the dough should start to come away from the sides of the bowl, although, with all-purpose flour, it may stick slightly to the bottom. If necessary, add more flour, a tablespoon at a time, stopping the motor each time you do so. In the end, the dough should be firm, smooth, and elastic, and only slightly sticky.
- Put the dough into a large oiled bowl, turning to completely coat it with oil. Cover with plastic wrap and let rise until tripled in volume, 1 1/2 to 2 hours.
Make the braid
- Punch down the dough. To make a 6-strand braid, form it into a long, flat loaf. Cut it into 6 crosswise pieces. Form each piece into an oval loaf and keep the pieces on a lightly floured board, covered with a clean dish towel, then let rise for about 30 minutes.
- Roll each piece into a strand about 12 inches long, thick in the center and tapered to a point on each end. Line up the strands and pinch the ends together. Bring strand #6 from the right end over strand #1 and up to the left. Bring strand #1 from the left up to the top right.
- You now have a four-legged, two-armed creature with the arms crossed over each other. Keeping the legs spread apart in pairs, bring the left arm (as you face it) down into the center between the legs. Bring the outer right leg over and up to form a new top left arm. Bring the top right arm down between the legs.
- Repeat the pattern: the left outer leg comes up to form the new right arm, and the left arm comes down to the center; the right leg comes up to form the new left arm, and the right arm comes down to the center. Finish by pinching the ends tightly closed.
- Always keep hold of the last strand you moved so that you remember your location in the pattern. When moving strands, grasp the arms by the ends where hands would be. Grasp the legs where feet would be. Keep the legs spread in pairs so that the arms can easily be brought down to the center. If you make an error and become confused, stop, open the braid, and begin again. When you’re done, turn the bread upside down. The design should be perfectly symmetrical — if it’s not, undo the braid and begin again. Cover with a clean dish towel and let the dough rise another 30 minutes.
Alternative shapes
- To make 1 round loaf, form the dough into 1 long rope and coil the rope into a round loaf. Cover with a clean dish towel and let the dough rise another 30 minutes.
- To make standard loaves, divide the dough in half and gently form each piece into a 9-inch-long loaf. Place each loaf in an oiled 9- by 5-inch (23- by 13-cm) loaf pan. Cover the pans with clean dish towels and let the dough rise until it is over the top of the pan, 30 to 60 minutes.
Finish the loaf
- Position an oven rack in the center of the oven. Preheat the oven to 350°F (175°C).
- Make an egg wash by beating the egg and sugar together. Brush onto the surface of the dough, making sure to glaze the crevices between strands.
- Bake for 35 to 40 minutes. To test for doneness, tap the bottom of the loaf with your fingers. It should sound hollow. Move to a rack to cool thoroughly before slicing and serving.
Video
Nutrition
Nutrition information is automatically calculated, so should only be used as an approximation.
Recipe Testers’ Reviews
This challah is worth all the praise I can give it. It’s similar to brioche; light and moist, subtly rich and subtly sweet. Best of all, it’s easy to make. The bread yields an exterior with a smooth, shiny appearance, thanks to the egg and sugar wash generously brushed on its surface.
The soft texture of the bread made it easy to guide a bread knife through it. Each slice had a strong crumb, holding its shape in toast form and heartier tasks like French toast. Even after the slices soaked up the egg batter, they still retained their shape without breaking apart or falling limp. Make at least two loaves at a time. That’s what I did—and it’s a good thing because there isn’t a crumb left.
I made this bread by hand (not in a mixer), and used all-purpose flour instead of bread flour (therefore, using a total of 6 cups of flour). The dough mixed, proofed, and baked off without a hitch—but braiding six strands of dough together, on the other hand, proved to be a bit tricky.
Don’t braid the strands too tightly or they will stretch while baking, which will cause the bread to loose some of its artistic definition. Here’s a video that shows how to braid a loaf of challah.
I baked the loaf on a parchment-lined baking sheet for 40 minutes. In this time, the bread developed a delicious golden-brown color, with deep yellow accents in each braided section. I suggest rotating the pan midway through baking to achieve uniform browning. If the bread browns too quickly, don’t hesitate to cover the loaf with a piece of tinfoil during the final 10 minutes of baking.

This is a great challah recipe that’s extremely easy to make. Mixing the ingredients in a stand mixer works well. The dough turned out perfect, and I didn’t need to add any extra flour. In fact, it was a lot less sticky than some of the other bread doughs that I make.
Make sure to stop the mixer once or twice as needed to scrape the sides and bottom of the bowl. When you restart the mixer, the dough will come together again almost immediately. I let it rise the first time for the full two hours, and that was just right. After making the six pieces for the braid, there is a second rise, and the 30-minute timing for that was also spot-on. My kitchen temperature was running about 70°F.
The end result is one of the most beautiful challah I’ve seen. The exterior is a rich, dark golden brown and the crumb is light, moist, and flavorful. It would be very easy for a beginner to make this loaf.
The part that gets a little tricky is the braiding. I think I missed one of the moves because I was in a hurry, but I didn’t take it apart to redo (which the recipe suggests), and it still looked fantastic. I took the liberty of adding sesame seeds after egg washing.
If you find the six-strand braid too complicated, then try using three strands, which is done like braiding someone’s hair. I was concerned about not having an additional rise after braiding, as other recipes for challah instruct, but judging from the way my loaf turned out, it was not at all necessary.
You’re on your own to figure out how to bake the challah after it’s braided. Do you use a pan, a sheet pan, a cookie sheet, or a baking stone? I used my baking stone brushed with a little oil, but a cookie sheet or sheet pan oiled or lined with a Silpat or parchment paper would also work fine.
Be sure to brush the egg wash into the crevices between the braids so your loaf will have an even shine after baking. If I’m making challah for a special occasion, I’ll add a little more egg wash to the crevices midway thought baking, after the loaf has started to rise. You should be able to serve more than six with this recipe—it makes a fairly large loaf.
I love challah, and this recipe is so easy and really tasty. I wouldn’t change a thing. This isn’t your supermarket yellow “white bread” version. It’s dense and flavorful; just sweet enough, with a nice crust and crumb. A slice of this bread with some butter is heavenly.
The braiding was a bit tricky, as the braids tended to shrink, but I was quite happy with the results. Next time, I may just make it in a loaf pan, as suggested. The only instruction missing was whether the baking sheet should be oiled or not. I did oil the baking sheet. I’m hoping there will be some stale bread leftover to make a bread pudding, but I may not be so lucky.
Having never made challah before, I was a little nervous—mostly about the time and effort involved. But I was pleasantly surprised, the actual hands-on time was minimal. Mixing the ingredients (and letting the KitchenAid knead them) and forming the braid were the only real active portions of prep. The rest of the time involved was simply waiting for the dough to rise, and then to bake.
The most difficult part was making the braid. I unwound and re-braided the dough twice before giving up and putting it in the oven, even though I knew the pattern was wrong. (It was a day or two later when I realized exactly what I’d done wrong and how I could’ve fixed it.)
Despite my imperfect form, the challah came out beautifully, but it was a little darker than I would’ve liked. Next time, I’ll experiment with shorter baking times. I did manage to eke out challah French toast, however, and it was magnifique.
This challah recipe recipe resulted in an excellent loaf of bread—good enough to earn a Testers’ Choice designation despite a few quibbles with the directions. The bread was simple to make; it was pretty, tasty, and had a lovely, light crumb that was sturdy enough to withstand a spread of cool butter.
I wasn’t successful in using the dough hook for the initial mixing of ingredients in steps 1 through 3. In recipes like this, I normally use the paddle attachment or stir with a spoon before switching to the dough hook, and I’d suggest doing the same here. Also, there’s no mention of what to bake the bread on, though it’s easy enough to figure out that a cookie sheet will work.

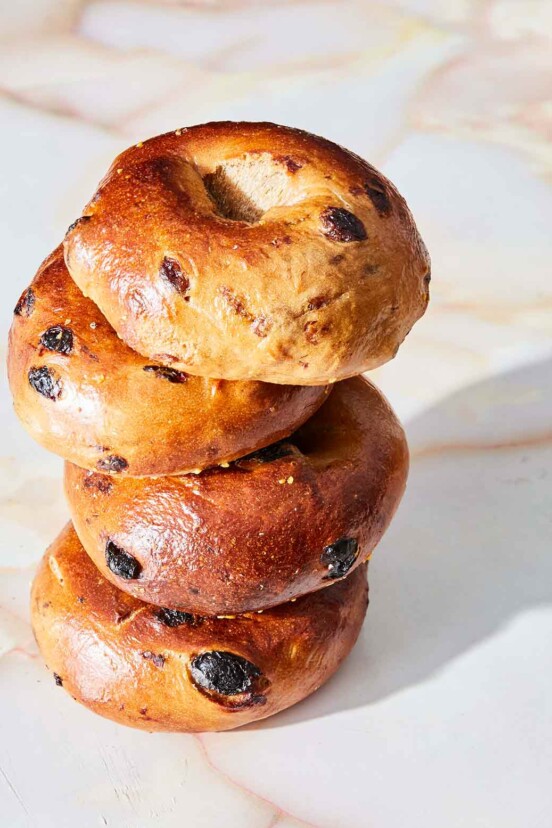


This was my first time making challah. I have made brioche on many occasions though. I wanted to make challah bagels. I order some on fresh direct every now and then and they are amazing. I couldn’t find a recipe for challah bagels anywhere but I found this recipe. I have made bagels several times, so after the dough was ready I shaped, boiled, then baked just as I would a bagel. My kids love chocolate chips so I added mini chocolate chips to the bagels. They tasted delicious. I will definitely save this recipe!!
Those look perfect, Noel. We’re delighted that this worked out so well for you. Thanks so much for taking the time to comment.