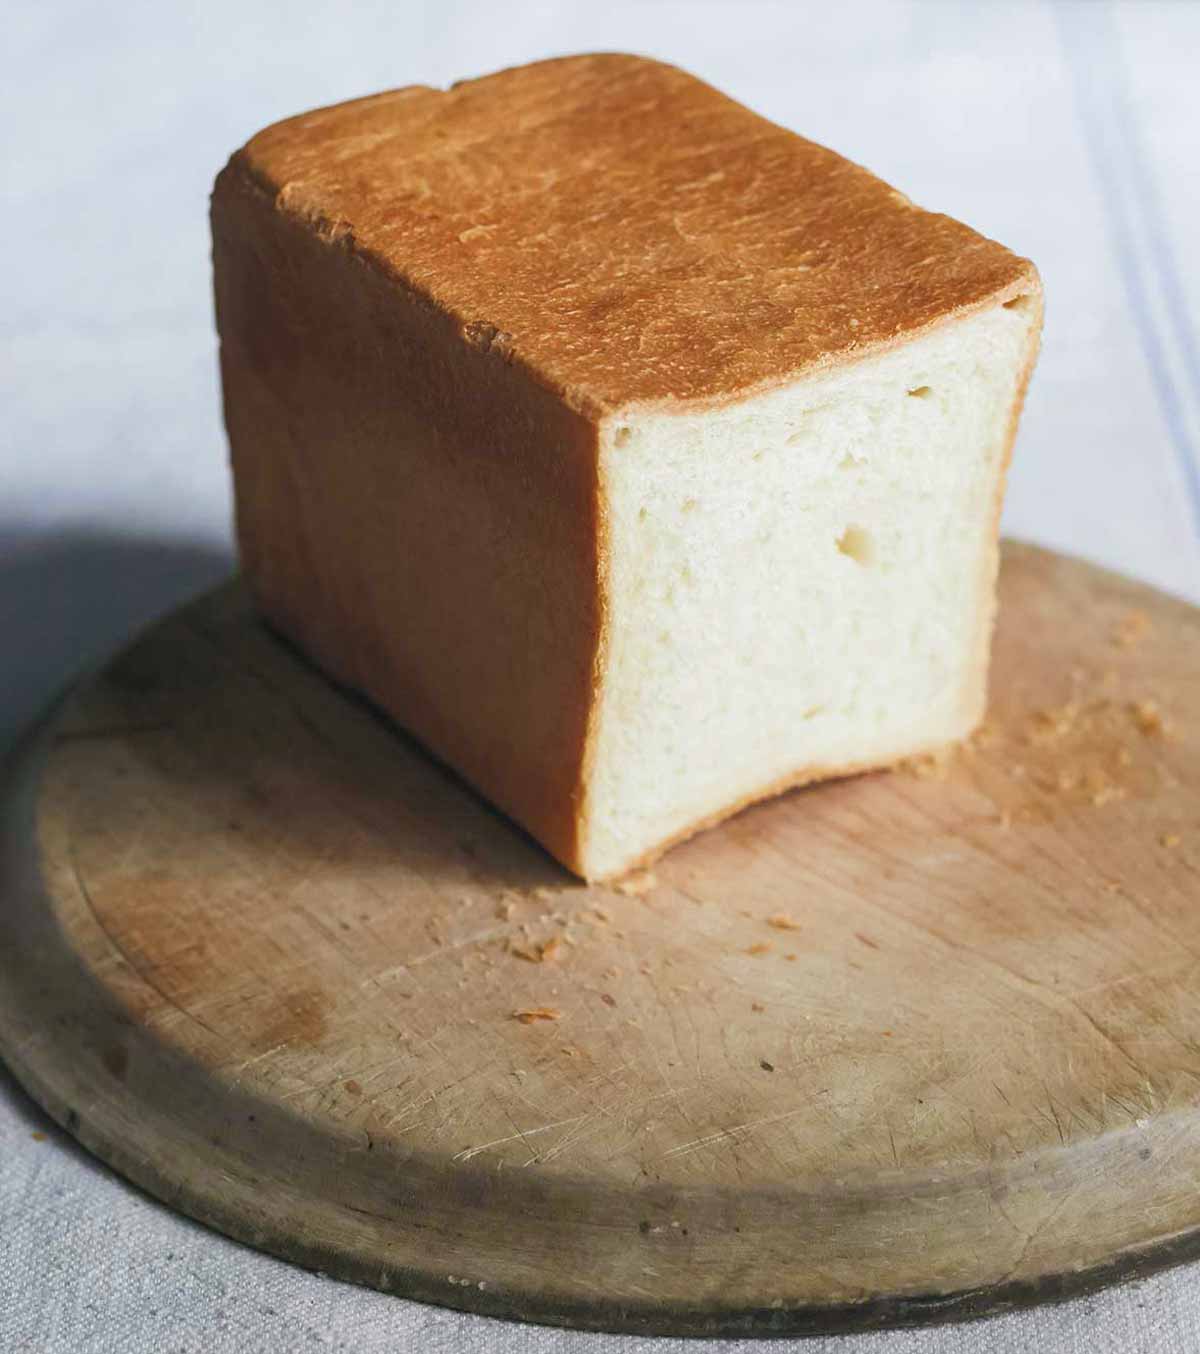
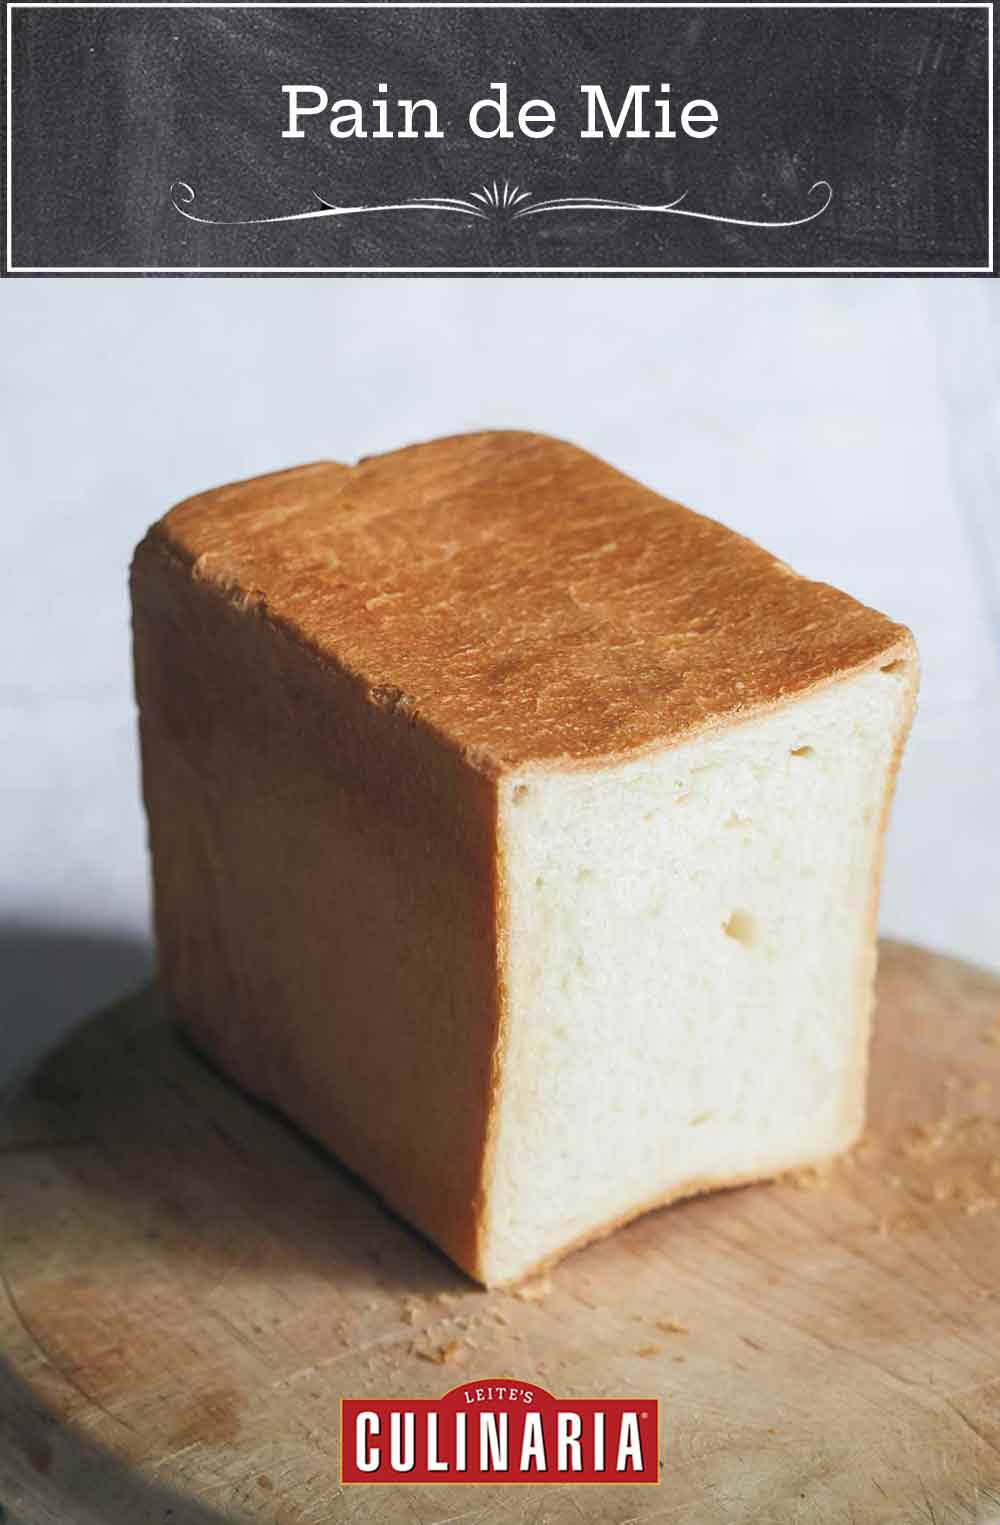
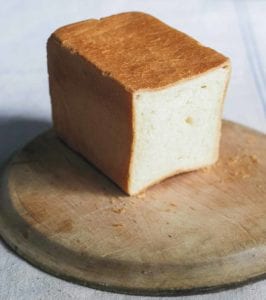
Pain de mie means “bread of the crumb” in French, and it’s called that because of how the bread is baked; the vessel that holds the dough creates a finished product with very little crust and almost all crumb. The butter and milk make this a soft and malleable dough, which is supported by the pan it’s baked in. The pan used for baking, called Pullman because it replicates the shape of a railway car, is long and rectangular with a removable sliding lid, and is sold at specialty food stores. It promotes a flat, rectangular loaf of bread. However, I’ve had luck by using a regular loaf pan and covering the top tightly with a lightly oiled piece of aluminum foil, doubled and wrapped snugly around the pan. This lovely bread with a tight and tender crumb is an excellent sandwich bread.–Sarah Black
Pain de Mie
Equipment
- One Pullman loaf pan (15 3/4-by-3 3/4-inches or 40-by-9 1/2-cm) or one standard loaf pan (9-by-5-inch or 22-by-13-cm); instant-read thermometer
Ingredients
- 2 ounces unsalted butter
- 1 1/2 teaspoons active dry yeast
- 1 tablespoon granulated sugar
- 2 teaspoons table salt
- 1 3/4 ounces warm water
- 16 ounces unbleached all-purpose flour, plus more for the work surface
- 12 fluid ounces whole milk, warmed ever so slightly
- Vegetable oil or mild olive oil for the bowl
Instructions
- Cut the butter into 1/2-inch (1-cm) chunks and let it come to room temperature.
- Measure the yeast into a small bowl. Pour the warm water into another small bowl. The water should feel hot to the touch and register between 105°F (41°C) and 115°F (46°C) on an instant-read thermometer. Sprinkle the yeast on top of the water and stir to dissolve it. Set the yeast aside until it bubbles a little on top.
- Dump the flour in a large bowl, sprinkle with the salt and sugar, and stir to incorporate. Make a well in the center.
- Pour the milk into a small bowl. Add the yeast mixture and then add the milk mixture to the flour and mix to incorporate. The dough will be very sticky but that’s okay. Then add the butter and continue to mix for 2 to 3 minutes.
- Cover the bowl with a kitchen towel or plastic wrap and let the dough stand still for about 30 minutes. The dough may appear puffy and it may not. Don’t worry if the dough doesn’t change in appearance.
- Sprinkle your work surface with flour and then use a plastic bowl scraper to turn the dough out onto the surface. Tap your hands in a little flour to coat them and then gently flatten the dough into a rectangle with a short side facing you. Use your fingers or the plastic scraper, flip the top edge of the dough down to just below the center, then flip the bottom edge up to just above the center, as if you were folding a letter. Repeat this process with the right and left sides and then turn the dough over and dust off the flour.
- Oil a second large bowl, then place the dough in it, seam side up, to oil the top. Then turn it seam side down and cover the bowl with oiled plastic wrap. Mark the time with a felt-tipped pen on the plastic wrap and allow the dough to rest and rise in a moderately cool place until it has doubled in volume, 1 to 2 hours, depending on the temperature of your kitchen.
- Once the dough has doubled in volume, sprinkle a little more flour onto your work surface, then scrape the dough out onto it, letting the dough assume its natural shape. Shape the dough into a log, then cover with oiled plastic wrap and let rest for 5 to 10 minutes before you continue shaping. (To shape the dough into a log, flatten it into a rectangle, and position the rectangle so that the short end faces you. Using both hands, pick up the top edge and pull it past the center of the dough, press it so it adheres to itself, then do the same with the bottom edge. Repeat this action with the top piece only and press the dough together firmly to make a tight log. Don’t worry if the dough looks misshapen.)
- Now shape the dough by beginning with the pre-shaped log placed lengthwise in front of you with the seam side up. Fold the dough in half lengthwise and press down so that it adheres to itself. Close the interior gap by pulling dough from the top with your left hand and sealing at the bottom with the heel of your right hand, as you would for a baguette. Place the dough seam side down, then place your hands at the center, fingers together, and with gentle but consistent pressure move your hands away from each other, rolling back and forth toward the ends of the dough. Place the dough in an oiled 15 3/4-by-3 3/4-inch (40-by-9 1/2-cm) Pullman pan or 9-by-5-inch (22-by-13-cm) loaf pan, seam side down, and gently press it into the corners. (If you are using a 9-by-5-inch loaf pan, it will seem like there is too much dough for the pan but it’s okay.)
- Cover the pan with oiled plastic wrap and let it rest until just before the dough reaches the top of the pan, 30 to 60 minutes.
- While the dough is resting, preheat the oven to 400°F (204°C), with a rack in the middle.
- After the dough has finished resting, remove the plastic wrap. If you are using a Pullman pan, slide on the lid. If you are using a loaf pan, take a long piece of foil, oil the area that will come in contact with the dough, and wrap the foil tightly around the pan twice.
- Place the loaf pan on the middle rack of the oven and bake for about 30 minutes.
- Pull the bread out of the oven, remove the lid or foil, and then return the bread to the oven to continue baking until the top is a light brown color, 7 to 15 minutes. If you wish to measure the temperature, the center of the loaf should register 200°F (93°C) on an instant-read thermometer.
- Remove the pan from the oven and let the bread rest in the pan for about 10 minutes. Carefully turn the bread onto a wire rack and let it cool. Originally published May 14, 2016.

Explore More with AI
Nutrition
Nutrition information is automatically calculated, so should only be used as an approximation.
Recipe Testers’ Reviews
Did you know only 68% of the recipes we test make it onto the site? This recipe survived our rigorous blind testing process by multiple home cooks. It earned the Leite’s Culinaria stamp of approval—and the testers’ reviews below prove it.
As described, the bread was soft with a close crumb, and the crust was thin and soft. It was easy to slice thinly for toast or sandwiches. I used some to make French toast and it was sublime. I have never made pain de mie before and I haven’t yet added a Pullman pan to my baking collection. After baking this recipe, I might need to add it to my birthday wish list.
I sprinkled the counter heavily with flour before turning out the dough. The folding directions were easy to follow. I was surprised how quickly the dough became less sticky and easier to handle after folding it as directed. I don’t have a Pullman pan, so I used a regular 9-by-5-inch loaf pan. The dough seemed like way too much for the pan, it filled it more than half-full right after shaping, before any further rising. I did have a small leakage of dough out of the end of the pan, but the foil did a good job of keeping the top mostly flat.

I love making breads, any kind of breads, and trying new flavors and textures. But French breads like this one, soft, tender, with very little crust, are my favorites. Although it takes about 4 hours to prepare, the final bread makes it all worthwhile. And it’s not so difficult, so if you want to do bread this is a good recipe to start with. It tastes better the same day it is baked!

A no-knead dough that produces a nice firm white loaf perfect for sandwiches and toast? Yes, please! This makes a perfect white bread and was such a treat it was devoured within a day.
My only issue was with the dough itself, there are plenty of instructions listed for how to fold, and they all make sense, but the dough was so sticky and wet, that it was impossible to fold in any way at all. In the end it got plunked into the pan, but still turned out beautifully. I used the aluminum foil wrapped around the pan method which worked perfectly.
If you love butter, you will love this bread! This is unlike other breads I have made. The butter in this recipe gives it a biscuit-like crust and the butter is stronger in flavor than I was expecting–closer to that of a biscuit. It is very good and would be a nice addition to soups or would make good toast for breakfast. It is also good sandwich bread and slices nicely. Overall, this bread is great for anything if you are wanting a stronger butter-flavored bread.


Hello again, I’ve tried a longer proofing time of 1 1/2 hours instead of the usual 1 hour. there was a slight size increase but still came out of the oven a little short. the top is rounded so there was some oven spring. should i increase the amount of active dry yeast to try and get a bigger loaf out of the oven?
Thanks.
Yu-Jin, I love that you’re continuing to work with the recipe to make it perfect. The amount of yeast should be sufficient, although do make sure you’re not skimping on it at all. Is your dough doubling at the 1 1/2 hour mark? Also, are you measuring the temperature of the water you’re dissolving the yeast in? That temperature range of 105 to 115°F is optimal for proofing yeast.
The dough doubles at the one hour mark during the initial rise in an oiled bowl but not much during the final proof just before the oven.
Yu-Jin, you may be letting your first rise go too long. Once it has doubled, you should proceed with the recipe and not let it sit any longer.
The first rise only goes for one hour but i let the second rise go for 1 and 1/2 hours just to get it slightly taller once fully cooked however it is still a little short. Anything i can do to get a taller rise during the second proof?
Yu-Jin, since you’ve really worked at finding the best timing to achieve maximum rise, the only other thoughts I can offer are to make sure your water is at an appropriate temperature, let your dough rise in a warm, humid environment, and avoid overworking the dough when handling and shaping it. I hope that helps!
Hi, the bread shrunk while in the oven. Is this normal? if not how do i stop it from happening? Thanks
It’s not ideal, but it happens occasionally, Yu-Jin. There are a few things that can cause it. If you let your dough rest too long during the final rise before baking it may have over-proofed, which can cause it to collapse and shrink in the oven. Also, if possible, make sure that your oven is calibrated to the correct temperature in case it’s running on the cool side.
The dough didn’t rise to the top of the pan so i let it sit longer which may be the cause. Should i just bake the dough if it doesn’t reach the top of the pan by the 1 hour mark?
Yes. You’re likely not going to get much more rise after that point. Letting it rise in a warm, draft-free area will also help it to rise more quickly.
The dough did almost rise to the top at the 3 hour mark but I’m guessing letting it sit that long may have over proofed the dough. I’ll try baking it at the 1 hour mark irregardless of whether it rose sufficiently next time. Thanks
Let us know how it turns out Yu-Jin. I think that 3 hours was definitely too long. If your kitchen is on the cool side, putting it in a warm spot will help with the rise time as well.
There was some oven spring in the loaf but didn’t quite reach the top of the pullman loaf pan. Still somewhat puzzled as to why.
It looks really good, Yu-Jin. Is your yeast fairly new? Sometimes that can impact how much rise you get.
Thank you Angie. Yes the yeast is fairly new, bought a pack last week
You’re welcome, Yu-Jin. Keep working with it, if you’d like. It sounds like you’re doing everything right and it often takes a few iterations to perfect a bread recipe.
I simply turned one bread pan upside down onto the other, using foil to hold the two together. Works nicely.
Good suggestion, Misti. Thank you!