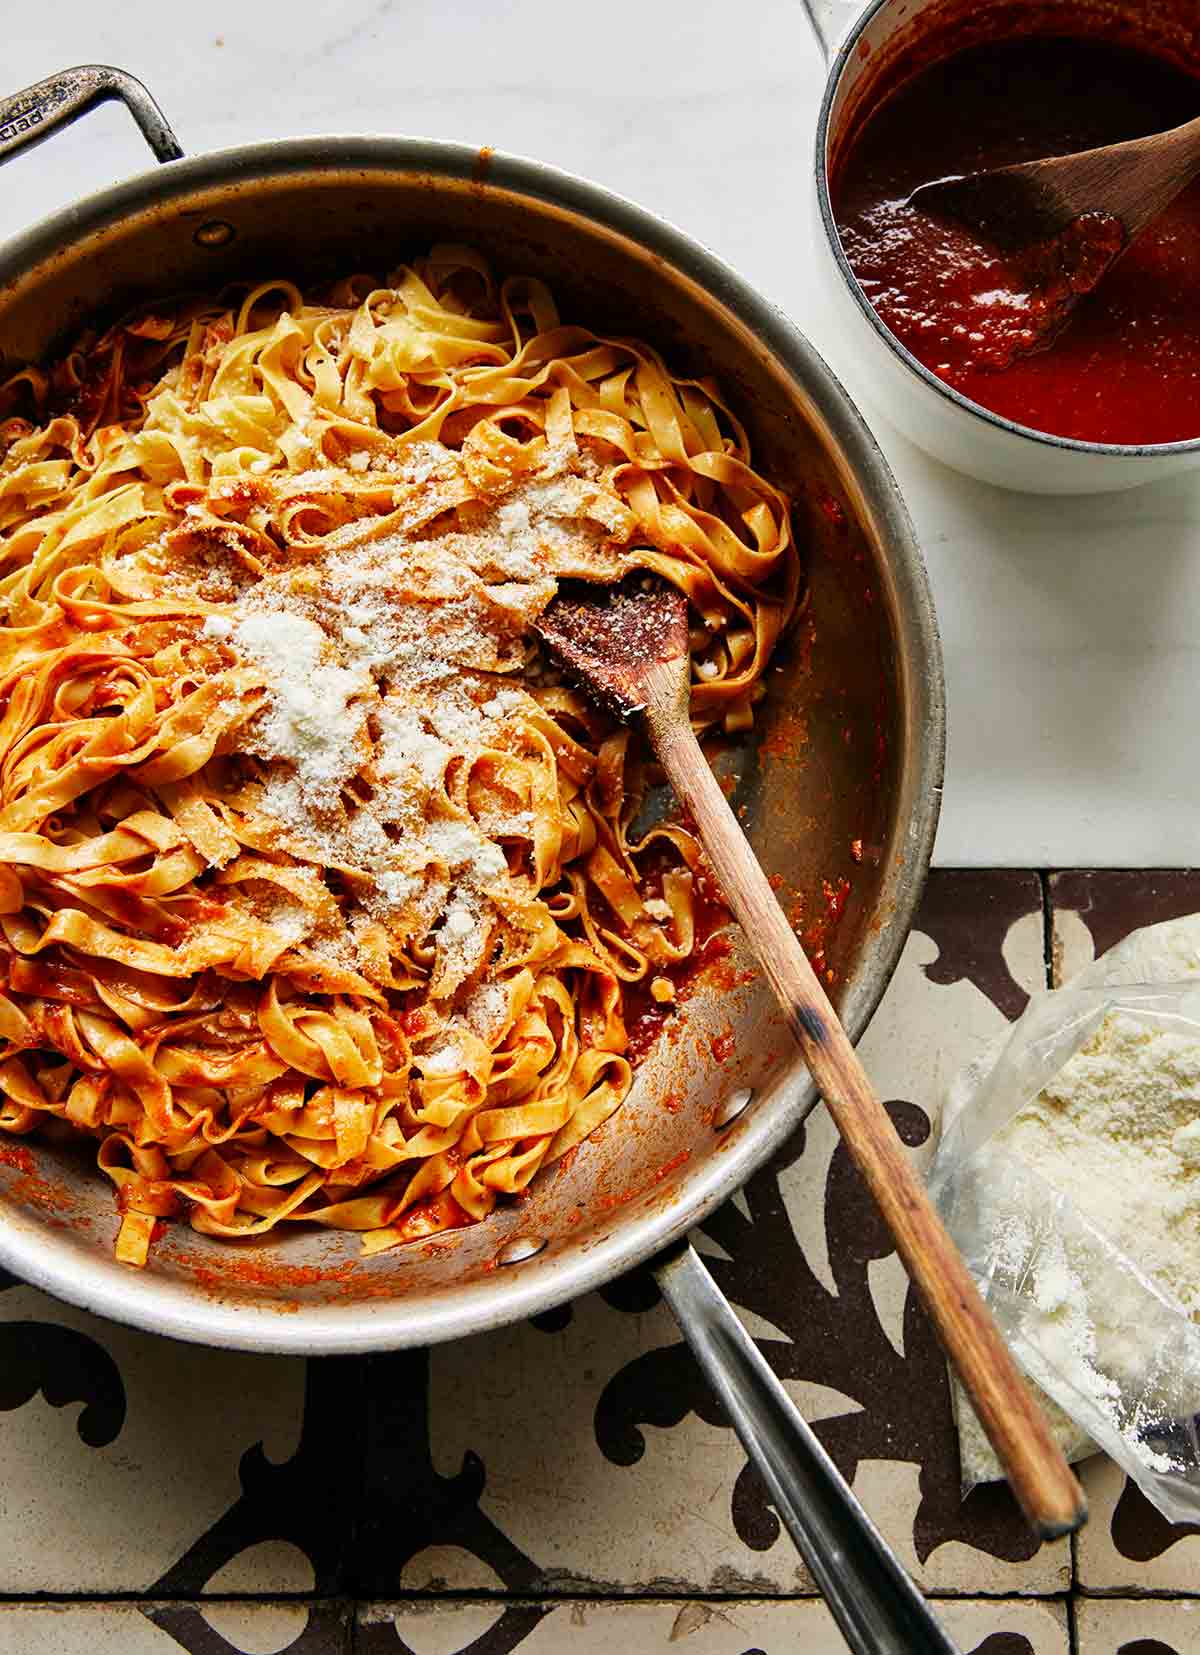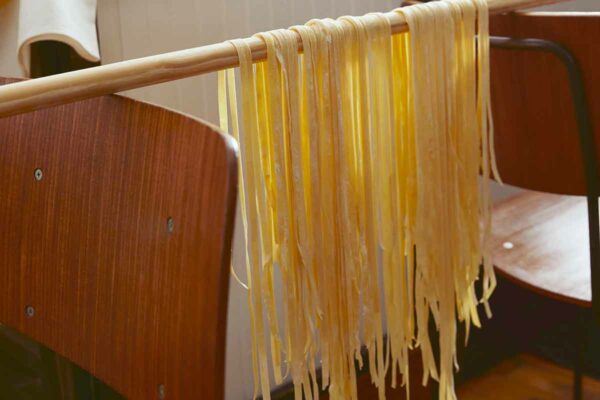
As the youngest kid in my family, I’d often be sent next door to my grandmother Rosie Bova to help her make the homemades (really, she was just babysitting me). “Homemades” is slang for homemade pasta. Specifically, the shape of homemades most closely resembles tagliatelle, from the Italian verb tagliare, “to cut.” My grandmother and I would mix, roll, and cut the homemades on a pasta maker. Then she’d leave them to dry by draping the fresh homemades over a broomstick held up between two chairs in the dining room. They would be served with her Sunday gravy and finished with freshly grated pecorino cheese.
When I was a small boy, we would head over, hand in hand, to Di Bruno Bros. on Ninth Street, and I’d delight in watching them freshly grate the hard cheese on an old cheese grater. Emilio (“Mimi”) would give it to us in a plastic bag with a tie on it. And my grandmother would inevitably haggle for the price (while I’d be stealing olives from a barrel near the counter). I remember feeling very special to be singled out to help her. I know now that it was probably one way for my parents to get me out from underfoot on a busy Sunday, but the whole process of making something from scratch left an indelible mark on my spirit; a sense of confidence and pride emerged from within, which meant a lot more than someone telling me that I did a good job. Excuse me while I wipe my eyes.–Joey Campanaro
CAN I MAKE HOMEMADE TAGLIATELLE AHEAD OF TIME?
Make the tagliatelle as directed and allow them to dry for 30 minutes. Once dry, space them apart in little nests on a parchment paper–lined baking sheet. Cover the baking sheet with plastic wrap and place it in your freezer for 3 hours. Once they’re frozen, transfer the hardened nests of homemades to a couple of freezer bags, wrap the bags in aluminum foil, write the date on them with a Sharpie, and return the bags to the freezer where they can stay for up to 2 months.
To cook the frozen tagliatelle, carefully drop the frozen nests in boiling water, one at a time. Give them a gentle stir so that they unfurl. Cook until they float to the top and are al dente when tested, about 4 minutes.
Want to save this?

Homemade Tagliatelle
Ingredients
- Semolina flour (optional)
- 3 cups all-purpose flour, plus more for flouring
- 1 tablespoon kosher salt
- 12 large egg yolks, freeze or reserve the whites for an egg wash, omelet, or meringue
- Fine sea salt
- Warm store-bought or homemade tomato sauce, for serving
- 1/2 cup finely grated pecorino cheese
Instructions
- Space two tall dining room or kitchen chairs with their backs facing each other about 3 feet (91 cm) apart. Lay a broomstick across the tops of the chairs. Drape several clean kitchen towels over the broomstick to completely cover it. If you happen to have a pasta hanging rack, there's no need to rearrange your furniture. Alternatively, you can prepare a baking sheet by dusting it with semolina flour and setting it aside for your pasta to dry.
- In the bowl of a stand mixer fitted with the dough hook attachment, add the flour, salt, and egg yolks and mix on low speed so the flour doesn’t fly in your face, about 20 seconds.
- Increase the speed to medium, mix until incorporated and you see the mixture come together into a dough ball that wraps around the hook, 1 to 3 minutes.
- Increase the speed to high and continue mixing the dough, an additional 30 seconds. Pause your mixing. The dough may have a bit of crumbly texture, so put your hands in there and give it few squeezes, pulling any sticky dough off the dough hook to incorporate it.
- Return to mixing, at high speed, about 1 minute. Now here’s a fun trick to pull it all together: At the 1-minute mark, add 1 tablespoon of water to the dough and continue mixing, watching it all come together into a very fine-looking dough ball, about 30 seconds. If the dough doesn’t come together, continue adding water, 1 tablespoon at a time until it does. It may take as much as 6 tablespoons water, depending on your dough.
- Dump the dough onto a lightly floured work surface and, using your fingertips, flatten the dough out into a slightly uniform oblong shape before you begin kneading. To knead, use a pull, push, and turn motion. Begin by pulling the top half of the dough toward you, then use the heel of your hands to push the dough away, repeating this motion, turning the dough each time you do so, about 1 minute. You’ll achieve a golden-yellow dough ball with a very firm texture.
- Wrap the dough in plastic wrap and refrigerate for 20 minutes.
- Meanwhile, attach your pasta maker to your kitchen counter or work surface and set the knob so the rollers are at their widest setting. Divide the rested dough into quarters. Working with one quarter at a time, pass the dough through the setting three times, folding the dough in half with each pass. Once you hear a pop in your dough, that means you’re doing it right!
- It's important to keep the dough well-floured as you pass it through the pasta rollers, adjusting the roller and working your way from the widest setting to the narrowest setting, passing the dough through twice on each setting. The dough will elongate and become a silky and thin—but not transparent—sheet of pasta. Cut the elongated pasta sheet into thirds.
- To cut grandmother-style homemade tagliatelle, set your pasta maker’s crank on the tagliatelle or fettuccine setting (or if you have an attachment, use that) and pass each piece of dough through once, carefully grabbing your homemade tagliatelle as they come out the other side. Drape them over the broomstick, or on your pasta rack, spacing them out so they don’t overlap until ready to cook. Or place them on the prepared baking sheet, wrapping them in your hand so that they fall into a little nest. Repeat the process with the rest of the dough.
- Bring a large pot of generously salted water (using fine sea salt) to a boil.
- Meanwhile, in a large shallow serving bowl, ladle a generous scoop of warm tomato sauce. Once the water comes to a boil, add the homemade tagliatelle to the pot. Cook until they float to the top and are al dente, 1 1/2 to 2 minutes.
- Using tongs, immediately move the pasta to the serving bowl (carrying a bit of the pasta water with you— that’s OK!). Gently swirl and mingle the pasta in the bowl with the sauce so that they are covered. Add more sauce if you like things extra saucy. Divvy the homemade tagilatelle between individual serving plates and top with freshly grated pecorino.

Explore More with AI
Nutrition
Nutrition information is automatically calculated, so should only be used as an approximation.
Recipe Testers’ Reviews
Making homemade pasta is always a rewarding experience and this recipe for homemade tagliatelle doesn’t disappoint. The richness of the dough enhanced by a dozen egg yolks allows you to create a pasta that perfectly pairs with a Sunday gravy replete with meats of your choosing whether it be meatballs, Italian sausage, beef braciola, pork spareribs, or all of the above. To make the dish even easier and less time-consuming, a simple marinara sauce would work equally well with this pasta. To do justice to all your hard work in making the pasta, just be sure to use high-quality canned tomatoes, such as D.O.P San Marzano tomatoes.
I used my KitchenAid pasta roller to thin and elongate the dough. The dough is exceptionally easy to work with as long as you keep a bit of flour on the rollers as you pass the dough through whether you are using a manual or electric pasta roller. I try to minimize the amount of flour used to keep the dough as tender as possible, so it’s a bit of a balancing act to use enough flour to allow the dough to run through easily, but not so much to make the dough tough.
For cutting the dough into strips I used a chitarra which is literally a guitar-like instrument that slices the dough into perfectly even strands. I chose the wider side of the chitarra which cut the dough about the width of fettuccine.
To hold and dry the dough before cooking, I used a pasta drying rack rather than the traditional broomstick method. The recipe made 1 1/2 pounds of dough so you can serve quite a few people—5 to 6 as a main course and more as a primo piatto.
This came together quite easily even for a beginner like myself. The richness from the egg yolks and the silky-smooth texture of the dough made it quite easy to work with. Although the semolina flour was optional, I highly recommend it. It added a wonderful added texture besides preventing everything from sticking. I served the homemade tagliatelle with a generous helping of traditional bolognese sauce and some freshly grated Parmigiana-Reggiano. I’ll no longer be intimidated by making pasta dough. If you’ve tried and failed in the past, forget it. Try this.
I really enjoyed this homemade tagliatelle pasta. It was delicious, delicate, and light. I decided to make a Sunday gravy to accompany my pasta. In hindsight, I wish I would have gone with a simple tomato sauce as the Sunday gravy was too heavy of a sauce for this pasta. I think a buttery white wine sauce would complement this pasta as well. Making homemade pasta is a little time-consuming but it is well worth the effort.


