


Want to save this?
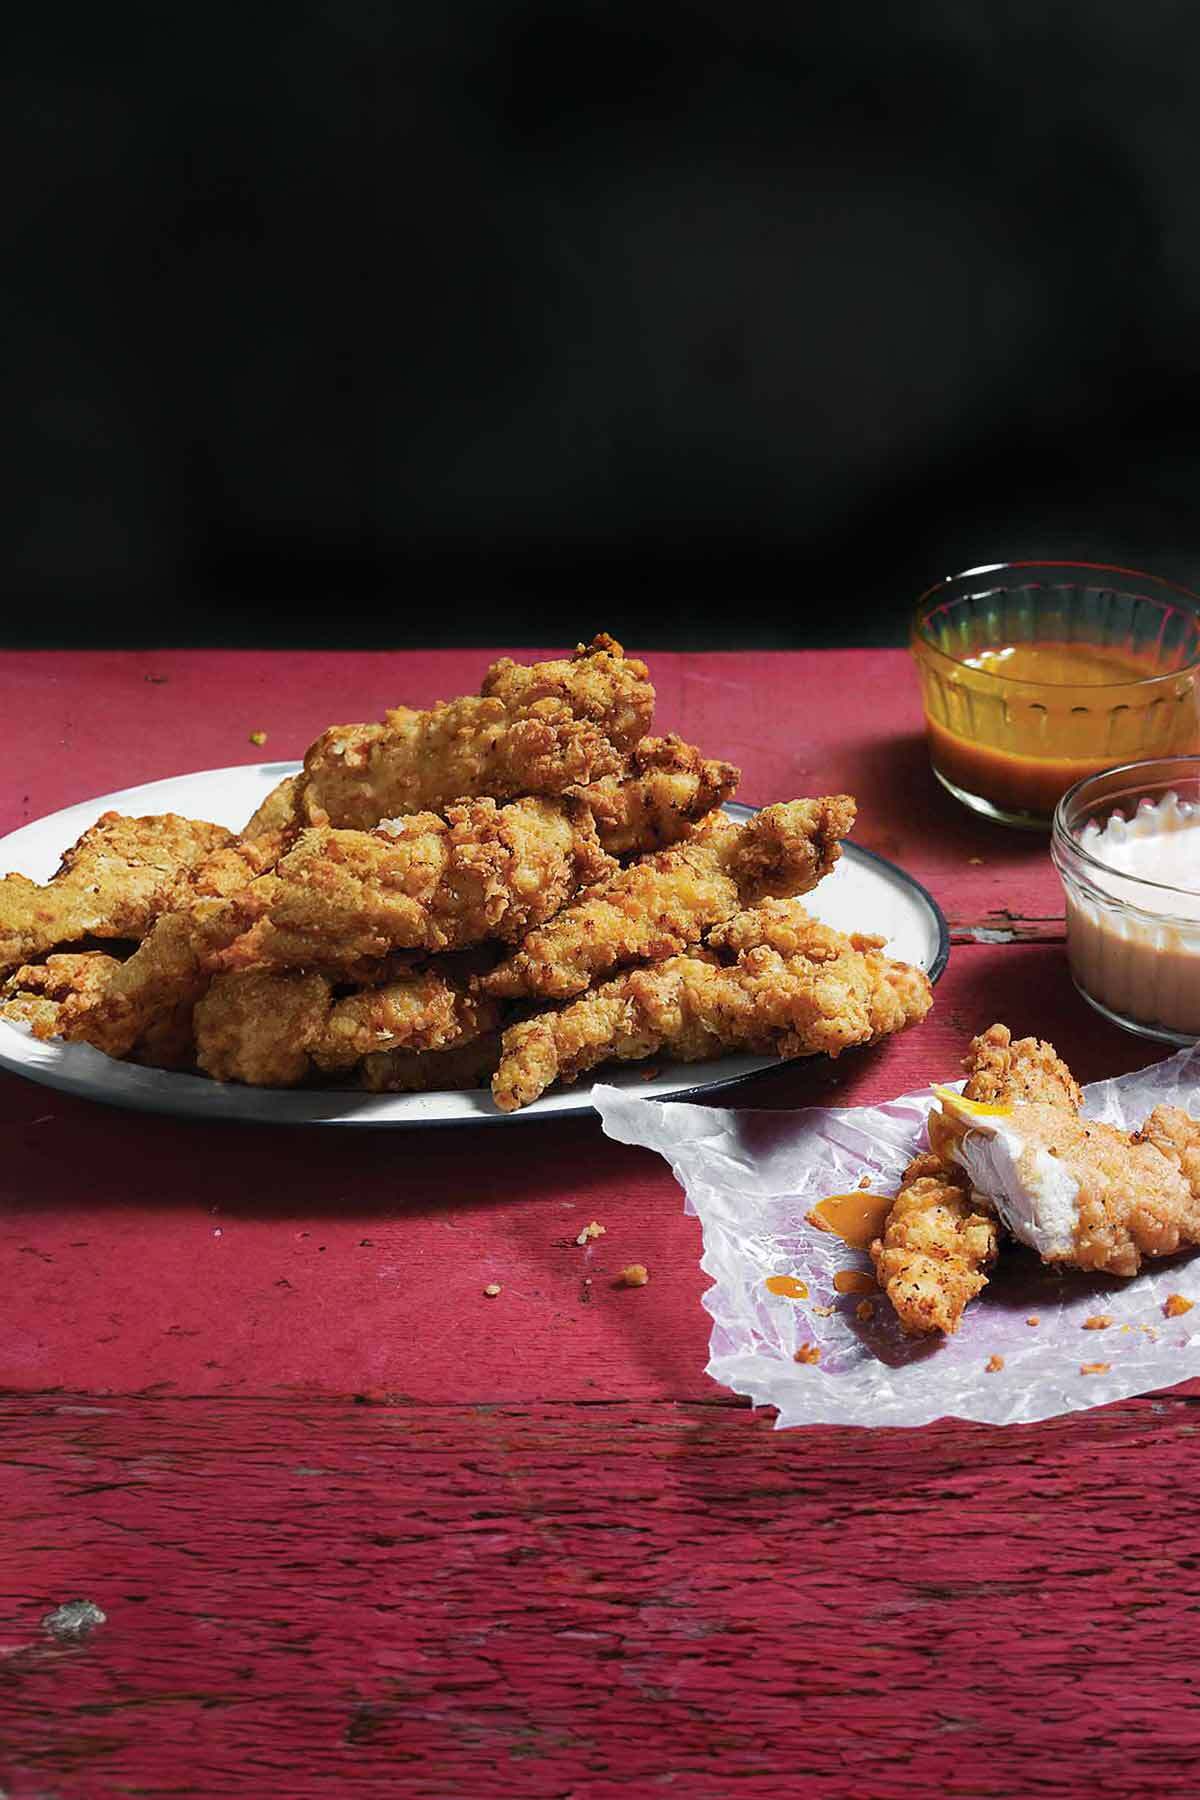
The creator of this homemade chicken fingers recipe, a mom, found herself wincing at the ingredients list on many a package of processed chicken strips before coming up with these. And everyone is happier because she did—including every mom and kid we know who’ve tried these based on the comments we’re hearing like, “This is my new go-to chicken recipe, thanks in part to my kids’ ‘These are yummy!’ statements.” and “Crisp and not at all greasy.” “I ate one cold the next day, and it wasn’t even soggy.” Sorta makes you want to try them, yeah?
Your Chicken Fingers Questions Answered
Kind of like a beef or pork tenderloin, chicken tenders are the little strip of meat that you’ll sometimes find still attached to the underside of a breast. Sometimes, you’ll find them sold as “stir-fry strips”. You can also remove them anytime you have boneless breasts and freeze them until you have enough for a chicken finger feast.
Believe it or not, we know the exact time and place the chicken finger was born: 1974 at The Puritan Backroom restaurant in Manchester, New Hampshire. The restaurant was looking for a clever way to use the pectoralis minor, or tenderloin—the small, lean strip of meat attached to the underside of a chicken breast. By separating it, frying it, and serving it as a “finger,” they created a culinary icon.
The idea was a smash hit. As Americans looked for convenient, kid-friendly meals in the 1980s and ’90s, major poultry companies like Tyson and Perdue began marketing chicken tenders nationally.
They’re often confused with chicken nuggets, but there’s a major difference: a true chicken finger or tender is a whole, intact piece of chicken meat, whereas nuggets are typically made from ground chicken that has been shaped and formed. Mystery meat, anyone?
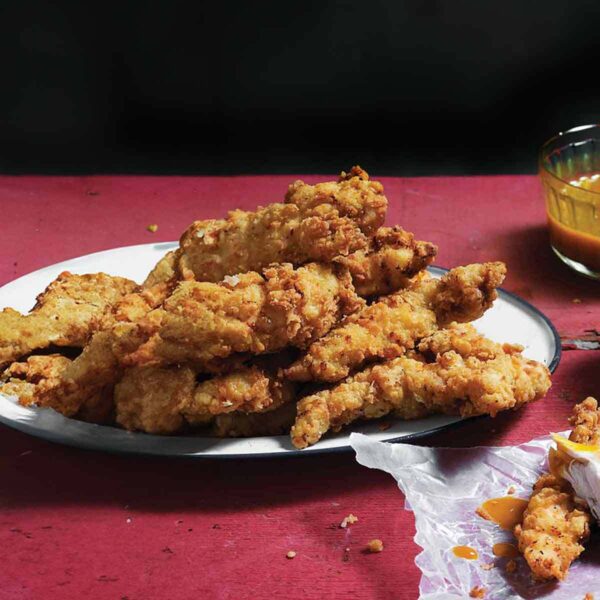
Homemade Chicken Strips
Equipment
- Deep-fry or candy or instant-read thermometer
Ingredients
- Olive oil, for frying
- 2 cups all-purpose flour
- 1/2 cup unseasoned dry bread crumbs
- 2 teaspoons sea salt
- 1/2 teaspoon freshly ground black pepper
- 2 cups buttermilk, (either low-fat or full-fat)
- 1 3/4 pounds chicken tenders, (about 18 tenders) or chicken breast meat cut into slender strips
- ketchup, (optional)
- Barbecue Sauce, (optional)
Instructions
- Pour enough olive oil into a large heavy skillet to reach a depth of 1/2 inch. Place over medium heat until the oil registers 325°F (163°C) on a deep-fry or candy thermometer. Place a wire rack over a rimmed baking sheet and place it alongside the stove.
- Meanwhile, in a shallow bowl, whisk together the flour, bread crumbs, salt, and pepper. Pour the buttermilk into a separate shallow bowl.
- Pat the chicken dry with paper towels. Working with half the strips at a time, dip them first in the buttermilk, allowing any excess to drip off, and then dredge them in the flour mixture, turning to coat all sides. (You want to stir the flour mixture often in between strips to keep the bread crumbs from settling to the bottom of the bowl.)
- Carefully place a few chicken strips in the hot oil and cook, turning often, until the coating is golden brown, the juices run clear, and the chicken is cooked through, 6 to 10 minutes. It may be necessary to adjust the heat during frying to maintain an oil temperature of between 315°F to 325°F (157°C to 163°C). Be certain to return the temperature to 325°F (163°C) in between batches. Place the cooked strips on the wire rack. Repeat with the remaining ingredients.
- Serve the chicken strips with ketchup or barbecue sauce, if desired, on the side for dipping.
Notes
Homemade Chicken Strips Variation
Even Healthier Homemade Chicken Strips To sneak a little more nutrition into these homemade chicken strips, you can replace the all-purpose flour and bread crumbs with 1 cup all-purpose flour, 1 cup whole-wheat flour, and 3 tablespoons ground flaxseeds.
Explore More with AI
Nutrition
Nutrition information is automatically calculated, so should only be used as an approximation.
Recipe Testers’ Reviews
Did you know only 68% of the recipes we test make it onto the site? This recipe survived our rigorous blind testing process by multiple home cooks. It earned the Leite’s Culinaria stamp of approval—and the testers’ reviews below prove it.
This is my new go-to chicken strips recipe, thanks in part to my kids’ “these are yummy” statements. Fast and easy input, very tasty and tender output. It took less than 5 minutes to pull together all the ingredients, but because the chicken was cooked in batches, the full cooking time was 15 minutes. About 6 minutes was sufficient time to cook each batch.
I’ll admit that when my kids were little (more than 20 years ago) and my husband and I were going out on a Saturday night, I reached for Perdue chicken nuggets for their dinner. If I had this recipe then, I would have been (nutritionally-speaking) a much better mother. These chicken strips are delicious, and they’re a breeze to prepare. I used prepared chicken tenders, and I followed the basic recipe. I was a little nervous about the olive oil for frying since I only had extra-virgin, but the oil didn’t burn. To be honest, I didn’t take the temperature of the oil. I just let it heat up until it was shimmering, and then put in the chicken. The cooking time was 8 to 10 minutes. The strips were crisp and not at all greasy. I ate one cold the next day, and it wasn’t even soggy.
These proved to be a good weeknight meal option. The batter was crisp and clung to the chicken well. Each piece took about 10 minutes to cook through and turn golden brown. The recipe did not state to salt the chicken while still hot out of the oil, but it should.


I made this recipe with a buttermilk substitute basically take 3/4 cup of sour cream and 1/2 cup of milk and it came out delicious and moist! Thanks for sharing this recipe ?
You’re welcome, Ace. Thanks for taking the time to comment.
I hesitated to make this recipe because the chicken is fried but a closer reading of the instructions — “a dept of half an inch”— convinced me I should try making it last night. Oh my goodness, am I glad I did!! The chicken tender turned out light, moist and unlike other recipes I’ve tried, not the least bit oily! It’s the perfect weeknight meal so easy to make & so delicious!! Serve these guys with different condiments — asian chili, bbq, sriracha-mayo sauce or simply ketchup. My husband said they taste great on their own! Am I using too many exclamation points?? Can’t help myself…thanks, Leites Culinaria for these grownup chicken fingers!!!
You’re welcome, Anne! Thank you so much for taking the time to share your experience. We’re so pleased that it was such a hit at your dinner table, and love love love the suggestions of possible dipping sauces!