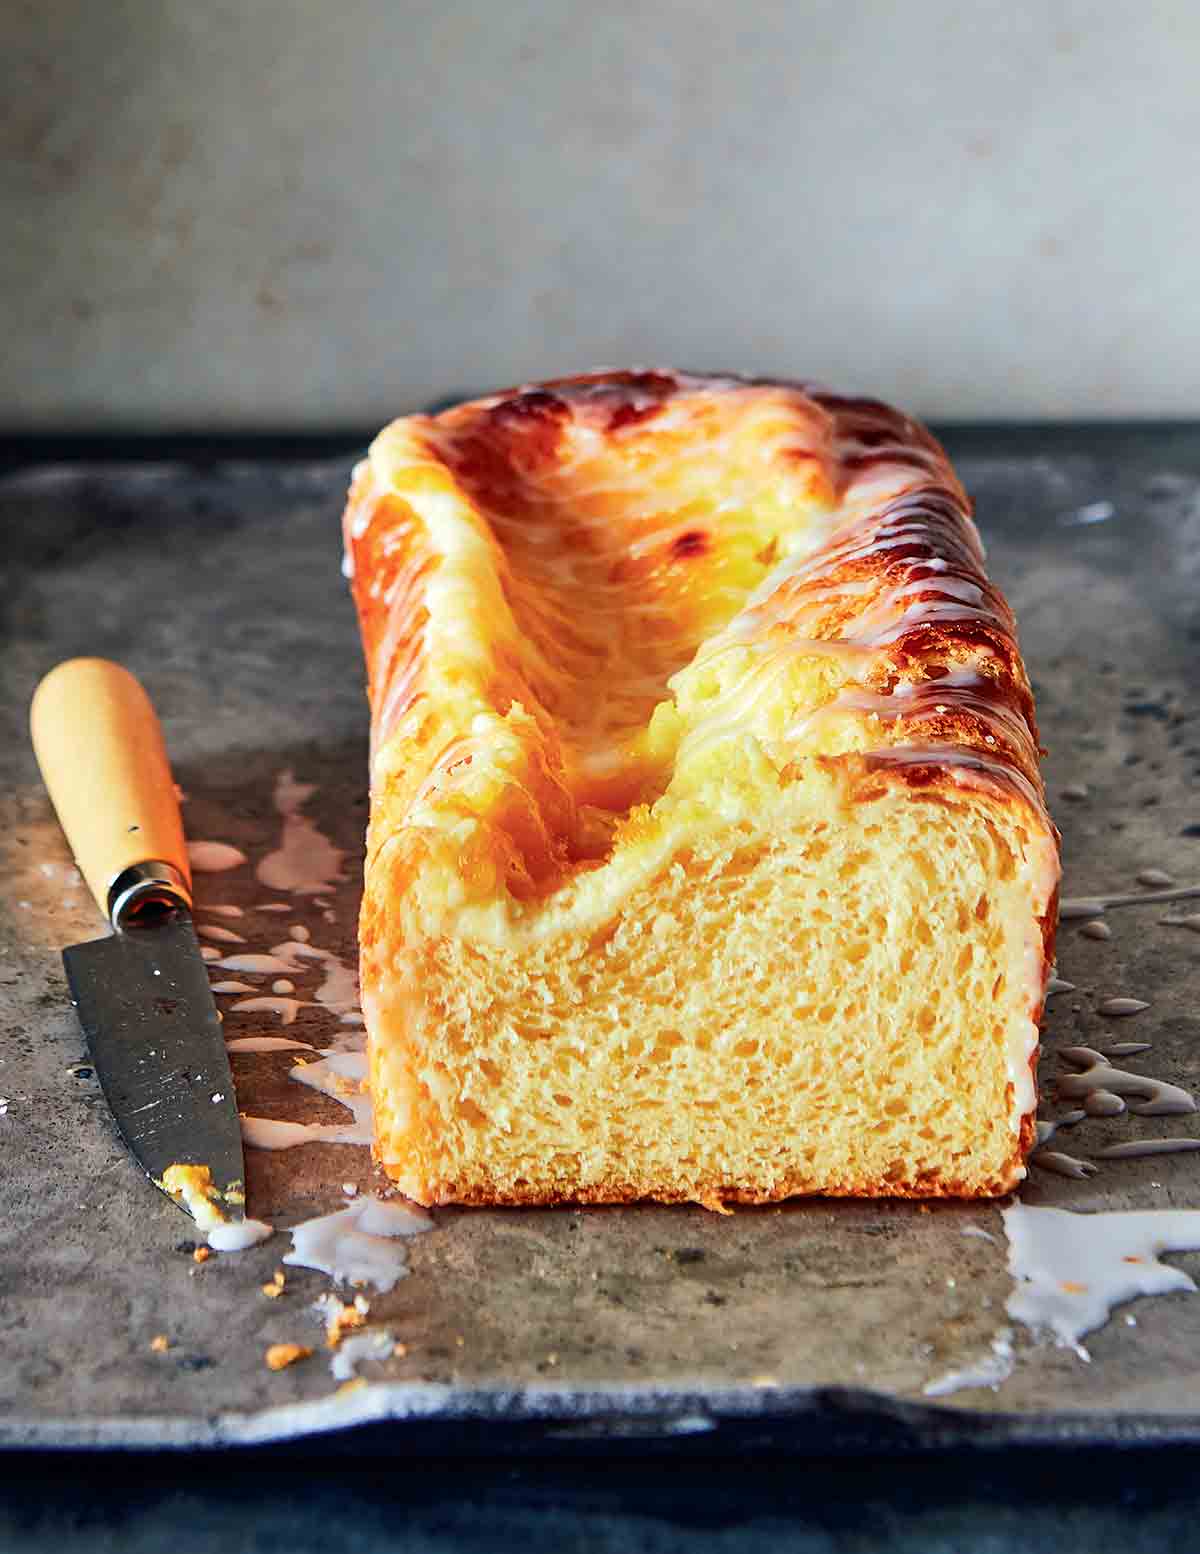
Less time-consuming to shape than traditional individual lemon cream cheese danish yet just as indulgent, these loaves are a touch more refined than the classic breakfast thanks to a subtle sweetness. You may be wondering, when you read the recipe, if you really NEED two loaves. You do. They make lovely gifts, although after devouring the first of these light, airy, buttery breads, you may banish any thoughts of parting with the second one.–Angie Zoobkoff
How do I store my cream cheese danish bread?
While we’re pretty sure you won’t actually have any leftovers—seriously, that first loaf will be devoured within an hour—you might want to store the second loaf. Let it cool, and then wrap it with foil or plastic wrap and tuck it in the fridge or, if you want to freeze it for later, place the wrapped loaf in a plastic bag before freezing.

Lemon Cream Cheese Danish Bread
Ingredients
For the dough
- 3/4 cup warm whole milk (110° to 115°F | 43° to 46°C)
- 1/4 cup granulated sugar
- One (1/4-ounce) package active dry yeast (2 1/4 teaspoons)
- 1 large egg, at room temperature
- 2 large egg yolks, at room temperature
- 3 cups all-purpose flour
- 3/4 teaspoon kosher salt
- 1 stick (4 oz) unsalted butter, at room temperature, plus more for the bowl and pans
For the cream cheese topping
- 8 ounces full-fat cream cheese, at room temperature
- 1/4 cup confectioners’ sugar
- 1 large egg, separated
- 1/2 teaspoon vanilla extract
- 1/2 cup store-bought or homemade lemon curd
For the glaze
- 3/4 cup confectioners’ sugar
- 2 to 4 teaspoons fresh lemon juice
Instructions
Prepare the dough
- In the bowl of a stand mixer, combine the milk, 1 tablespoon of the granulated sugar, and yeast, and let stand until foamy, about 5 minutes.
- With the dough hook on low speed, add in the egg, egg yolks, flour, salt, and the remaining 3 tablespoons sugar. Mix until a shaggy dough forms, 2 to 3 minutes.
- Add the butter pieces, a few at a time, and continue to mix until the butter is completely incorporated and the dough until smooth and pliable, about 7 minutes.
☞ TESTER TIP: If your dough is still sticky after mixing for 7 minutes, knead in a little extra flour, 1 tablespoon at a time, until the dough is smooth and pliable.
- Remove the dough from the bowl, butter the bowl, and return the dough to the bowl. Cover with plastic wrap and let stand at room temperature until double in size, 1 to 2 hours.
- Butter two 8 1/2-by-4 1/2-inch (22-by-11-cm) loaf pans and line with parchment paper, leaving a 2-inch (5-cm) overhang on 2 opposite sides.
- Turn the dough onto a work surface (you shouldn’t need any flour at this point) and then gently press to expel the air from it. Pat out the dough and divide in half.
- Pat each piece into an 8-inch (20-cm) square and roll it into a tight roll. Tuck each roll into a loaf pan, seam-side down. Press the dough into an even layer. Cover with plastic wrap and let stand until doubled in size, 1 1/2 to 2 hours.
- About 30 minutes before baking, preheat the oven to 375°F (191°C).
Make the cream cheese topping
- Meanwhile, in a medium bowl, combine the cream cheese, confectioners’ sugar, egg yolk, and vanilla, reserving the egg white for the next step. Divide the mixture between 2 resealable plastic bags. (This makes it easier to spread the mixture over the risen dough without deflating it.)
- Just before baking the loaves, carefully brush the some of the egg white on the top of each loaf.
☞ TESTER TIP: If your loaves are quite rounded on top after the second rise, gently press the tops to create a flat surface so the cream cheese and lemon curd don’t fall off.
- Snip 1 of the bottom corners from each of the bags of cream cheese mixture. Squeeze the mixture down the center of each loaf, leaving about a 1-inch (25-mm) bare border on each of the 2 long sides, then spread 1/4 cup of the lemon curd down the center of each loaf. It doesn’t need to cover the cream cheese mixture completely.
- Place the pans on a rimmed baking sheet and bake the loaves until puffed and set and the internal temperature has reached 185°F (85°C), 30 to 45 minutes. If the cream cheese mixture starts to brown around the edges, loosely cover the loaves with aluminum foil.
- Move the pans to wire racks to cool for at least 15 minutes. Using the parchment overhang as handles, lift the loaves out of the pans and let cool completely.
Prepare the glaze
- In a small bowl, whisk together the confectioners’ sugar and 2 teaspoons of the lemon juice. Add a little more juice, if necessary, to make a thick glaze.
Glaze the loaves
- Drizzle the glaze over each loaf. Slice and devour. Originally published February 29, 2020.

Explore More with AI
Nutrition
Nutrition information is automatically calculated, so should only be used as an approximation.
Recipe Testers’ Reviews
Did you know only 68% of the recipes we test make it onto the site? This recipe survived our rigorous blind testing process by multiple home cooks. It earned the Leite’s Culinaria stamp of approval—and the testers’ reviews below prove it.
The wonderful aroma of this lemon cream cheese Danish bread wafted through the house as it was baking. It was difficult to wait for it to cool to try it. So, we didn’t wait. Eaten warm, it’s soft, and delicious— perfect for brunch or afternoon tea. The next morning, I warmed a piece in the toaster oven for breakfast—delicious.
I then let the bread rise for 1 hour for the first rise and 90 minutes for the second rise. My loaves baked in 35 minutes. The inside was perfect and I didn’t need to cover the loaves while baking.There are approximately 10 slices per loaf.
This lemon cream cheese Danish bread was relatively easy to make and the flavor was great. It just took a little time. It tastes pretty much like a cheese danish but a little less sweet.
I used store-bought curd. I baked the loaves for 45 minutes and went ahead and covered them with foil for the second half of the baking time just to be safe.
The topping-to-bread ratio is a little low. I think with a loaf, it’s hard to get the topping on each bite. Maybe if you made it with the round cake pan or even a square one it would be better because there would be topping on each bite.
This recipe made 2 decent-size loaves. My topping ran to the edge and over the sides but was caught by the parchment.
The individual steps of this lemon cream cheese Danish bread were quick and easy and the final product was delicious. I sliced the loaves into 1-inch slices and drizzled with the glaze before setting them out at a party. The flavor was great and the texture of the loaf itself was really nice—light and airy, like brioche. The slices were devoured and people raved about it.
After rising, the dough was very easy to work with and divide into the 2 pans and it took 2 hours for it to double in size again in the pans. The loaves came easily out of the pans and didn’t stick at all.
I used a store-bought lemon curd versus making my own. The lemon cream-cheese topping tasted great but looked like overcooked scrambled egg. The directions cautioned that it may brown too quickly but mine didn’t really brown at all, which resulted in a not super appetizing top over a beautiful brioche like loaf. The exposed edges were perfectly golden brown and shiny from the egg white.
There were 16 slices from each loaf that would have worked equally well as an after-dinner treat, with a cup of tea in the afternoon, or as part of a brunch spread
I will definitely make this again and continue to play with the filling because it all tasted great. I just wish it looked a little prettier. Is there a way to make the topping more of a filling? Maybe spread it on the dough before rolling for the second proof? I might try that!


My brother and sister-in-law are coming out, and I would like to know if I can make topin a 13-x-9 pan and pour the topping ingredients on top so there is more filling. Thank you for all your great recipes.
phyllis, thanks for writing. I’m sorry, but I don’t understand your comment. There’s no filling in this bread. Can you be a little more specific so I can help? Thanks!
I wondered if you can spread the dough in the pan and then spread the filling on top so you have more of a danish pastry. The dough would be thinner and the filling would be all over the top of the dough. In grocery stores they have danish pastry in aluminum pans that the dough is about an inch thick.
Phyllis, it’s possible, but it’s changing the recipe so much that I can’t hazard a guess without testing it. If you looking for a Danish pastry, I’s suggest take a gander at this cheese Danish.
Sounds like a delicious recipe but wondering if you think it might work if rolled like a babka with the filling inside as the topping seemed to be an issue. Might give it a try both ways with the 2 loaves in the recipe. Could sprinkle a little lemony streusel on top?? Thx!
It sounds like a very promising solution, Stephanie. We didn’t try it this way, so I can’t say if it will actually work. if you try it, do let us know how they compare. Love the streusel suggestion!
I wish you published your recipes in metric weights as well as volume. Not all of us use volume anymore, as metric is more accurate, and scales are readily available, even at local grocery stores.
Catherine, we do! If you toggle the US/METRIC button at the top of the ingredients list, you’ll see all metric.