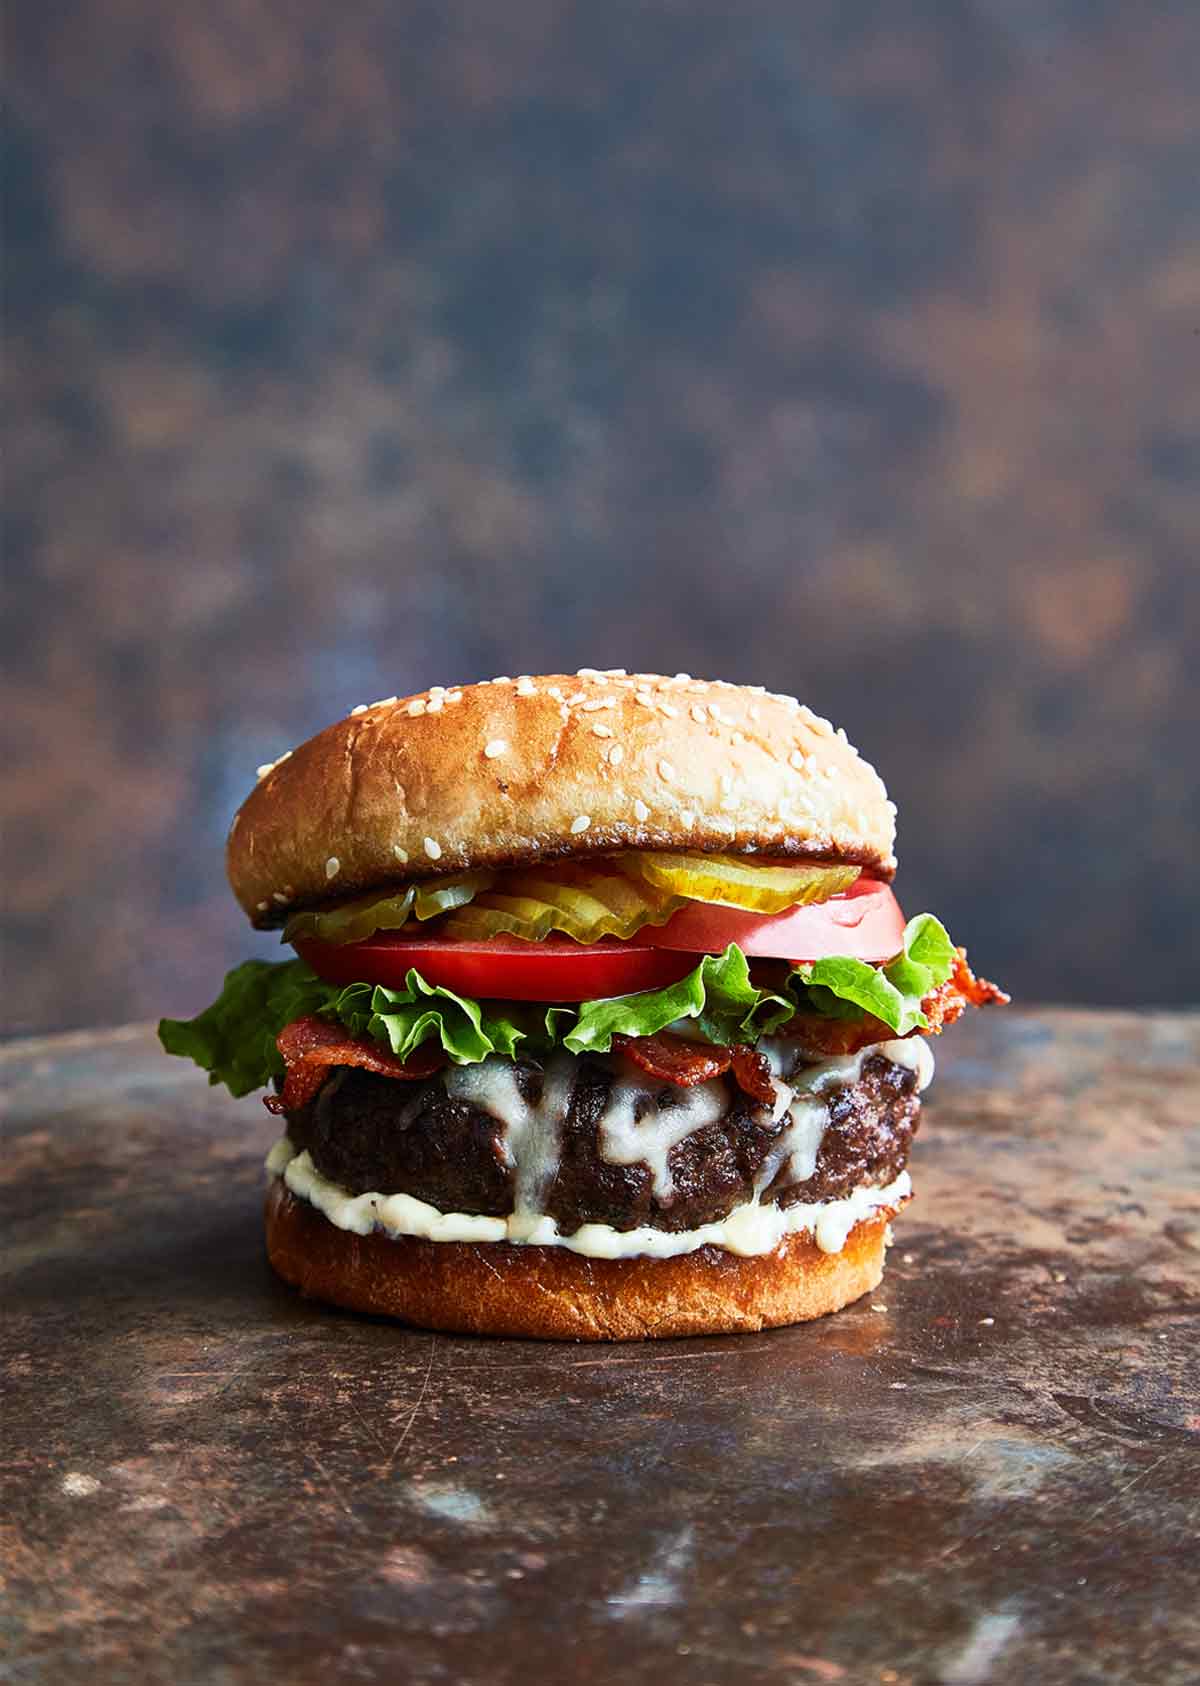
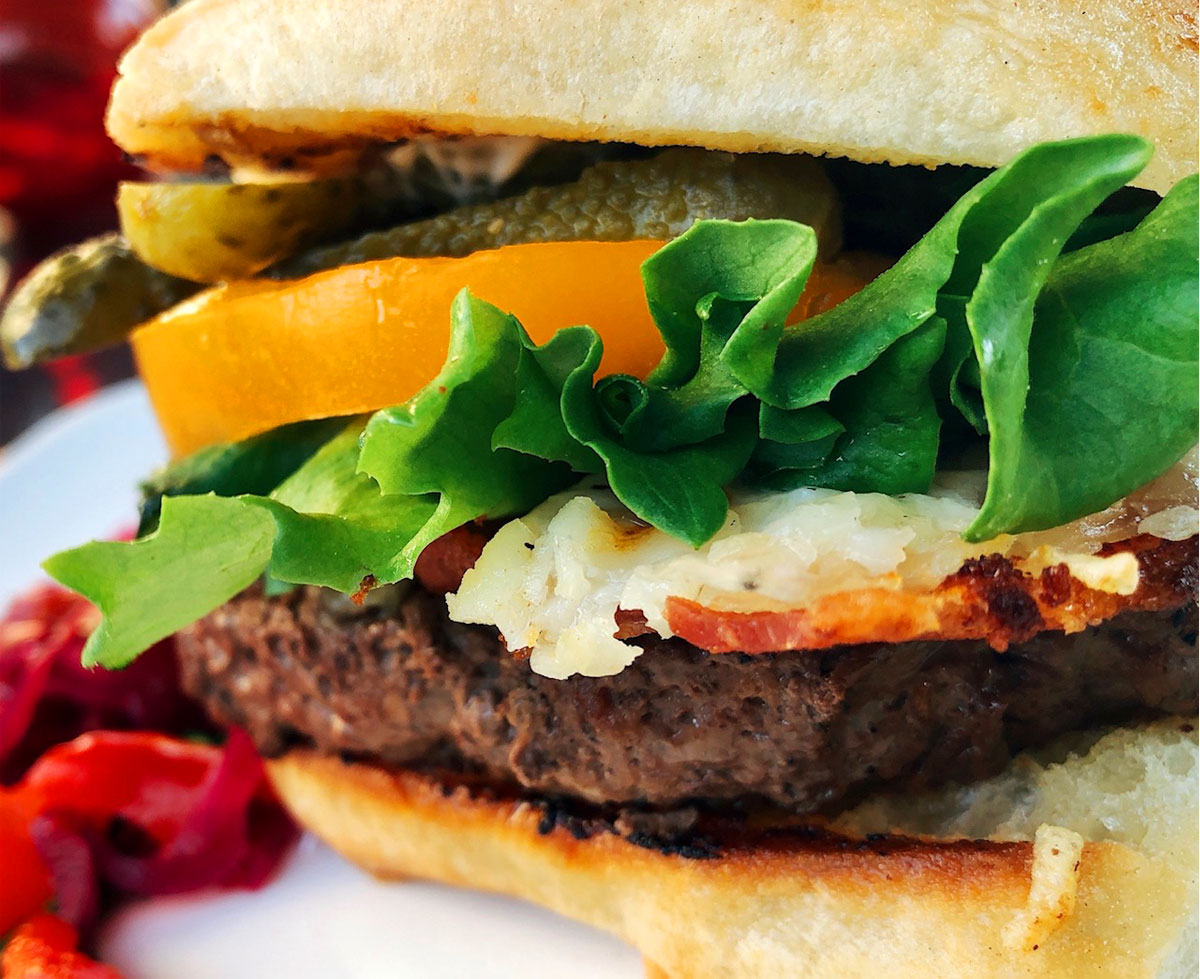
This bacon Swiss burger from Nashville chef Matt Moore delivers that satisfying sizzle as the burgers meet heat and achieves that elusive crisped crust while maintaining an astoundingly juicy interior—thanks to the use of a cast-iron skillet and an ever-so-gentle smash of the burger. Your burger is then smothered with bacon, Swiss cheese, and all the other fixings we know you consider requisite. And you can even make it on the grill, which means no heating up the kitchen come summer.
Notes on ingredients
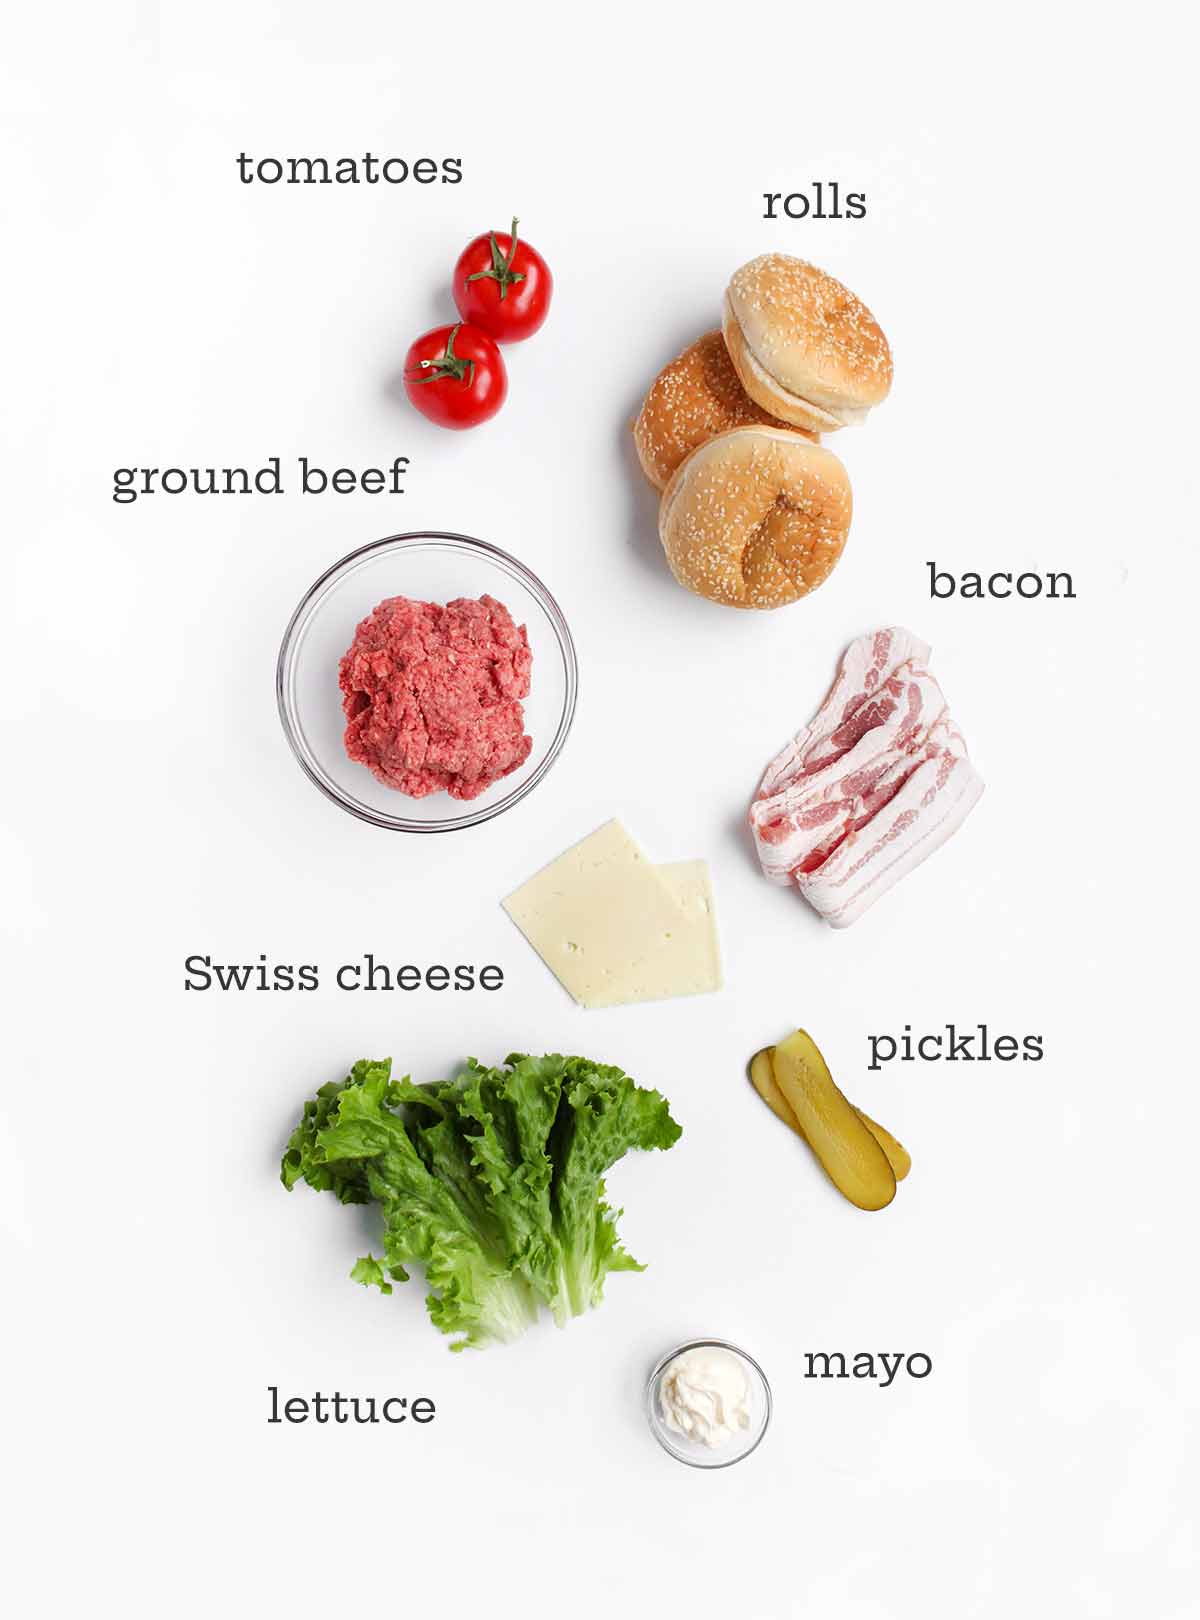
- Ground beef—For the juiciest burger, use 80/20 ground beef.
- Bacon—Feel free to use thick or thin bacon, depending on your preference.
- Cheese—Swiss cheese adds great flavor to these juicy burgers, but feel free to use whatever sliced cheese you have on hand, or shred your own combination.

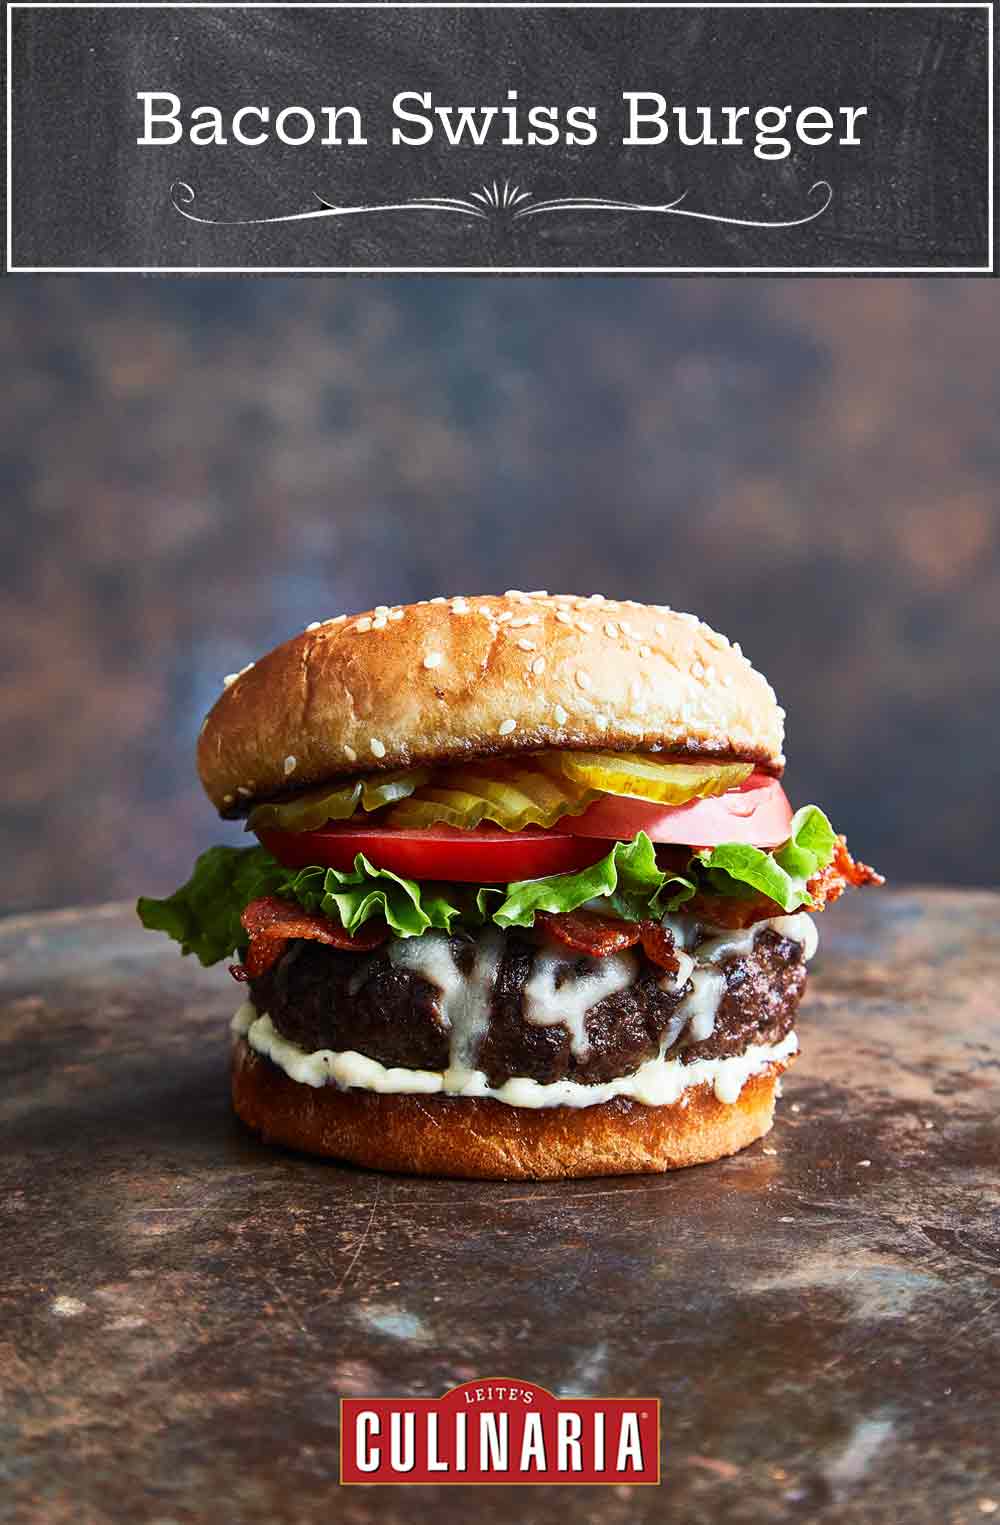
Bacon Swiss Burger
Video
Ingredients
For the burgers
- 2 pounds 80/20 lean ground beef
- Kosher salt and freshly ground black pepper
- 12 strips bacon, cooked crisp
- 6 slices Swiss or American cheese (or you can use a shredded cheese blend)
- 6 store-bought or homemade hamburger buns
For the toppings
- mayonnaise
- Leaf lettuce
- Tomato slices
- Dill pickle slices
Instructions
Make the burgers
- If using a charcoal grill, open the bottom vent of a charcoal grill completely. Light a charcoal chimney starter filled with charcoal. When the coals are covered with gray ash, pour them onto the bottom grate of the grill. Adjust the vents as needed to maintain an internal temperature of 400°F (204°C).If using a gas grill, preheat to medium-high (400°F | 204°C).
☞ TESTER TIP: If you don't have access to a grill, or the weather isn't cooperating, these burgers can easily be made on the stovetop using a cast-iron grill over medium-high heat.
- While the grill is heating, loosely form the beef into six 1/3-pound (151 g) patties, about 1-inch (25-mm) thick. Season each patty with salt and pepper.
- Once the grill reaches 400°F (204°C), place a large, seasoned cast-iron skillet on the grill grate over direct heat and let the skillet heat for 2 minutes.
☞ TESTER TIP: If your grill is large enough, cook all the burgers at once using 2 skillets or a cast-iron flat top griddle placed directly on the grill.
- Add 3 of the patties to the skillet and gently smash each once with a spatula. You should hear a sizzle. Cook undisturbed and uncovered, until they develop a sear, 3 to 3 1/2 minutes, depending on how well done you like your burgers.
- Flip the patties, and cook to the desired doneness, 2 to 3 1/2 minutes for medium-rare.
- Divvy half of the bacon and cheese among the patties, cover the grill, and cook just until the cheese has melted, 30 to 45 seconds. Transfer the patties to a plate and keep warm while repeating with the second batch.
- If desired, add the buns to the hot skillet, cut-sides down, working in batches again, and toast in the pan drippings until lightly browned, about 1 minute.
Assemble the burgers with your toppings
- Generously spread some of the mayonnaise on the cut sides of each toasted bun, add the burgers, and top with your desired toppings. Sandwich ’em up and serve immediately.
Explore More with AI
Nutrition
Nutrition information is automatically calculated, so should only be used as an approximation.
Recipe Testers’ Reviews
Did you know only 68% of the recipes we test make it onto the site? This recipe survived our rigorous blind testing process by multiple home cooks. It earned the Leite’s Culinaria stamp of approval—and the testers’ reviews below prove it.
This cast iron skillet technique results in THE juiciest burgers!
I used my bacon press for frying the bacon and then again to smash the burgers in the skillet. You will hear a welcome sizzle as the burgers hit the pan. Next time I’ll definitely season the meat not just with some salt and pepper but garlic powder and maybe a little Worcestershire sauce.
Followed the recipe exactly, cooking 3 1/2 minutes on one side, flipping for another 3 1/2 minutes, and then adding the cheese. I used Swiss cheese slices as I had those on hand. Garnished with tomato, pickle, ketchup, and mustard. erved with sweet potato fries and Brie mac and cheese. Such a quick and easy recipe with restaurant-quality results!
Doesn’t take much—just a photograph of a juicy looking burger layered with classic toppings like crisp bacon and melted cheese to lure us. Funny how burger-making techniques come into and go out of fashion. Move out grilling—move in cast-iron cooking. I had read about this patty “smashing” and was excited to give it a try. I enjoyed this burger immensely.
The recipe calls for squishing your beef patty on a preheated cast iron pan. I have about 5 cast iron pans of various sizes but this time I was excited to use my latest purchase—a steel griddle on one side, pizza steel on the other. You can use it in the oven, on the stovetop, and also on top of the grate inside your grill. Tonight I smashed our 1-inch beef patties for the trademark sizzle and sear and was very pleased with the crispy brown crust. The technique worked like a charm. The juices and rendered fat remained on the griddle instead of dripping down through the grates, bathing and intensifying the beef flavor.
We layered each patty with bacon and then melted American cheese on top. We toasted our sesame seed buns face down in the cheese and beef juices. The beef and the toppings were proportionate and complementary, a nice change from the thicker, more dense patties I typically grill. The most time-consuming piece of the recipe was frying the bacon and thawing our frozen 2 pounds of beef. The grill/griddle together took about 15 minutes to preheat to 400°F. Each patty sizzled as described when I applied a moderate amount of pressure with a long metal grilling spatula. Just 3 1/2 minutes for the first side was the perfect amount of time to achieve an even brown sear. The following side, I cooked for 3 minutes—probably 1 minute too long since we all prefer medium-rare. My family enjoyed their bacon cheese burgers and toppings—thinly sliced red onion, thinly sliced tomato, and chopped romaine. My husband prefers a thicker, more traditionally grilled burger while my kids and I devoured these smashed burgers.
My fellow taste tester and I really, really, really, enjoyed these burgers. I cooked my burgers to medium doneness and they were so very juicy.
My burgers were seasoned with powdered Worcestershire, onion powder, garlic powder, salt, and pepper. I gave them each a gentle smash right after placing them into the skillet. At this point you leave the lid open. It took the burgers about 6 minutes on the first side. I turned up the burners after flipping and the second side cooked in 3 1/2 minutes. I placed the cheese slices (one slice of Swiss and one slice of American) on top of the burgers and closed the lid for 1 minute until the cheese had melted.
After removing the burgers, I then toasted the hamburger buns in the cast iron skillet for that added little extra oomph. The burgers were dressed with mayonnaise, lettuce, tomato, pickles, and BACON!!!! Just when you think something won’t get any better, you add a couple of slices of bacon and you have a flavor explosion! I used 2 slices of applewood smoked bacon on each burger. I made my own buns using the Burger Buns recipe on the Leite’s Culinaria site. If you have a little extra time, they are totally worth the effort.
These burgers are so good and very filling so you won’t need a lot to serve with them. We had grilled yellow squash and potato chips with ours. Delicious!!!!
One last note, when first reading this recipe, I wondered why you would do this on the grill instead of just doing it on the stovetop? The biggest advantage for me was the lack of grease splattering all over my stovetop. I can’t really say that cooking the burgers on a gas grill in a cast iron skillet added any smokiness. If it did, I didn’t notice it. But I was able to cook my entire meal on the grill and enjoy being outside while cooking dinner. I love summertime and these burgers!!!

The juiciness of this burger as portrayed by the photo captured my interest and taste buds.
There was an immediate sizzle when the patty hit the griddle and sure enough, the spatula “squish” let out juices that were subsequently reabsorbed during cooking. I seasoned the second side just before flipping the burger after 3 1/2 minutes. The sear on the first side was tantalizing and another 3 1/2 minutes on the second side prepared the patties for the crispy bacon and cheese. At this point, I moved the burgers to a parchment-lined upper grate in my gas grill to assist with melting the cheese without overcooking the patties.
For the cheese, I used a mix of Gruyere and Comte. I then toasted the buns in the caramelizing griddle. Assembly was a cinch! The burger was tender and juicy without the habitual flare-up that discourages this type of indulgence at home. I garnished with sliced cornichons, fresh dill sprigs, leaf lettuce, yellow heirloom tomato slices, and mayo. The garnishes, though simple, were just the right complement to the bacon Swiss burger. My husband and daughter also very much enjoyed this experience and had no suggestions for improvements, which says a lot!
I used square ciabatta rolls and shaped the burgers also in squares. Served with a side of garden greens dressed with pink sauerkraut, more tomato, and fermented peppers.

I first started the gas grill to get it up to temperature and placed the cast iron skillet on the grill to preheat. My patties were 4 inches across and almost 1 inch thick. I left them thick knowing that I was going to smash them.
As soon as I put the patties on the pan they began to sizzle and the first “smash” more or less just flattened out the patty. I left them to develop a nice crust on the surface. At the 3 1/2 minute mark, I flipped them and this time the “smash” released a lot of the juice and bubbled around the edges of the patty. What’s nice about this technique is the “smash” produces an irregular edge that crisps nicely and gets a good char. After the second smash, I left them on the grill for only 2 minutes because I felt like they were starting to dry out a bit. I was right to pull them off early because they ended up a bit over medium so I suggest maybe leaving them for only 3 minutes on the first side and 2 to 2-1/2 minutes on the flip to keep them at medium-rare.
I used sliced Swiss and American cheese which melted quickly in the heat of the grill (30-45 seconds). My bacon was thick cut hickory smoked. I folded the bacon to form a slight “V” so it fit better on the burger.
I used toasted Hawaiian Sweet Roll Hamburger buns and garnished with mayonnaise, ketchup, red leaf lettuce, tomatoes, and dill pickles. I didn’t use the pans to toast the buns because at that point, the juices and hamburger fat had gotten quite dark and there were a lot of little burnt bits in the pan.

This is a great way to make a burger. You get the advantage of cooking on the grill, but on the surface of your favorite cast iron pan.
I used salt and pepper to flavor my burgers and to bring out the flavors of the meat. The burgers immediately sizzled when I added them to the skillet. Even though I smashed them gently, I found that leaving them in the pan for 3 1/2 minutes was much too long for my taste. I like my burgers medium-rare. When I flipped my burger it was already 120° in the middle. I immediately put my bacon on the burgers and then used grated cheese on some burgers and a slice of cheese on the other and immediately closed the lid. I found that the slice of cheese melted quicker than the mound of grated cheese. The slices also tended to stay on the burgers better than the grated cheese. But, alas, by the time my cheese melted, my burgers were overdone. I garnished them with mayo, lettuce, and tomato. I think with an adjusted cooking time this would make a great burger.


