
TL;DR (Quick-Answer Box)
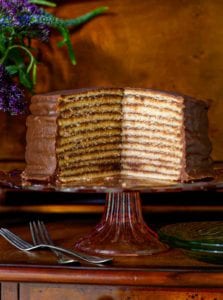
- What it is: A showstopping 12-layer vanilla cake, stacked with an old-fashioned, poured chocolate glaze that sets into a sophisticated, Southern dessert.
- Why you’ll love it: The thin cake layers, cooked quickly, remain moist, and pair perfectly with the deep, coffee-infused chocolate glaze for an elegant flavor. Pure Southern comfort.
- How to make it: Make the glaze first, then bake thin cake layers in batches. While the remaining layers bake, keep the glaze warm. Immediately remove the hot layers from the pans, place them on a cake stand, and immediately slather with warm glaze as you stack them. Drizzle the remaining glaze over the top.

Jump To
You’re looking at these layers and thinking, “Yeah, sure! There’s no way in hell I’m making this at home!” But, honestly, I can tell you from experience that the recipe is both easy and savvy.
That’s what I thought when I first saw this cake. I decided to freelance and cut two layer cakes into six layers each. Arrrrgh! There were crumbs everywhere, and my sanity was one emotional outburst away from walking out the door.
So I caved and followed Yearwood’s instructions the second time. I baked the 12 thin layers, three at a time, in cake pans. In no time, I was done (because they bake so quickly), and my composure returned. Bottom line: Don’t make the same mistake I did; listen to Trisa.
How to make this torte as a two-layer cake
If I haven’t convinced you to give this a go, I get it. You don’t always have the time or patience for tradition—or lots and lots of layers. So sure, why not? Go ahead, bake the batter in two standard 9-inch round cake pans, and then stack and frost the two layers as is, as you would any layer cake. Then call it a day—a damn good day.
More irresistible chocolate cake recipes
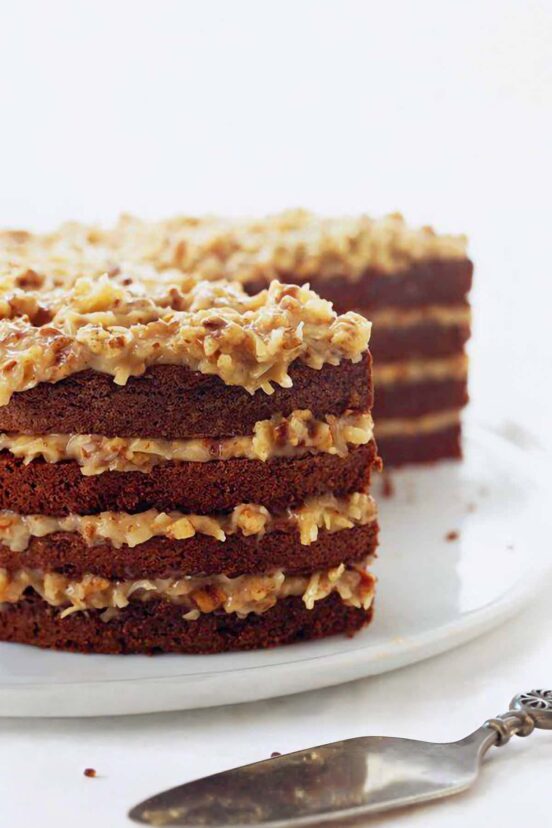
German Chocolate Cake
4 hrs 45 mins
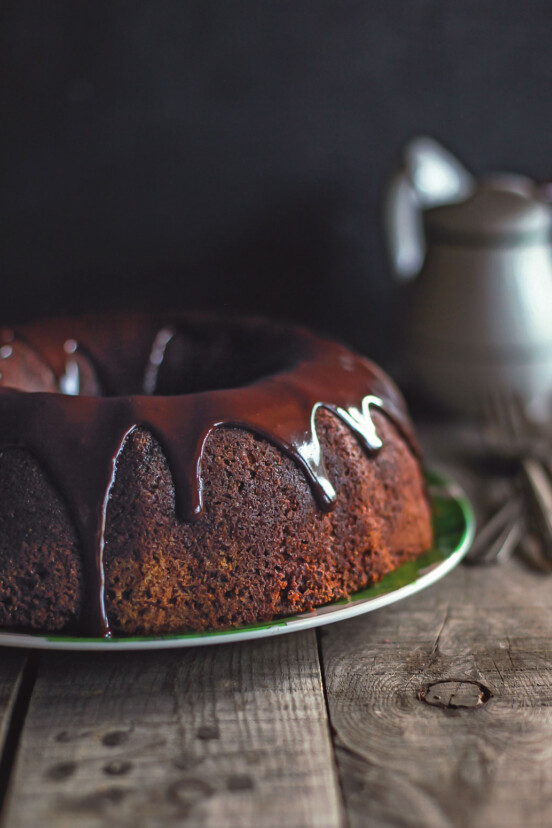
Chocolate Zucchini Cake
1 hr 35 mins
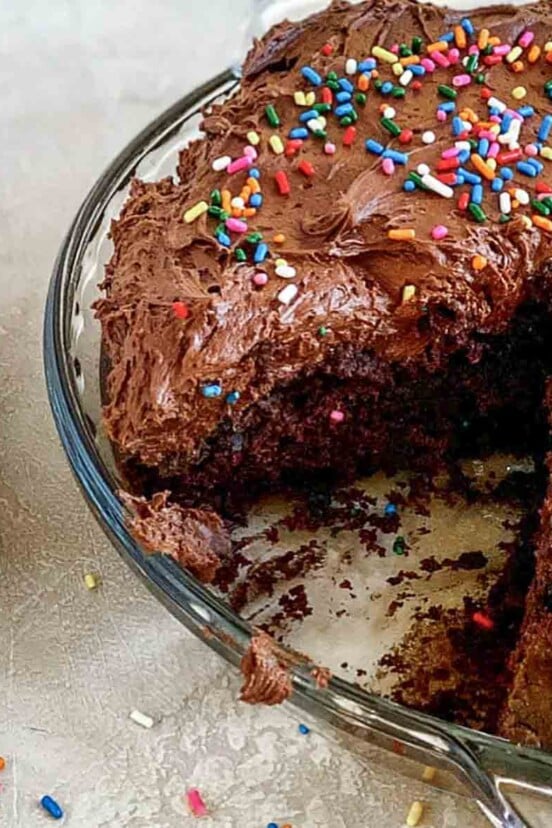
Chocolate Wacky Cake with Chocolate Frosting
1 hr 30 mins
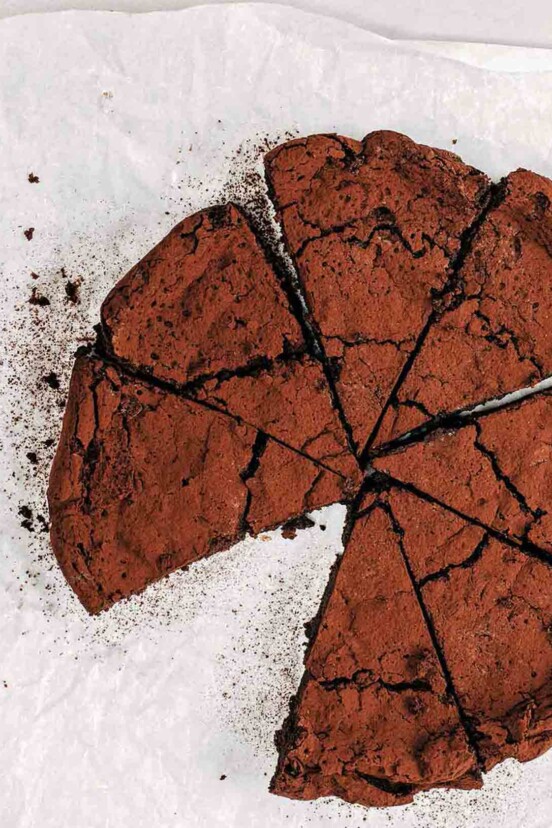
Flourless Chocolate Chile Cake
1 hr 10 mins
Write a Review
If you make this recipe, or any dish on LC, consider leaving a review, a star rating, and your best photo in the comments below. I love hearing from you.–David
Featured Review
I loved this recipe! I had been looking for a recipe where the icing hardens after icing the cake, and this is the first one I have found that works! Not to mention how delicious this cake is!
Jenson Bland
⛰ Baking at High Altitude? When baking above 3,500 feet, you often need to tweak recipes a bit for stunning results. If that’s you, take a look at our guide to high-altitude baking before beginning!
Trisha Yearwood’s Chocolate Torte
Ingredients
For the chocolate glaze
- 1 1/2 sticks (6 oz) butter
- 5 ounces unsweetened chocolate
- 4 1/2 cups granulated sugar
- 2 1/4 cups evaporated milk
- 2 teaspoons vanilla extract
- 1 tablespoon instant coffee granules, preferably French roast
For the cake
- 2 sticks (8 oz) butter, at room temperature, plus more for the pans
- 2 1/2 cups granulated sugar
- 6 large eggs, at room temperature
- 1 teaspoon vanilla extract
- 2 cups plus 1 tablespoon milk
- 4 cups self-rising flour, plus more for the pans
Instructions
Make the glaze (Do this first)
- In a large saucepan over medium-low heat, melt the 1 1/2 sticks (6 oz) butter. Add the 5 ounces unsweetened chocolate and stir until melted.
- Add the 4 1/2 cups granulated sugar and stir to combine (the mixture will be thick and grainy). Then stir in the 2 1/4 cups evaporated milk, 2 teaspoons vanilla extract, and the 1 tablespoon instant coffee granules, increase the heat to medium-high, and bring it to a boil.
- Continue cooking, stirring constantly, until the mixture thickens to a glaze, about 20 minutes.
- Remove the glaze from the heat.
Make the cake
- Preheat the oven to 350°F (176°C). Butter and flour at least four 9-inch cake pans.
- In the bowl of a stand mixer or in a large bowl with an electric mixer, beat the 2 sticks (8 oz) butter and 2 1/2 cups granulated sugar until smooth. Add the 6 large eggs, 1 at a time, beating just until blended after each addition.
- In a small bowl, mix the 1 teaspoon vanilla extract with the 2 cups plus 1 tablespoon milk. Add the 4 cups self-rising flour to the egg mixture alternately with the milk mixture, beginning and ending with the flour.
- Pour a very thin layer of batter—about 7 tablespoons, a scant 1/2 cup—into each pan, shaking the pans to distribute the batter to the edges. Bake the layers for 11 to 13 minutes.
- While the first cake layers bake, return the glaze to low heat as the glaze must be warm to spread on the cake layers.
- When the cake layers are done, immediately remove the layers from the pans and, working one at a time, place the layers on a cake stand and immediately slather with some of the warm glaze.
- Bake all of the remaining batter in this manner and continue to stack and glaze in this fashion. You should be able to get 12 layers from this recipe. Reserve the last of the glaze to dribble over the top of the cake.

Explore More with AI
Nutrition
Nutrition information is automatically calculated, so should only be used as an approximation.
Recipe Testers’ Reviews
Did you know only 68% of the recipes we test make it onto the site? This recipe survived our rigorous blind testing process by multiple home cooks. It earned the Leite’s Culinaria stamp of approval—and the testers’ reviews below prove it.
An impressive cake. The thin layers of both cake and icing were visually appealing as well as delicious. The icing has a taste similar to brigadeiros, or Brazilian chocolate fudge balls, with an almost caramel-like quality to the chocolate and coffee flavor.
The recipe calls for an interesting technique of layering the cake while still hot, and it worked. It’s labor-intensive, but the extra time in baking thin layers of batter is definitely offset by not having to cut standard-size cakes into layers and deal with all the crumbs while spreading the icing and assembling them.
I halved the recipe and got 8 layers from it, although I needed more than the amount of icing specified to effectively cover each layer. I also made the cake gluten-free, and the recipe adapted perfectly. The finished cake is not really rich, but is very sweet. I might be inclined to reduce the sugar next time I make this, but it’s otherwise a wonderful dessert.

I must admit that when I first read the recipe, I was a bit overwhelmed, but I was quite surprised at how easy this cake is to make and how beautiful and tasteful it is.
I follow a gluten-free diet, so I had to switch the self-rising flour for the exact same amount of all-purpose GF flour ( Bob’s Red Mill) and did what the site Art of Gluten-Free Baking says with regard to adding the baking powder and salt. Worked beautifully. I was able to divide the batter into 3 pans and divided each cake into 2 layers, so I had 6 layers altogether. I’m sure I could have cut each into 3 layers, but I was too scared of breaking them. We had friends over for dinner and this was an absolutely HUGE success.


I want to outline this cake with a chocolate icing in a pipe bag. Do you have a good recipe for this?
Jenson, this is the closest we have. Hopefully, it works for you.
Can I use cake mix for cake?
Reem, we’ve never used a cake mix for this, so we have no idea how it would work here. If you make it, do let us know!
Yes you can, you will use Duncan Hines yellow cake mix, we use 1/2 cup veg oil, 4 large eggs room temp, and substitute sour cream for the water now we do this because we make a 14 layer cake this way. We grease 14 9” disposable pans and bake 5 minutes then assemble with a rich cooked chocolate pour over icing. If the batter is to thick as some sour creams have less moisture or liquid we will add a little buttermilk to get the right consistency. Spread about 3 -3 1/2 tablespoons per cake pan.
Thanks, Sharlotte. That’s very helpful. Gorgeous cake!
I make custom decorated cakes as an occasional side job, but every December I make my husband a birthday cake that’s too delicious (too moist, too tender, too chocolaty, etc.) to be decorated since both of us tire of the plain white cake and buttercream frosting I use for most other cakes. This was perfect. It was impressive on the inside, but kind of a mess on the outside. And so, so moist. Everyone loved it.
Here are some tips to make it MUCH easier:
1. Buy disposable pans. I paid $5 for 12 pans and was able to evenly distribute all the batter at once. I actually could have made more than 12 layers from the batter if I’d had more pans.
2. Ignore the part about the glaze thickening. Mine never got much thicker than it started and I cooked it for a long time because I was nervous. The thin consistency was great for pouring on the cake and still solidified at room temp.
3. Put a cardboard cake circle (available at craft stores) a little bigger than your cake layers under the first layer. Cover a sheet pan with foil. Place a cooling rack on the sheet pan. Place the cake circle on the cooling rack. This allows the excess glaze (and there will be lots) to drip into the pan. If you’re running low on glaze you can scrape the excess off the foil. After the cake has set for a bit, slide a spatula under the cake circle and move to a cake plate. My cake circle was completely covered in glaze so no one knew it was there.
4. Let the glaze cool to nearly room temp before doing one last coat around the side. It still won’t leave the cake smooth, but covers some bumps.
Many thanks, Angelyn! Your husband is a lucky guy.