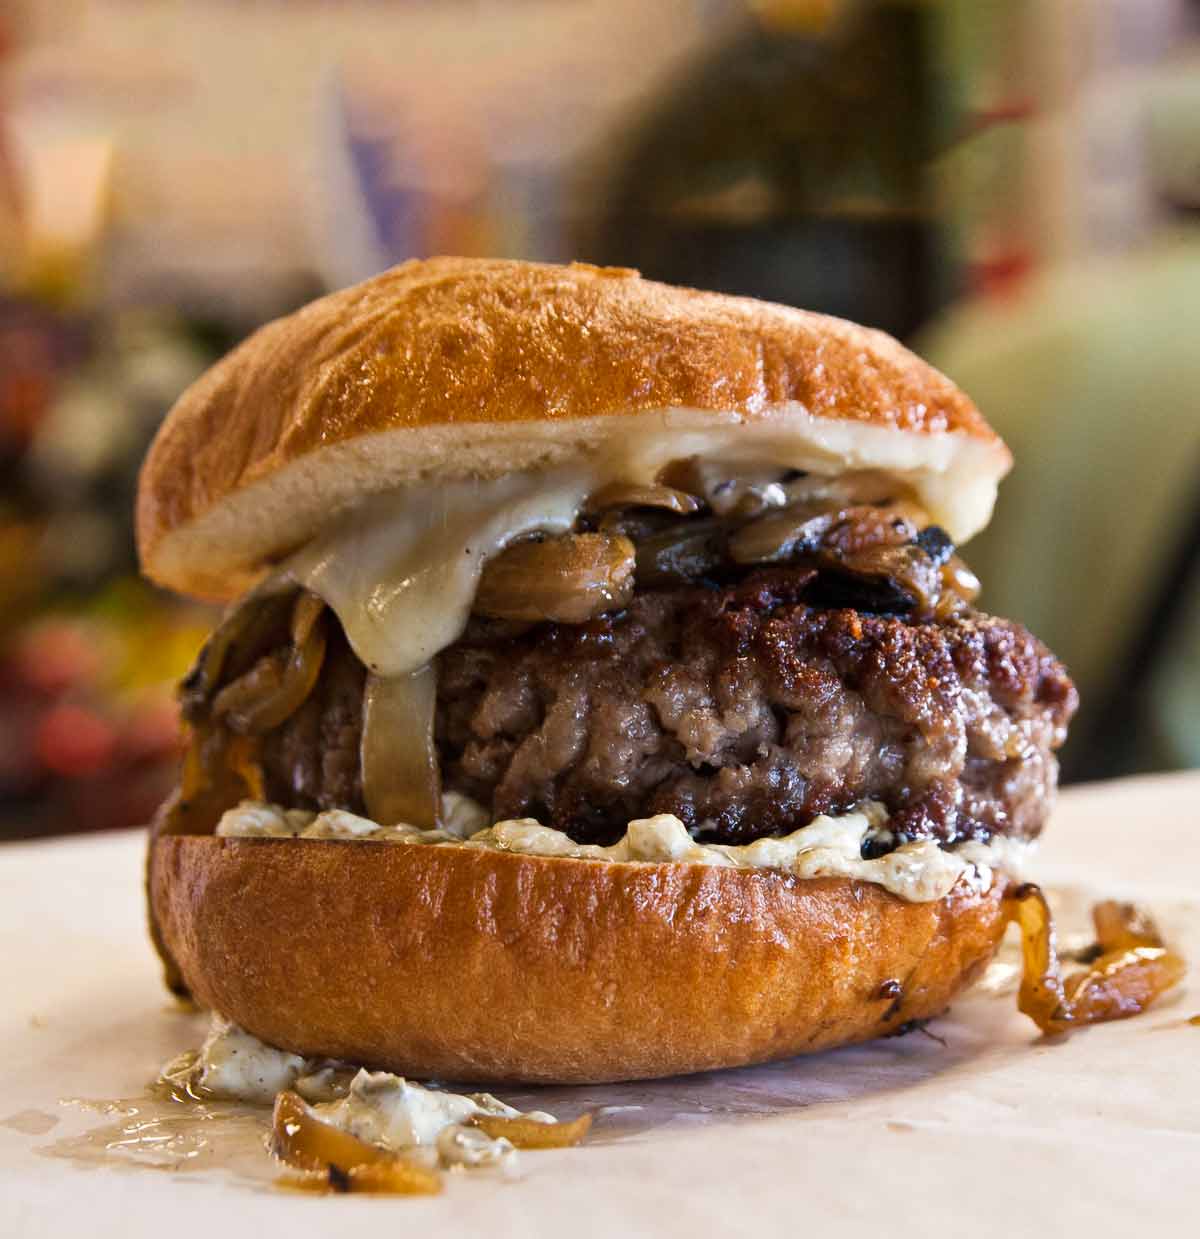
This aptly titled best burger isn’t just any old hamburger. This is an exquisitely complex burger conceived by the folks at Mission Street Food from ground short ribs and brisket and chuck, oh my. It’s then ever-so-gently shaped, expertly sizzled, and handily assembled.
It’s sufficiently satiating to consume naked if you like (the burger, not you). Although if you like, you can dress it with your fave condiments, maybe even slapping the patty with a slice of Monterey Jack cheese, smothering it with caramelized onions, and sandwiching it all with a pillowy yet sturdy toasted bun slathered with homemade mayo. Or feel free to do your own thing. Hungry? Us too.
Burger FAQs
In between the shoulders (which becomes chuck) and the ribcage of a cow, there are another five ribs that are too short to make a decent steak. They’re generally classified as part of the chuck, which means that they’re tougher but have a lot of rich, beefy flavor. Since they come from the space between the chuck and the rib, they retain the best parts of both—short ribs will have some good marbling like a ribeye but also the flavor of chuck.
For the burger itself, top with cheese, if desired, and your favorite condiments, such as mayo, pickles, homemade mustard, or homemade ketchup. If you want to get fancy, the sky is the limit. Sliced tomatoes, onions, avocado would all be welcome atop this juicy burger.
On the side, we’d recommend homemade French fries and an easy salad like this raw asparagus one or a simple veggie plate.
We don’t recommend it. Cooking them on a griddle or in a skillet allows them to cook in their fat, keeping your burger juicy and moist inside.

Best Burger
Equipment
- Meat grinder
Ingredients
- 4 1/2 pounds chuck, untrimmed
- 3 1/2 pounds brisket, untrimmed
- 3 pounds short ribs, untrimmed
- 4 tablespoons Morton's kosher salt OR 5 tablespoons of Diamond kosher salt
- Hamburger buns
- Cheese, if desired
- Pickles
- Condiments of your choice
Instructions
- Using a sharp knife, remove any "silver skin" and any tough, gristly parts from the chuck, the brisket, and the short ribs. Reserve the skin and gristle for making beef stock or toss them in the trash.
- Then slice off any large chunks of visible fat from the different cuts of meat. But don't get too obsessive—some fat ought to remain on the meat. Reserve the trimmed fat.
- Cut the chuck, brisket, and short ribs into 1-inch chunks, keeping the cuts of meat separate. Weigh the meat, still keeping the kinds separate. You should end up with a total of about 7 pounds.
- Place the meat on a wire rack set over a rimmed baking sheet, still keeping the three kinds separate. Salt the meat, using a ratio of 1/4 cup of salt for 7 pounds of meat. (If you have more than 7 pounds of meat, use a little more salt; if you have less than 7 pounds, use a little less salt.)
- Refrigerate the meat, uncovered, for 2 days. Cover and refrigerate the reserved fat.
- When you're ready to grind the meat, cut 1 1/2 pounds of the reserved fat into 1/2-inch chunks. (If you have more than 7 pounds of meat, use a little more fat; if you have less than 7 pounds of meat, use a little less fat.)
- Set up your meat grinder, whether it's the old-fashioned sort that clamps onto your counter or an attachment for your food processor or stand mixer.
- Grind the 1 1/2 pounds of cubed fat with the brisket and the short ribs and let it fall into a large bowl. Set the bowl off to the side.
- Now fashion a wide landing strip of sorts from plastic wrap on your work surface beneath your grinder, using multiple overlapping layers of plastic wrap.
- Pass the mixture of ground brisket and short ribs and fat through the grinder again, this time adding the chuck. As the ground meat emerges from the grinder, carefully let the columns of ground meat fall alongside one another on the plastic wrap in a parallel formation.
- Stack the meat columns to create a single large column of ground meat that's about 5 inches in diameter. Gently wrap the ground meat in plastic wrap, pressing firmly enough so the column holds together but not so firmly that you compress it too much.
- Refrigerate the ground meat for at least an hour and up to a couple of days. (Or you can freeze the meat for up to 3 months.)
- When you're ready to cook the burgers, unwrap the ground meat and, using a sharp knife, slice it into as many burger patties as you like, each 3/4 to 1 inch thick.
- Melt some of the reserved fat on a griddle or in a large, preferably cast-iron skillet over medium-high heat. At the same time, heat another large but dry griddle or skillet over medium heat. Sear each patty, without budging it, until a crust forms, 60 to 90 seconds.
- Using a thin metal spatula, flip the patties and carefully sear the other side for 45 to 60 seconds. Move the patties to the ungreased skillet over medium heat to finish cooking to the desired doneness and to allow some of the grease to drain. The exact amount of time will depend on how you like your burger.
- Move the burgers to a warm place for another 2 minutes to rest and drain, such as a wire cooling rack set on a rimmed baking sheet in a low oven.
☞ TESTER TIP: Never grill these burgers. The fat and moisture will drip right out. Searing the burgers in a generous amount of fat creates that all-important moisture-sealing crust that ensures rich, juicy, flavorful burgers.
- Assemble your burger however you darn well please with pickles and any condiments.

Nutrition
Nutrition information is automatically calculated, so should only be used as an approximation.
Recipe Testers’ Reviews
Another 10! We did a side-by-side taste test. The best burger versus a freshly ground chuck burger, no-frills. The best burger won, hands down. Without a doubt, it is the best burger I have ever eaten. (There was moaning involved.)
I’m great friends with my butcher and he willingly ground the meat for me. I came home with 7 pounds of meat, cooked it up for 3 of us, and still have lots in the freezer.
I halved the recipe and still had 6 rather large burgers; 3 to grill and 3 to freeze. I’d highly recommend serving these beauties on homemade hamburger rolls (you’ll conveniently find an excellent recipe here!) with your favorite toppings. Or naked. They’re perfect naked, and let’s face it, not much is!
Thank you, thank you! I’ve been searching for the perfect burger recipe for decades. This knocked our socks off…my husband’s eyes literally rolled back into his head when he took his first bite. It was juicy, toothsome, and epically delicious.
I don’t rate many recipes a “10,” but this certainly warrants it. The different cuts of meat and the ability to adjust the fat content to your personal preference make this recipe worth the effort. This also allows you to keep the grind coarse so your burger isn’t packed too tight, which makes it tough when you cook it.
It’s important to follow the cooking instructions. Resist the urge to press your burgers, as this pushes the fat and moisture out and you’ll end up with dry burgers. Letting the burger rest keeps them moist, just as with resting a steak or any other kind of meat.
These are BIG burgers. I quartered this recipe and still had large burgers and way more than the 4 burgers I was expecting. I ended up with almost 3 pounds of meat.
This brisket, chuck, and short rib burger recipe takes time and an extraordinary amount of meat but it’s definitely worth it. This is the burger recipe that you pull out to impress the people you like the most. I served these on fresh dinner rolls from the bakery and everyone dressed their own from an assortment of toppings. However, the consensus was that these burgers need very little in the way of accompaniment.
I ended up making the entire recipe (my butcher is a saint and did all the grinding for me). I followed the directions exactly, not packing the burgers too tightly, and then placed the meat in the fridge for nearly 2 hours. I cooked 8 at a time to a medium-rare on a large cast-iron grill pan before putting them on a wire rack in a low oven while I cooked the remaining 8.
The short rib burgers are nothing like any other burger you’ve ever tasted. As I said, they’re what you pull out for those you love the most.


I spent a lot on the meat and currently have it all in the refrigerator to make them tomorrow. I wish there was a video for this as the grinding steps are a bit confusing…at least for me. Thank you
Thanks for the feedback, Timothy. We can certainly look at putting a video together or providing some step photos to make it clearer. Is there anything in the directions that I can clarify for you?
I am fine until I begin grinding and making the parallel logs. The grinder has it come out in a pile. I just think a brief you tube showing the entire process would be very helpful. I am a big fan of this
website. Thank you.
I can see how this is confusing, Timothy. To get parallel logs, you’ll need to be moving the plastic wrap along as you go. One big pile is fine too, as long as you’ve got enough space on your plastic wrap to contain it all. Alternatively, you can grind it all into one large bowl, and then transfer it to your plastic wrap to shape the log.
I understand. I did take the mound of meat and gently formed it into two logs which I then put together to form one larger log and wrapped that in plastic. I try not to handle ground beef very much so not to make it tough. I am anxious to try a burger!
I hope you love them as much as I do, Timothy. I’m looking forward to hear what you think!
I’ve read the recipe and reviews and see that you call for 11 pounds of meat to purchase, but the recipe and reviews mention 7 pounds with 1.5 pounds fat. Is 11 pounds before trim accurate? I want to get it right. Thanks!
Dani, yes, 11 pounds before trim is accurate. You may end up with a little more or a little less than 7 pounds of meat depending on how much you trim. And you will likely have quite a bit more than 1 1/2 pounds of fat, but you will only need to use about 1 1/2 pounds of it.
I just made this recipe and there is way too much salt for 7 or even a total of 8.5lbs (with fat) of meat, did the math and it works out to 5 g of salt per 6 oz or 170 g burger. Now I have a bunch of way over-salted burgers to serve my guests tonight. One-half cup of kosher salt is 126 g, and I used even less than this. Should have done the math beforehand. ATK’s burger recipes have about a 1 g or so per 6 oz. Thanks a lot, Dave 🙁
Giacinto, I am so sorry to hear this. We didn’t have problems with any of our testers. May I ask what brand of salt you used? Morton salt weight 124 grams per 1/2 cup. Diamond salt weighs 90 grams per half cup.
Did you let the meat rest for two days before grinding as the recipe says? That would draw moisture out of the meat and make it less salty. Also, the salt may disperse a bit when you grill the burgers.
I don’t understand how ATK uses 1 g of salt per burger. That is 0.0353 ounces. That’s not even a pinch. Can you direct me to the recipe? (I subscribe to all of their sites.) When I checked, I saw small amounts of salt in some recipes, but they include other salt-heavy ingredients, such as soy or Worcestershire sauces. Please get back to me.
This recipe is a lot of work but worth it. Just make sure to weigh your salt. I used a total of 115gm of table salt which made the burgers too salty, but when dressed it was not as apparent to taste as the sample patty I fried up. Will use 60gm next time I make it.
Giacinto, thanks for that. Much appreciated.