TL;DR (Quick-Answer Box)
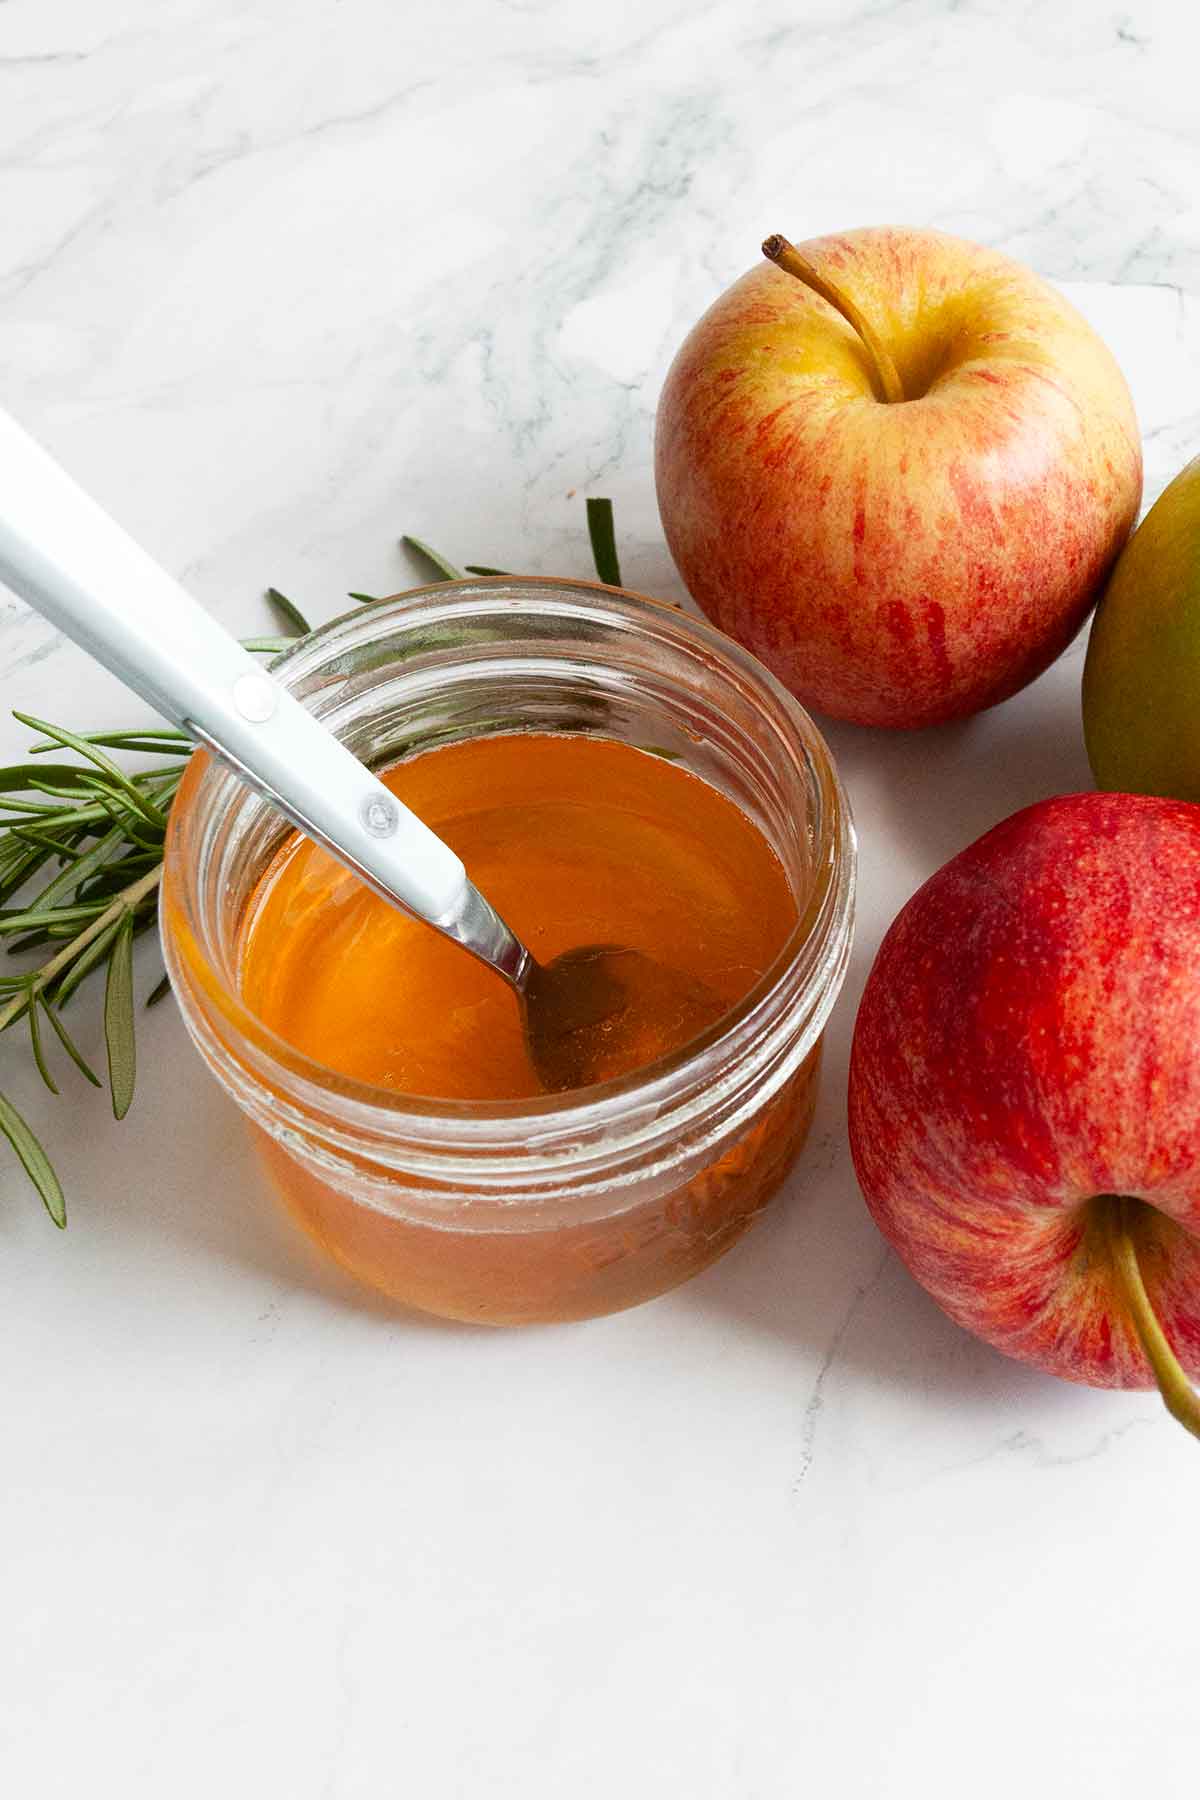
- What it is: A beautiful, clear apple jelly infused with a savory note of fresh rosemary, brightened by lemon juice and acid from the apple cores/skins, and sweetened with sugar and honey.
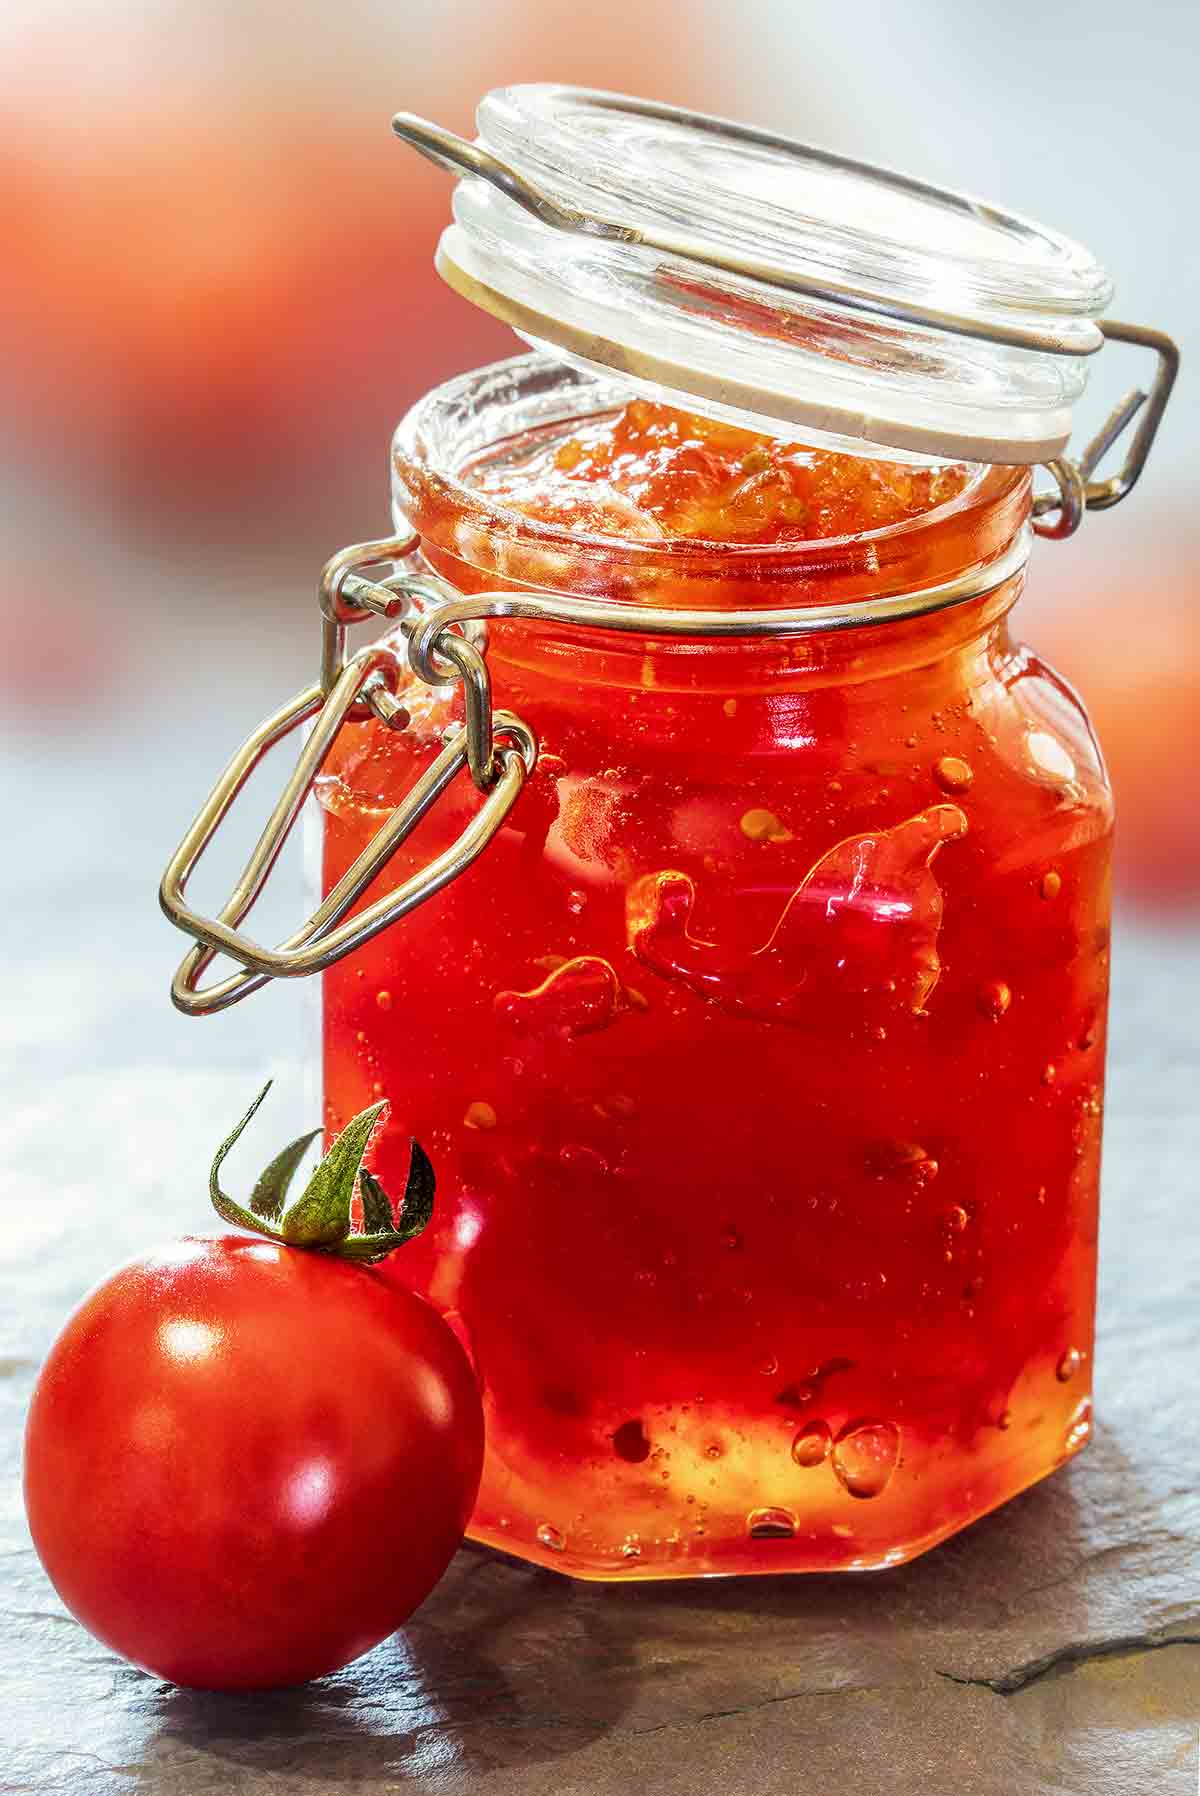
- Why you’ll love it: This preserve is an incredibly versatile condiment, pairing equally well with a cheese board, roasted meats, or simply warm biscuits.
- How to make it: Chop and simmer apples, cores, and skins + rosemary with water for a pectin-rich juice. Strain, without squeezing, then boil the liquid with sugar, honey + lemon juice until it passes the “wrinkle test” for setting.

Jump To
What I love about this sparkling small-batch apple jelly is that it plays nicely with others, both sweet and savory. The One smears it on toast and, especially, savory bacon and cheese scones. I like to dollop spoonfuls on this lovely braised rosemary pork or a simple roast chicken for Sunday supper. Of course, it’s superb with a cold meats platter and all manner of cheeses. (I’m looking at you, Cheddar.)
When I’m in a classic mood, I whip up an apricot tart or my apple rose tart and brush it on as a glaze. If that’s your jam (pun intended), warm the jelly in a small pan, brush it liberally over the finished tart, and then leave to set.
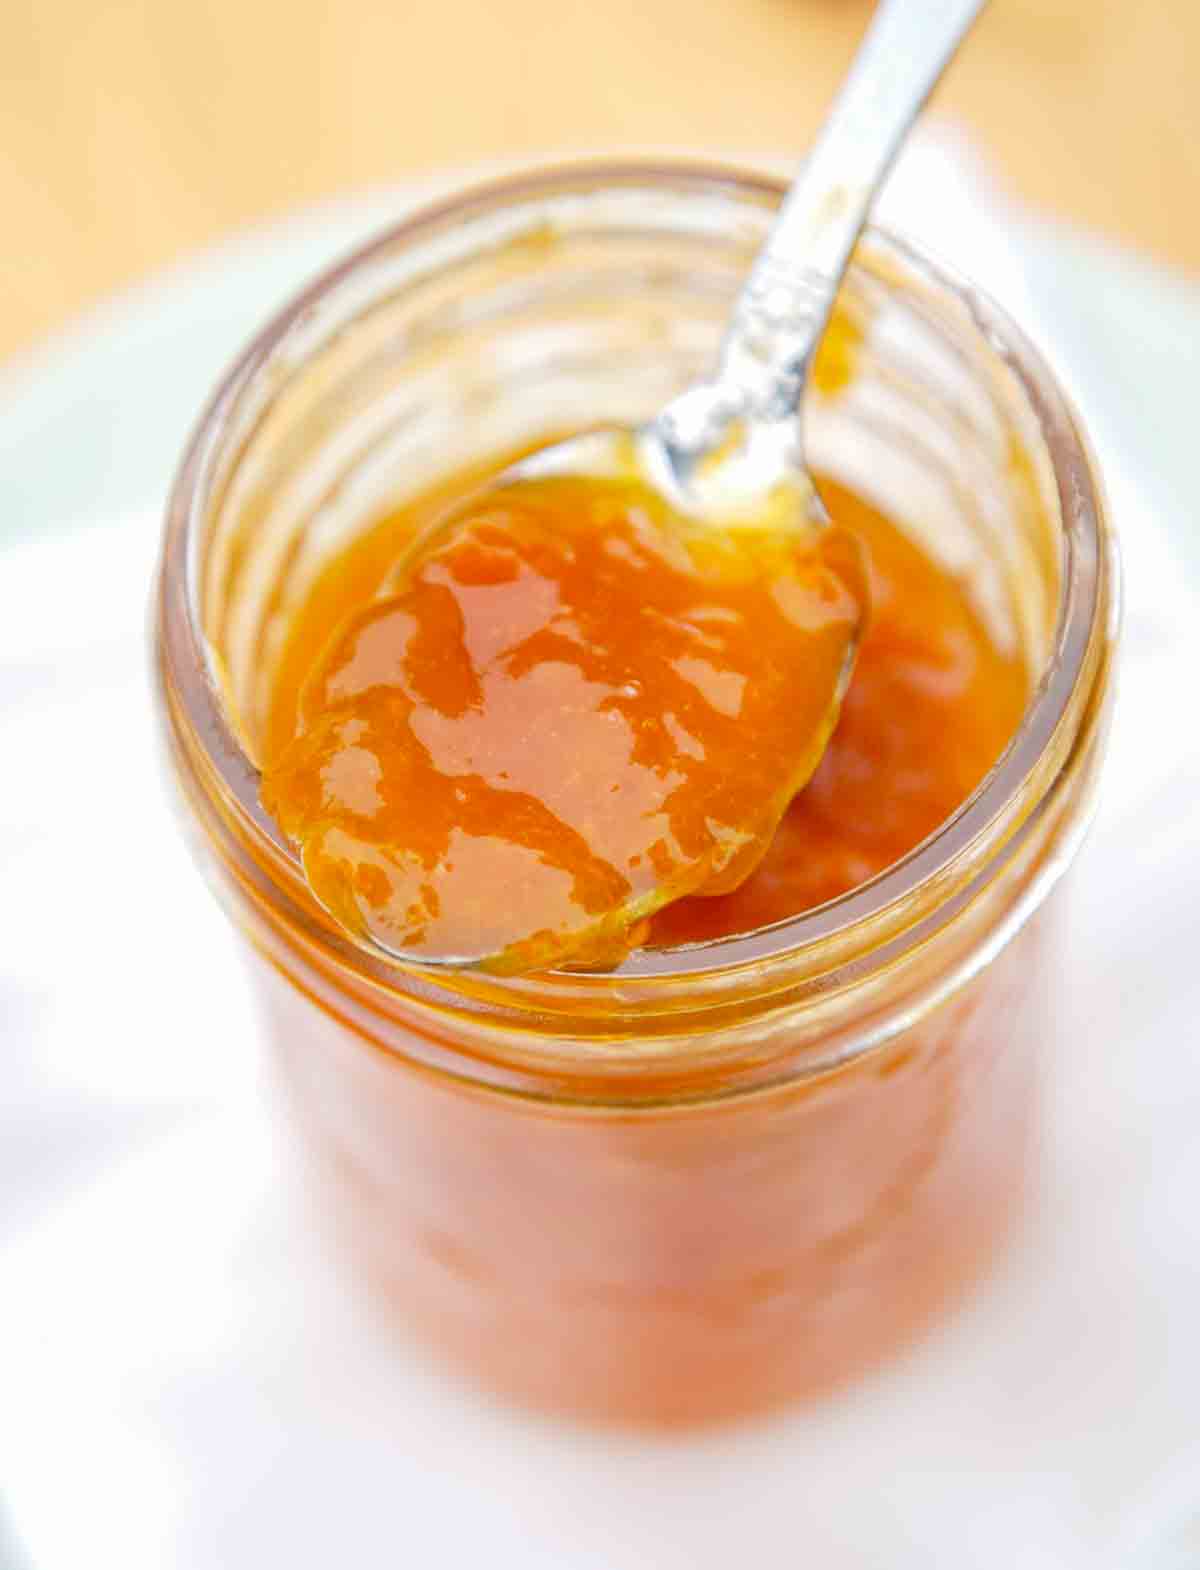
The lemon juice perks up the flavor and helps the pectin, a natural setting agent in the apples, to work better. Because it contains honey, the jelly isn’t crystal clear, but no matter. It compensates by sporting a beautiful, pinkish-orange color. Gorg, totally gorg.
Chow,

Featured Review
A beautiful recipe with precise instructions. I have doubled the recipe, and it came out perfect. Thank you for sharing.
Sumeet

Why Our Testers Loved This
The testers were delighted that this easy apple jelly was a perfect accompaniment to sweet and savory dishes. Suzanne Fortier describes it as “more complex than overly sweet, with a strong overtone of honey and herbal undertones.”
Notes on ingredients
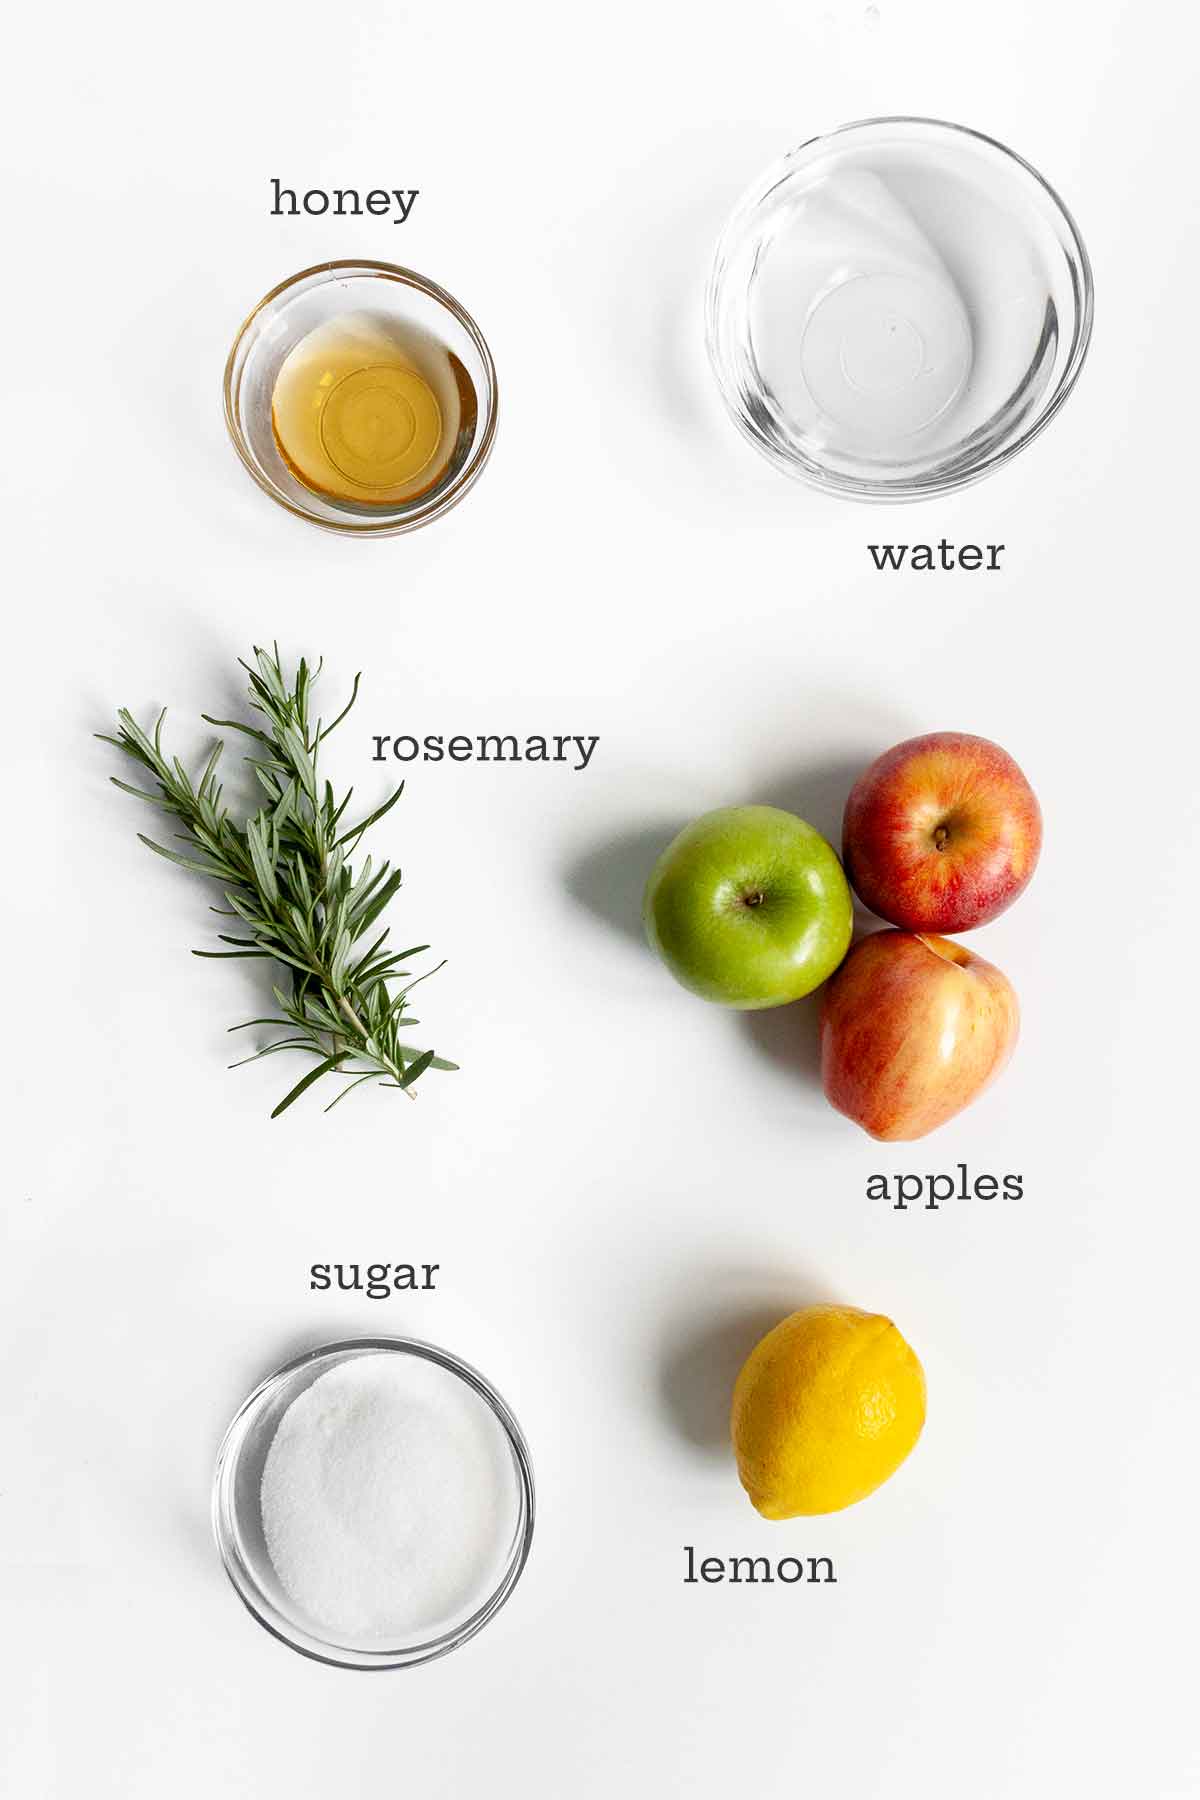
- Apples–You can use any type of apple, or a combination of various types, to make the jelly. Green or slightly underripe apples will have higher levels of pectin, resulting in a firmer jelly.
- Rosemary–This adds a subtle herbal undertone to the jelly.
- Honey–The flavor of the honey is noticeable in the finished preserves, so use a mild-flavored honey that you enjoy eating. Avoid strong-flavored varieties, such as buckwheat or chestnut, as they’ll overwhelm the taste.
Step-by-step instructions
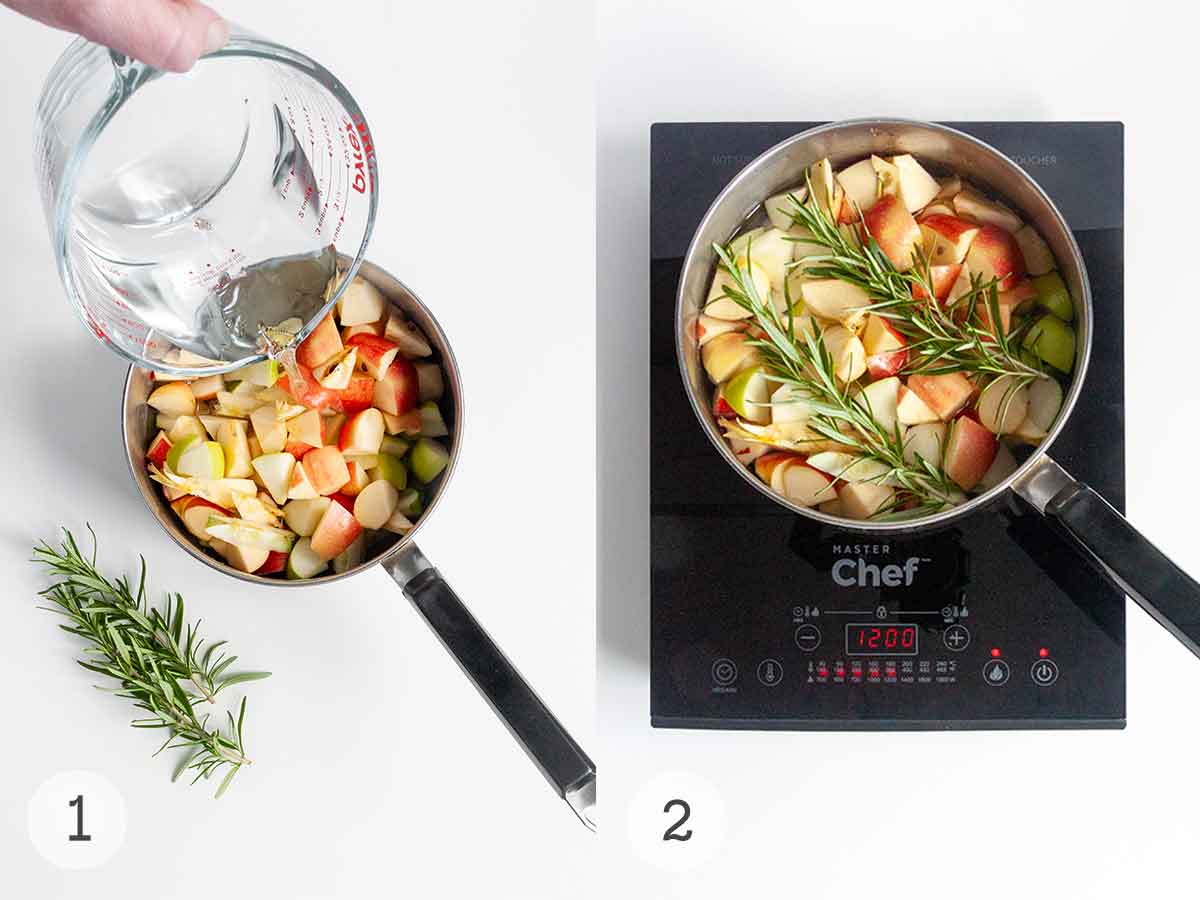
- Prepare the apples by chopping them into small chunks. Toss the apples, cores, and seeds into a large pot.
- Add the water and rosemary. Simmer for 45 minutes.
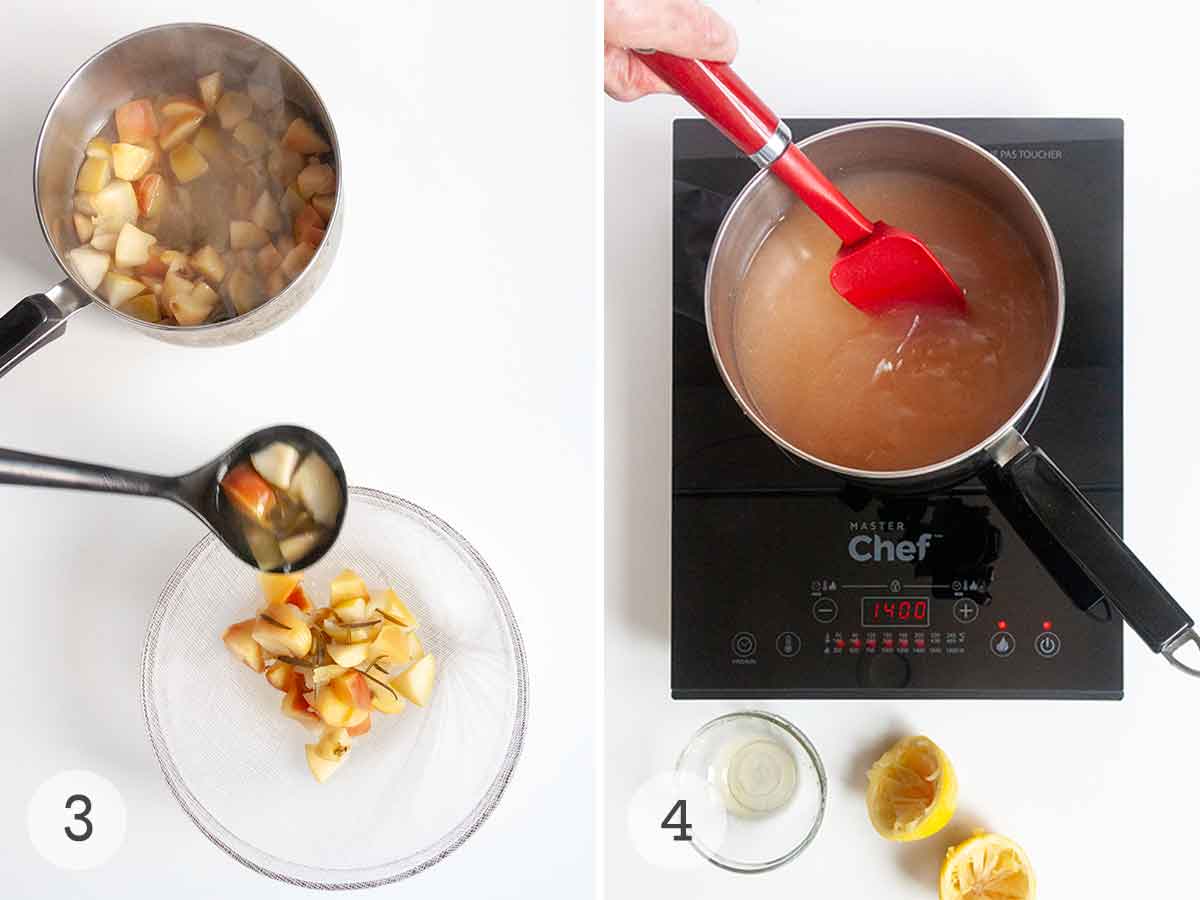
- Strain the apple mixture through cheesecloth into a large bowl.
- Combine the apple juice with the remaining ingredients in a pot and bring to a boil. Cook until the jelly reaches the setting point.
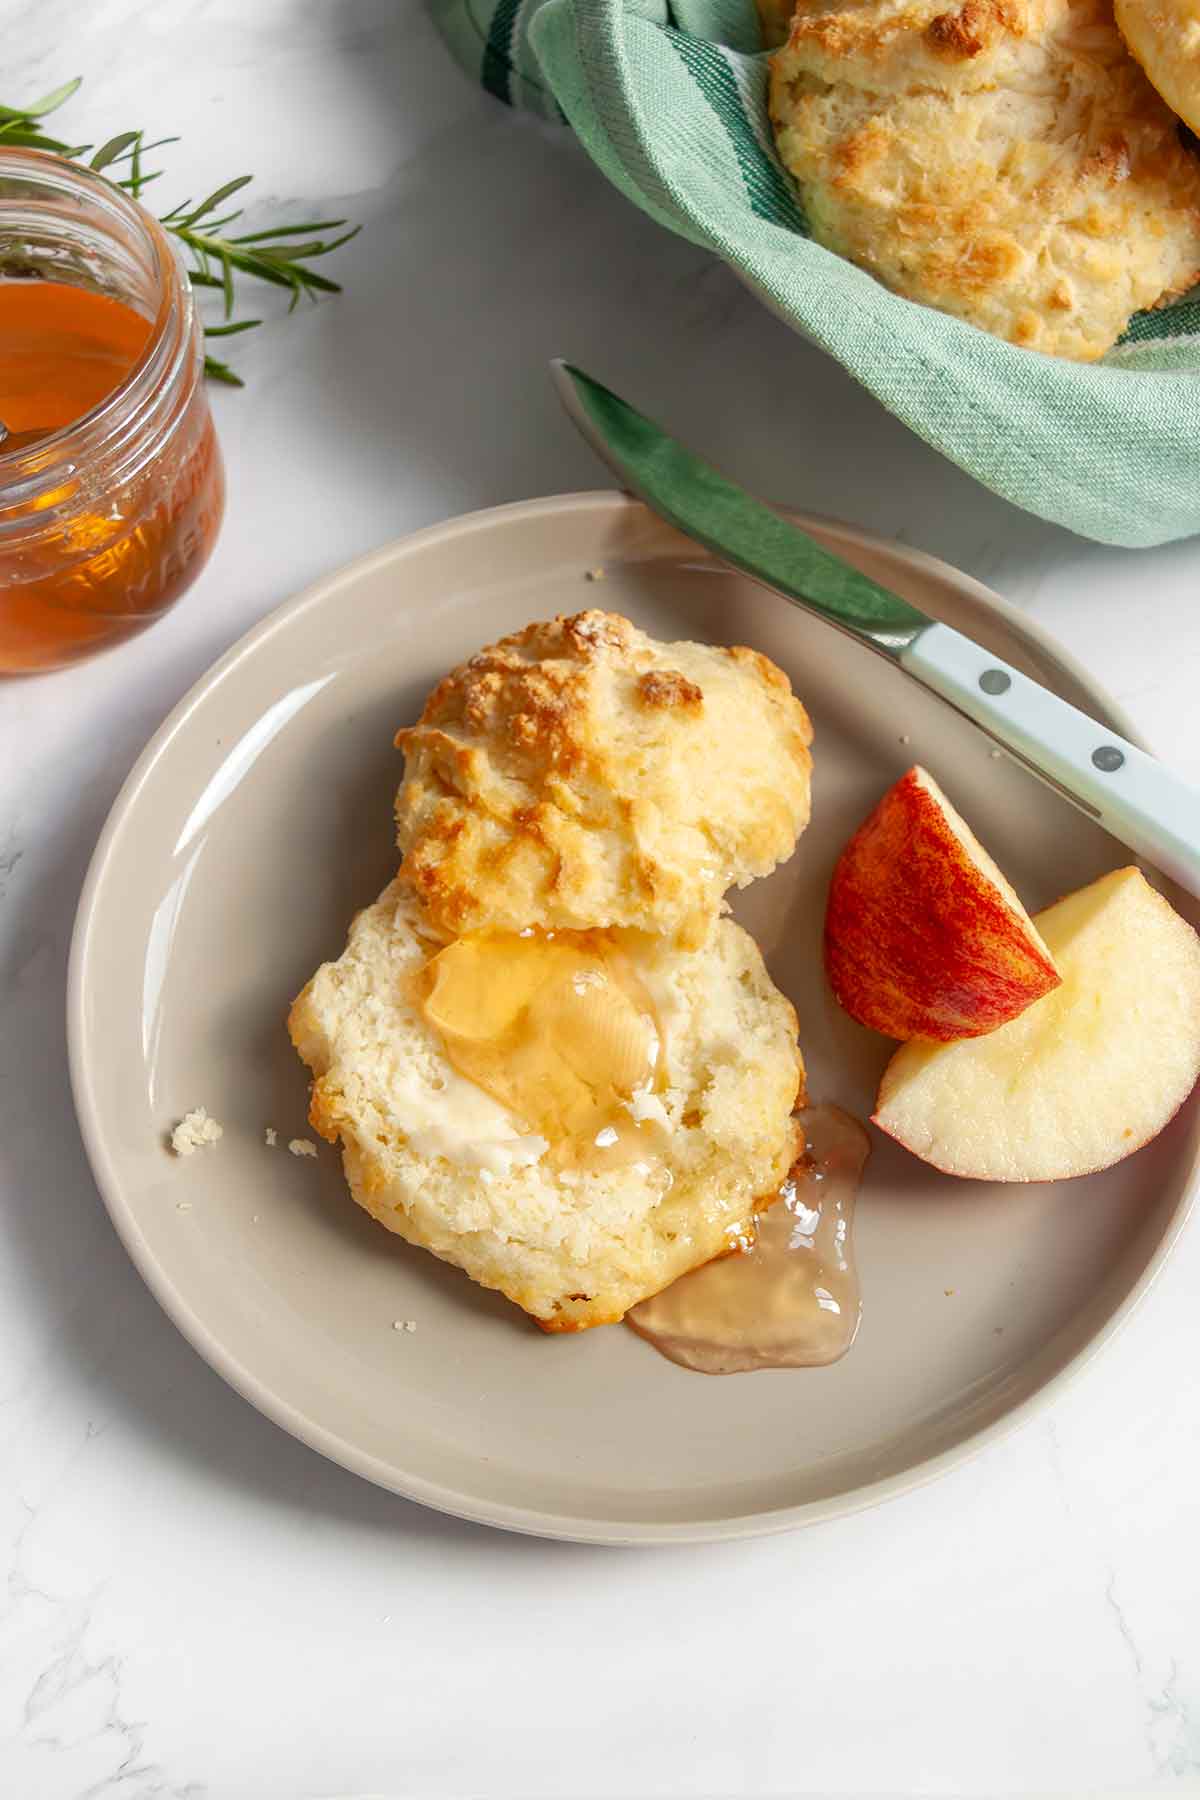
- Sterilize the jars and rings in a pot of boiling water.
- Fill sterilized jam jars with apple jelly and process in a water bath canner.
Your Apple Jelly Questions, Answered
Nope. You can proceed with the recipe through step 6, ladle it into jars, and stash it in your refrigerator. The jelly will keep for about 6 weeks.
As the author suggests, use this sweet jam as part of a charcuterie platter, schmeared on toast, scones, or homemade biscuits, or served alongside roasted meats. It can also be brushed over fruit tarts to give them a shine.
Apple skins and seeds are naturally high in pectin, so they are initially added to the jelly mixture to extract as much pectin as possible so that the jelly sets properly.
Any good eating apple will make great jelly! The testers found that Cortland apples work well, and Granny Smith or Golden Delicious are also popular choices.
Granny Smith apples deliver a tart flavor and high pectin content, which helps to create a firm jelly, while Golden Delicious apples provide a pleasant balance of sweetness and tartness.
Pro tips & troubleshooting
- Don’t use overripe fruit for making jelly. The reduced level of pectin found in this fruit can interfere with setting.
- Use an instant-read thermometer to precisely measure when your apple jelly has achieved a setting point. Jams and jellies set at 220°F (104°C) at sea level.
- If you are canning your jelly at a high altitude, adjust the processing time.
More Superb Jam and Jelly Recipes
Write a Review
If you make this recipe, or any dish on LC, consider leaving a review, a star rating, and your best photo in the comments below. I love hearing from you.–David
Featured Review
I had a big bag of crabapples and wanted to try something a little different. The rosemary is very subtle and my jelly is a beautiful blush colour from the crabapples. The hardest part was waiting for the liquid to drain (patience is not my strong suit) but worth it in the end. The leftover cooked apples are being turned into apple butter as I just didn’t want it to go to waste.
HeAther

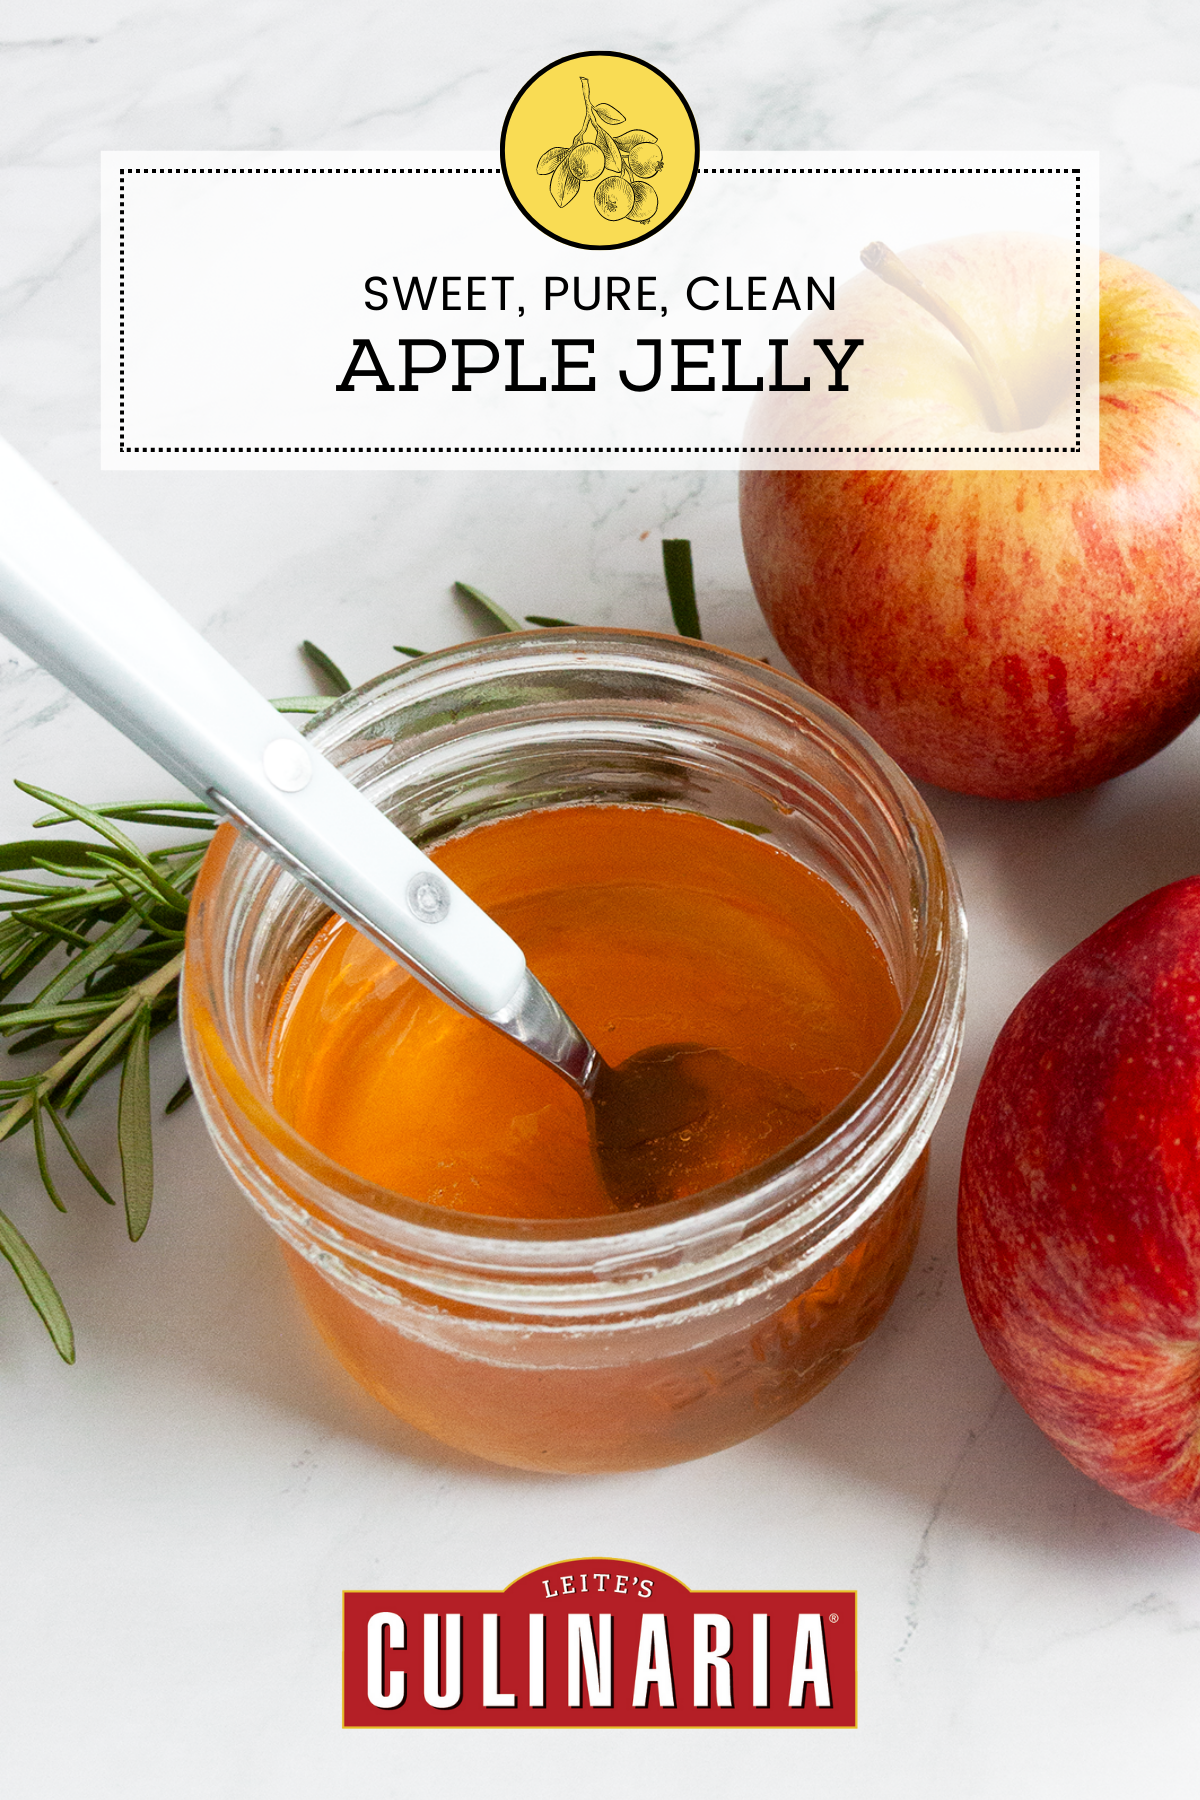
Apple Jelly
Ingredients
- 2 pounds (about 4) large apples, (eating apples such as Cortland, Gala, and Golden Delicious work just fine)
- 2 pints cold water
- 2 large sprigs rosemary
- About 1 pound granulated sugar
- About 10 1/2 ounces honey, preferably a light, floral type such as clover or wildflower
- 1 lemon, juiced
Instructions
- Cut the apples into quarters. Cut out the stems and any blemishes. Roughly chop the apples and toss them into a large pan—including the skins, core, seeds, and all.
- Pour in the water and add the rosemary. Bring to a boil, then turn down the heat and gently simmer for 45 minutes.
- Ladle the apple mixture onto cheesecloth suspended over a large bowl. Let this drip through the cheesecloth, without squeezing, for 3 to 4 hours. Meanwhile, put a saucer in the freezer.
☞ TESTER TIP: It will be tempting to try and speed along the process by pressing on the apple mixture. Resist the temptation. The key to getting clear jelly is to let only the juice drip from the apple mixture.
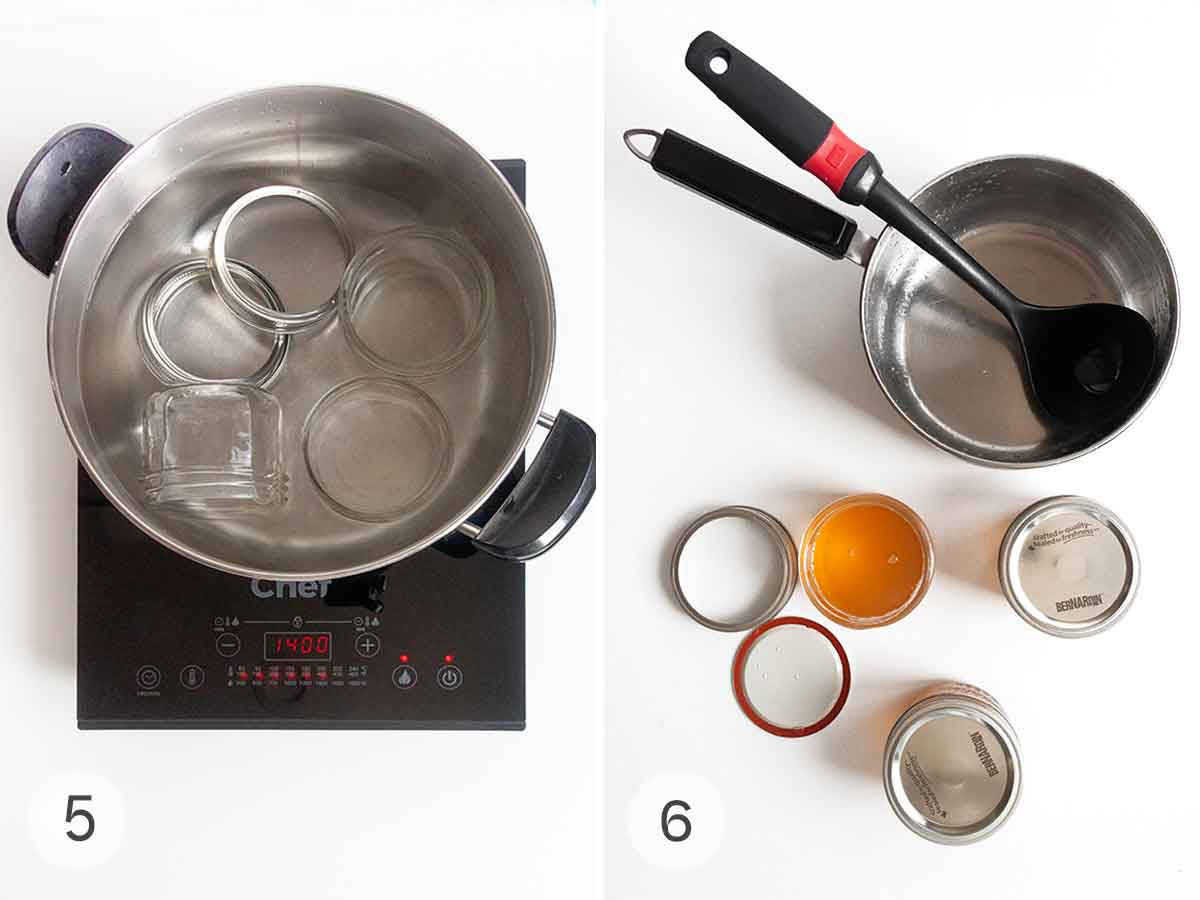
- Measure the liquid and transfer it to a pan. For every 18 ounces (500 ml) liquid, add 9 ounces (250 g) sugar, 5 1/2 ounces (150 g) honey, and the juice of 1 lemon.
- Bring the mixture to a boil, stirring occasionally to ensure the sugar has dissolved by the time it comes to a boil.
- Boil the jelly mixture for about 10 minutes, then turn off the heat and put a teaspoon of the liquid on the cold saucer and put in the fridge for 1 minute.
- Push the mixture with your finger and if it wrinkles (or rather, if it leaves a defined trail left by your finger) then it has reached setting point. This is known as the "wrinkle test.” If not, then continue to boil the mixture and test it every few minutes, cleaning the saucer and putting it into the fridge between times and turning off the stove each time so you don’t overcook the jelly. It can take 15 minutes or longer for the jelly to be done, depending on the particular balance of pectin, acid, and sugar in your jelly.
- Skim any scum from the surface of the jelly. Turn off the heat and let the jelly rest for 10 minutes.
- While the jelly mixture is boiling, sterilize the jars.
- Skim any scum from the surface of the jelly and then ladle the jelly into the hot sterilized jars, filling them right to the top. Put the sterilized lids on immediately and process according to manufacturer’s directions. The jelly will set in the jar as it cools.
- Keep in a cool, dark place and consume within 1 year. Once opened, keep in the fridge and consume withing 3 weeks.
Notes
- Use slightly underripe or barely ripe fruit–Don’t use overripe fruit for making jelly. The reduced level of pectin found in this fruit can interfere with setting.
- Temperature for jelly set–For a precise measurement of when your apple jelly has achieved a setting point, use an instant read thermometer. Jams and jellies set at 220°F (104°C) at sea level.
- High altitude canning–If you are canning your jelly at a high altitude, adjust the processing time.
Explore More with AI
Nutrition
Nutrition information is automatically calculated, so should only be used as an approximation.
Our Guide to Canning Jam and Other Preserves
1. Prepare the canning jars
Be sure to set up your jars and workspace before making the jam. Wash your jars and lids in hot, soapy water and set them to dry completely on a rack or a clean dish towel.
Sterilize jars by placing them in a canning pot, filling it with water, and bringing it to a simmer. Hold jars in hot water or in a 225° F (107°C) oven until ready to use. (The oven trick isn’t recommended by the USDA, but I’m still alive to give you the option.)
2. Fill the jars
All canned goods need headspace to allow for the expansion of the food and to create a vacuum in cooling jars. Generally, leave 1/4 inch of headspace on all jams and jellies. Always wipe the rim of your jar before placing the lid on top.
When placing lids and rings on canning jars, do not overtighten the rings. Secure just until the rings have tension and feel snug. Overtightening will not allow air to vent from the jars—a crucial step in canning.
3. Process the jars
Fill a canning pot or a deep stockpot half full of water and bring to a low boil. Hold the liquid at a very low boil until ready to use.
If using a canning pot, place prepared jars of food on the rack in the canner.
If using a deep stockpot, best only for small-batch preserving, line the bottom of the pot with a dish towel and place jars on top. This helps them from rattling around on the bottom of the pot or tumbling over onto their sides. This form of canning isn’t universally recommended or endorsed by the USDA. However, I have seen plenty of farmers and European country folk use this old-school technique, and I’ve adapted their laissez-faire ways.
Do not stack the jars, as you need to allow for water circulation for proper sealing. Lower jars into the pot and add enough hot water to cover the jar tops by an inch or more.
Cover the pot and return to a boil. Processing times begin once the canning pot water is returned to the boil. This can take as long as 15 minutes, so keep an eye on your pot and a timer nearby.
4. Remove the jars
Using a jar lifter or a set of kitchen tongs, remove jars from the canner when the processing time has elapsed. Set them aside on a folded towel to cool. Make sure you do not press on the tops and create an artificial seal.
5. Know when the canning jars are properly sealed
You’ll hear the sound of can tops popping shortly—a sign that a secure seal has been made. Once the jars are cool, check the seal by removing the outer ring and lifting the jar by holding only the lid. If it stays intact, you have successfully canned your food.
If the seal is loose or broken, you may reprocess it in the water bath within 24 hours. Be sure to replace the lid, check the jar rim for cracks or nicks, and replace it if necessary. Alternatively, refrigerate the jar immediately and use it within 2 or 3 weeks.
Recipe Testers’ Reviews
Did you know only 68% of the recipes we test make it onto the site? This recipe survived our rigorous blind testing process by multiple home cooks. It earned the Leite’s Culinaria stamp of approval—and the testers’ reviews below prove it.

Looking for a flavorful accompaniment to a roast turkey tenderloin last holiday season, I made this tasty recipe for apple jelly and loved the sweet-savory flavor combination. It took a bit of time to make, although it was sort of half-science experiment, half-cooking—it was really fun!
Having made jam before by just boiling various fruits, lemon, and sugar, I was intrigued by the use of apples for their natural pectin in this particular apple jelly recipe. You aren’t using the apple flesh here for the jam, just the juices that come from allowing the cooked apples and rosemary to seep through cheesecloth.
This was a great accompaniment to Instant Pot turkey, and I could also see it being very yummy on a wedge of buttermilk cornbread or a homemade biscuit.
I’m so excited to add this gorgeous apple jelly to my preserving repertoire! As the author suggests, this jelly is more complex than overly sweet, with a strong overtone of honey and herbal undertones. It would be wonderful with any pork dish, grilled cheese sandwich, or smeared on buttered bread.
When you boil the syrup, remember to boil it hard, or it’ll take longer to come up to temp, and you get more evaporation. Mine took almost 30 minutes to set via the “wrinkle test.”
It’s also a good idea to skim the scum while cooking, as it’s harder to remove once the jelly starts to set. My yield was almost 16 ounces of clear blush jelly. Gorgeous.


Would you be able to make this jelly omitting the honey? Not a honey fan…
Thanks 🙂
Em
Emily, no, you can’t omit the honey in this recipe. It’s too important/large of an ingredient. For the greatest success, I’d suggest finding an apple jelly recipe that doesn’t call for honey. Sorry…😟
Does it require a pressure cooker or just a water bath?
M Anderson, you just need a water bath canner for this recipe.