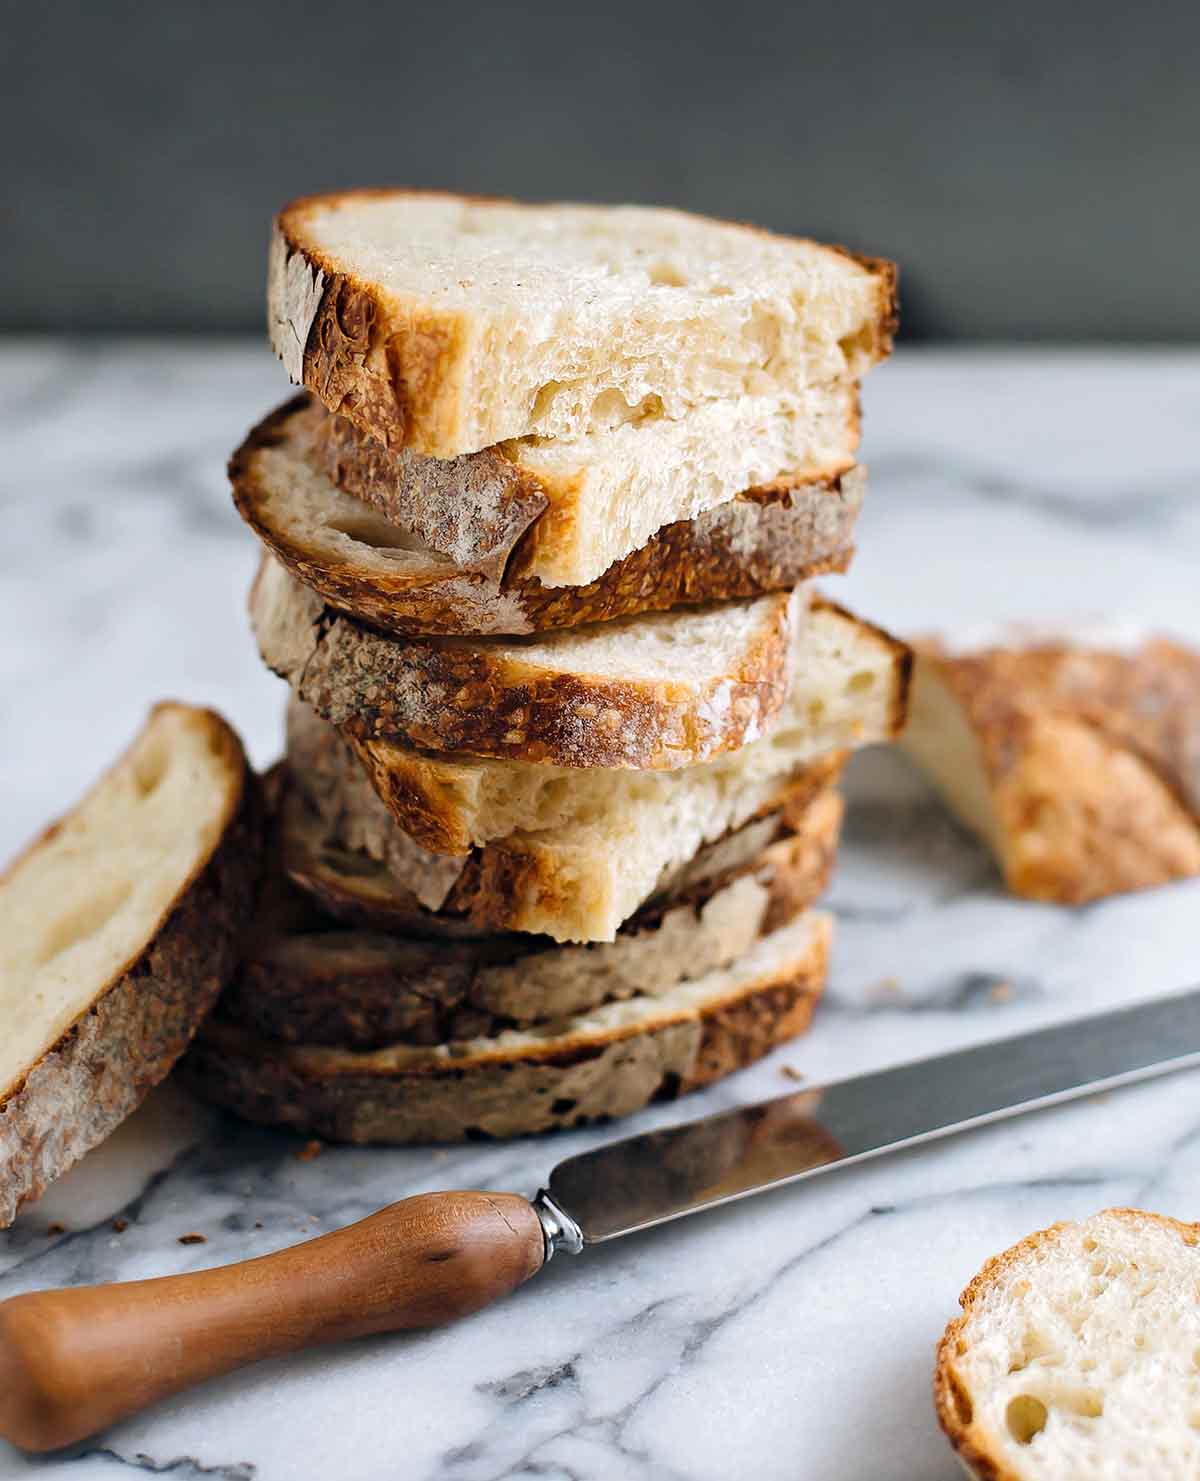
There’s no shortage of sourdough bread recipes available, many of which involve many complicated steps. While they can produce outstanding results, they can be intimidating for those of us who are new to baking bread and somewhat fussy and impractical for all of us. This simple sourdough recipe requires less than 30 minutes of your time and the finished loaf has the same crunchy crust and tender crumb of a classic artisan sourdough.–Angie Zoobkoff
☞ LEARN MORE, READ: HOW TO DRY SOURDOUGH STARTER
.
WHY DO I HAVE TO WAIT BEFORE SLICING FRESH-BAKED SOURDOUGH?
Want to save this?
We know! Waiting for that bread to cool seems like something made up just to mess with amateur bakers. Sadly, it’s true—you definitely have to let your bread sit for at least an hour before slicing into it. This lets the cooking process finish and ensures that you don’t end up with a soggy or gummy loaf. On top of that, if you slice into it too soon, all that moisture will evaporate too fast—it will be gummy now and dried out later. It might seem unreasonable, trust us…we know, but it’s science.
Sourdough Bread
Ingredients
- 1/4 cup bubbly, active starter
- 1 1/3 cups plus 2 tablespoons warm water
- 4 cups plus 2 tablespoons bread flour (or, in a pinch, you can substitute all-purpose flour), plus more for the work surface
- 1 1/2 teaspoons fine sea salt
Instructions
- In a large bowl, use a fork to whisk the starter and water together. Add the flour and salt. Combine until a stiff dough forms, about 1 minute. Then finish the mixing by hand to fully incorporate the flour. The dough will feel dense and shaggy and it will stick to your fingers as you go. Scrape off as much as you can, using a bench scraper if you have one.
☞ TESTER TIP: Keep in mind that this bread takes more than 12 hours to complete, so start the process early in the morning or in the evening to allow for an overnight rest.
- Cover the dough with a damp towel and let rest for 30 minutes.
- Meanwhile, replenish your starter with fresh flour and water, and store according to your preference.
- Grab a portion of the dough and fold it over, pressing your fingertips into the center. Repeat, working your way around the dough, until it begins to tighten and form a fairly smooth ball, at least 15 seconds.
- Cover the bowl with a damp towel and let rise at room temperature. This will take 8 to 12 hours at 70°F (21°C), although it may be as short as 6 hours in a very warm climate. The dough is ready when it no longer looks dense and has doubled in size.
☞ TESTER TIP: Because this dough rises while you’re asleep, you won’t be tempted to rush the process or check on it every 5 seconds to see if it’s ready. (No, you’re not the only one who does that.)
- Once the dough has doubled in size, gently coax it onto a lightly floured work surface. To shape it into a round, start at the top and fold the dough over toward the center. Turn the dough slightly and fold over the next section of dough. Repeat until you’ve come full circle. Flip the dough over and let it rest for 5 to 10 minutes.
- Meanwhile, line an 8-inch (20-cm) bowl with a towel and dust with flour. With floured hands, gently cup the dough and pull it toward you in a circular motion to tighten its shape. Using a bench scraper, place the dough into the bowl, seam side up.
- Cover the bowl and let rest for 30 minutes to 1 hour. The dough is ready when it looks puffy and has risen slightly but has not yet doubled in size.
- Preheat the oven to 450°F (230°C). Have ready a large lidded baking pot, such as an enamel-coated Dutch oven or clay pot. Adjust the oven rack so the Dutch oven or pot just fits beneath the top of the oven with the lid on. Cut a sheet of parchment paper to the size of your baking pot, leaving enough excess around the sides to remove the bread.
- Place the parchment over the dough and invert the bowl to release the dough. Sprinkle the dough with flour and gently rub the surface with your hands.
- Using the tip of a small, serrated knife or a razor blade and holding it at an angle to the dough, score the dough with a cross-cut pattern or any way you’d like. Use the parchment to gently move the dough to the baking pot.
- Bake the dough, covered, on the center rack for 20 minutes. Remove the lid and continue to bake for 25 to 30 minutes. Then, carefully remove the loaf from the pot and bake directly on the oven rack until the crust is crisp, 5 to 10 minutes.
- Using the parchment, move the bread to a wire rack. Cool for 1 hour before slicing. Kindly note that sourdough is best consumed on the same day it’s baked, which shouldn’t be a problem with this lovely specimen. To maximize freshness, cool completely and store at room temperature in a plastic bag for up to 1 day.
Explore More with AI
Nutrition
Nutrition information is automatically calculated, so should only be used as an approximation.
Recipe Testers’ Reviews
This is the sourdough you’ve been looking for! I’ve tried quite a few sourdough recipes in my quest for the perfect loaf and most have been a sad failure, but not this recipe. This one has that amazingly chewy and crunchy crust and that wonderfully chewy, airy interior that you expect from really good sourdough. Absolutely delicious! This isn’t a quick recipe, as you need to plan ahead for the overnight rise and for feeding your starter if necessary, but the results are more than worth it.
I used a starter that I’ve had going for quite a while that I knew was a good one with a 1:1:1 ratio (starter, flour, water) feed. The first mixing took about 90 seconds to bring it together as did the second turning. I used my bread scraper to turn the dough so I didn’t lose as much dough to my fingers.
Our house is a little cool so I let it rise for 12 hours, starting it before bed and finishing the next morning. You DO need a covered baker for this recipe. I used a 3 1/2-quart enameled cast-iron Dutch oven that I placed in the oven while it preheated. I didn’t adjust my oven rack and probably should have moved my oven rack up one notch as the bottom ended up a bit darker than I like but that’s easily adjustable.
My finished loaf ended up with beautiful “ears” (the crunchy little spikes that show up from proper slits) and was a beautiful golden color. Unfortunately, my parchment didn’t fare well and I ended up dumping the bread out and flipping it over onto my oven rack since the paper was disintegrating when I tried to lift the bread. Minor inconvenience for such a wonderful result.
The hardest part is waiting that hour to slice! I would say this loaf would probably make 12 servings… although it won’t serve that many here as we’re devouring it too quickly!
This was a very simple sourdough bread recipe to execute, right down to the dough being easy to work with. Some doughs tend to be so sticky they can be challenging to form and remove from resting containers. This dough was pliable and quite velvety, even in the early shaggy stage. The last step, cooking the loaf on the bare oven rack for 10 minutes, was a technique I hadn’t done before and I feel it gave the crust one last blast of heat. The crust had a crispy, chewy texture that I look for in a sourdough. The inside was denser, I was missing those delightful air pockets. This could be due to the fact that I used all-purpose flour instead of the recommended bread flour. Or it could be the minimal time spent kneading the dough.
The dough puffed up in 1 hour. (My house was cold, so for the last 30 minutes, I carried my bread baby around with me for warmth. It worked.) I used a 10-inch Le Creuset pot. I used a razor blade to make a leaf cut in the top. And the baking time was spot on.
I’ve been rediscovering the joy of baking sourdough
bread during this pandemic, so this recipe seemed like a good one to try as it’s a little different than the other “no-knead” recipes I’ve been making. Other recipes I’ve tried require one to heat the pot and a sheet pan at the same time as you preheat the oven, then carefully drop the risen dough into the pot then add a cup of hot water into the pan to create steam to bake the bread. This recipe is much safer, and just as easy, with the same results IMHO.
I generally bake bread using a mix of white and whole wheat bread flour (75:25 ratio). However, as this was my first try with this recipe, I followed the directions exactly. Everything comes together easily and the result is a wonderfully crusty bread with a nice crumb and not too many air pockets.
I made my own starter using a ratio of 75% white flour and 25% wheat flour with 100% hydration.
If you’re adventurous, feel free to kick it up a notch using some other flour in the dough, but take care to use a larger percentage of white bread flour over exotic grains like rye or flaxseed.
My hands-on time was just 15 minutes overall. The total time was 2 hours plus an overnight rise (close to 12 hours). I used a Romertopf clay pot and top for baking.
I love making sourdough bread. I already follow a particular pattern when making my usual loaves every few weeks, which I tend to bake, slice, and freeze as soon as they’re cool enough. I always use organic flour and I prefer to use King Arthur bread flour combined with some heirloom wheat variety like einkorn. My usual process is more finicky and very hands-on and takes twice as long as this recipe, so I was really interested in trying a simpler, shorter version and comparing it to my usual style.
I must say the results really speak for themselves…an incredible crunchy crust, an interior that isn’t dense but modestly open, and the glorious flavor and texture of my bread blend for the flour (which this time was 50% einkorn and 50% Dove Farms organic bread flour).
It took about 15 minutes of active time to prep the starter and then mix all the ingredients together when the starter was ready. It took another 15 minutes total to shape the bread for the second rise and prep it for the oven as well.
There are about 3 hours of waiting for the starter to activate, 6 hours of waiting for the dough to double, and another hour of wait time before the bake, which is another hour. (I actually started this in the morning and baked it in the evening of the same day. Because it’s a good 10°F warmer here in the Caribbean than the proofing temperature recommended in the recipe, I wanted to keep a closer eye on the rise of the dough and work with it according to feel rather than strict timing. And 8 to 10 hours out of the fridge for a long proof here just sounded like too much.)
The outcome was certainly worthy.
In future, I’d adjust the bake times. I found the crust got slightly too dark on the bottom and the ears started to burn, which is why it came out early. I’d keep the lid on for 25 mins, then do 25 minutes with the lid off and 5 mins out of the pan for a total time of 55 minutes at 450°F. I baked this in a lidded ceramic-coated cast iron pan about 12 inches in diameter that’s deep enough to perfectly fit a rising round loaf of this size.
I might also try higher hydration and add another 50g to 150g of water. In that case, I’d increase the initial contact time to work the dough from the 15 seconds recommended for a single set of “stretch and folds” to a good minute or two of slap and folds with one stretch and fold about 15 minutes later. This would still be a relatively easy bread, but a little needier than the one described here.
As it is, I think it’s a wonderful recipe, I just caution people to adapt based on the temperature of their environments and the intensity of their ovens.
I cut this round loaf in half first, then cut each half into 12 slices. I would say this makes 12 servings.
This recipe is a definite keeper. The ingredients are simple and basic. And for those lacking yeast, the recipe doesn’t require yeast. The end result was a delicious loaf of bread! Two people ate over half of this loaf for dinner.
There’s not a lot of work involved in making this loaf. While it takes time, doing it overnight is a great time-management method.
I used my own starter, which I’ve had since 2012. Based on other sourdough recipes that I make, this recipe used not much starter. I think this may have affected the rise as the dough never doubled. I checked the dough at 8 hours, 10 hours, 12 hours, and then at 14 hours before moving on to the next step. There was some rise, probably 1 1/2 times the original, but not double.
There was, however, more rise during the baking. The next time I make this recipe, I’ll use a little more starter and less water to see if I can get a little more rise.
I used an enamel-coated cast-iron Dutch oven. While the size is indicated on the bottom of the pot, I couldn’t decipher it, though I’m pretty sure it’s 8 quarts.
If you have the virtue of patience, you, too, will be rewarded with a chewy, airy loaf and an oh-so-satisfying crust. The flavor of this sourdough has a nice depth but isn’t notably sour, so the bread serves as a good base for either savory or sweet toppings. If you have just a little bit of bread-baking experience and you want to expand your repertoire, this is an easy, almost foolproof place to start your sourdough adventure.
I’ve made this recipe three times, and the bread turned out beautifully each time. I used all-purpose flour (and even substituted about 100gr of whole wheat flour once) and it still produced a delightful loaf—this recipe is pretty forgiving. It required very little hands-on time, less than 30 minutes total. Go to bed, let it do its thing, et voila, 15 hours later, you end up with a gorgeous loaf.
My tips for a successful loaf:
Most importantly, make sure have a mature starter. Put a spoonful of it in a bowl of water and if it floats, it’s ready to use.
Measure everything by weight.
Follow visual cues to know when your dough is ready; mine actually doubled in less than 8 hours, but I live in a very warm climate.
Be extremely generous in flouring your towel—the dough is still very sticky and it will cling to your tea towel for dear life, ruining the shape of your loaf. I found it easier to wrap the dough in the floured towel on the countertop and then use the towel to lift it into the bowl.
If you can, preheat your pot. I used a 5-quart cast-iron Dutch oven and preheated it for at least 30 minutes.
Eat a snack while this is in the oven, because the smell is torture, and waiting a full hour for the loaf to cool may just drive you completely mad. Enjoy the fruits of your labor and brag to all your friends, they don’t need to know how easy this was to make!
I used Trader Joe’s All-Purpose flour and the starter linked to from the recipe.
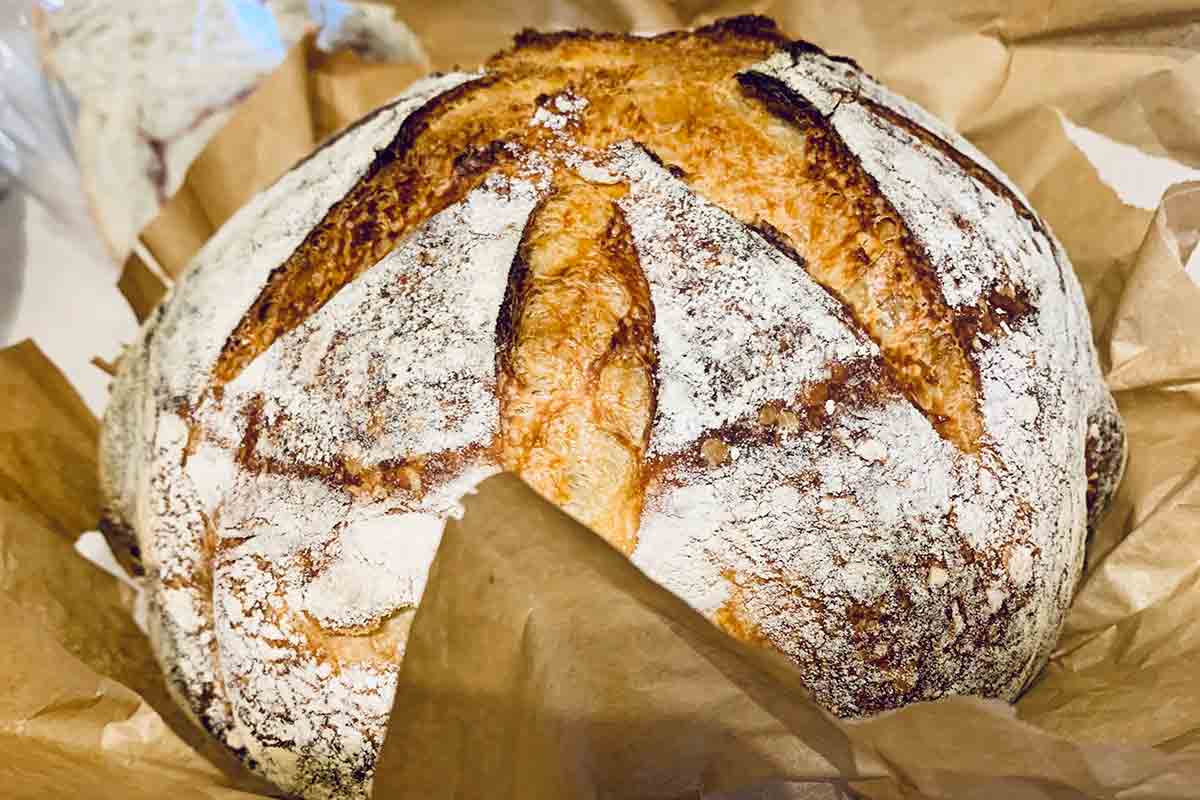


I’ve made a bunch of sourdough over the years and I have to say this recipe resulted in the closest thing I’ve ever made that resembles that tangy San Francisco-style sourdough. I don’t know if my starter has never been just right or what but, wow, I love this bread. I only had half the bread flour the recipe called for so I used AP for the rest and it was a-OK. The dough was sticky at first but not really a problem. One trick other than dusting your hands with flour, is to wet them. That’s what I did before the 12-hour rest and it worked great. I found the recipe easy to follow. My parchment crisped up so I couldn’t use it to pull the bread out of the pan but I just tipped it out. Also, the bottom was a little crisp, so I would cut the timing down by 5 minutes or so. When I make it again, because I will make it again!
Gorgeous loaf, Greg! I couldn’t agree more – this sourdough is the best. It’s the go-to at my house.
Do you think I could double the recipe? Or would it be better to make two loaves separately?
I have always just made two loaves separately, Greg. It seems easier to work with.
Can I use the rye starter with this recipe?
Sure, Jennifer. You can use any active starter that you have here.