This soft pretzels recipe are a German classic but are an easy homemade version with everyday ingredients, including beer (!), that are just like the real deal you'll find abroad. Here's how to make them at home.
What it is: German-style soft pretzels—deep mahogany, crunchy, yeasty, and chewy in the middle—made with beer and a lye-free baking soda trick.
Why you’ll love it: These taste like the real deal you’d find at a Munich Biergarten, not the bready imposters from the mall. The dough is mostly hands-off (overnight in the fridge = flavor you can’t fake), and the baked baking soda trick gives you that dark, burnished crust.
How to make them: Mix a beer-and-barley-malt dough, cold-ferment overnight, shape, dip in baked baking soda solution, blast at 500°F, try not to eat all eight before they cool.
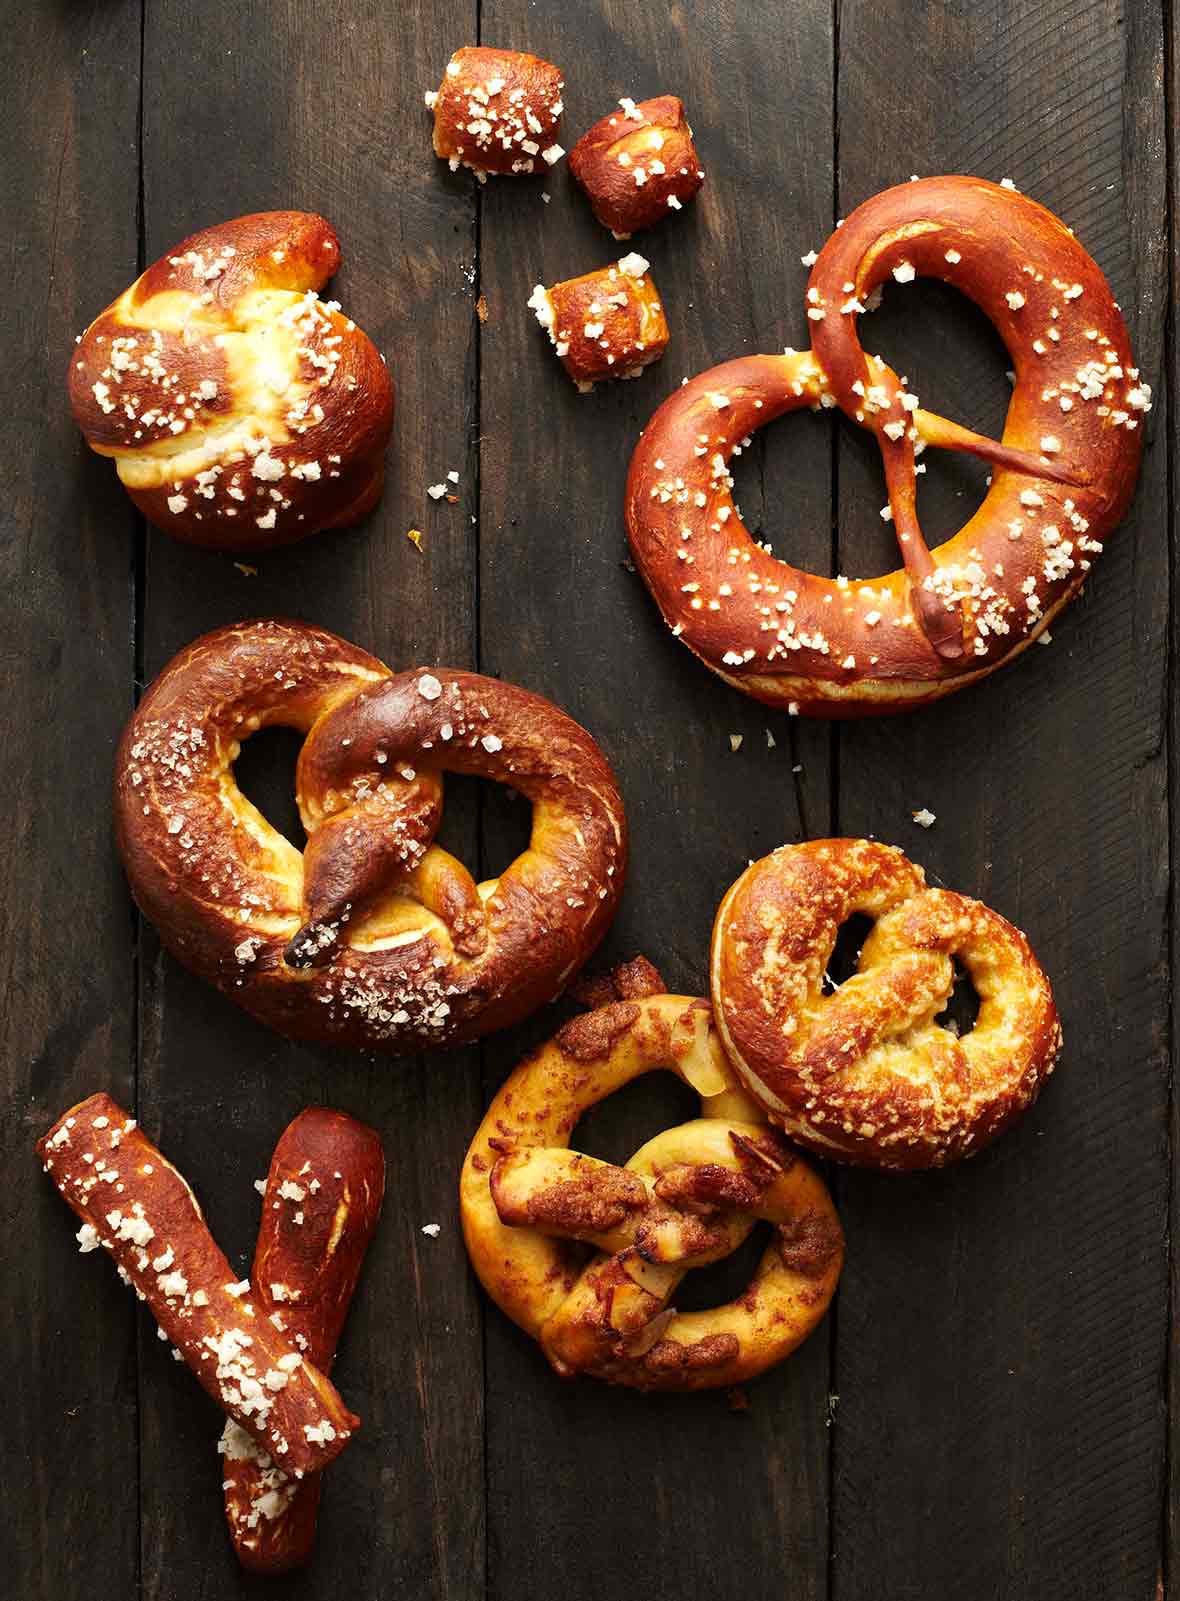
If you’ve ever tasted real German soft pretzels, with a deep, dark, burnished skin showered with crunchy salt crystals and a yeasty, chewy middle, then you know what you’re in for here. The shape of these soft pretzels is typical of the historic German region known as Swabia, where the tradition is to shape pretzels with fat “bellies” and thinly tapered, crispy “arms” interlocking in a twisted embrace. [Editor’s Note: The author was generous enough to share several shape variations—and how-tos—with us, which you’ll find beneath the recipe.]–Andrea Slonecker
Why this soft pretzel recipe works
A lot of pretzel recipes will get you something edible. This one will get you something embarrassing—I’m talking being embarrassed by how fast they disappear. The secret is four things working in tandem:
Beer in the dough. Not a gimmick. It adds subtle complexity and helps that burnished color develop.
Barley malt syrup (feeds the yeast and deepens the crust).
Overnight cold fermentation (the slow rise builds a nuanced, yeasty tang a quick 90-minute proof can’t fake).
The brilliant lye-free move—baked baking soda. Baking it at 250°F makes it significantly more alkaline, giving you that dark exterior, signature chew, and unmistakable pretzel flavor.
Why do I have to bake baking soda to make pretzels?
Sounds like the kind of thing you’d do on a dare, right? But there’s real science behind it. Spreading regular baking soda on a baking sheet and roasting it at 250°F for 2 hours transforms it from sodium bicarbonate into sodium carbonate. This process chemically forces out water and carbon dioxide, leaving behind a compound that is hundreds of times more alkaline than it was out of the box.
That spiked pH aggressively accelerates the Maillard reaction, causing the crust to brown deeply and fast. It’s what gives your pretzels a dark mahogany exterior, their signature chew, and that distinctly sharp, mineral-forward flavor that separates a real pretzel from twisted bread. Food scientist Harold McGee popularized this hack in 2010 as a safer home alternative to hazardous food-grade lye.
[lc-note]While baked baking soda doesn’t require a hazmat suit and goggles like commercial lye, sodium carbonate is a mild skin and eye irritant. Avoid touching the dry powder with bare hands, and keep the solution away from your eyes. Also important: Use only stainless steel cookware and utensils for the dipping bath. The solution can react with aluminum, copper, and nonstick surfaces causing butt-ugly discoloration and pitting.[/lc-note]
Why do I have to dip pretzels in baking Soda before baking?
This is the step that separates a real pretzel from glorified bread dough shaped into a loop. Dipping the pretzels in an alkaline solution—traditionally lye, here baked baking soda dissolved in water (see FAQ above)—raises the surface pH of the dough dramatically. (Like drama-queen dramatic.)
That high pH is what causes the Maillard reaction (the browning reaction responsible for flavor and color) to happen much faster and at a lower temperature than it otherwise would.
The result: that deeply mahogany exterior, the distinctive chew, and the unmistakable slightly-bitter, mineral-rich pretzel flavor. Without the bath? You’d get pale, soft rolls. Delicious? Sure. Pretzels? Absolutely not.
How do I know when my pretzel dough is fully kneaded?
The dough should be smooth, elastic, and quite firm—way stiffer and tighter than typical bread or pizza dough. It shouldn’t be sticky, but it also shouldn’t be crumbly; look for a satiny, slightly tacky surface.
Forget the traditional windowpane test for this one. Because pretzel dough is pretty dry, stretching it thin right away will usually cause it to tear. Instead, use the Poke Test: Press your finger firmly into the dough ball to create a deep indent. If the dough is properly kneaded and the gluten is strong, it’ll spring back, almost filling in the hole. If it feels shaggy or leaves a deep, lackadaisical indent that doesn’t bounce back, knead it for another minute or two.
If you make these homemade pretzels, or any snack on LC, consider leaving a review, a star rating, and your best photo in the comments below. I love hearing from you.–David
Gorgeous, dark mahogany deliciousness! I’ve made several recipes for pretzels over the years and this is the best. Even using the quick version, the color and flavor are absolutely spot on. The dough is easy to work with and the method is straightforward and easily presented. Don’t be put off by all of the steps—it’s just nicely explained and isn’t too much hands-on time. Your only complaint will be how quickly they go—I made a same-day batch for a party, and they were gone in ten minutes. Definitely will make these again, and I might try pretzel sticks next time.
Adam
Soft Pretzels
4.86 / 7 votes
This soft pretzels recipe is a German classic but are an easy homemade version with everyday ingredients, including beer (!), that are just like the real deal you'll find abroad. Here's how to make them at home.
2 1/4teaspoons active dry yeast, (one 1/4-ounce) package
1/2cupwarm water, plus more as needed, [between 100° and 115°F (38° and 45°C)]
1tablespoonbarley malt syrup, or 1 tablespoon firmly packed dark brown sugar
3 1/4cupsunbleached bread flour, plus more as needed
1/2 cuppilsner-style beer, cold
2tablespoonsunsalted butter, cubed, at room temperature, plus more for the bowl
2teaspoonsfine sea salt, such as fleur de sel or sel gris
1/4cupbaking soda
1largeegg yolk
1tablespooncold water
Coarse sea salt, poppy seeds, sesame seeds, onion flakes, or whatever you desire
Instructions
Prep the pretzel dough
To prepare the best soft pretzels, you’ll need to begin a day, or at least 8 hours, in advance and let the dough slowly rise in the refrigerator. (While we offer an option for making quick pretzels, we highly recommend the overnight method because the dough’s flavor really develops during the slow fermentation, becoming nuanced with a yeasty tang that's worth every moment of anticipation.) The day before you want to bake the pretzels, sprinkle the 2 1/4 teaspoons active dry yeast over the 1/2 cup warm water, plus more as needed in the bowl of a stand mixer or in a large bowl. Add the 1 tablespoon barley malt syrup or brown sugar and stir until it’s dissolved. Set aside until the yeast is foamy, 5 to 7 minutes.
Stir in the 3 1/4 cups unbleached bread flour, 1/2 cup pilsner-style beer, 2 tablespoons unsalted butter, and 2 teaspoons fine sea salt and continue stirring until a shaggy mass forms. Attach the bowl and the dough hook to the stand mixer and begin kneading on medium-low speed. After about 1 minute the dough will form a smooth ball that’s quite firm and maybe slightly tacky but not sticky.
☞ TESTER TIP: If the dough is sticky, add a little more flour, about 1 tablespoon at a time, and knead it in until the dough is smooth. Conversely, if the dough is too dry to come together, add more warm water, 1 teaspoon at a time.
Continue kneading on medium-low speed until the dough is elastic, 5 to 7 minutes. Alternatively, turn the shaggy dough out onto an unfloured work surface and knead it by hand.
Lightly butter a bowl that will be large enough to contain the dough after it has doubled in size. Transfer the dough to the bowl. ☞ For slow-rise pretzels, cover the bowl tightly with plastic wrap and place the dough in the refrigerator to rise for at least 8 hours and, for optimal flavor, up to 24 hours. ☞ For quick pretzels, set the bowl aside at room temperature (in a warmish spot) and let the dough rise until doubled in size, about 1 1/2 hours.
Meanwhile, preheat the oven to 250°F (150°C). For one batch soft pretzels, spread 1/4 cup baking soda on an aluminum pie pan or a small rimmed baking sheet covered with aluminum foil. Bake the baking soda for 2 hours. The baking soda will lose weight as it bakes but maintain about the same volume, so you should end up with about 1/4 cup baked baking soda.
Let the baking soda cool completely and then keep it in an airtight container at room temperature until you are ready to make soft pretzels.
☞ TESTER TIP: If you see more than one batch in your future, consider baking a whole box of baking soda in one shot, since it keeps indefinitely. Sift baked baking soda before using, as it cakes after prolonged storage.
Form the pretzels
Line two 12-by-17-inch rimmed baking sheets with parchment paper. Turn the dough out onto an unfloured work surface and firmly press it down to deflate.
To form the classic pretzel shape, cut the dough into 8 equal portions. Work with 1 piece of dough at a time and keep the rest covered with a damp, clean kitchen towel. Pat a piece of dough down with your fingertips to form a rough rectangle about 3 1/2 by 5 1/2 inches. Beginning on a long side, roll the dough up tightly, forming it into a little loaf. Pinch the seam together. Shape the dough into a rope by rolling it against the work surface with your palms and applying mild pressure, working from the center of the dough out to the ends.
☞ TESTER TIP: If you need more friction, spray the counter with a little water from a squirt bottle or drizzle a few drops of water and spread it with your hand.
Once you can feel that the dough rope doesn’t want to stretch any farther (usually when it is between 12 and 16 inches long), set it aside to rest and begin shaping another piece in the same manner. Repeat with the remaining pieces of dough.
Return to the first dough rope and continue rolling it out to a length of 24 to 28 inches, leaving the center about 1 inch in diameter and tapering the ends by applying a little more pressure as you work your way out. Position the dough rope into a U shape, with the ends pointing away from you. Holding an end in each hand, cross the ends about 3 inches from the tips and then cross them again. Fold the ends down and press them into the U at about 4 and 8 o’clock, allowing about 1/4 inch of the ends to overhang. Place the pretzel on one of the prepared baking sheets and cover it with a damp towel. Repeat with the remaining dough, spacing them on the baking sheets at least 1 inch apart and covering them with a damp towel.
Rise the shaped pretzels
Let the covered dough to rise at warm room temperature until it's increased in size by about half, 20 to 30 minutes. (At this point the soft pretzels can be covered tightly with plastic wrap and refrigerated for up to 8 hours.)
Prep the oven
At least 20 minutes before baking, position one rack in the upper third and another rack in the lower third of the oven and preheat it to 500°F (260°C).
Make the pretzel bath
Select a large stainless-steel pot and add about 8 cups water. Be sure to choose a pot that’s at least a finger’s length wider than the diameter of the soft pretzels and tall enough so that the water comes up no more than 2 inches from the rim. Add the baked baking soda and bring the liquid to a simmer over medium-high heat.
☞ TESTER TIP: Avoid other metal surfaces, such as aluminum and copper, and nonstick surfaces, which may react with the baked baking soda.
Dip the pretzels
Once the baking soda dissolves, reduce the heat to medium, and maintain a gentle simmer. Use a large skimmer to gently dip the pretzels, 1 or 2 at a time, in the baked baking soda solution. Leave them in the solution for about 20 seconds, carefully turning them once after 10 seconds. Remove the pretzels from the liquid, drain, and return them to the baking sheets, spacing them at least 1 inch apart. If the ends of the soft pretzels come detached, simply reattach them. Repeat with the remaining soft pretzels.
Score the pretzels
Using a sharp paring knife or new razor blade, cut a slit about 1/4 inch deep in the thickest part of each soft pretzel (you’ll find that at the bottom of the U) to allow steam to escape as the soft pretzels bake.
Brush the pretzels
In a small bowl, lightly beat the 1 large egg yolk with the 1 tablespoon cold water. Brush the tops of the soft pretzels lightly with the egg wash to give them a glossy finish. Top them as you choose, if desired.
☞ TESTER TIP: If you plan to enjoy some of the pretzels later and not hot out of the oven, don’t salt them before baking. Just salt the ones you plan to eat the same day. When stored in an airtight container or wrapped in plastic—a necessity to keep them from drying out—the trapped humidity will dissolve the salt crystals on the surface of the crust. You’ll end up with droplets of water and swollen, soggy spots where the salt once was.
Bake and store the pretzels
Bake the soft pretzels until deep mahogany in color, 8 to 12 minutes, rotating the pan from front to back and top to bottom halfway through the baking time.
Transfer the soft pretzels to a wire rack to cool for 10 minutes before serving. The soft pretzels are best enjoyed the day they're made, ideally warm from the oven or within an hour of being baked. Soft pretzels keep at room temperature, without being wrapped up or enclosed in a container, for about 12 hours.
Store your soft pretzels in an airtight container or wrap each one tightly in plastic wrap, and keep them at room temperature for up to 2 days. Or place the soft pretzels, tightly wrapped in plastic, in a resealable plastic freezer bag, and freeze for up to 1 month. Reheat the pretzels in a 350°F (180°C) oven for about 5 minutes, or for 10 to 12 minutes if frozen.
Notes
Pretzel Variation
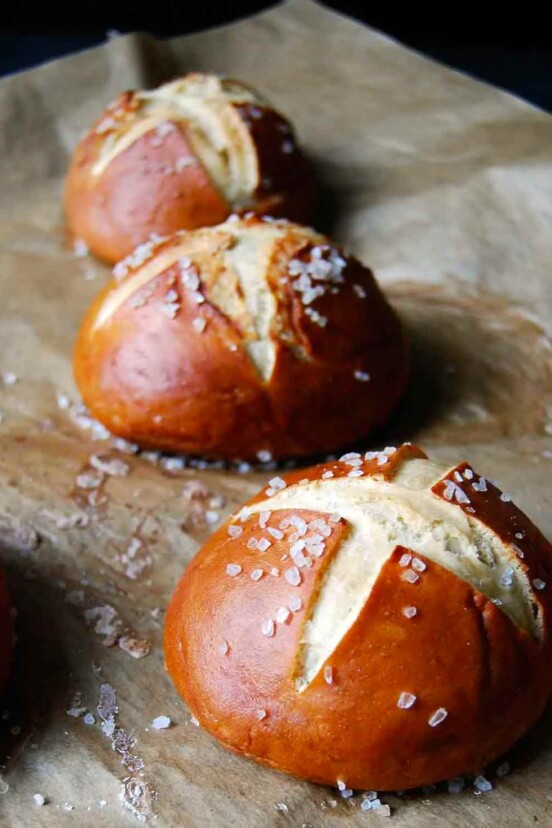
New York-Style Soft PretzelsPretzels sold by New York City street vendors are larger and the arms are not tapered to thin strands of dough like pretzels in the traditional Swabian shape, but rather are kept plump. To achieve this, follow the instructions for shaping the pretzels in the master recipe, making the following changes: Divide the dough into six equal portions. Shape each portion of dough into a 36-inch rope, applying even pressure as you roll from the center of the dough to the ends to avoid tapering the ends. Proceed as instructed in the recipe. Makes 6.Pretzel BitesThese are the perfect snack when you’re watching a movie. To create bite-size pretzels, make the following changes: Reduce the ingredients to make a half batch of the dough, using the following amounts: 1 1/2 teaspoons yeast, 1/4 cup warm water, 1 1/2 teaspoons barley malt syrup or firmly packed dark brown sugar, 1 1/2 cups plus 2 tablespoons (210 grams) unbleached bread flour, 1/4 cup cold, pilsner-style beer, 1 tablespoon unsalted butter (cubed, at room temperature), and 1 teaspoon fine sea salt. Divide the dough into 8 equal portions. Shape each portion of dough into a 12-inch rope, applying even pressure as you roll from the center of the dough to the ends to avoid tapering the ends. Cut the ropes into 1-inch pieces. Proceed as instructed in the recipe, but dip the pretzel bites in batches of at least 8 to 10 (or more if your pot is large enough). Reduce the baking time to 6 to 9 minutes. Makes 8 dozen or so.Pretzel KnotsPretzel knots are great for topping with cheese or streusel. Follow the instructions for shaping the pretzels through Step 4, making the following changes: Divide the dough into 12 equal portions. Shape each piece of dough into a 12-inch rope, tapering the ends slightly as you roll from the center of the dough to the ends. Loop the dough into a loose knot without tugging or stretching. There is no need to slash the dough before baking. Proceed as instructed in the recipe. Makes 12.Pretzel RollsPretzel dough can be fashioned into dinner rolls for a dazzling addition to your breadbasket or a clever bun for sliders or sandwiches. Follow the instructions for shaping the pretzels, making the following changes: Divide the dough into 12 equal portions. Working with one portion at a time, pat the dough down with your fingertips to form a 4-inch circle. Lightly dust the work surface and dough with flour if it’s sticky. Fold over the edges of the circle so that they meet in the middle. Pinch the seams together and turn the roll over so that the seam side is down. Cup your hand over the dough ball and roll it rapidly against the work surface to smooth out the seams and create a well-shaped sphere. Repeat this process with the remaining dough. Use a sharp paring knife or a razor blade to slit a large, deep cross into the top of each roll before baking. Proceed as instructed in the recipe. Makes 12.
Did you know only 68% of the recipes we test make it onto the site? This recipe survived our rigorous blind testing process by multiple home cooks. It earned the Leite’s Culinaria stamp of approval—and the testers’ reviews below prove it.
I’ve made several soft pretzel recipes over the years. I’m ALWAYS a little disappointed. This problem has now been solved. I couldn’t be any more pleased with the results. The pretzels were dark and shiny and I LOVE the use of the beer in the dough—after all, what goes better with pretzels than beer?
Allowing this dough to ferment overnight gave the pretzels a wonderful deep flavor. I used brown sugar instead of malt. I doubled the batch and made some nice pretzel buns for sandwiches. This is a GREAT recipe.
I jumped at the chance to make homemade soft pretzels. The recipe is long because it’s packed with details and cues that really help manage the process, but the actual execution is pretty fast and easy. I went with the slow fermentation and I’m glad I did. The pretzels were really tasty.
The yeast quality matures and mellows into a seasoning, for lack of a better description. I used a generous sprinkling of Maldon flaked sea salt over the top. I also used a large carving board to roll out the dough ropes. The wood texture gives the perfect traction necessary to lengthen the dough without it sticking to the surface.
I’ve made bretzeln for more than 20 years, but never had a recipe that adds beer to the dough. I had to try it. The pretzels turned out nice with a deep, mahogany color.
The instructions are very clear and elaborate. I followed them exactly, and mostly they worked very well. The only thing I had to add was 2 more tablespoons water. The dough was just too stiff. I should’ve added probably 1 more tablespoon to make the dough a bit more elastic. I let it rest in the fridge for 24 hours. I used lye (sodium hydroxide), which worked just fine. You have to thin the lye with water. I always use a 3% solution.
They were just a little bit on the soft side for me; I like them soft and chewy inside, but crisp on the outside. All things considered, it’s a nice recipe and great fun to try out. You’ll never buy pretzels again….
Many times I regret picking the long recipes to make, yet this was worth it in the end. What was most difficult for me was, well, staying on task (teenager problems) and rolling out the dough to a thin and long strip. I had my mom help me on a few steps. But for the most part I managed to get through it myself.
I used dark brown sugar instead of barley malt syrup. In terms of the steps of the recipe, first I added the warm water, then the dark brown sugar, and last topped it off with the dry yeast. I enjoyed it; I just wish I would’ve kept them in the oven for a little less time.
These pretzels are a bit of a project, but the results were worth it. The instructions are really good, and so are the pretzels! The last and only other time I tried to make pretzels, I was a teenager and the pretzels turned out soggy and leaden, and my mother never lets me forget it. In contrast, these pretzels are beautiful: brown and chewy and slightly crunchy on the outside. I used the baking soda method and didn’t have any problems.
Gorgeous, dark mahogany deliciousness! I’ve made several recipes for pretzels over the years and this is the best. Even using the quick version, the color and flavor are absolutely spot on. The dough is easy to work with and the method is straightforward and easily presented. Don’t be put off by all of the steps — it’s just nicely explained and isn’t too much hands-on time. Your only complaint will be how quickly they go — I made a same-day batch for a party and they were gone in ten minutes. Definitely will make these again, and I might try pretzel sticks next time.
Adam, I love, love, love this! 1.) They look ah-MAY-zing, 2.) I love how you just whipped them up for a party, and 3.) They disappeared in NO TIME. That’s the best kind of recipe. If you make pretzel sticks, let me know how they come out, and don’t forget to take a picture!
I love this recipe and make it often. The dough is great to work with and the flavour is amazing. I do have to add a fair bit more flour to make it workable but I assume that’s to do with differences in humidity and the bread flour I use vs the original authors’. I use brown sugar instead of the malt syrup, German wheat beer and then baking soda for the dip. I couldn’t tell any difference in taste or look with baked baking soda vs unbaked so I just go with the quicker version. I always let them rest at least 24 hours or even more, when you spread out making them over a couple days it never seems too labour intensive! I always miss the egg glaze and just throw on some mature cheddar half way through and bake a couple extra minutes for Kasebretzel.
I would love to know if anyone has tried freezing the bulk dough before shaping and rising, as I have a small freezer and I don’t have the space to put in a tray of the shaped uncooked pretzels to freeze.
5 star recipe anyway, so clear and I really appreciate all the tips and explanations. I will definitely be making other recipes from this site. I was born in Munich by the way, so I have high standards that these met!
Thanks, Rachael. Clearly, you’ve got these mastered! We so appreciate you taking the time to share your experience with us and your fellow readers. If anyone has tried freezing the dough before shaping, we’d love to hear from you.
Hi! Have a question to procedure #10. Did I understand correctly that after the 20-30 mins of 2nd proofing, I’ll have to put the shaped pretzels back to the fridge for another 8 hours?



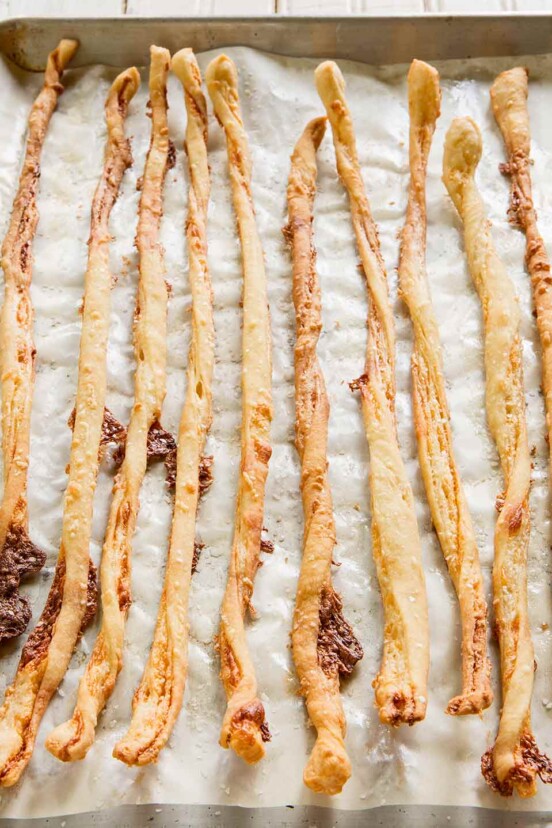
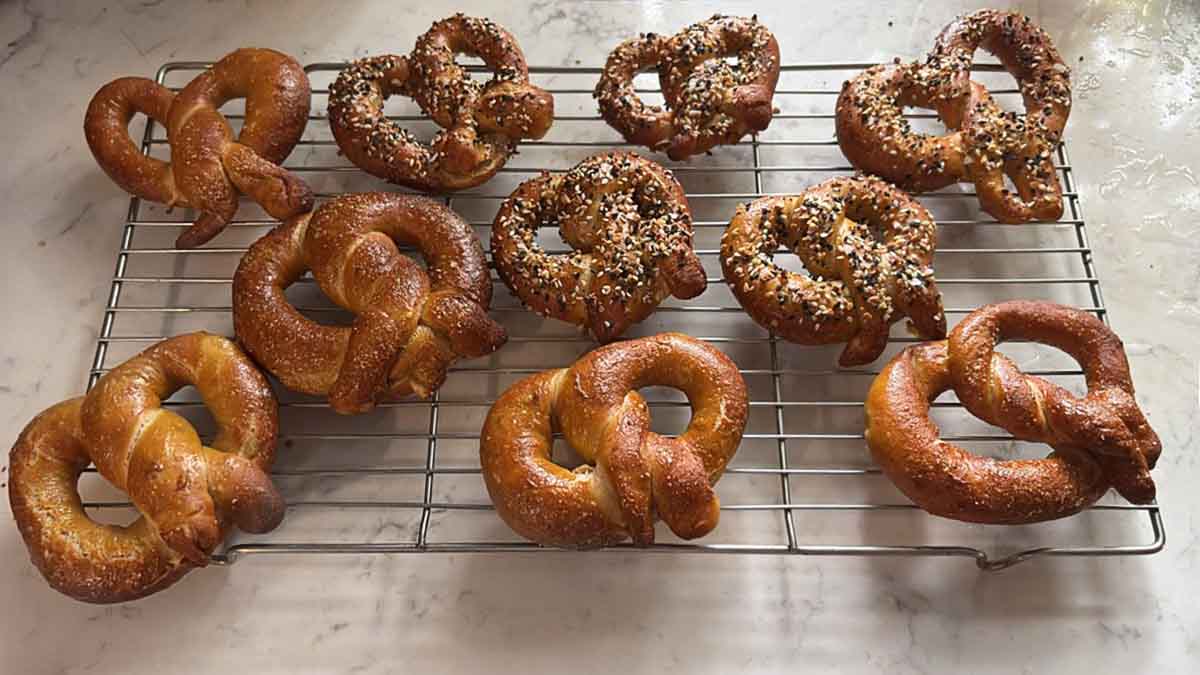














Gorgeous, dark mahogany deliciousness! I’ve made several recipes for pretzels over the years and this is the best. Even using the quick version, the color and flavor are absolutely spot on. The dough is easy to work with and the method is straightforward and easily presented. Don’t be put off by all of the steps — it’s just nicely explained and isn’t too much hands-on time. Your only complaint will be how quickly they go — I made a same-day batch for a party and they were gone in ten minutes. Definitely will make these again, and I might try pretzel sticks next time.
Adam, I love, love, love this! 1.) They look ah-MAY-zing, 2.) I love how you just whipped them up for a party, and 3.) They disappeared in NO TIME. That’s the best kind of recipe. If you make pretzel sticks, let me know how they come out, and don’t forget to take a picture!
I love this recipe and make it often. The dough is great to work with and the flavour is amazing. I do have to add a fair bit more flour to make it workable but I assume that’s to do with differences in humidity and the bread flour I use vs the original authors’. I use brown sugar instead of the malt syrup, German wheat beer and then baking soda for the dip. I couldn’t tell any difference in taste or look with baked baking soda vs unbaked so I just go with the quicker version. I always let them rest at least 24 hours or even more, when you spread out making them over a couple days it never seems too labour intensive! I always miss the egg glaze and just throw on some mature cheddar half way through and bake a couple extra minutes for Kasebretzel.
I would love to know if anyone has tried freezing the bulk dough before shaping and rising, as I have a small freezer and I don’t have the space to put in a tray of the shaped uncooked pretzels to freeze.
5 star recipe anyway, so clear and I really appreciate all the tips and explanations. I will definitely be making other recipes from this site. I was born in Munich by the way, so I have high standards that these met!
Thanks, Rachael. Clearly, you’ve got these mastered! We so appreciate you taking the time to share your experience with us and your fellow readers. If anyone has tried freezing the dough before shaping, we’d love to hear from you.
Hi! Have a question to procedure #10. Did I understand correctly that after the 20-30 mins of 2nd proofing, I’ll have to put the shaped pretzels back to the fridge for another 8 hours?
Cecille, you could continue with the recipe after the second proofing. The refrigeration step is for those who don’t want to bake right away.
Thanks you for the clarification ?
You bet, Cecille.