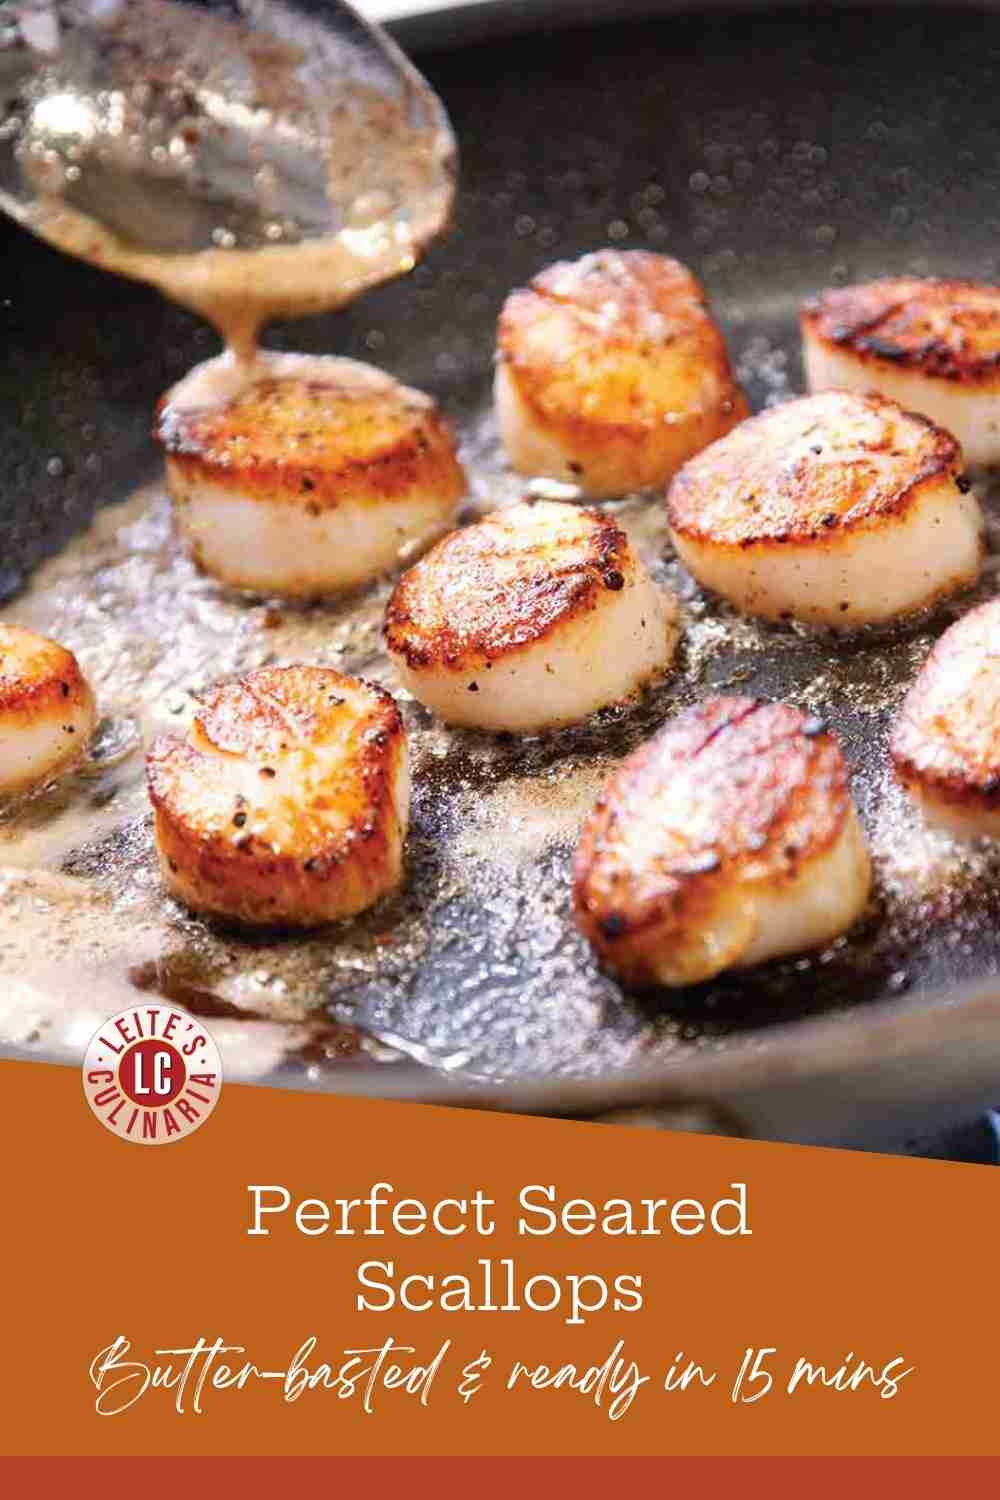
TL;DR (Quick-Answer Box)
- What it is: A restaurant-quality seafood dish featuring fresh sea scallops seared until golden in hot oil, basted with rich butter, and served with lemon wedges.
- Why you’ll love it: Impressive enough for guests but incredibly fast. It requires just five simple ingredients, one skillet, and goes from fridge to table in under 20 minutes.
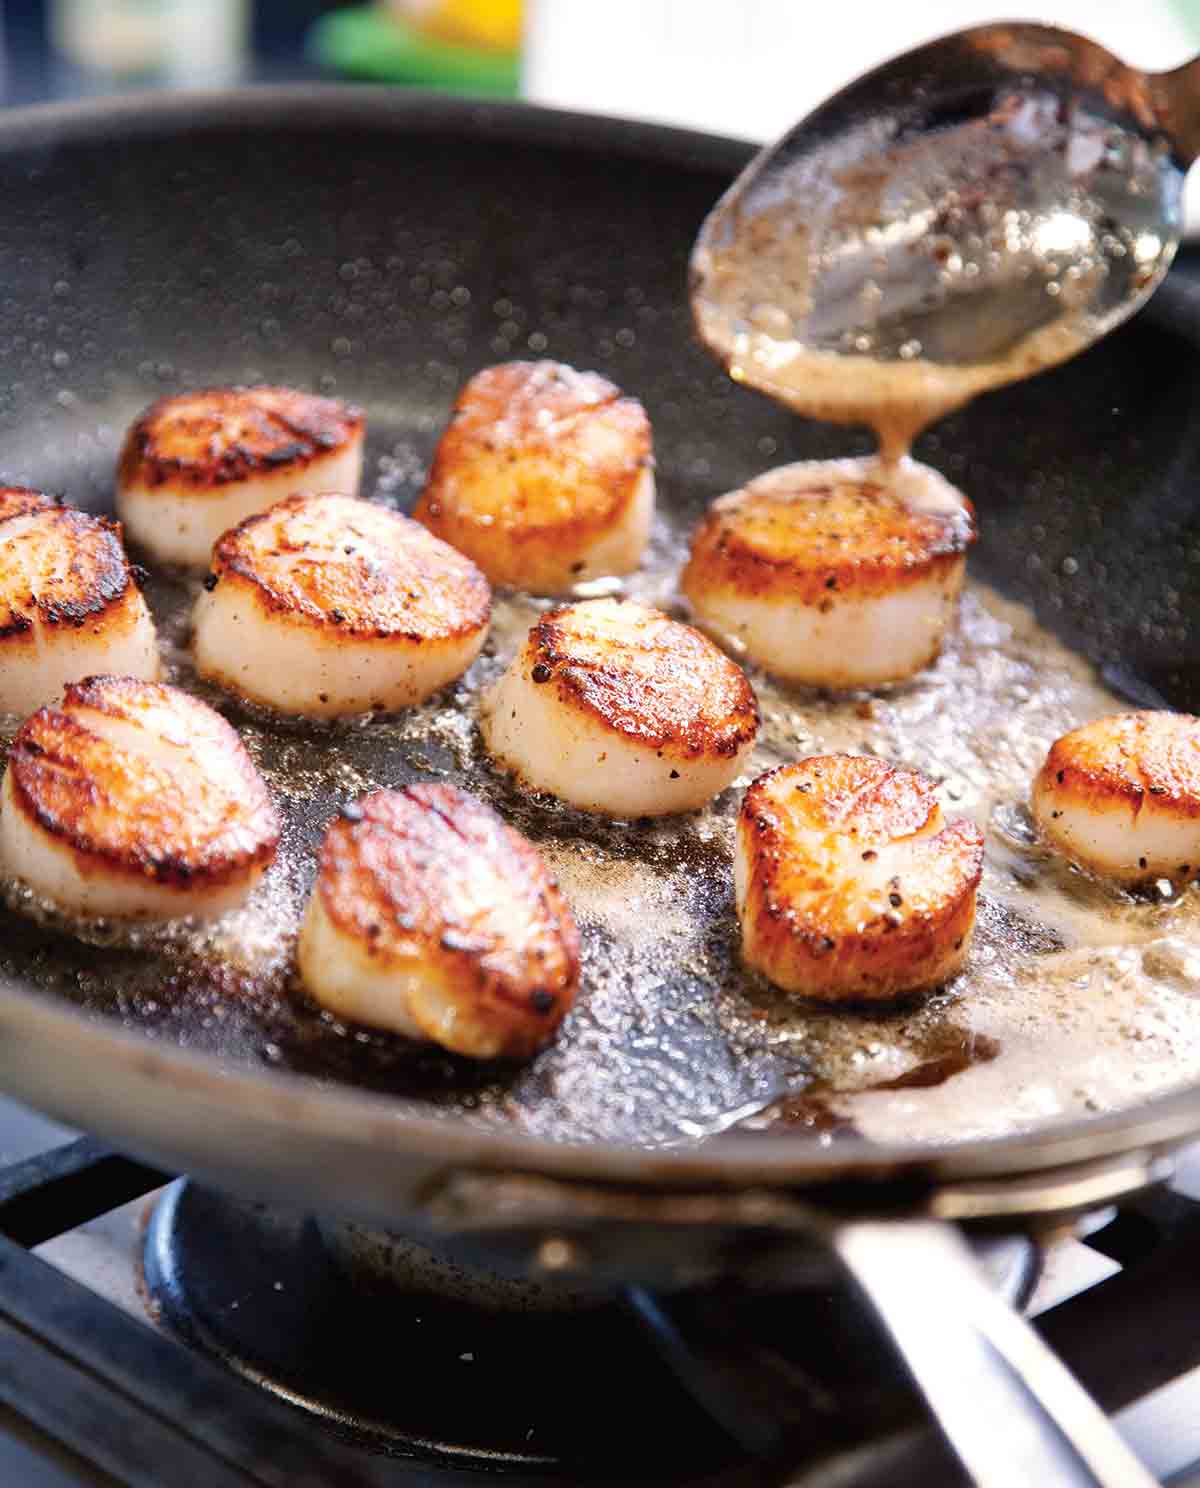
- How to make it: Blot the scallops dry to ensure a good crust, season with salt and pepper, and sear in hot oil. Flip, add butter to the pan, and baste until tender.
Jump To
- TL;DR (Quick-Answer Box)
- Why Our Testers Loved This
- The most important rule for buying scallops: Wet vs. dry
- Notes on ingredients
- How to cook scallops perfectly on the stove
- Your seared scallops questions, answered
- Pro tips & troubleshooting
- More Great Scallop Recipes
- Write a review
- Pan Seared Scallops Recipe
- Recipe Testers’ Reviews
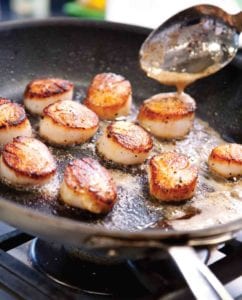
I’ve been using this technique for searing scallops long before America’s Test Kitchen’s cookbook came out. I learned the method while studying at the French Culinary Institute. And it turns out eye-poppingly stunning caramelized scallops with crispy edges, sweet buttery flavor, and tender insides. Everytime.
But there’s one crucial mistake you must avoid at the grocery store, or you’ll end up steaming them instead of searing them. (I learned this the hard way at a dinner party I was catering—read about my abject humiliation below, which I can laugh at NOW!)
Chow,

Featured Review
My friends and I were at a fine restaurant last year in Lake Tahoe and one of my friends offered me one of her scallops. OMG, it was so good… yesterday I bought two frozen ones… I followed your directions and to my surprise they could not have been any better. They were beautifully “magnificently golden brown on the bottom” and tasted so sweet and tender and looked just like your picture… The surprise is, I have never cooked fish before. I am 72-years-young lady, and it is about time I join the seafood world…Next will be lobster!
Victoria Conner

Why Our Testers Loved This
Our testers loved these easy seared scallops so much that they were scrapping dinner reservations just to stay home and enjoy them. Yes, they’re that good. They loved that they were easy to make, and the finished scallops were “perfectly cooked, with a nice, crisp crust.”
Rita R. said it best. “These scallops are easy and delicious. What more can one ask from a simple Sunday dinner? This was my first time making seafood from beginning to end, and I have to say, it’s definitely a recipe I’ll make again.”
The most important rule for buying scallops: Wet vs. dry
If you take only one thing away from this recipe, let it be this: always buy “dry” scallops.
Years ago at a fundraiser, I was auctioned off as a private chef for a posh dinner for six. I bought these massive, gorgeous sea scallops as a starter. But despite the fishmonger’s insistence they were “dry” scallops, they were “wet” scallops. I put them in the pan, following this recipe, and no matter how high the heat was, no matter what I did, they wouldn’t sear. They just released gallons of water and boiled in their own juices. I ended up serving rubbery, steamed scallops to the guests. I wanted to crawl under the table.
Don’t let that happen to you. Here’s what you need to know so you don’t waste your money.
What are wet scallops?
Wet scallops have been treated with a solution of water and sodium tripolyphosphate (STPP). This chemical brew preserves them, but it also forces the scallop to suck up excess water (which you pay for by the pound!).
When you throw them in a hot pan, that water floods out. Instead of searing, the scallops steam. You’ll never get that crusty, golden-brown surface. They also tend to have a soapy or chemical aftertaste. Avoid them at all costs.
How to spot them: They usually sit in a pool of milky white liquid in the display case and look bright white and shiny.
What are dry scallops?
Dry scallops are shucked and packed without any chemical additives or water. They’re pure, unadulterated scallops. Because they aren’t waterlogged, they caramelize beautifully in the pan, giving you that sweet, nutty, restaurant-quality sear.
How to spot them: They have a natural tan or vanilla color (sometimes with a pinkish hue) and are slightly sticky or tacky to the touch. They smell like the clean ocean, not chemicals.
Notes on ingredients
- Scallops—As mentioned below, use fresh “dry” sea scallops for this recipe. If you can’t find dry scallops I say pass on this recipe. Trust me.
- Oil—Use a neutral-flavored oil with a high smoke point. You’ll be using the oil to sear the scallops initially before basting them in butter, so you don’t want the oil to smoke and turn bitter while the scallops are searing. Canola, vegetable, mild olive oil, refined sunflower, or safflower oil are all good choices.
How to cook scallops perfectly on the stove
- Dry the scallops. Use a dish towel or paper towel to dry the scallops thoroughly. Season with salt and pepper.
- Heat the oil in a skillet until very hot. Add the scallops and sear, without touching them, until golden brown on the bottom.
- Reduce the heat and flip the scallops. Toss in the butter and cook, basting with the butter, until the scallops are just cooked through.
Your seared scallops questions, answered
A cast-iron skillet. No doubt. The sturdy metal not only retains heat well, but it also heats evenly.
That results in the beautiful golden brown sear that we so covet on our scallops, pan-seared chicken, pork chops, steaks, and more. You’ll often see recipes call for nonstick skillets to sear food to avoid sticking. But they’re made of flimsier metals, which means they conduct heat less efficiently, ergo a less lovely sear.
The secret to preventing scallops (or any protein) from sticking is patience. Rather than nudge and poke them, worrying about them sticking, trust that when they’re properly seared, they’ll release from the skillet. If they don’t, then it’s not ready yet.
Try again in a few moments. When it’s had enough time, it’ll let go. Trust me.
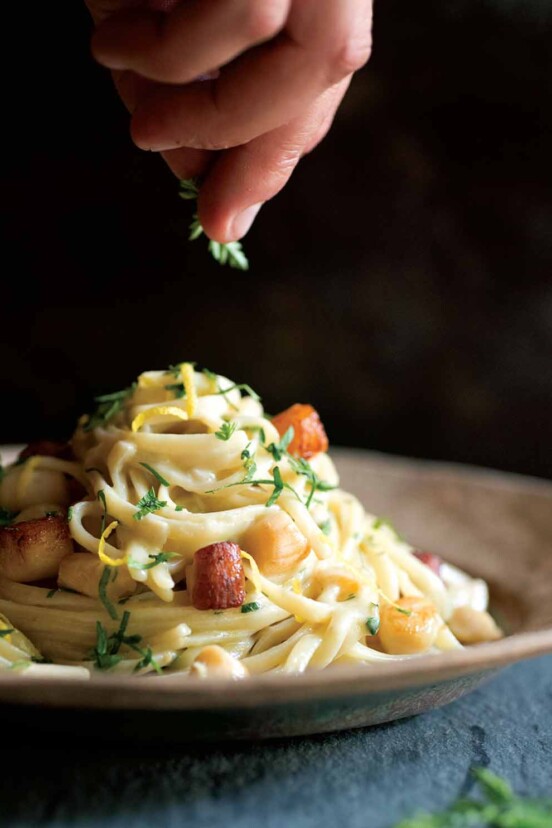
Sea scallops are larger and have a meatier texture than bay scallops, which tend to be smaller, sweeter, and more tender. Sea scallops are ideal for grilling or pan-searing. Save the bay scallops for adding to easy pasta dishes, like this simple spaghetti with scallops.
Pro tips & troubleshooting
- Use tongs or a thin metal spatula to flip the scallops.
- Serve the scallops immediately! They can cool off in amount of minutes.
- Because scallops cool so quickly, gently warm the plates in the oven. You’ll thank me later.
- This recipe is suitable for gluten-free diets.
More Great Scallop Recipes
Indian Pan-Grilled Scallops
1 hr 30 mins
Fettuccine with Scallops
30 mins
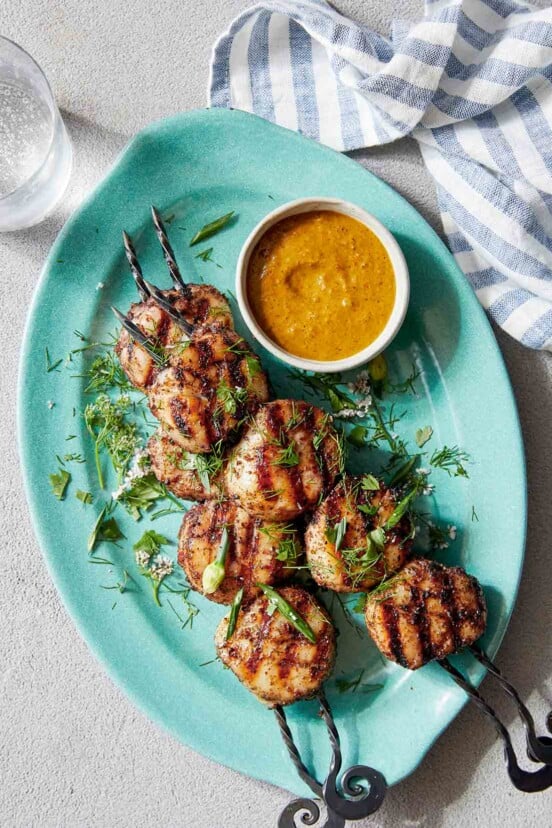
Grilled Scallop Kabobs
1 hr 10 mins
Write a review
If you make this recipe, or any dish on LC, consider leaving a review, a star rating, and your best photo in the comments below. I love hearing from you.–David
Featured Review
Mine isn’t a beautiful presentation, but you did say 20 minutes from fridge to table, and that is what I did. For me, it’s a keeper recipe. I used what I had on hand, which meant frozen, wild, USA sea scallops… I dried them thoroughly… For a high smoke point oil, I used grapeseed oil. I used an 8-inch cast-iron skillet because I was cooking for just myself. I followed your instructions slavishly and now can go to a restaurant without being tempted to spring for the scallop dinner. Thank you.
Rae L
Pan Seared Scallops
Video
Ingredients
- 12 ounces fresh (not frozen) "dry" sea scallops, (see my note above)
- salt and freshly ground black pepper, to taste
- 1 tablespoon mild olive or vegetable oil
- 1 tablespoon (1/2 oz) unsalted butter or ghee
- lemon wedges, for serving
Instructions
- Place the 12 ounces fresh (not frozen) "dry" sea scallops on a large plate or rimmed baking sheet lined with a clean dish towel or several paper towels. Place another clean dish towel or stack of paper towels on top of the scallops and gently press to blot any liquid. Let the scallops rest at room temperature for 10 minutes so the towels absorb any excess moisture.
- Just before cooking, season the scallops with salt and freshly ground black pepper. Heat the 1 tablespoon mild olive or vegetable oil in a large cast-iron skillet over medium-high heat until hot and almost but not quite smoking.
- Add the scallops to the skillet in a single layer, preferably around the perimeter of the skillet and without crowding them. Cook, without touching the scallops, until they're magnificently golden brown on the bottom, 1 1/2 to 2 minutes.
- Reduce the heat to medium and, using tongs, flip the scallops. (If the scallops stick to the skillet, just let them be still for another moment; they're just not ready to be turned yet. When they're ready, they'll let go.)
☞ TESTER TIP: For the love of all things good, don't use a plastic spatula to flip sea scallops.. Tongs are best but a super skinny metal spatula—you know, a bendy flexible spatula—also works quite well.
- Add the 1 tablespoon (1/2 oz) unsalted butter or ghee to the skillet and use a large spoon to baste the scallops with melted butter as you continue to cook the scallops until the sides and centers are opaque, 60 to 90 seconds more, depending on the size. Use tongs to transfer the scallops to plates or platters as soon as each is done.
- Serve immediately with the lemon wedges.
Notes
- Lemon brown butter variation—Cook the scallops as directed but serve with this sauce on the side: Cook 2 tablespoons unsalted butter in a small saucepan over medium heat, tilting the saucepan constantly, until the butter turns golden brown and has a nutty aroma, 3 to 4 minutes. Add 1 minced small shallot and cook until fragrant, about 30 seconds. Remove the pan from the heat and stir in 2 teaspoons minced flat-leaf parsley leaves, 1/4 teaspoon minced thyme leaves, and 1 teaspoon fresh lemon juice. Season with salt and pepper to taste.
- Dietary—This recipe is suitable for gluten-free diets.
Explore More with AI
Nutrition
Nutrition information is automatically calculated, so should only be used as an approximation.
Recipe Testers’ Reviews
Did you know only 68% of the recipes we test make it onto the site? This recipe survived our rigorous blind testing process by multiple home cooks. It earned the Leite’s Culinaria stamp of approval—and the testers’ reviews below prove it.

Loved, loved, loved this scallop recipe—so much so that I wanted more after eating them for dinner. I woke up the next day thinking about them and decided that they’d be dinner that next night, too. We even scrapped plans to go out to dinner in order to eat these again. And you know how sometimes when you have something again, it doesn’t live up to what you experienced the first time? Didn’t happen here.
I should have prefaced this by saying that I like scallops that are allowed to shine on their own. These do just that. I also believe in using a cast-iron skillet to sear mine. I just couldn’t use a non-stick skillet.
The technique of adding the butter and basting the scallops as you cook them is fabulous. No burned or blackened butter. No over-done scallops. Just succulence.
And the butter that’s left in the skillet? Pour it over the scallops. We dipped them in that butter. We also stirred it into a marvelous green rice that I had made to accompany it. Oh, so delicious.
While I’m waxing poetic, I’m going to mention that these sea scallops are so very quick and easy to make. Do you want something really good that will cook in no more than a few minutes? This is it. You can’t heat up prepared food, whether fresh or frozen, this fast. You can’t get take-out or delivery this fast.
I’ll also mention that even though previously-frozen scallops aren’t ideal, you can definitely get them to sear. (Scallops that aren’t previously frozen can be extremely difficult to find.) I decided a while ago not to let that stop me. I defrost scallops with paper towels under them as well as over them. I do need to change the paper towels a few times till they are defrosted and “dry.”)
Once dry, they can achieve that beautiful sear I enjoy, even when fresh aren’t available. Wouldn’t want to be scallop-deprived.
These scallops are easy and delicious. What more can one ask from a simple Sunday dinner? This was my first time making seafood from beginning to end, and I have to say, it’s definitely a recipe I’ll make again.
I used a cast-iron skillet to sear the scallops, and I had no problem with the butter burning. The sauce became nicely brown, and the timing worked out perfectly.
And even with the absence of lemon wedges that my mom forgot to buy, the scallops were still amazing. For the rest of the meal, I prepared a fresh green garden salad with bacon, and I served the scallops along with their buttery sauce on top.

If you follow the instructions in this recipe, you’ll get perfectly-cooked scallops with a nice, crisp crust. Butter-basting is a technique used by restaurants that evenly sears the scallop while imparting flavor. The technique isn’t a new one, but it works well, and adding the butter in the second half of cooking prevents the butter from burning.
Be sure to follow the advice in the recipe and use only “dry” scallops. Also, make sure they’re completely dry before searing them.
Also, make sure your pan and your oil are very hot. I agree that the oil shouldn’t be smoking hot, but rather good and hot, which is indicated by the oil shimmering in the pan.
I didn’t want to take a chance with a nonstick pan, so I used a cast-iron pan. I knew this would give the best possible crust while allowing the center to cook to the perfect degree of doneness. I turned down the heat when I added the butter to ensure that the butter would brown rather than burn. I made the variation with the lemon browned butter, which is a classic combination with the scallops.

These seared scallops were sweet, delicious, and simple.
My butter got very, very brown. Next time, I’d probably take the pan off the heat after flipping the scallops and just baste them and finish cooking off the heat.
I transferred them to a plate and squeezed some lemon over them. The scallops were nice and brown on the outside and tender and juicy on the inside.
These were fabulous—nicely browned and perfectly done. I followed the instructions as written using an All-Clad nonstick skillet, but only turning the heat to medium because my stove and skillet both get really hot.
I cooked the sea scallops for 90 seconds per side and was pleasantly surprised that they were done and opaque in the center. The butter baste helped the browning and gave the scallops quite a nice flavor.
Personally, I’m not fond of sea scallops, but my other half is, and as a treat, I made this for her. As a result, I’m a convert.
This recipe was a home run. This is truly a recreation of what’s served in fine restaurants, and, if you’re using gas, it works well for adapting to the lower BTU temps of a home stove. My stove is electric and can achieve much higher temps.
There’s a difference in the types of scallops mentioned, and the quality is very noticeable. I found wild scallops were superior to the ones at the local fishmonger, so I opted for them. They were all natural, very pink, and also a nice size. It’s very important that there is very little moisture in them, or they’ll steam before they sear. A good gentle squeeze between paper towels will do it.
The timing depends on the size of the scallops because it took more than double the noted time for the scallops I had. In addition, especially if you’re using a cast-iron skillet, remove it from the heat for a minute before adding the butter, then return it to the heat so the butter doesn’t burn.
Some high-quality scallops and just a couple of minutes produced a really delicious meal for the sea scallop lover in my family.
I used my cast-iron enameled skillet and found that when I went to turn the scallops, the crust had stuck to the pan on most of them. I suppose it meant that they were not quite ready yet. Those that kept their crust had a beautiful color.
I turned down the heat as I basted them with butter and had to watch carefully as the heat quickly browned the butter. They were perfectly done when I served them.


Cooked perfectly, followed the recipe. Will wrap in bacon!
I’m with you, Carolyn. Everything is better with bacon!
Carolyn, bacon! Be still my heart…in the metaphorical sense only!
Mine isn’t a beautiful presentation, but you did say 20 minutes from fridge to table, and that is what I did. For me, it’s a keeper recipe. I used what I had on hand, which meant frozen, wild, USA sea scallops because I had just sprung for them last week ($17/lb). They weren’t particularly wet, and I dried them thoroughly. I was happy enough with the sear; maybe they had been frozen only very recently. I also used white pepper instead of black pepper because I had just discovered a brand new Asian store walking distance from my house and had never cooked with white pepper before. My shallots came from a nearby farmstand. For a high smoke point oil, I used grapeseed oil. I used an 8″ cast iron skillet because I was cooking for just myself. I followed your instructions slavishly and now can go to a restaurant without being tempted to spring for the scallop dinner. Thank you.
This looks fantastic, Rae. Nicely done!
Rae, beauty may be in the eye of the behold, but taste is in the mouth of the diner. And that’s all that matters!