My Mexican-born friend Gilberto Martin del Campo, who taught me how to make a green chile sauce, also showed me how to make these enchiladas. This is how a lot of people in Mexico prepare them and is very unlike the gloppy “cheese enchiladas” of the typical Tex-Mex place this side of the border.
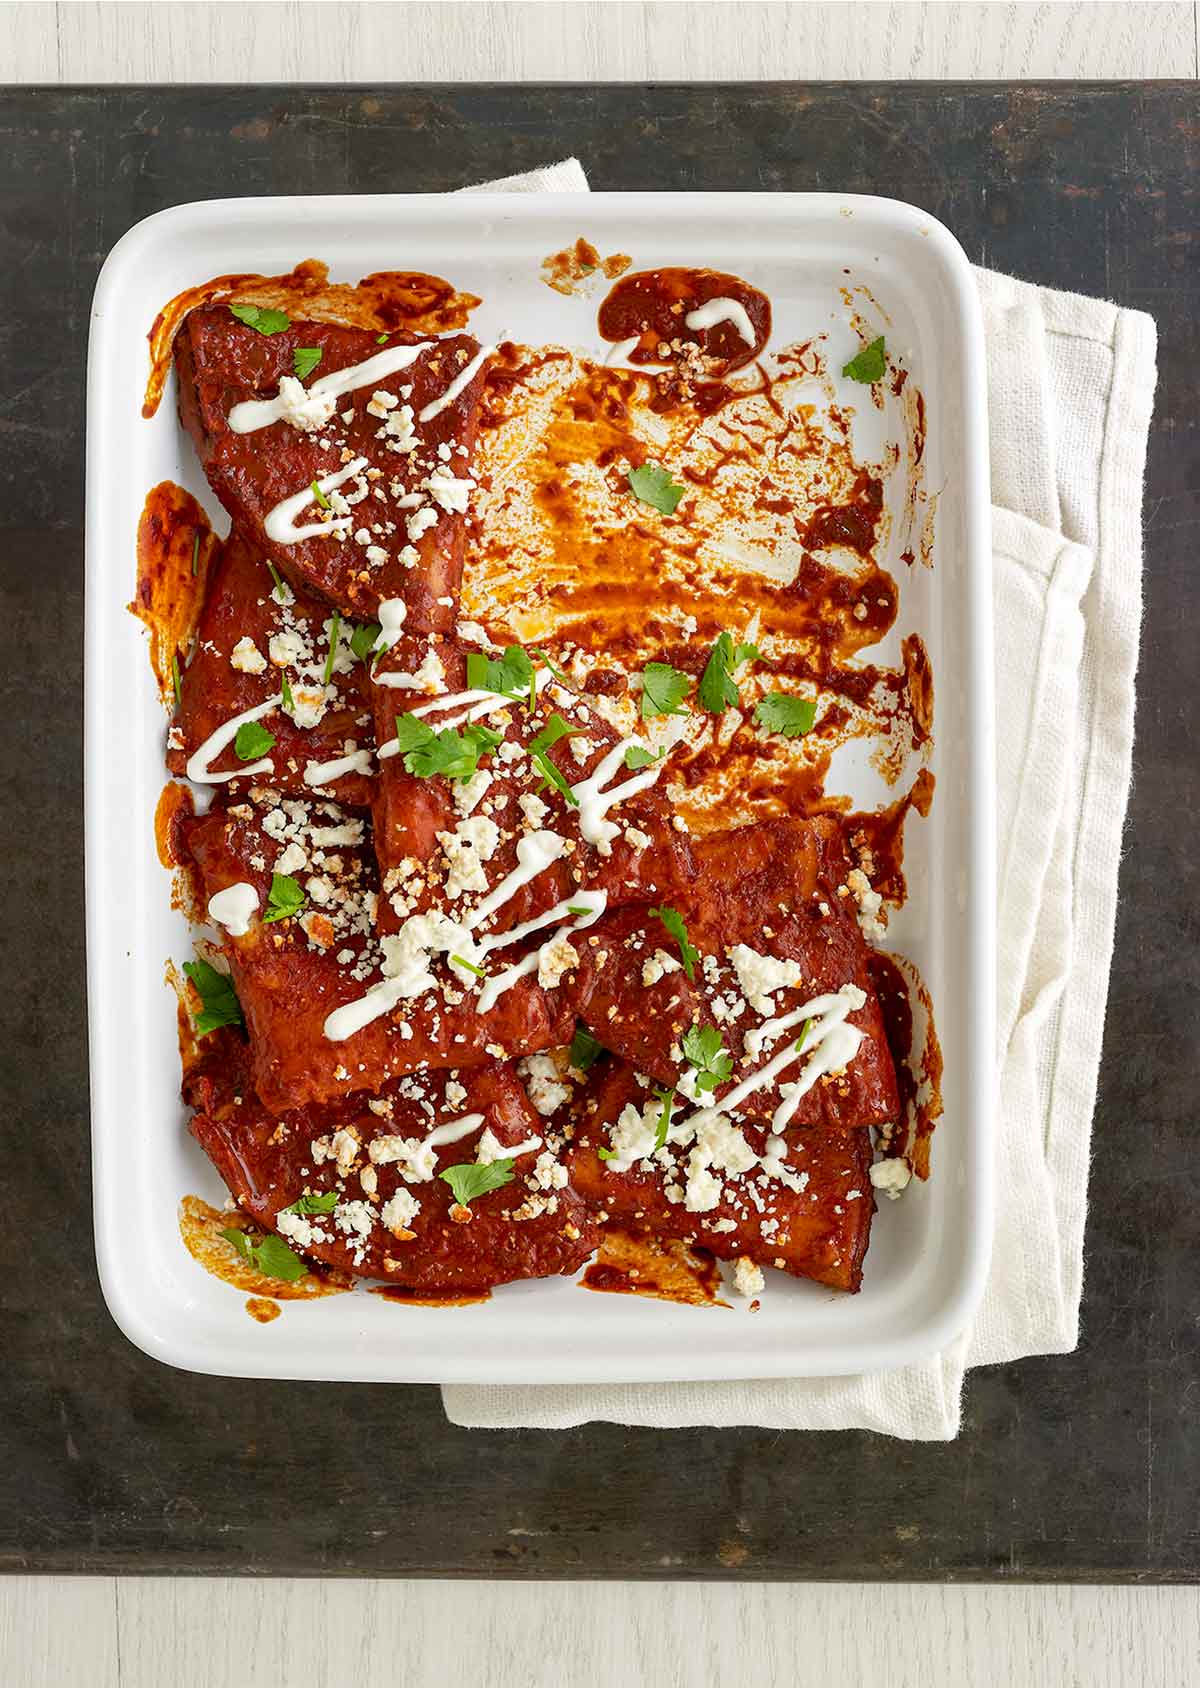
The day I realized that I could make my own sauce for enchiladas was a day when life’s lovely possibilities glowed a few degrees brighter. The sauce turns ordinary corn tortillas and a dribble of sour cream into a feast. The method of frying a sauce-coated tortilla probably seems unusual, but you’re not frying the tortillas to get them crisp and golden. The idea is to make them supple, tasty, and hot. If possible, buy locally produced, real handmade corn tortillas. Sometimes Gilberto will put some queso fresco in the center of the tortilla before he folds it, which is a lovely variation. Make a platter of these enchiladas and serve them for a light supper or lunch. Of course, it will be difficult to fill the platter because the cook usually wants to eat them straight from the frying pan.–Martha Holmberg
What is cotija?
“A slightly dry and crumbly cow’s milk cheese with a nice tang,” is how author Martha Holmberg describes cotija [pronounced koh-TEE-hah], a Mexican cheese named for a town in the state of Michoacán. We couldn’t have said it better ourselves. You’ll find the mild, reticent-to-melt cotija in many grocery stores stateside, although, in a desperate moment, a dryish feta will work instead, notes Holmberg. Nothing’s quite the same as the real thing, though, so go on. Get your cotija on.
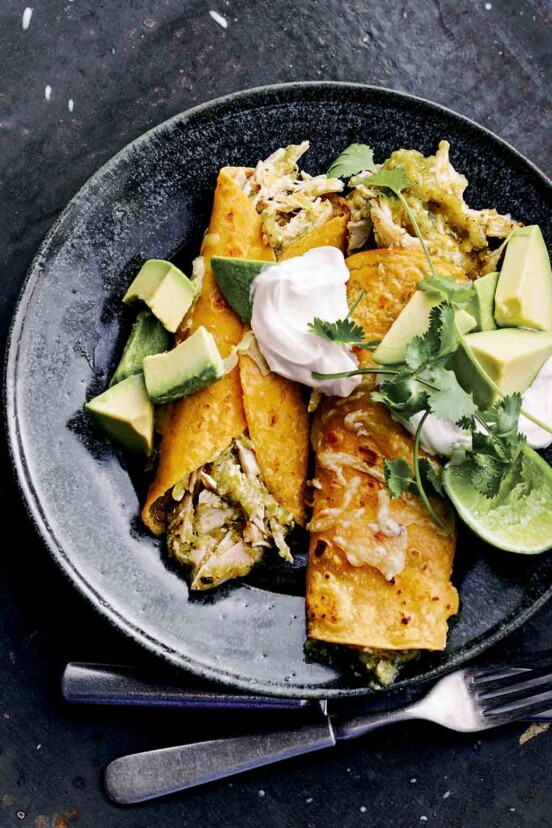
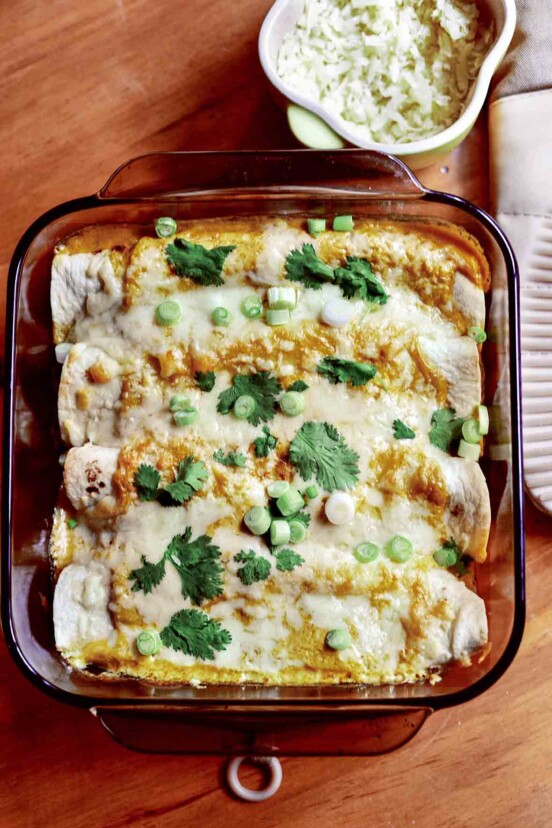
More comforting enchilada recipes
Write a review
If you make these cheese enchiladas, or any dish on LC, consider leaving a review, a star rating, and your best photo in the comments below. I love hearing from you.–David

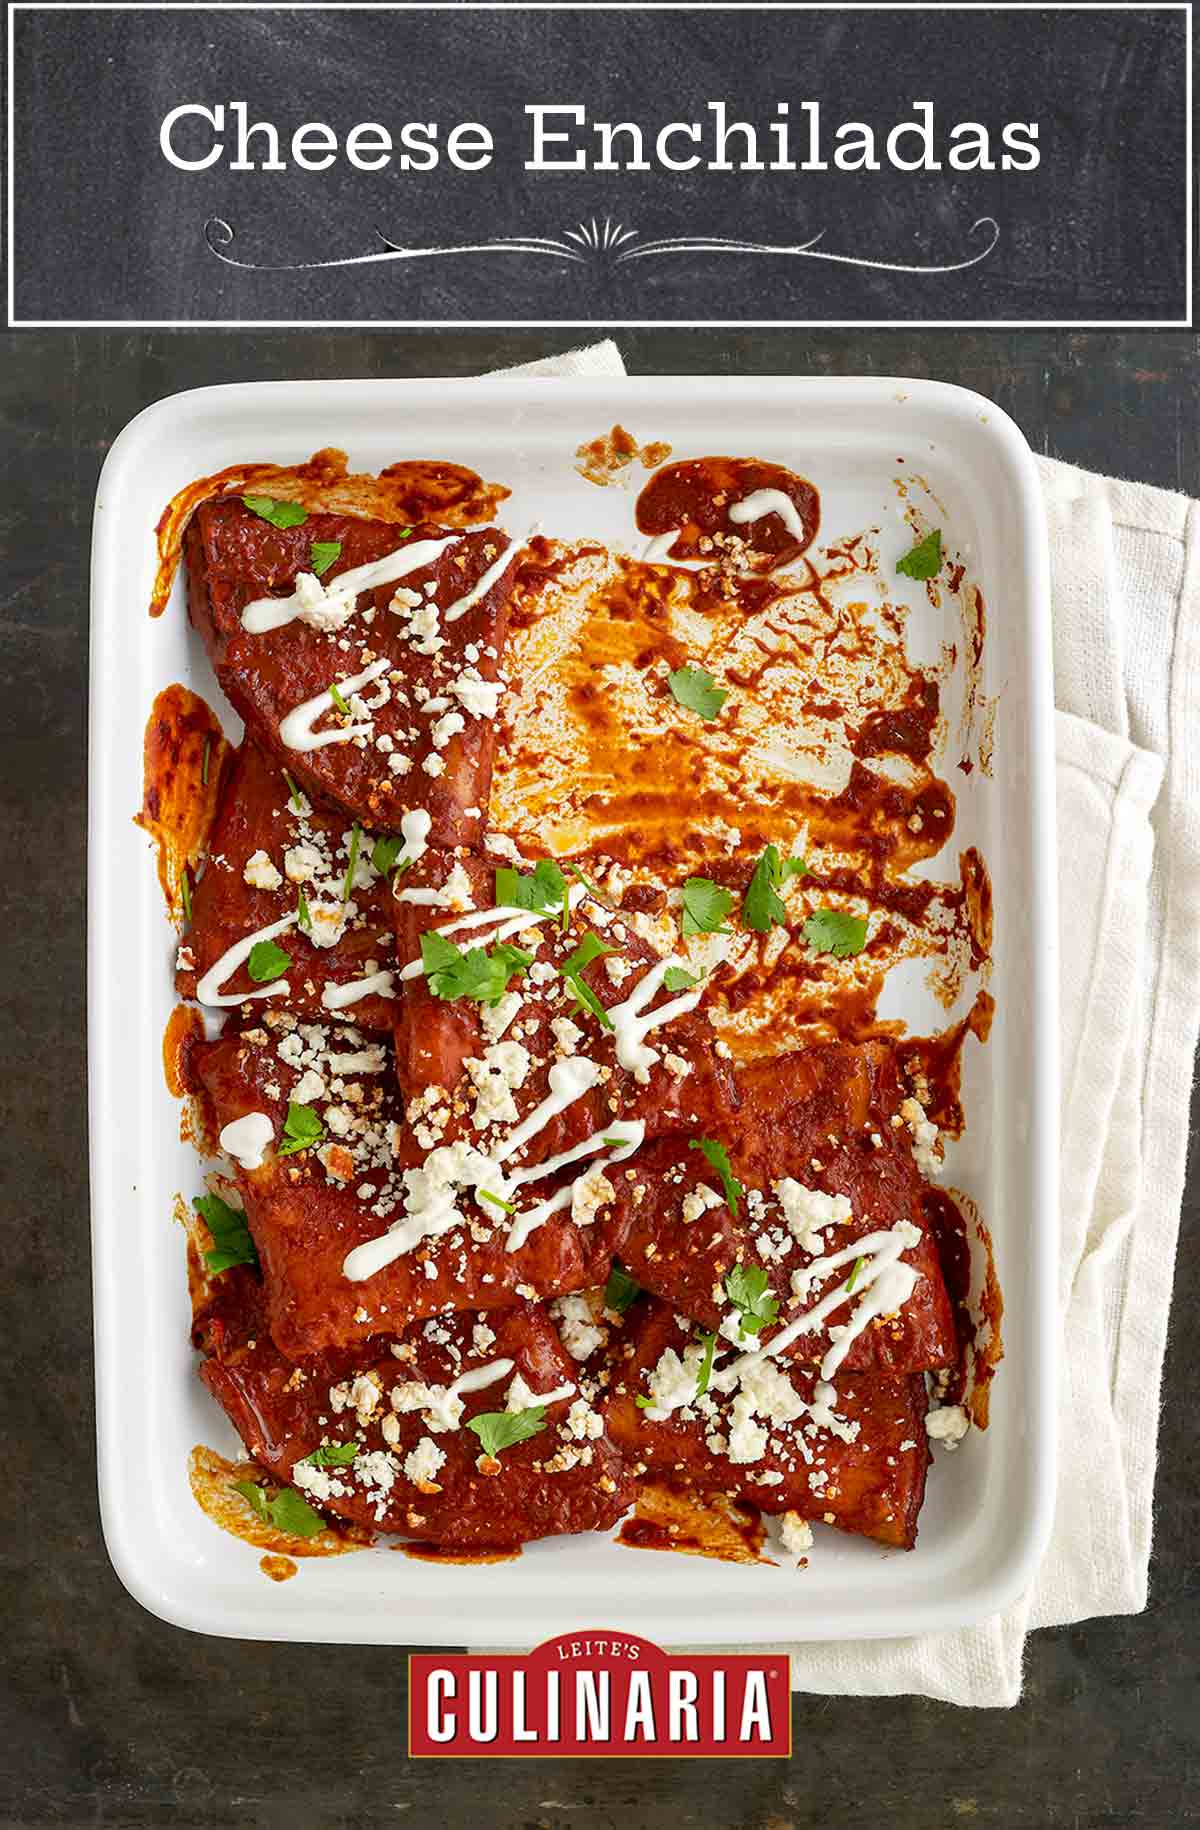
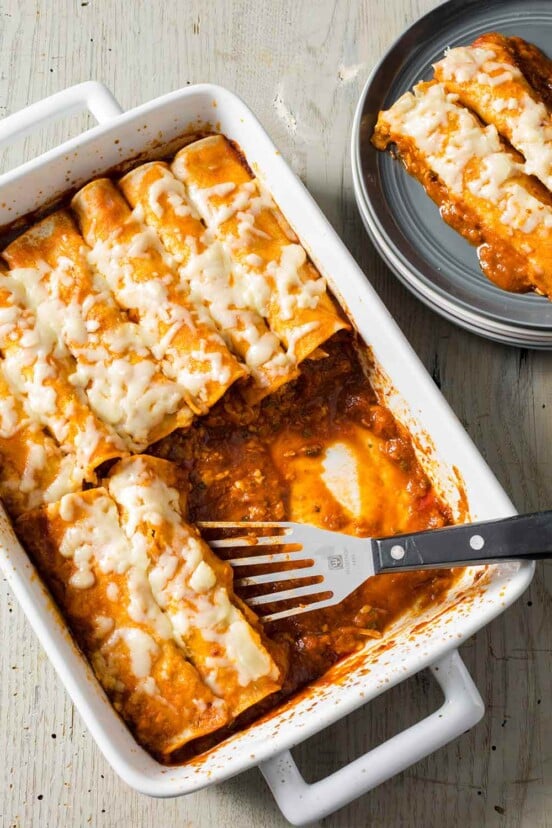
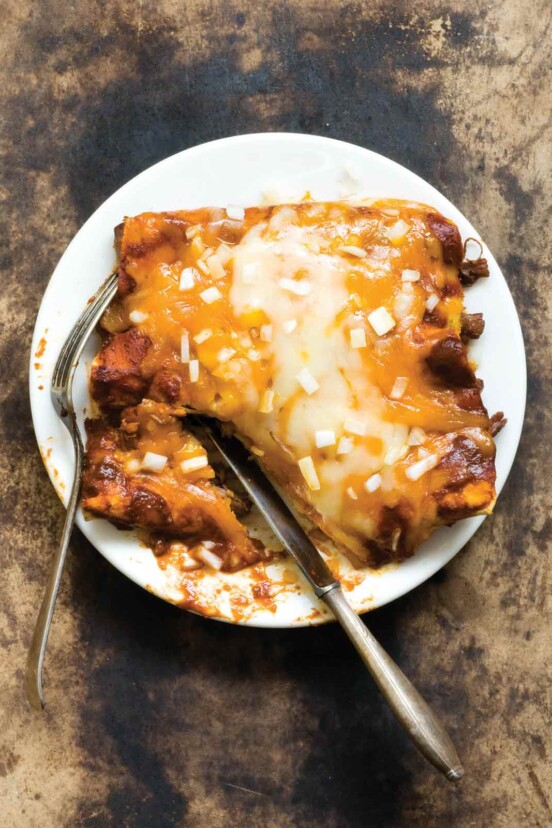
Cheese Enchiladas
Ingredients
For the red chile sauce
- 12 dried New Mexico chiles, (or substitute ancho chiles)
- 2 ancho chiles, (which are, by definition, dried)
- 2 tablespoons olive oil, lard, or rendered chicken fat
- 1/2 yellow onion, sliced
- 1/4 teaspoon kosher salt, plus more as needed
- 3 large garlic cloves, smashed
- 1/2 teaspoon ground cumin
- 1 teaspoon granulated sugar, plus more as needed
- 1/2 cup homemade chicken stock, low-sodium canned chicken broth, turkey broth, or vegetable broth
For the enchiladas
- 4 tablespoons olive oil
- Twelve (6-inch) corn tortillas
- 1/2 cup crumbled cotija cheese
- 1/2 cup sour cream
- 1 teaspoon fresh lime juice
Instructions
Make the red chile sauce
- Break open both types of chiles, discard the stems, and shake out the seeds. Depending on how brittle the chiles are, you can use your hands or use kitchen scissors. The chiles contain a natural chemical that can irritate your skin or eyes, so be careful. If your skin is particularly sensitive, wear rubber gloves. Be sure to wash your hands thoroughly with soap and water when you have finished.
- Place a large skillet over medium-high heat, add the chiles, and toast them by pressing them flat onto the hot surface with a metal spatula, turning them once. Once they change color and you can start to smell them, they’re ready. This can happen in as short a time as 15 seconds a side. Don’t toast them too long or they’ll scorch. Pour the chiles into a medium bowl, add hot water to cover, and let soak until quite soft, at least 30 minutes.
- While the chiles are soaking, in a medium skillet, heat the oil over medium-high heat. Add the onion and salt and cook, stirring frequently, until the onion starts to sizzle. Then reduce the heat to low and continue to cook until the onion is very soft and sweet and is starting to caramelize, about 15 minutes. Add the garlic, cumin, and sugar and cook for another 30 seconds or so. Remove from the heat and set aside until the chiles are ready.
- Drain the chiles, reserving the soaking water. In a blender, combine the chiles and the onion mixture and process until puréed, adding enough of the broth to create a smooth purée and stopping to scrape down the sides of the blender. Add the remaining broth and process, adding a little of the soaking water if needed to get a nice pouring consistency reminiscent of very thick canned tomato juice. Taste and adjust the seasoning with more salt or sugar if needed. You should have about 2 cups. (You can refrigerate the sauce in an airtight container for up to 1 week or freeze it in resealable plastic bags for up to 2 months.)
Assemble the enchiladas
- Heat the oven to 250°F (120°C).
- To keep things from getting messy (well, uh, from getting too messy), set up your workstation like this: Pour 2 cups chile sauce into a shallow dish, such as a pie plate. If you’re right-handed, set the dish of sauce to the left of the stove, place the stack of tortillas within easy reach on the same side of the stove, and set a large baking dish (a 9-by-13-inch dish is a good size) to the right of the stove.
- In a large skillet, heat 1 tablespoon oil over medium-high heat. Dip a tortilla into the chile sauce, coating it on both sides. Let a little bit drip off, and then place the tortilla in the hot oil—be careful, as it will spit and sizzle. If there’s room in the skillet, coat a second tortilla and add it. Cook for 30 seconds, turn, and cook on the other side for a few more seconds until the tortilla is floppy and hot. You’re not trying to crisp the tortilla, merely warm it until it’s bendable. Slip tongs or a long, thin metal spatula carefully under the middle of the tortilla, lift it carefully, and let any oil drip back into the pan. Move the tortilla to the baking dish, carefully fold it in half, and then in half again to make a loose triangle.
- Repeat with the remaining tortillas, adding more oil to the pan as needed, and snugging the tortillas together in a neat single layer in the baking dish.
- Crumble the cheese evenly over the folded tortillas and pop them in the oven to warm, 5 to 7 minutes.
- In a small bowl, stir together the sour cream and lime juice and drizzle over the enchiladas. Serve immediately.
Notes
Richer & thicker variation
You can add 1/2 cup sour cream to the sauce just after you add the broth to make a richer, though less authentic, version of this enchilada sauce.
Explore More with AI
Nutrition
Nutrition information is automatically calculated, so should only be used as an approximation.
Recipe Testers’ Reviews
Did you know only 68% of the recipes we test make it onto the site? This recipe survived our rigorous blind testing process by multiple home cooks. It earned the Leite’s Culinaria stamp of approval—and the testers’ reviews below prove it.

This recipe represents the simplest, and arguably most traditional, type of enchilada. “Enchilada” translates roughly as “chilied,” and at its most basic, an enchilada is a tortilla in a chile-based sauce. Fillings are just extra.
The cooking method outlined in the recipe works, if you follow it exactly. I’ve made many an enchilada in my day, folded, stacked, and rolled, and have done many variations of the frying and sauce-dipping steps. For some types, it works best to fry in oil then dip in sauce, and for others, to do it in the opposite order, as in this recipe. For this folded enchilada, I recommend the method in the recipe. I didn’t find that 1 teaspoon lime juice was enough to thin the sour cream to a drizzling consistency, but it’s not that big a deal. You could also use Mexican crema here, if available, or crème fraîche.
The sauce is simple and easy and will work well on enchiladas or as a cooking element in other recipes, such as rice. The chiles are the star here, so treat them well, starting with the toasting. It took about 3 minutes to toast the chiles. I recommending rinsing them briefly (very briefly, you don’t want them getting soggy), and drying them before toasting. The instructions don’t mention turning them, but you should turn them while toasting, and make sure they don’t scorch. You want them fragrant, but not blackened. I did need to add quite a bit of soaking liquid to get a sauce-like texture, about 1/2 cup. I also recommend taking the time to adjust the seasonings as recommended. I added a bit more sugar and quite a bit more salt.
These were so authentic they brought back fond memories of our extended family from Mexico that we don’t see very often. In addition to the chicken stock I used 1/4 cup of chile water to thin the sauce to a thick tomato sauce consistency. The yield ended up being a little over 2 1/4 cups. It only took my peppers 1 minute each side for them to smell. It mentioned that they’d change colors but my dried chiles were so dark you didn’t notice a change in color, just the smell.
The onions sizzled immediately due to the fact that you were putting them into a hot skillet with oil. I did add an additional 1/4 teaspoon salt and 1 teaspoon sugar, as they sauce tasted a little flat. This addition gave it the taste I desired. The cotija cheese was worth the trip to five different stores, as it added the most authentic Mexican flavor. The author is correct: this isn’t a clean job. My stove is covered with sauce and grease, but they were so worth the mess. The sour cream with lime juice was very thick, certainly not drizzleable (yep, made that word up), so I thinned it with buttermilk until it was able to be drizzled. The kids loved tonight’s meal.

The original title of this recipe, Simple and Delicious Enchiladas, says it all! Coating the corn tortillas with chile sauce before frying them is a stroke of brilliance. I used a silicone basting brush to coat both sides of the tortillas, and thought this method was simple and not at all messy. The chili sauce is excellent, I can foresee many variations (dried chipotle chilis ) and many uses. If you heat your skillet (I used cast-iron) to medium and then drop the dried peppers in, it should take no more than three minutes or so to toast them.
I also heated the oil for the onion to medium and dropped the temperature to low almost immediately. I found for a good consistency, I couldn’t use all of the broth and certainly none of the water from soaking the peppers. In the end I had a bit less than a cup and a half of an EXTREMELY good chili sauce. I’d never encountered cotija cheese, but let me say, if you like good cheese, you may have trouble saving the required amount for the dish.

These enchiladas really are simple and delicious. I wouldn’t bother turning on the oven, as the cooking process was so quick that I didn’t have time to put the first batch in the oven before frying another tortilla, moving it to the dish, placing the next tortilla in the skillet, turning it, and placing it in the dish. The flavor of these is both warming and satisfying. While I’d love to try this dish with different cheeses, I’d use the sour cream and lime sauce again and again. I really enjoyed the cooking method and will use it in the future when working with corn tortillas for enchiladas of all kinds.
The red chile sauce is simple to make and comes together very quickly. I was able to find all the ingredients called for in the local supermarket. The step in the recipe that made me a bit nervous was the toasting of the chiles, but this step was actually pretty straightforward. It only took about 15 seconds for the chiles to become fragrant and toasty. They did not scorch. I soaked them for about an hour. When it came to sautéing the onion until it began to sizzle, that took all of 15 seconds as well. The caramelizing of the onions did take the full 15 minutes.
While the sauce had great depth of flavor, it was a bit spicy. I wasn’t sure everyone in my family was going to love the heat. It was also pretty thick—more like canned chili than canned tomato juice. I thought I might be able to solve both problems with additional microwave chicken stock. This did the trick, thinning the sauce and softening the heat. I ended up with about 3 cups of sauce.
The sauce you will need for the simple and delicious enchiladas is easy and very straightforward, though it takes about an hour to prepare. I used dried new Mexico and ancho chiles, like the recipe says. Prepping those chiles takes some time, and be careful to remove all the seeds and membranes if you don’t want it overly spicy.
I made this sauce for the whole family, kids included, and everybody loved it. Toasting the chiles took about 15 seconds each side, in my case. I put 4 chiles at once on my griddle, that was good manageable. It was fairly easy to see when they changed color as they turned bright red. When blending the chiles, I needed more than a little bit of the soaking water, a total of about 1/2 cup. I had to stop the blender about 6 times and push the top layer down to really blend it. The yield was about 2 cups, not quite enough to coat 12 6-inch tortillas.
This recipe is a keeper. I’ve probably made this at least 5 or 6 times and counting! My family loves, loves, loves the sauce—it’s full of flavor. There’s nothing quite like a good homemade enchilada sauce, and this one is a snap to make. I usually end up using some, if not most, of my chile soaking liquid to thin out the sauce—the earthiness and depth of flavor from roasted chiles is so good. I’ve also made these with cooked cubed boneless chicken stuffed inside, and they are fantastic.
Plan some time for assembly, at least 30 minutes. I assembled everything ahead of time and placed it in the refrigerator. Texturally, the tortillas may have gotten just a bit soft, although no one complained, so maybe it was my super sensitive taste buds. I think next time I’ll assemble and cook it immediately as the recipe states or I’ll make it ahead but cook the tortillas a little less. For the softening of the tortillas, I have always used the “pan fry with oil then coat with sauce” method, so I enjoyed trying a different technique. The “sauce first” method could have also contributed to the slightly softer texture.
On the next day, my second attempt, I tried this recipe again because I had plenty of the delicious sauce left over. I tried a different method, which worked better for me and yielded much better results. I place a few tablespoons of oil in the pan and briefly heat each side of the tortilla. I then stacked the tortillas on top of one another and took a tablespoon and lightly coated each one with the back of the sauced spoon (one tortilla at a time, just before putting them in the pan) and place the tortilla back in the pan for a quick reheat. While the tortilla was heating on the sauced side, I coated the other side with the back of the sauced spoon. This method allowed the tortillas to get soft and pliable with some, but not too much, sauce—unlike when I dipped them in the sauce the previous time, which made them mushy and fall apart.
The tortillas stayed intact much better and I was able to roll them and place a small sliver of Monterey jack cheese in the middle and topped with a cojita-style cheese. These were so delicious. My family ate them all up (yesterday there were leftovers).


Hi I had been looking for this recipe as I used to rent a room from a family and the mom would make these kind of enchiladas…but we would put some fresh cabbage and cojita cheese inside before folding them over on the plate, and she made this tangy vinaigrette to drizzle on top or sometimes inside with the cabbage. I am on the hunt for that vinaigrette recipe as she never shared with me how to make it. It looked like she used regular vinegar with some herbs and a touch of sugar, but I have no idea what proportions, have you come across such a vinaigrette recipe to go with this type of enchiladas? Thank you for your time, and for posting this enchilada recipe.
Hi Jo Ann, one of our testers suggested that you try this as a tangy, herby vinaigrette.
I must have done this wrong somehow, though I don’t see any deviation in what I did from the recipe. They turned out bitter and bland. My mother is half Mexican so we ate Mexican foods multiple times a week but I did not care for these at all. I am hesitant to even try this recipe again with variations. We will, unfortunately, probably throw these out.
Hi Lauren, I’m so sorry that you didn’t enjoy the dish. Our testers loved the combination of the tangy cojita cheese and the chile sauce. I am wondering if perhaps you toasted the chiles a tad too long? That might account for bitterness.
The bitter taste is from over toasting the chiles!!!
Thanks, Barbara.
These enchiladas look amazing! Love them. 🙂
Hi Sara, we can’t wait to hear if you like the taste, please let us know.