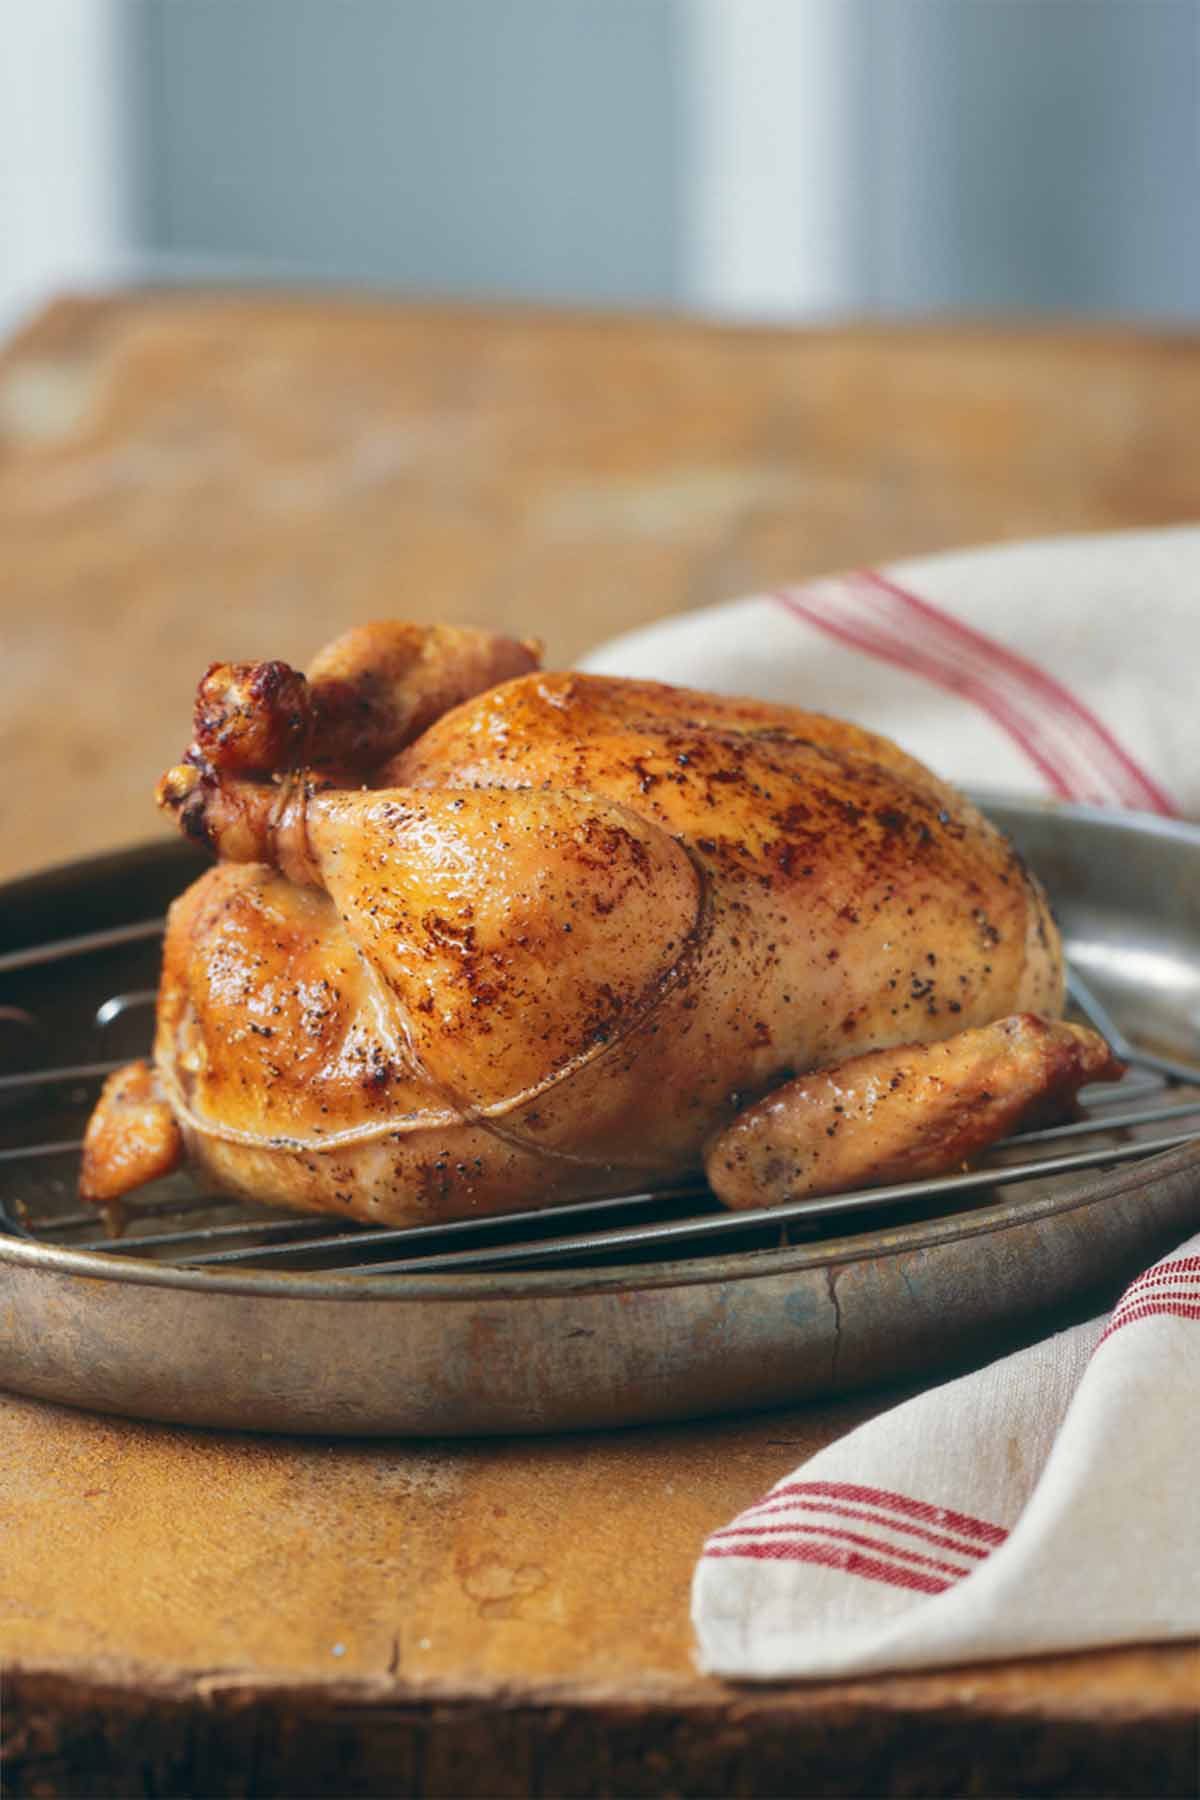
Succulent. Crisp-skinned. Simple. If that’s what you seek in a classic roast chicken, your search stops here. This approach uses nothing but a slick of olive oil on the skin, a sprinkle of salt and pepper, some aromatics in the cavity, and a hot, hot, hot oven. Nothing else. No flopping the bird this way and that midway through roasting. No fussing with pan juice or gravy. It’s just not necessary with a hen that turns out this juicy. For purists only. Easiest and best roast chicken EVER. Swear.

Classic Roast Chicken
Ingredients
- One (4 1/2- to 5-pound) chicken
- Olive oil
- Kosher salt and freshly ground black pepper
- 1/2 small yellow onion, cut into chunks (optional)
- 4 or 5 fresh flat-leaf parsley sprigs, (optional)
- 4 large fresh thyme sprigs, (optional)
Instructions
- Remove the packets in the cavity of the chicken and reserve them for another use or discard them. Remove and discard any pockets of excess fat from around the cavity. Pat the chicken dry with paper towels.
- Brush or rub the chicken all over with oil and season it inside and out with salt and pepper. If using the onion, parsley, and thyme, cram them inside the cavity. Tuck the wing tips under the back. If you like, truss the chicken by tying the legs together with kitchen string. (Please note that trussing the hen will increase the roasting time by a few minutes since the bird is held in a more compact mass.)
- Oil a V-shaped roasting rack or a wire cooling rack and place it in a roasting pan or baking dish just large enough to hold the chicken. Place the chicken on the rack and let it stand at room temperature for 30 minutes.
- Preheat the oven to 450°F (232°C) and position an oven rack in the lower third of the oven. [Editor’s Note: You do, of course, know that anytime you crank the oven past 400°F it’s an invitation for the remnants of last week’s apple pie and last summer’s barbecue ribs to smolder, yes? Best take an honest look at your oven before roasting this hen and, if need be, scrub any splotches or chances you’ll find yourself flinging open some windows and fanning towels at some smoke detectors.]
- Roast the chicken until the juices run clear and a thermometer inserted into the thickest part of a thigh away from the bone registers 165°F (74°C), 50 to 60 minutes.
- Remove the pan from the oven. Slip the handle of a long wooden spoon or a pair of tongs in the chicken cavity and carefully tip the bird slightly, draining the liquid from the cavity into the pan. Transfer the chicken to a platter or carving board and tent it with aluminum foil. Let the hen rest for 10 to 15 minutes.
- If you trussed the hen, snip the string and discard it. Remove any contents from the cavity and toss them in the trash. Carve the chicken and serve it at once, trying not to surreptitiously snitch any of that crisp skin before sitting down at the table.

Nutrition
Nutrition information is automatically calculated, so should only be used as an approximation.
Recipe Testers’ Reviews
This recipe is simply divine. Simplicity at its best! The only suggestion is to check the internal temperature of the chicken after 40 minutes of cooking…for me, it read 170°F after 43 minutes. So just know your oven and have that meat thermometer ready! This is the perfect roast chicken!
This is the easiest roast chicken I have ever made. The preparation came together in a snap. I placed the chicken in the oven, set the timer, and walked away. About 35 minutes into the roasting, I heard sizzling sounds coming from the oven. Since there were no flames, I didn’t worry about, it but continued to let the chicken roast. It only took 40 minutes for the chicken to register the required temperature. The skin of the chicken came out golden and crisp. The chicken itself was moist, tender and surprisingly full of flavor.
This is an easy go-to recipe on those crazy long days. Roast chicken in less than an hour—that is pretty cool.
Easy and perfect. What more could a cook want? Oh yeah, fast. This recipe hit the mark on all three. Usually I brine to ensure juiciness, but this high-heat recipe turned out a bird with moist meat and crisp skin. My husband even remarked that the leftovers he reheated were still juicy and delicious. I removed the chicken from the oven when the temperature on the thermometer read 168°F. After a 10-minute rest, it had risen a few degrees and was well within the safe zone. I will be tweaking the seasonings for variety but this a great all-purpose basic recipe that I am happy to add to my roast chicken repertoire
This recipe is about as simple as it gets when it comes to roasting a chicken. The skin was absolutely crispy and delicious and the meat was very moist.
The bird I roasted was 4 pounds. I followed the recipe exactly, doing the trussing of the legs as well. The chicken took almost twice as long as the recipe asked for, so perhaps you should start early if you have guests coming over. Maybe the problem was mine—the onion and parsley and thyme sprigs filled the cavity almost to capacity. I probably used branches of the herbs instead of sprigs. The end result was worth it, however.
I hated to waste the tasty bits on the bottom of the roasting pan, so I added a touch of white wine and fresh lemon juice, salt and pepper, and made a quick pan sauce. Will make this again, perhaps not trussing the bird next time.
If you’re looking for a simple yet tasty roast chicken, this is it. There really is nothing to it, but the end result is a very nice, juicy, tender and far-from-dry roast chicken.
I used a 4-pound organic chicken, and even though I was afraid of the high heat and timing of 60 minutes, it was actually perfect. Now I must say…we DID have to have the fan on and even opened a few windows, as we had quite a bit of smoke in the house. This is a redo for a day we won’t have much time to create a more complex roast chicken, as it can all be prepared ahead of time.
I was looking for a Sunday night dinner dish, and this roast chicken really appealed to me. Mainly because I have never used such high heat to roast a chicken throughout the entire course of the suggested roasting time. Also, I usually rub butter on the chicken before I roast it; I liked the idea of olive oil instead. My chicken was perfectly crisp on the outside and juicy in the middle, right at 45 minutes. I would sprinkle some salt and pepper on the outside of the chicken for flavor, in addition to inside the cavity of the bird.
The recipe says to drain the juices into the pan before serving, which works fine, but don’t get rid of those fabulous juices! I plan on making a gravy with mine this week. Also, I would save the onions from inside the bird as well…maybe chopped up in my gravy! I would recommend this recipe to anyone looking for a crisp, juicy chicken any night of the week.
I roasted a 3 1/2-pound chicken for an hour to get to the correct internal temperature. At 165°F, the chicken was perfectly cooked throughout. The high oven temperature made the skin quite crisp and gave it a beautiful golden color. The breast meat, which can sometimes be quite dry, was moist and juicy. I learned that I no longer need to sear the chicken on the stove top before roasting to get that crisp, golden skin that is the mark of a well-roasted chicken.
My only recommendation would be to make a quick pan sauce with the juices that are drained from the cavity. I deglazed with a little white wine (actually Prosecco, which I already had open in the refrigerator), then I added some chicken base, a little water, and flour for thickening, brought everything to a boil for a few minutes, strained it and added a pat of butter for richness and shine. With very little effort, I had a delicious sauce to pour over the chicken.
My roast chicken technique is an amalgamation of a variety of techniques I’ve picked up over the years, including an overnight salt brine and starting out the oven really hot to crisp the skin, turning it down after a bit to not dry out the chicken. This recipe is much quicker, basically because it cuts out the brining process. All in all, this is a straightforward recipe—follow the instructions, keeping an eye on the bird to make sure that it doesn’t burn/dry out.
I found that for my 4.5 pound chicken, it took about 45 minutes. I like to slice up potatoes and onions and place them under the chicken while it roasts to soak up the juices. If I have time, I’ll be following my usual roast chicken technique, but this is a good one to keep on hand if you have a hankering for roast chicken and need to have it that same night.
Not only is this the simplest roast chicken I’ve ever made, it is the best!
I roasted a 7-pound chicken, so the cooking time was closer to 90 minutes. Cooking the chicken at such a high heat ensures a very crisp skin and moist meat—even the breast! And not a bit goes to waste—I’m using the carcass right now to make homemade chicken stock! I omitted parsley because the batch in my garden looked rather anemic. Otherwise I followed the recipe precisely. This is the new “go to” roast chicken recipe in our house!
An excellent basic recipe for roast chicken. You can get fancier with herbs, lemon, garlic, etc., but if you follow these instructions, it will be perfectly cooked and moist.
I had a 4 1/4-pound chicken and 55 minutes was perfect. I did truss the chicken, which adds a little time, but makes it easier for beginners to get a moist chicken.
Hints: if you are going to cook chicken right, get an instant-read thermometer or probe thermometer. It’s the only way to tell if the meat truly is done to the right temperature. Also, if you loosen the skin a little by carefully working your fingers under it, it puffs a bit when you cook it and gets a nice crisp to it. Also—the hottest part of the oven is the back, so put the chicken in feet first—this way the dark meat that is trussed is in the hottest part and the breast is at a lower temp for a moister chicken breast and perfectly done legs and thighs.
This is a great recipe for a basic roast chicken. I used a larger bird than called for because I feed a family of 6 and I only had to add about 10 minutes to the roasting time. The bird did get crispy and dark brown before the time was up, but a sheet of tin foil over the bird kept the wonderful skin from burning.


This chicken recipe really couldn’t be easier. And so flexible. I didn’t have an onion but I had some scallions that were soon to be in the compost pile, so I cleaned them up and used them. I popped in a couple garlic cloves and some fresh rosemary for the heck of it. Wonderful flavor. I should have flipped the chicken though because it did take an extra 10-15 minutes, which I think was because the thighs were on the bottom (plus my bird was just over 5 pounds). It did produce a massive amount of smoke, which wasn’t great but our year-old XO range hood did yeoman’s work! Sandwiches on Day 2 and the chicken was still nice and moist.
Excellent, Greg! We’re so pleased that you enjoyed it. Thanks so much for sharing all those details and your process.
I always cook the bird thigh side-up — it self-bastes and keeps the breast from drying out. If you want crispy breast skin, flip the bird (pardon the pun) about 15 minutes before done — which is not easy with a hot, 20 pound bird, but much easier for a chicken. Make sure the rack is oiled so it wont stick.
Thanks, Susan. Great tips!
This looks spot-on! However, when I roast a whole hen (or he grills one..) I stuff it with the above ingredients PLUS a half of a lemon. I also throw in a softened pat of butter with it. I tie the sprigs of Thyme, Parsley, a few Sage leaves and one Rosemary sprig with twine and add the lemon quarter or half & stuff the hen. Oil the outside, season, and roast. Comes out absolutely beautiful! A comfort food anytime and company-worthy.
Sounds wonderful, Grammasue!