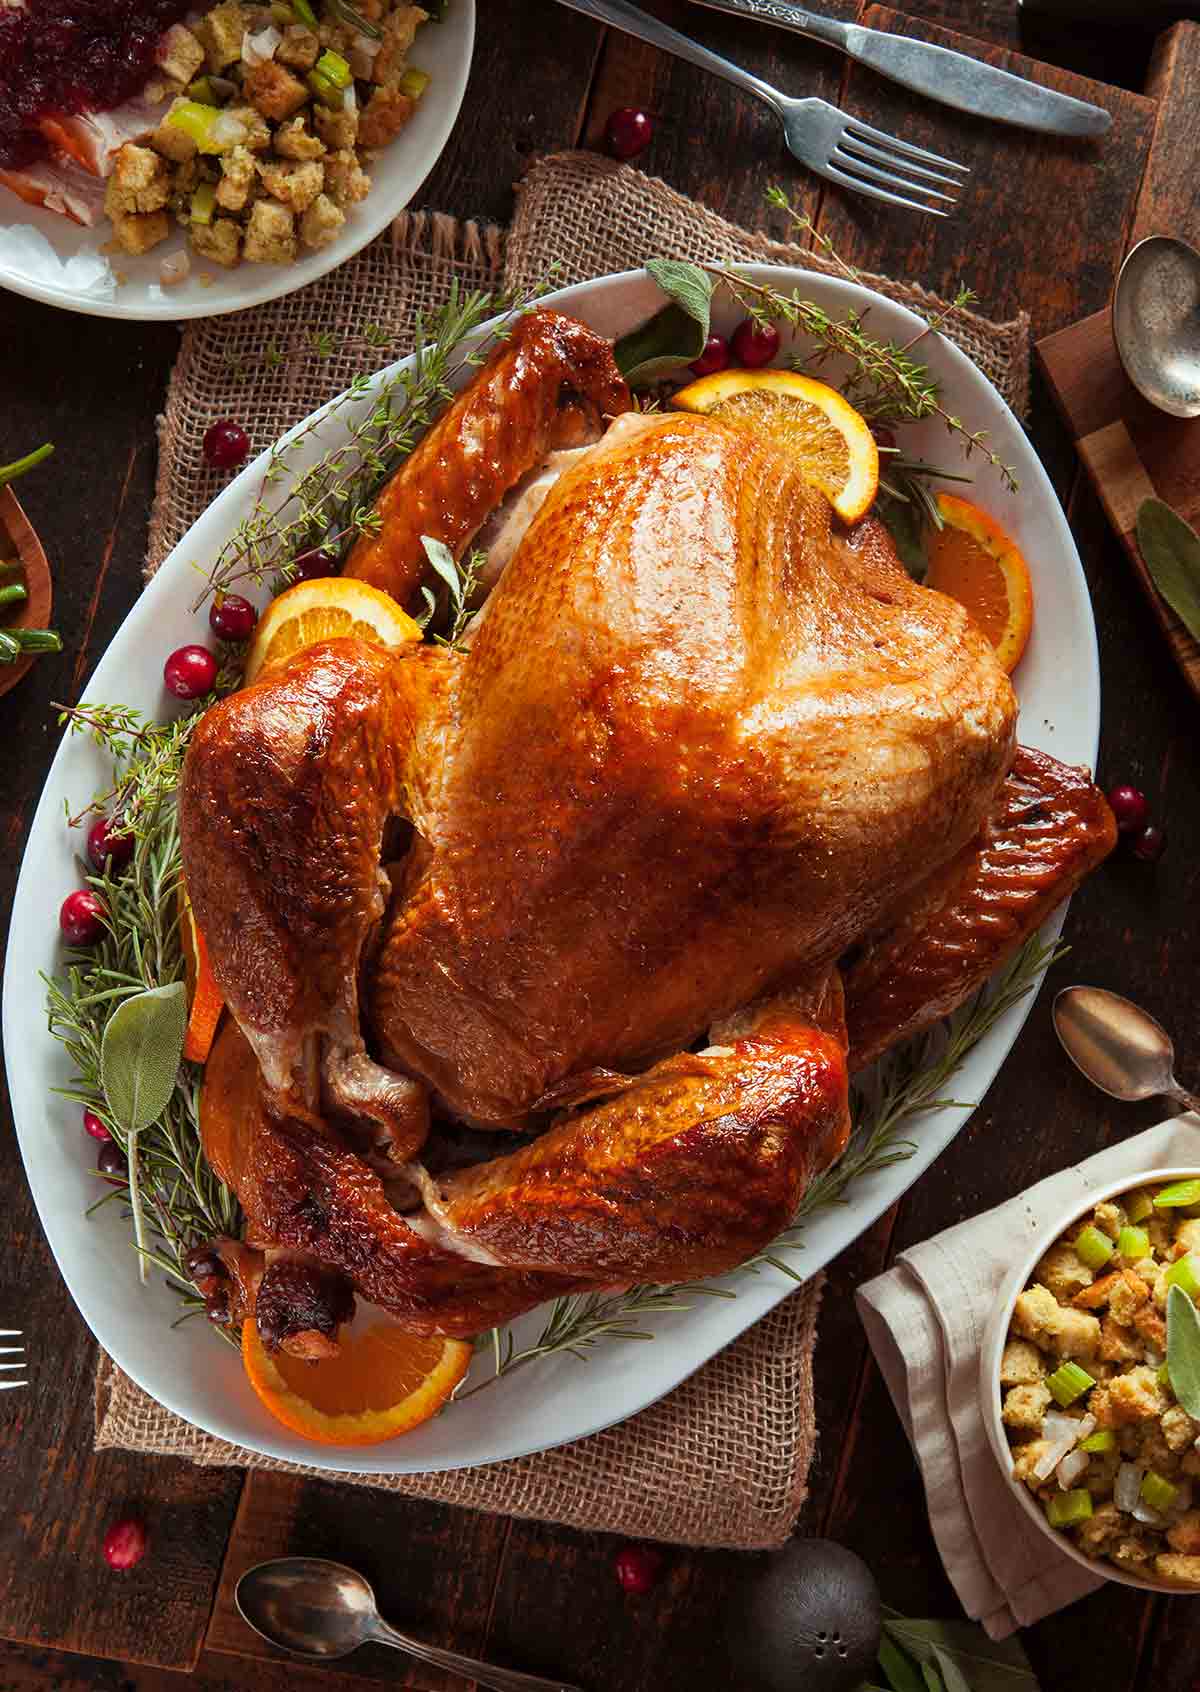
Simple roast turkey. It sounds sorta too good to be true, yes? And yet we’re here to assure you, from our own experience as well as that of the venerable Barbara Kafka, that it is possible. And easy. And juicy. And quite possibly the best damn turkey you’ve ever experienced. Without further ado, here’s how to cook the perfect turkey.–David Leite

Why Our Testers Loved This
Our testers couldn’t believe how quickly this oven-roasted turkey was ready. They were delighted that it could be cooked so fast, yet still turn out juicy and tender with crispy, golden skin.
Notes on Ingredients
- Turkey–A 12-to-15-pound bird is perfect for the recipe. Make sure it’s thawed and at room temperature before starting. Set the giblets and neck aside for making gravy or freeze them then pull them out when making turkey stock.
- Black pepper–We suggest, at a minimum, sprinkling the outside of your turkey with freshly ground black pepper. Feel free to stick some fresh herbs or other spices in the cavity to give it a little more flavor.
How to Make This Recipe
- Heat the oven. Crank the oven to 500°F. Yes, you read that correctly. 500°F.
- Prepare the turkey. Pat the turkey dry and season with pepper. If stuffing the turkey, add stuffing to both cavities and secure the openings.
- Roast the turkey. Cook until the internal temperature reaches 165°F, about 2 hours. Let rest for 20 minutes before carving the turkey.
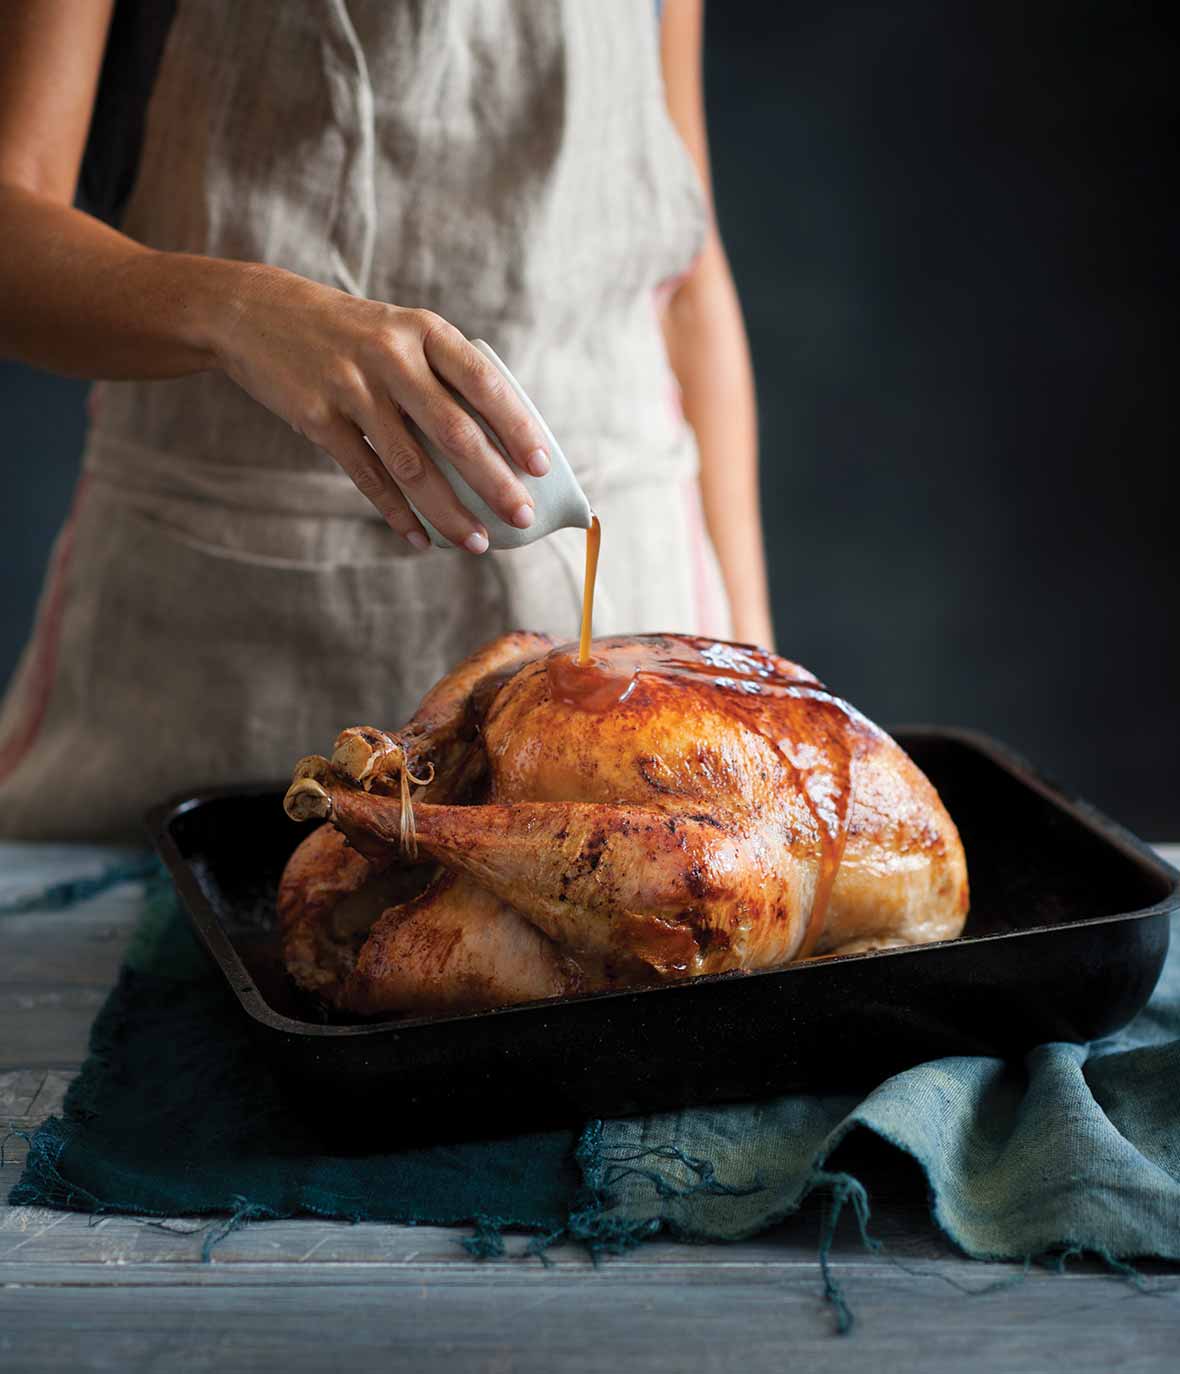
- Make the jus. Set the roasting pan over medium heat, pour in water or stock, and simmer until reduced by half.
Common Questions
We go out of our way to seek out a 12- to 14-pound turkey not only because that’s what fits readily in our roasting pan but because it cooks in a modest amount of time. Turkeys that are larger tend to cook more unevenly because by the time the dark meat is properly cooked, the leaner white meat tends to become dried out. When we need to feed a crowd, we simply snuggle a couple 12- to 14-pounders side by side in the roasting pan, turning them to face the short side of the pan.
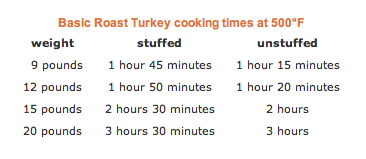
That said, no matter what size your hen, you’ll get superior results if you blast it at high heat, as in the recipe below, than if you use a lower temperature. Check out this handy roasting chart for approximate roasting times for a variety of weights.
No. Since this turkey is roasting at a high temperature, you want to keep the oven door closed as much as possible. Basting the turkey will only result in lost heat, meaning that the turkey will take longer to cook, and possibly end up dried out.
Allow 24 hours for every 4 pounds of turkey. If you’ve got a 12-pound turkey, you’ll need to move it to the refrigerator at least 3 days before cooking.
The turkey is ready when a meat thermometer inserted into the thickest parts of both the thigh and the breast (without touching the bone) registers 165°F (74°C).
Any of our Thanksgiving side dish recipes would be welcome here. Some of our favorites include pumpkin mashed potatoes, bread stuffing with bacon, apples, and onions, cranberry and orange relish, pan-fried green beans and almonds, and candied sweet potatoes.
Pro Tips
- Start with a clean oven. This high heat turkey recipe requires a very hot oven and any drips or spills that are lurking in there will create smoke. Nobody wants to have to call the fire department on Thanksgiving day.
- If your turkey is browning too quickly, tent it with foil. If you find the legs are becoming very dark, rotate the roasting pan so that the breast is at the back of the oven, and wrap some foil around the end of the legs.
- If you don’t have a large roasting pan, there’s no need to splurge on anything fancy. Pick up a large heavy-duty foil roasting pan. It’s inexpensive, and you don’t even have to wash it when you’re done.
- Don’t toss out the drippings from your roast turkey. They can be served to drizzle over the turkey or use in classic turkey gravy.
- Leftover roast turkey can be stored in the fridge for up to 4 days or in the freezer for up to 3 months. Looking for leftover Thanksgiving dinner recipe inspiration? Check out these 10 Dishes to Make with Thanksgiving Leftovers.
Write a Review
If you make this recipe, or any dish on LC, consider leaving a review, a star rating, and your best photo in the comments below. I love hearing from you.–David
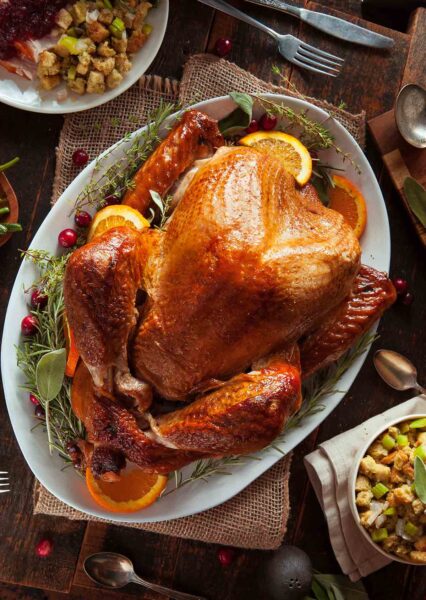
Simple Roast Turkey
Ingredients
- One (15-pound) turkey, thawed, if necessary, and at room temperature, wing tips removed, reserving giblets and neck for gravy, and the liver for stuffing
- Freshly ground black pepper, to taste
- 1 cup water, or turkey or chicken stock, homemade or canned
- Basic giblet gravy, optional
Instructions
- Place oven rack on second level from bottom of oven. Heat oven to 500°F (260°C). [Editor’s Note: If you haven’t scrubbed that volcanic-looking burnt-on apple pie filling from the floor of the oven yet, now would be a good time to do so.]
- Rinse the turkey inside and out and pat it dry. Sprinkle the outside with pepper. If stuffing the bird, stuff both cavities, securing the openings with long metal skewers. Do not truss the turkey.
- Place the turkey in an 18-by-13-by-2-inch roasting pan, breast side up. Put it in the oven legs first. After 20 minutes, wiggle the turkey around with a sturdy spatula to keep from it from sticking to the pan. Roast until the leg joint near the backbone wiggles easily, and an instant-read thermometer inserted into the thickest part of the thigh reads between 165°F (74°C), about 2 hours.
- Remove the turkey to a large platter. Let sit 20 minutes before carving.
- Pour off the excess fat from the juices in the roasting pan so you are left with just a slick of pan juices. Place the pan on top of the stove, setting it over 2 burners, if necessary. Add the water or stock and bring to a boll while scraping the bottom of the pan vigorously with a wooden spoon, loosening all the crisp burnt-on bits, which will add intensity to the gravy. Let reduce by half. Serve the jus on the side in a sauce-boat or add it to a giblet gravy.
Video
Notes
- Use a disposable pan–If you don’t have a large turkey roasting pan, buy a heavy-duty foil roasting pan. It’s inexpensive, and you can toss it out when you’re done.
- Storage–Leftover turkey can be stored in the refrigerator in a sealed container for up to 4 days and frozen for up to 3 months.
- Dietary–This recipe (without stuffing) is suitable for gluten-free and dairy-free diets.
Nutrition
Nutrition information is automatically calculated, so should only be used as an approximation.
Recipe Testers’ Reviews
Holy Incinerators, Batman! This method of roasting turkey is spectacularly effective. Two hours! If you’re a fan of deep-fried turkey, this is as close as you will come without setting your garage on fire. It is sooooo good.
My only concerns are these: feet first? The result of that was burnt legs! BUT I will make this again—really, really soon—and this time around I will change the orientation of the pan after the first 20 minutes. My oven can accommodate a pan going in with the turkey sitting sidewise and that is how I usually do it. I will also add some of the usual stuff to the cavity of the turkey, like garlic, celery, onion, and some other things.
And with your own personal treatment with spices and herbs, it will be fantastic! Go ahead, oven at 500°F, I dare you! Ready, set (the timer, that is, under 2 hours for an almost 11 pounder) and set the table! Turkey done.
This simple turkey recipe is a definite keeper. To be able to roast a turkey in about 2 hours, even if stuffed, is wonderful. I have a similar recipe for oven-blasted chicken, so I was familiar with this concept.
I found the timing in the recipe to be pretty spot on; my bird weighed in at 10 1/2 pounds and it was done in 1 hour, 15 minutes—even though the pop-up timer never popped. To be certain, I double checked the internal temperature of the bird (it was 172°F) as well as wiggled the leg joint to see how loose it was.
After resting, the bird carved beautifully and the breast was still very moist, even though I didn’t brine it like I normally do. One thing I did find was that the skin and outer layer of meat on the legs was really too dry and tough to eat; however, the rest of the leg meat was fine.
One of the things I would do the next time is to wrap the ends of the legs with foil to prevent them from becoming overcooked. I would also consider rotating the pan after the first 20 minutes so the breast is toward the back of the oven for the next 20 minutes, and then rotate the bird again so the legs would be to the rear for the remaining cooking time.
This was my first time to use a high-heat method for roasting turkey. The past few years, I’ve used an electric roaster for my turkey. I’ve preferred this method because it frees my oven and produces consistently moist meat. I didn’t think I would ever go back to cooking turkey in the oven, but this technique may have changed my mind.
I used a 15-pound turkey, stuffing the cavity with a few stalks of celery, an onion, some garlic cloves, and a few sprigs rosemary. It took about 2 1/2 hours to get to 165°F, and the heat created beautifully crisp—but not burnt—skin. It was so pretty!
Meat was moist, too, though on the bland side. I would do more than just pepper next time, maybe making an herb butter to slide underneath the skin as I usually do. Now…what to do with the leftovers??
I’ve always been leery to roast a turkey in the oven, as in the past mine would always come out dry and tasteless. So for quite a few years now we’ve smoked them.
Though last Thanksgiving, I was in a predicament. My younger daughter’s teacher asked if I could bring a turkey to their feast. I decided to try this recipe as it seemed fast—something I could quickly do after dropping off the girls at school. I came back home, put the bird in the oven, and still made it on time for the classroom feast.
What the heck was I doing wrong all those years before trying this recipe?! Seriously! Can a whole roasted turkey recipe be any easier or produce a juicier, tastier, more gorgeous turkey? The skin had the most amazing dark golden color, was perfectly crisp, and even the white meat was packed with flavor and natural juices.
It was a hit with all the kids, teachers and parents. It received countless praises and only bones were left. This is a recipe to keep in the repertoire and wow your family and guests.


Why no salt?
Hi Patricia, this method producing such a wonderful turkey that you may find you don’t need salt. I just confirmed this with Karen, one of our testers, who didn’t miss it one bit. You can always season to taste after cooking.
I did a bit more research on your question, Patricia, because I was curious as well. According to Barbara Kafka, “salt can cause the skin to cook unevenly by drawing out juices in a random pattern.”
I believe I would salt the cavities and then toss some salt under the skin, in that case. Love the high heat method. I usually go high-low at 500 and then down to 325, but it’s very cool to see that you can take it all the way home at 500. I would think that carryover cooking would be extreme, though, and would consider taking the bird out of the oven a good 15 or even 20F (for big birds) before the meat tests as done. I’m thinking it would coast home while resting. =)
Let us know, Jenni. And thinking of Thanksgiving, we know you have some wonderful desserts in store. What are you making?
Mmm turkey, my favorit food ever! I stuff my bird with green apples, onion, and plums (I´m from Sweden 😉 ). After cooking I mix the “stuffing” whith the meatjuice in a blender and make it the gravy (plus spices and cream). Best ever! Can´t wait for Christmas day!
Lovely, Camilla!
I’ve been doing this myself for more years than I will admit to (I’m only 29, you know ;), and I’m so glad to see someone as respected as Barbara Kafka espousing the same technique.