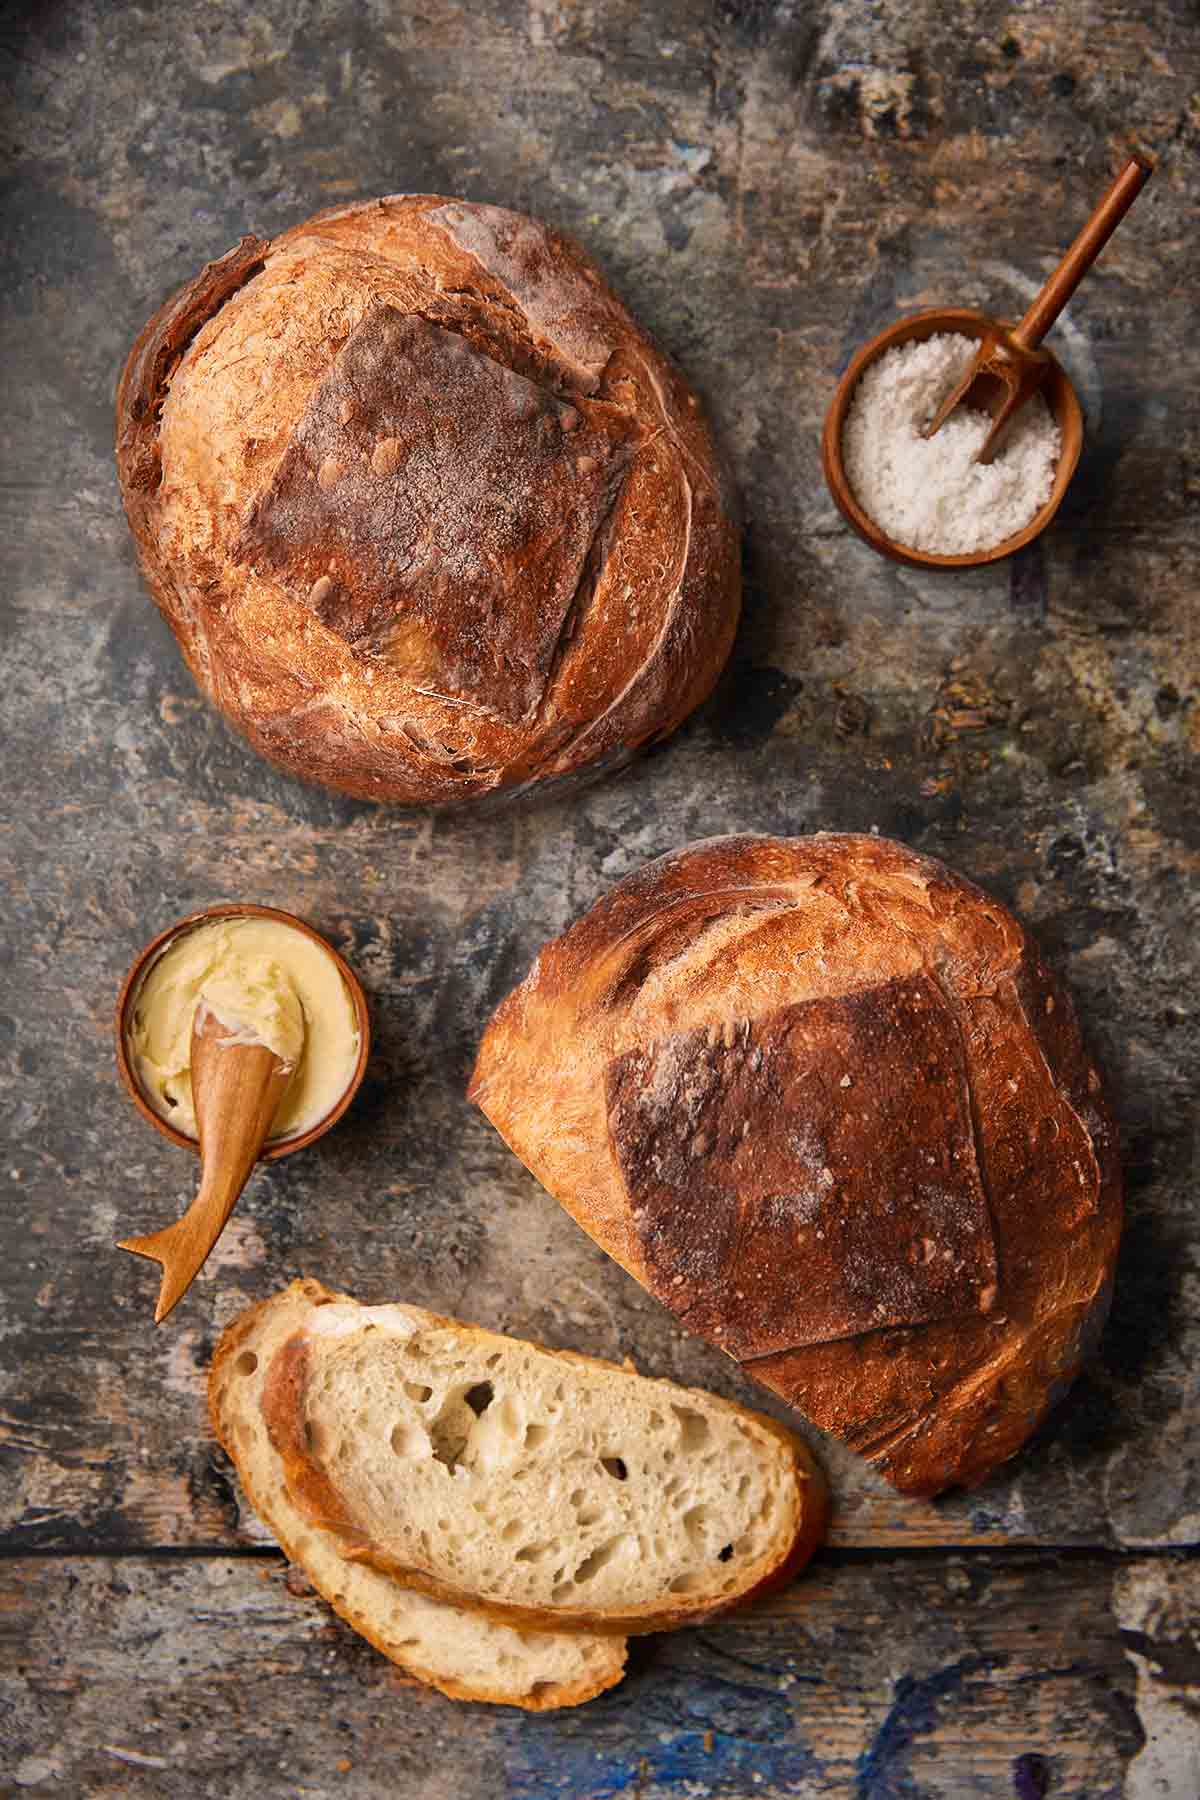
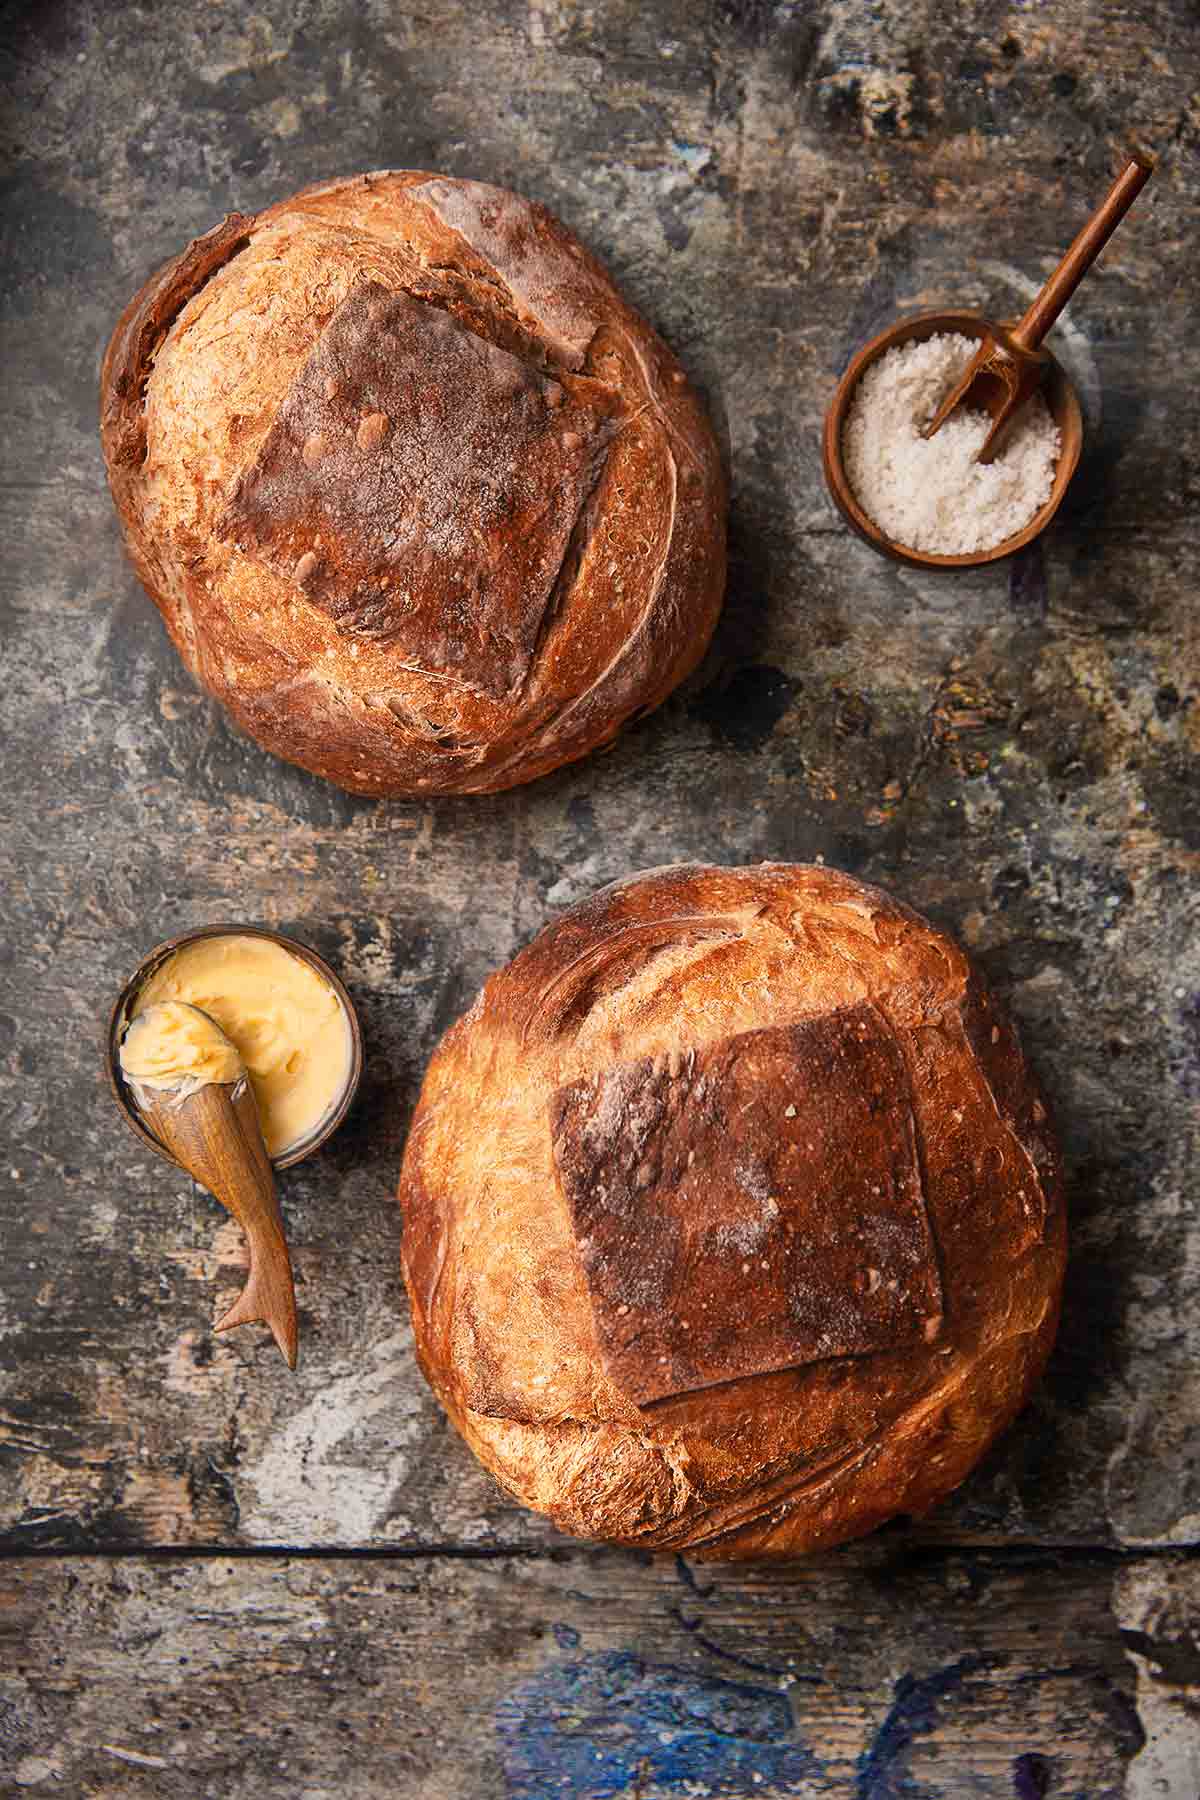
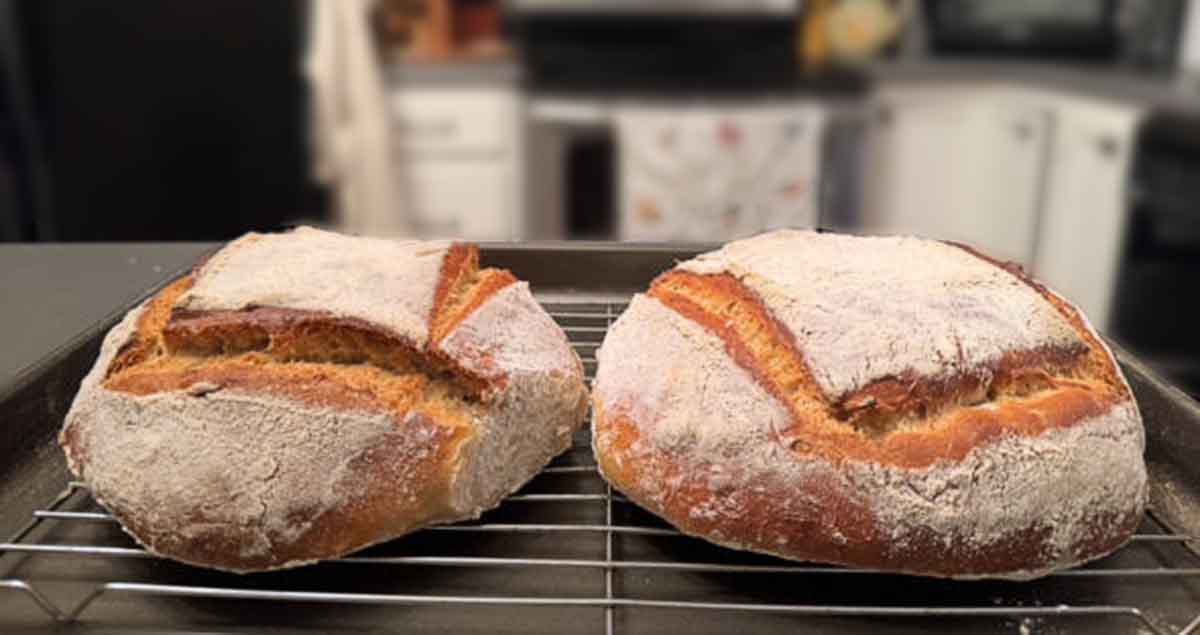
This no knead 5-minute artisan bread explains how to make homemade bread in just minutes a day without fuss. A quick, easy, and rustic bread, entirely doable even by novices. The best loaf you'll ever bake.
This post may contain affiliate links. If you make a purchase, we will make a wee commission.
TL;DR (Quick-Answer Box)
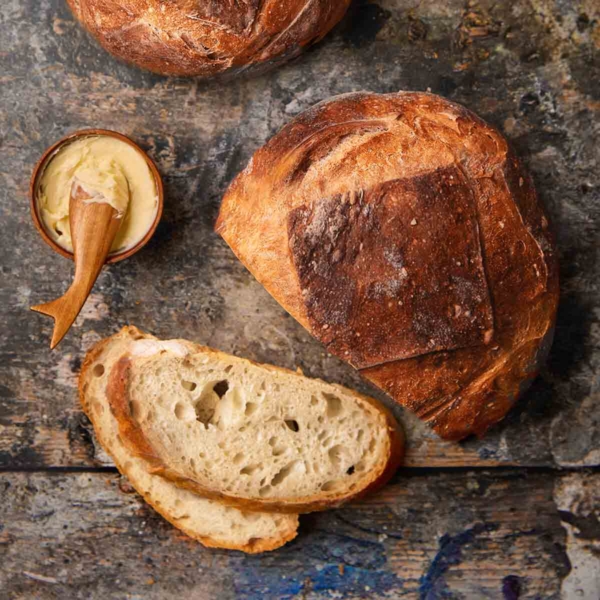
What it is: A beautiful, rustic, no-knead artisan bread recipe using 5 ingredients. This dough requires only 5 minutes of hands-on time and yields a perfectly crisp crust and chewy crumb.
Why you’ll love it: This recipe is ridiculously easy, delicious, and eminently customizable. The dough hangs out in the fridge for up to two weeks, so you can bake a fresh loaf whenever you’re jonesing for bread.
How to make it: Mix the ingredients, let it rise, and stash it in the fridge. When ready, shape a piece of dough into a loaf, rest it + bake with steam at 450°F (230°C).
This 5-minute no-knead artisan bread recipe is truly “revolutionary.” That’s the word the authors who created this quick homemade bread recipe use to describe it, and we couldn’t agree more. Like so many rustic bread recipes, it relies on just pantry staples of all-purpose flour, yeast, salt, and water. But what distinguishes this recipe, its true genius, is the technique. There’s no kneading required.
More than that, though, you can stash it in the fridge for later. So you simply forget about it until you’re overtaken by the craving for freshly baked bread. When that happens, you just grab the dough from the fridge, lop off enough for a loaf, shape it, let it rest a few moments, and then slide it in the oven before you continue to go about your life. We’re talking 5 minutes of effort here. Seriously. Just don’t forget to come back later to retrieve the best loaf of artisan bread you’ve ever experienced from the oven.
Chow,
Featured Review
I’ve been using this recipe almost weekly at least four years. It is ridiculously easy and produces an impressive loaf. I use whatever flour is on hand, unbleached, bread, etc. If you follow the recipe and measurements, it’s foolproof. Don’t over-stir or over-handle the dough. Make sure your oven is super-hot. Use a baking stone, a cast iron pot, or an overturned cast iron frying pan. And don’t forget to add steam (if not using a pot.)
Denise Wilson
Why this No-Knead Bread recipe works
This recipes works because it cleverly relies on a long, slow rise in the refrigerator to develop flavor and gluten. This eliminates the need for kneading, making it wicked convenient.
The high baking temperature and added steam create a crisp, golden crust. It’s the perfect combination of ease and artisan quality, yielding a fantastic loaf with minimal effort. That’s so Zoë!
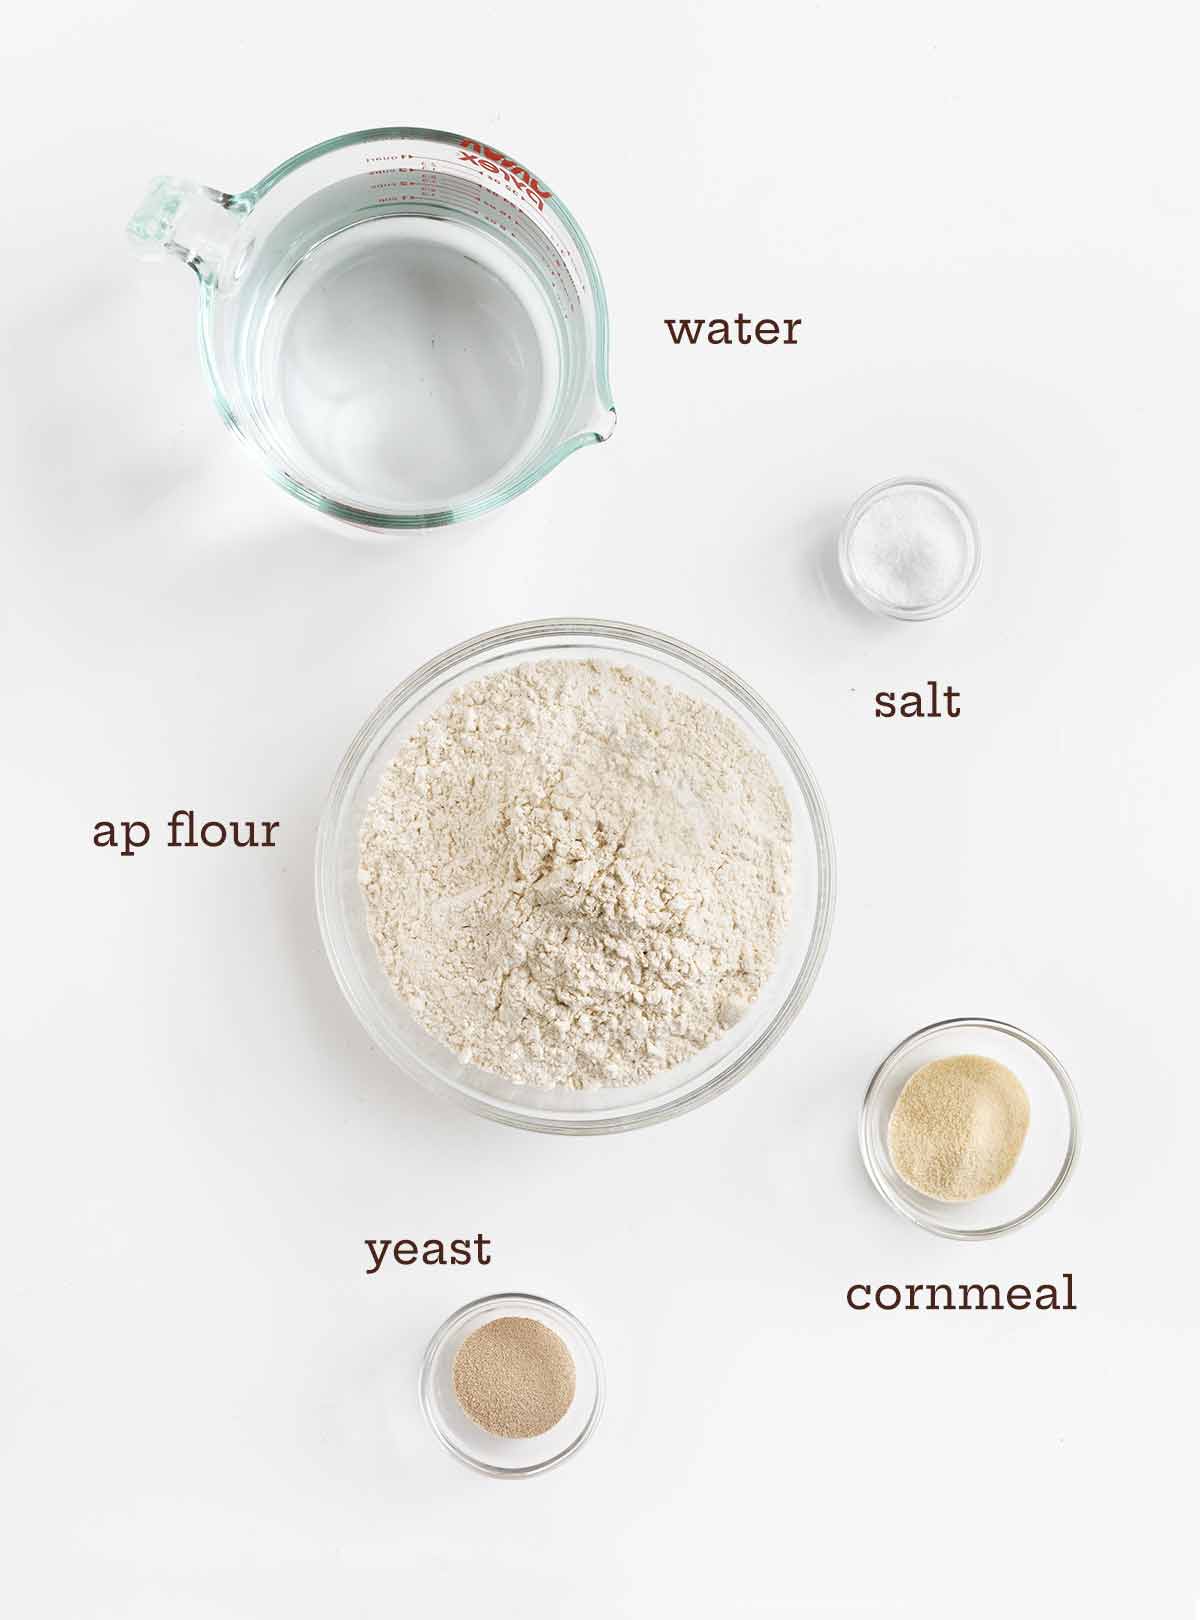
Notes on ingredients
Water–This serves two purposes in the recipe: first, to hydrate your bread dough, and second, to create steam in the oven during baking. The steam is imperative for creating a crisp crust on your bread.
Yeast–Any type of yeast you’ve got on hand will work for this recipe, whether it’s regular, quick-rise, instant, or bread machine. If you haven’t used your yeast in a while and want to make sure it’s still active, mix 2 1/4 teaspoons of the yeast with 1/4 cup of warm water and 1 teaspoon of sugar. Active yeast will bubble and foam within 10 minutes.
Flour–Regular all-purpose flour works best here.
Salt–Use a coarse style of salt for this bread, such as kosher salt. Don’t be tempted to reduce the amount of salt, as it plays a critical role in maintaining the stability of your bread.
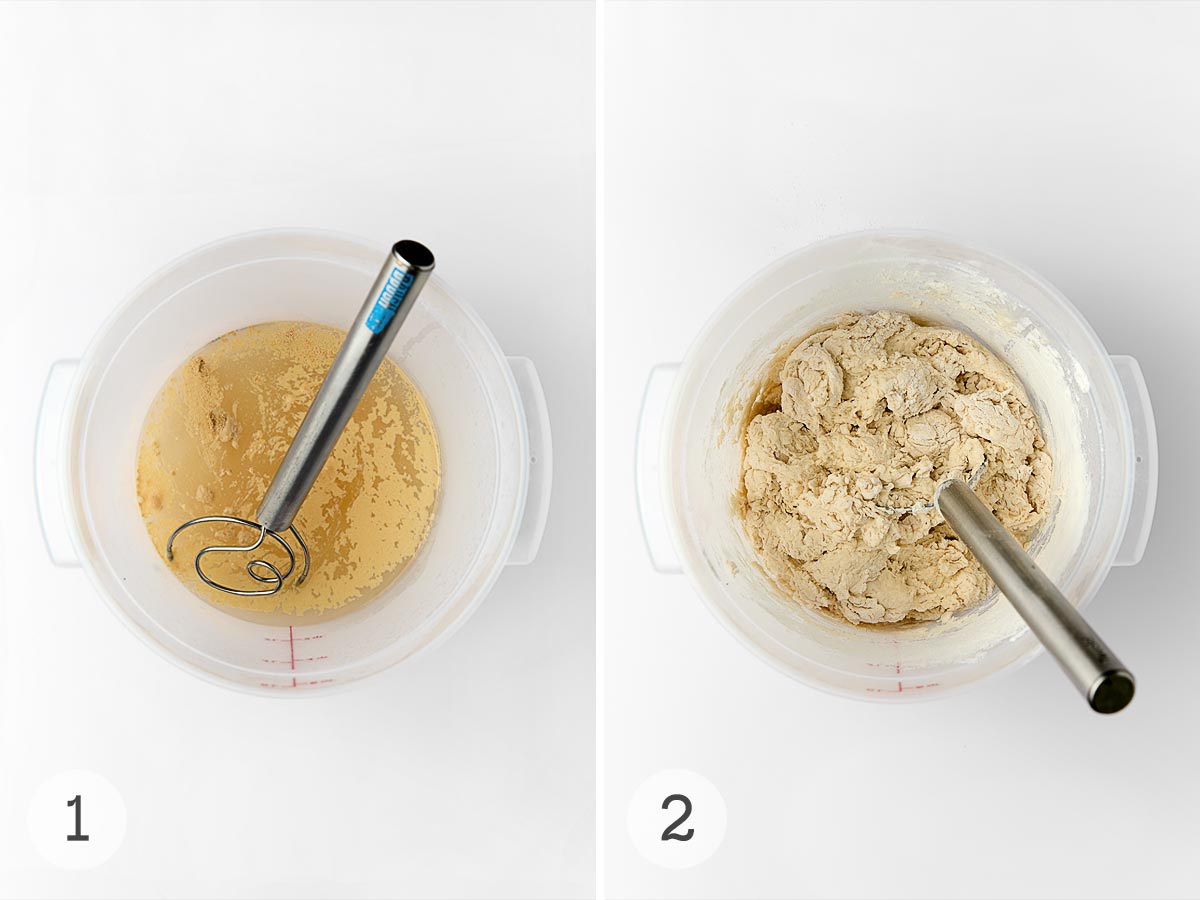
Visual Guide: How to make No-Knead Artisan Bread
Mix the warm water, yeast, and salt together in the bowl of a stand mixer or a large container, such as a lidded dough bucket.
Add the flour and mix just until the flour is completely incorporated.
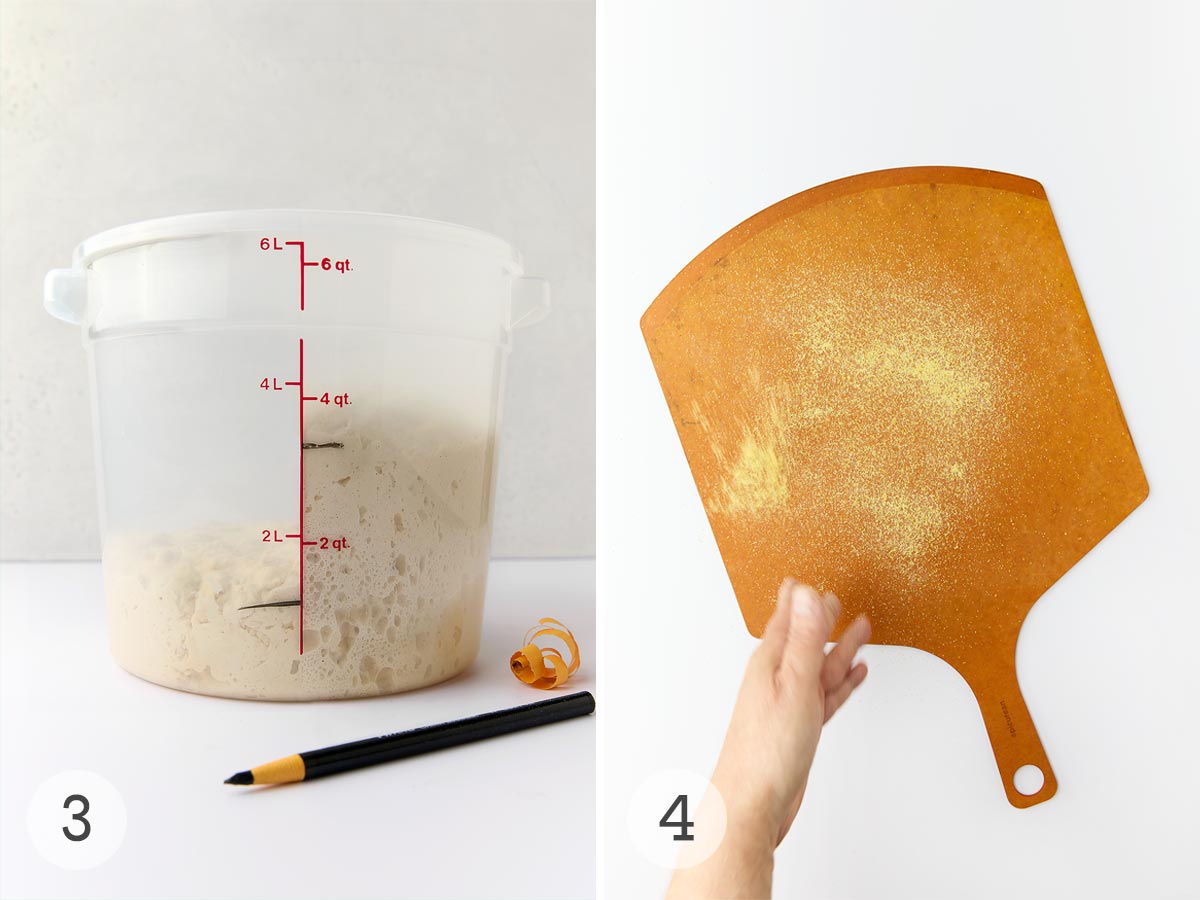
Loosely cover the mixing bowl or container and let the dough rest at room temperature for 2 hours, then store the dough in the fridge until you’re ready to bake.
Dust a pizza peel or inverted baking sheet with cornmeal or line it with parchment.
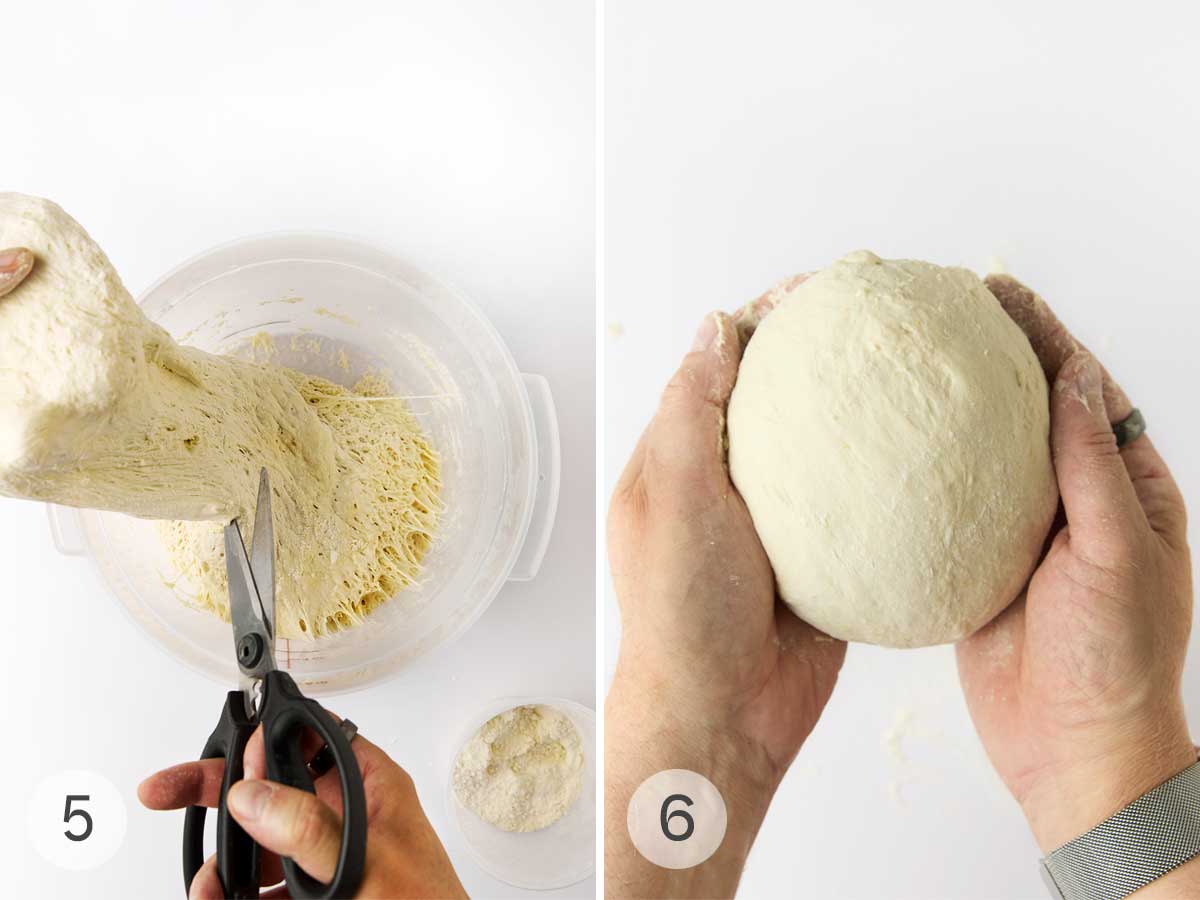
Cut off a 1-pound piece of dough and dust lightly with flour.
Gently stretch the surface of the dough, gathering the ends underneath, to create a smooth ball.
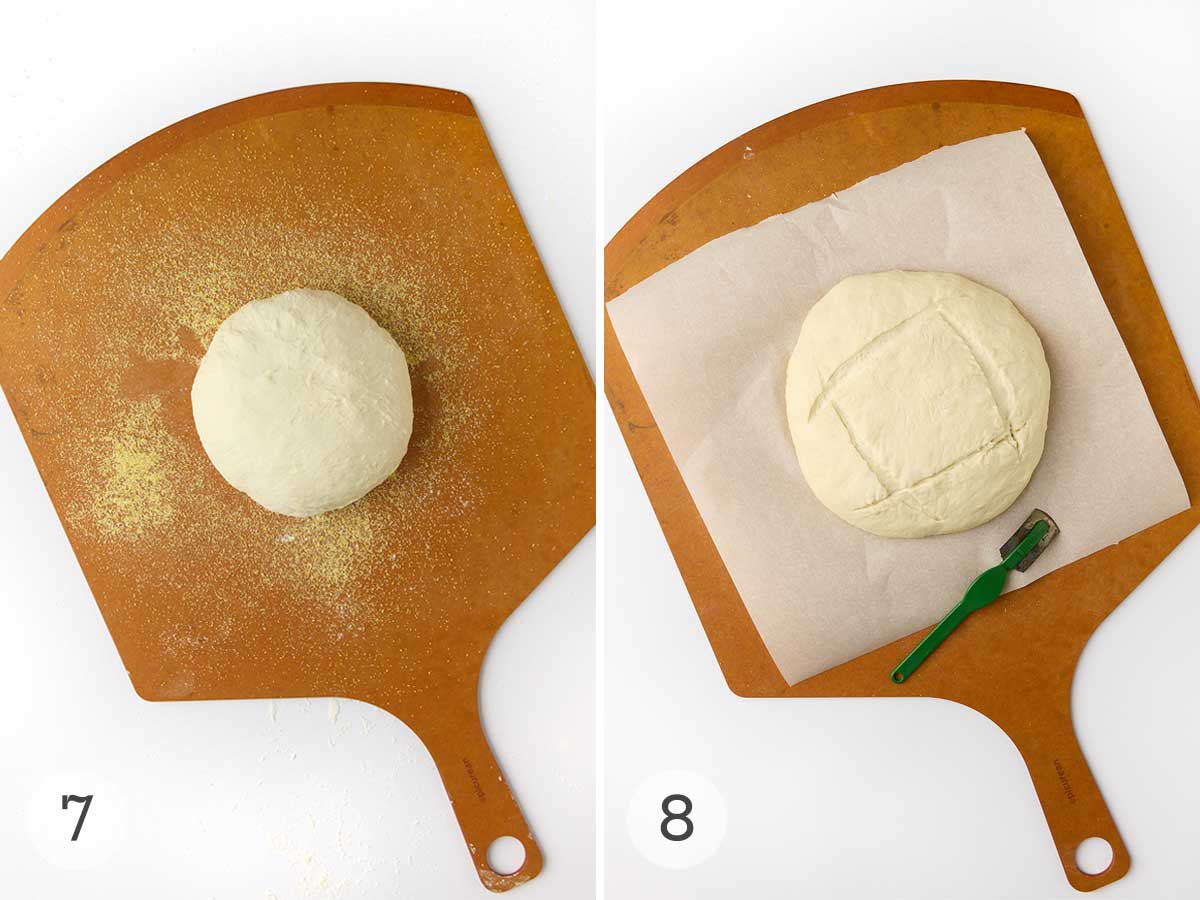
Place it on the pizza peel or baking sheet and let it rest for 40 minutes.
Preheat a baking stone or baking sheet in a 450°F oven while the dough’s resting. Place an empty broiler tray on a rack below. Dust the dough with flour and cut a gash across the top of the loaf.
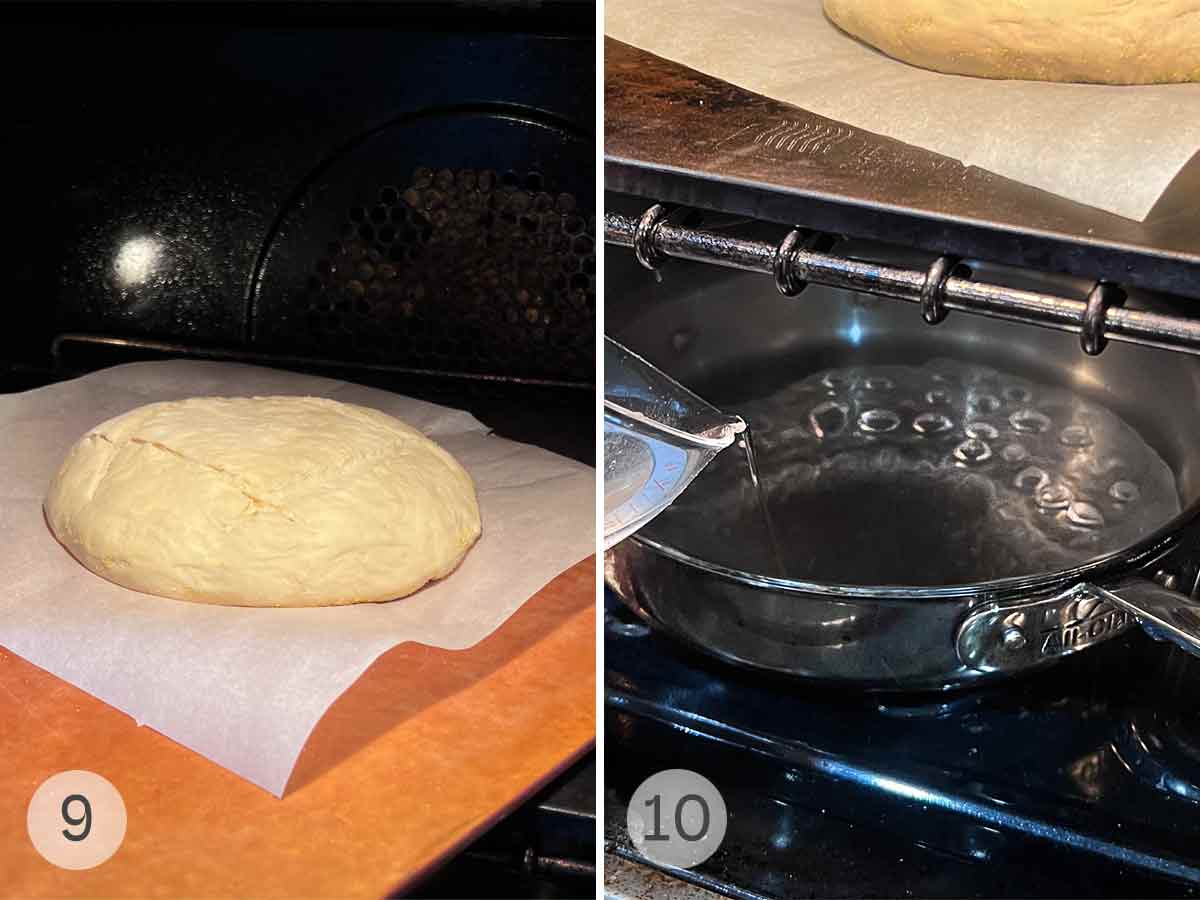
Transfer the loaf to the baking stone in the oven.
Pour 1 cup of water into the broiler tray to create steam. Bake the bread until the crust is firm and well browned. Cool completely before slicing.
Your No Knead Bread questions, answered
does no knead bread really take just five minutes?
Okay. If you want to get technical, this bread does take a little more than 5 minutes to make, but that’s only if you include the resting and baking time. But in terms of actual effort? Seriously, it’s just 5 minutes. We’ve relied on this recipe hundreds of times, and we can assure you that 5 minutes hands-on time is all you’ll ever invest at any given stage in the recipe. That’s nothing for a loaf of rustic artisan bread that’s homemade. Nothing short of a miracle, that is.
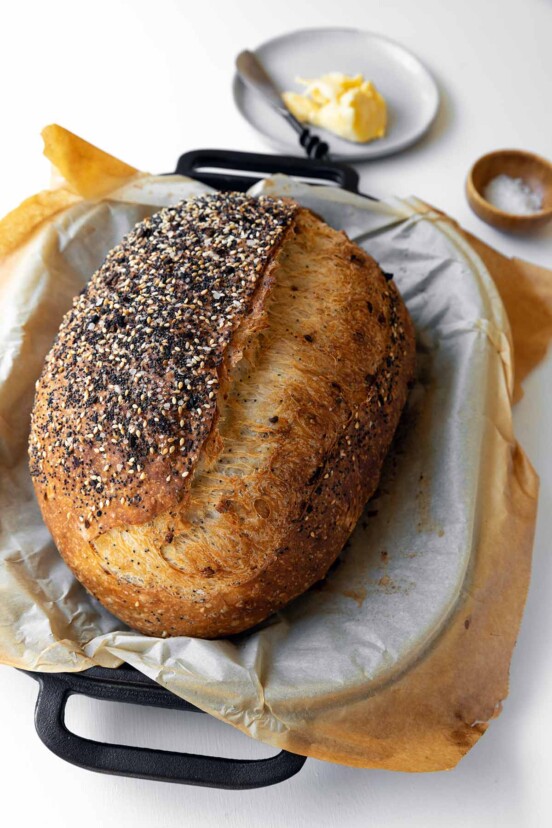
can I bake this loaf of bread in a Dutch oven? If yes, oven temp and cook time?
You absolutely can use a Dutch oven here. I do it often. Use the temperature stated in the recipe. You’ll want to preheat your Dutch oven (and its tight-fitting lid) for at least 30 minutes. To help you lower the loaf in the pan without burning yourself, make a parchment-paper sling.
Why is my no knead bread soft, not crusty?
There are several reasons. The biggest issue is a poorly calibrated oven. Even twenty-five degrees can make a difference. Always use an oven thermometer to be absolutely sure.
The second issue is not enough steam in the oven. Now, I know what you’re thinking: How can moist steam make for a dry crisp crust? It all has to do with the starches present in the flour. When the bread bakes, its skin heat up enough so that the starch molecules pop open and become jelly-like. They then continue to bake and firm up to a crusty loaf. The moisture from steam is what kicks this process into action.
In step 14, the hot water splashed into a shallow pan is what creates that steam. If you use a Dutch oven, there’s enough steam from the wet dough to do the job. Although, I often toss a few ice cubes in the pot for good measure.
Bread pro tips & troubleshooting
☞ Your scale is your BBF
For best results, measure your ingredients by weight. It’s truly the only way to get consistent results. This is my favorite scale.
☞ Water temperature matters
Warm water is ideal for proofing yeast, but take care not to use very hot water (over 115°F) as it can kill the yeast.
☞ Bake the dough within 2 weeks
Place a sticky note or a piece of tape with the date that you made your dough to help ensure that it gets baked within 14 days.
Storage and reheating
Room Temp: This bread is best enjoyed the day it is made, but it can be wrapped in a clean dish towel or foil or stored in a plastic or paper bag for up to 2 days.
Freezer: The bread can also be frozen, sliced or unsliced, for up to 2 months.
If you won’t be able to bake all of your dough within 14 days, the unbaked dough can also be frozen in 1-pound pieces, wrapped tightly in plastic. Thaw and let rise in the fridge before baking.
Reheating: To reheat a frozen loaf of no-knead bread, put it straight into a 375°F (190°C) oven—25 to 30 minutes if frozen, 10 to 15 if thawed—then let it rest 5 to 10 minutes before slicing so the crumb sets and the crust stays crisp.
If you make this recipe, or any dish on LC, consider leaving a review, a star rating, and your best photo in the comments below. I love hearing from you.–David
If you’ve ever wanted to try baking your own bread and feel intimidated, I suggest you try this recipe! I now make a batch of this dough weekly and have it down so that I’ve even experimented with making rolls from the dough (which freeze really well once you’ve baked & cooled them!) I also sometimes make two large loaves out of the dough and, once cooled, slice them and freeze the bread so that I can pull out slices for quick sandwiches. Of course, nothing beats eating the freshly baked bread but if you have a busy lifestyle sometimes having that quick option from the freezer is a real gift to yourself!
Gabrielle M.
No-Knead Artisan Bread
4.91 / 124 votes
This no-knead 5-minute artisan bread show you how to make homemade bread in just minutes a day without fuss. Quick, easy, rustic, entirely doable even by novices, and the best loaf you'll ever bake.
3cupslukewarm water, (100°F or 38°C) plus more for the broiler tray
1tablespoongranulated yeast, (active dry, instant, quick rise, or bread machine is fine)
1 to 1 1/2tablespoonskosher salt, to taste
6 1/2cupsunbleached all-purpose flour, measured by the scoop-and-sweep method
cornmeal, for dusting (optional)
Instructions
Make the dough
Mix the 3 cups lukewarm water, 1 tablespoon granulated yeast, and 1 to 1 1/2 tablespoons kosher salt in a large bowl or a 6-quart container with a lid.
Add the 6 1/2 cups unbleached all-purpose flour to the yeast mixture all at once, then using a spoon or Danish dough whisk mix until the flour is completely incorporated and you have a gloppy dough.
☞ TESTER TIP: Don’t knead the dough! You want the dough to be uniformly wet and loose with no dry patches of flour.
Loosely cover the bowl and let the dough rise at room temperature until doubled in size, about 2 hours.
Stash the dough in the fridge
Once the dough has risen, stash the bowl or container in the fridge.
☞ TESTER TIP: If your container isn’t vented, you want to ensure the gases can escape by leaving the cover open a crack for the first couple of days in the fridge.
You can use the dough anytime after the initial 2-hour rise, although it'll be quite wet and sticky. I prefer to let the dough rest in the fridge overnight (8 to 12 hours).
☞ TESTER TIP:
No matter when you use it, don't punch down this dough! And be certain to use the dough at some point within 14 days.
Shape the dough into a loaf
When you're ready to bake a loaf, dust a pizza peel or an upside-down baking sheet with cornmeal or line it with parchment paper.
Grab a hunk of the dough and use kitchen shears to cut off about a 1-pound piece. If needed, add just enough flour so the dough doesn't stick to your hands.
Gently stretch the surface of the dough, tucking the ends underneath the ball and rotating it a quarter turn as you go. Most of the dusting flour will fall off, and that's okay. The bottom of the ball of dough will look a bit ragged; it will flatten out and adhere during resting and baking. The top and sides of your loaf should be smooth and taunt, and the shaping process should take no more than 20 to 30 seconds—don't work the dough any longer, or your loaves may be dense.
Place the dough ball seam side down on the prepared pizza peel or baking sheet. Let it rest for about 40 minutes. It doesn’t need to be covered. You may not see much rise but don't fret. It'll rise plenty during baking.
Bake that gorgeous-looking loaf
While the dough rests, slide a baking stone or an upside-down baking sheet onto the middle rack and crank up the oven to 450°F (230°C) for at least 30 minutes. Place an empty metal broiler tray or an ovenproof skillet on a lower rack. (Don't use a glass pan as it could shatter.)
Dust the loaf generously with flour and, using a serrated bread knife, slash a 1/2-inch-deep cross, a couple of gashes, or a tic-tac-toe pattern in the top.
Place the far edge of the peel on the baking stone a few inches beyond where you want the bread to land. Give the peel a couple of quick back-and-forth jiggles, and then yank it out from under the loaf.
Quickly but carefully pour 1 cup of hot water into the hot broiler tray or skillet and immediately shut the oven door to trap the steam.
Bake the bread until the crust is richly browned and firm to the touch, 20 to 35 minutes.
☞ TESTER TIP:
If you're using a baking sheet rather than a baking stone, you may need a little extra time—up to 50 minutes total—for the bread to be done.
Remove the bread from the oven and let the loaf cool completely on a wire rack for the best flavor, texture, and easy slicing.
Did you know only 68% of the recipes we test make it onto the site? This recipe survived our rigorous blind testing process by multiple home cooks. It earned the Leite’s Culinaria stamp of approval—and the testers’ reviews below prove it.
Wow! What a gorgeous, beautifully colored, irresistible loaf of artisan bread! I wish I’d made more loaves at the same time. The loaf had a chewy crust and a beautiful interior.
The ingredients for the dough were fast and simple to assemble. I used a wooden spoon and didn’t need a mixer. I placed the dough in a large, ungreased Tupperware with a lid and rested it on the counter for 2 hours. Then I placed the container in the refrigerator, loosely covered, and waited 2 days to use the soft, spongy, yeasty-smelling dough.
Forming the boule and transferring it to my hot pizza stone was simple enough. I made a tic-tac-toe pattern on the top of the loaf, and there was definitely a significant amount of flour on the loaf, but it didn’t burn. My loaf baked for 25 to 30 minutes.
I nearly always have some of this no-knead 5-minute artisan bread dough in the fridge. This bread is a simple 4-ingredient dough.
I used a wooden spoon in a large mixing bowl and finished with my wet hands. The dough was very lumpy and sticky. After the 2-hour rise, the dough was full of holes, which are very noticeable throughout when using a glass bowl.
After refrigerating the dough overnight, it was very easy to work with. So easy, in fact, I really didn’t need to flour the surface before cutting a loaf-size amount from the dough. I made a couple of boules, and while they had a nice crumb, the crust was spectacular!
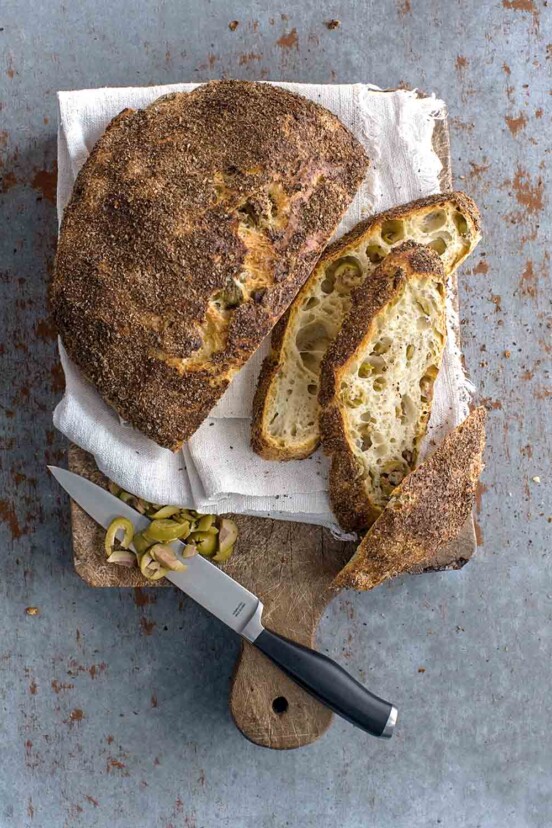
This dough is perfect to have on hand for any occasion. If, like me, you love a crisp, crunchy bread, this recipe is for you. If you leave the dough in the fridge for at least 48 hours, the crumb has many more holes. When you use it the next day, the crumb is much tighter. I prefer mine with holes to capture all of the goodies that I apply.
This no knead 5-minute artisan bread recipe has to be the easiest and fastest way to make bread. It’s also now my favorite way to make bread dough—and a decent loaf or boule of bread with little effort. It’s truly one of the best recipes for artisan breads I’ve tried.
I made a free-form boule and a loaf in a traditional loaf pan. I found that after baking the loaves for 30 minutes, I had a tanned boule, much like a round sourdough loaf. I found this loaf had a moist and dense crumb and a crunchy crust. As for the loaf pan, I found that batch didn’t rise as much, but this may be due to my handling of the dough. It was still delicious. This is certainly a way to wow on a weeknight, as the bread does its own thing while you prep dinner. It’s an easy rustic bread recipe that’s adapatble and impressive.
I used a 10-quart storage container with a lid. While the dough was rising, I left 1 corner open, and then when I refrigerated it, I closed that corner. It really is a good idea to open it the first few days to allow the extra gases out. I find it’s a good workout mixing the dough with a wooden spoon (about 6 or 7 minutes of mixing), but I’ve used a stand mixer in the past with other bread doughs for speed (about 3 or 4 minutes). Both work equally well. The resulting dough looks like wet pizza dough, sort of jelly- or pudding-like. When the work is done, all that remains is to use it within 14 days. I so far have not had this dough last a week.
The only suggestion I would make is that you should check your yeast to make sure it’s still viable before mixing your dough. I forgot to do that, and my first batch failed to rise. I replaced my yeast with fresh, and the second batch performed as it should.
This no knead artisan bread is absolutely delicious! I love the warm, earthy flavors, the spongy, chewy texture, and the crisp crust. Great recipe.
I just used the last of the dough that was in the refrigerator. However, I don’t have a pizza peel, so I used a small bread board with a handle. When I tried to put the dough on the baking stone as instructed, it fell and lost its shape, and I had to pick it up and re-shape it. I took the bread out of the oven when it was 210°F, and the top was richly browned. It took only about 20 minutes to bake the bread.
I’m going to start off by saying that this easy no-knead artisan bread dough is gorgeous, comes together without a hitch, and turns out a rustic loaf. I followed the directions precisely and used exactly 6 cups flour. It’s a lovely, sticky dough that’s a bit difficult to work with unless you’re used to working with loose doughs. The resulting boule was golden brown, with a lovely crust, fantastic chew, and wonderful flavor.
After allowing the dough to rest in the fridge for 2 days, I embarked on making the boule. I followed the directions precisely, and even without a pizza peel, I was able to put the formed boule onto the preheated baking stone without changing the shape too much.
Don’t be scared to use a lot of flour to help you shape the dough—it won’t get incorporated at all, and it looks rather gorgeous against the burnished crust. I baked the bread for exactly 30 minutes and then placed it on a rack to cool.
This recipe is so easy and would be a good one for first-time bread bakers. You don’t really need any fancy equipment. Just a bowl, a spoon, and a baking sheet.
I used all-purpose unbleached white flour and Red Star instant yeast. It took all of 10 minutes to mix up the dough. After a 2-hour rest at room temperature, the dough was refrigerated for 3 days before baking.
I made 2 loaves. Shaping was easy and I was careful to not knead or add much flour. After a 40-minute rest on the baking sheet, it went into the oven. Pouring the hot water into the boiler tray was an exciting flash facial! I baked for 35 minutes until an instant-read thermometer read 190°F. Let cool for a few hours–and yes, it did crackle and sing!
We really enjoyed this bread, especially toasted. The crust was super crispy. I was expecting the interior to have some bigger air pockets but the texture was very uniform. The taste wasn’t super complex but still delicious.
I am familiar with the book by Jeff Hertzberg and Zoë François, The New Artisan Bread In Five Minutes a Day, and while I had never made this recipe, when I saw this test recipe, I knew it was time to try their approach.
What I particularly liked is the simplicity of the bread making. The results are very good. I can see the appeal of this method to breadmaking as anyone can have fresh bread in very little time because you have a loaf ready to go just sitting in your fridge. I made my loaf 8 days after making the dough, and the flavor was excellent! This truly is one of the best no knead artisan bread recipes I’ve tried.
Homemade bread is such a luxury but it can be intimidating to try to make it. There’s nothing intimidating about this recipe. It’s as easy as it sounds. The hands-on time is truly only 5 minutes. (I have to admit, I was skeptical when I saw “5 minutes’ as part of the title, but it’s true!!!
There are only 5 ingredients in this recipe and one is optional (which I didn’t use). I used my mixer to combine the ingredients, which took about 1 minute. I couldn’t believe how fast this all came together. The hands-on time is very brief but there’s a waiting period to let your dough rest and rise. I made mine one day and put it in the refrigerator after it sat at room temperature for 2 hours.
I baked the first loaf of bread the next day. It was excellent. It’s a heavier bread and it’s delicious. I served it to company and the whole loaf was completely gone! I baked mine on a baking sheet lined with parchment paper for 25 minutes. This recipe requires little effort and delivers big! It’s one of the easiest recipes for artisan breads to impress guests.
The bread was simple and delicious! I felt very fancy baking my own bread and it was easy enough that I will do this again.
The notes throughout this recipe make bread baking approachable for any level of baker. The instructions were conversational yet specific, and were consistent with the results I saw. For example, step 10 reads like the author is there coaching you, gently encouraging you to shape the sticky dough into an attractive mound while note overworking the dough.
I also liked that the recipe made a large batch of dough that could be stored in the fridge and baked off one loaf at a time as needed.
I hand-mixed the dough with a rubber spatula with no issues. Step 5 indicated that after a couple days, venting was not necessary, but my dough continued to expand in an airtight container after one week in the fridge. A larger bowl is probably better if possible.
Be careful when adding boiling water to the hot tray because it steams up immediately.
I baked my loaves on a dark cookie sheet with parchment. After baking three loaves, I determined that the best method for my oven was to bake the bread on a lower rack for about 25 minutes, then do the last 5 minutes on an upper rack (requiring me to swap the bread pan and water pan) to brown the top of the loaf. Otherwise, the underside of the loaf is too pale and not crusty/chewy enough. I baked the third, larger loaf for an extra 5 minutes (35 total).
The first loaf was baked on day 1 (after about 6 hours in the fridge), the second on day 4, and the third on day 9. The second and third seemed slightly more flavorful than the first to me, and were definitely more fragrant (think bready/yeasty/sour notes). The second and third seemed to be less dense and have bigger air pockets throughout, as well as a chewier crust.
Sure!
Will need:
3 cups bread or all-purpose flour (sometimes I use multigrain)
1/4 tsp instant yeast
1 tsp table salt (or 3/4 Tbsp kosher salt)
1 1/2 cups lukewarm water
Cast iron pot, or baking pan with lid (I use an 8 in. square cake pan with aluminum foil for a lid. Pyrex will explode)
Mix dry ingredients together, then add water and mix til combined. Dough will be a goopy shaggy mess. Cover with plastic wrap and let rise in a draft free place for 12-20 hours.
2 hours before you want to bake, wet hands and turn dough out onto floured piece of parchment paper. Bring the edges of the dough together and turn over, and transfer the dough ball on top of the lightly floured parchment paper into another bowl. Cover with a cloth and let rest for those 2 hours.
Half an hour before baking, set oven at 450F and place the baking pan or appropriate pot (think Le Creuset. Should be able to withstand very high temp) in the oven to preheat.
After the dough has risen to your liking, take the pan/pot out of the oven and lift the parchment paper containing the dough right into your vessel (hassle-free transfer!). Place the lid and put back in the oven.
Bake for 30 minutes, then take the lid off and bake for another 15-20 minutes or until bread is golden brown and makes a hollow sound when tapped.
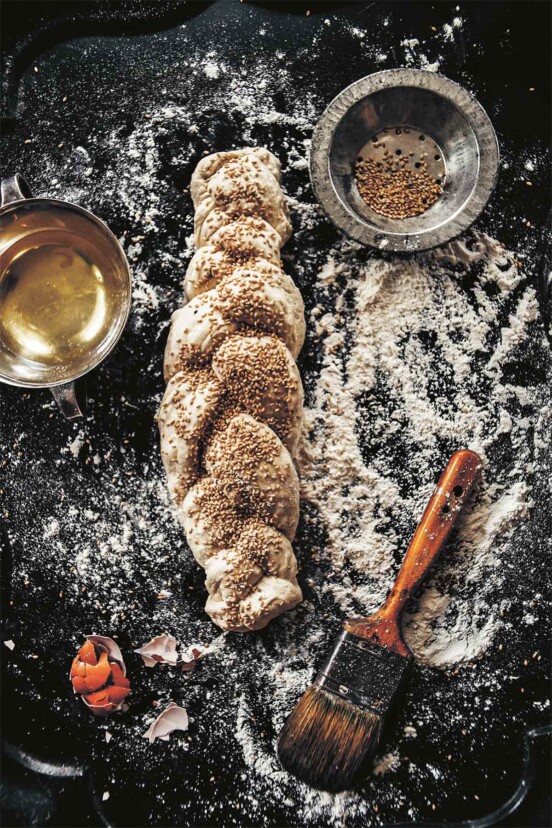
I use these ingredients and measurements to make my baguettes. The only difference is that I use roughly 1 cup of water. I mix everything together and let rest in a bowl for 1 hour. Then I fold the dough over several times. No kneading, just fold over. Let rest another hour and repeat the folding. Then I refrigerate overnight in a greased, covered bowl. The next day, I divide it into 3rds, fold each one once, shape into a log and gently roll them with my hands, until they are roughly 13 inches long. Then I place them in a baguette pan with the lid and let rise 90 minutes. Slash the tops several times, spray a little water on the tops, cover and bake in a preheated oven at 450° F for 20 minutes and then uncover for 5-10 minutes or until the loaves are browned. My kids thought I bought the bread or brought it home from an Italian restaurant. I now make this weekly. It was my very first homemade bread that actually turned out!
Wow, wow, wow. Best ever!!! Really 5 minutes tops to start the dough. Made 2 generous loaves, 1 regular, the second I stuck full of garlic cloves. In my book Zoe and Jeff get a Nobel prize for bread making. Next time will try with chopped dill, maybe fried onions. Can’t believe the quality and taste of the final product. Dipped it in chimichuri HEAVENLY!!! Can see myself using Costco bags of flour!!!
Hi Deborah, Some people are more sensitive to the taste of yeast than others, so you can always decrease the amount of yeast in the recipe, but you’ll need to let it rest a bit longer. Here is some more information.
If your dough doesn’t seem to rise enough for your liking, you can always let it rest longer, and it will have a more open crumb. Here is more information.


Sure!
Will need:
3 cups bread or all-purpose flour (sometimes I use multigrain)
1/4 tsp instant yeast
1 tsp table salt (or 3/4 Tbsp kosher salt)
1 1/2 cups lukewarm water
Cast iron pot, or baking pan with lid (I use an 8 in. square cake pan with aluminum foil for a lid. Pyrex will explode)
Mix dry ingredients together, then add water and mix til combined. Dough will be a goopy shaggy mess. Cover with plastic wrap and let rise in a draft free place for 12-20 hours.
2 hours before you want to bake, wet hands and turn dough out onto floured piece of parchment paper. Bring the edges of the dough together and turn over, and transfer the dough ball on top of the lightly floured parchment paper into another bowl. Cover with a cloth and let rest for those 2 hours.
Half an hour before baking, set oven at 450F and place the baking pan or appropriate pot (think Le Creuset. Should be able to withstand very high temp) in the oven to preheat.
After the dough has risen to your liking, take the pan/pot out of the oven and lift the parchment paper containing the dough right into your vessel (hassle-free transfer!). Place the lid and put back in the oven.
Bake for 30 minutes, then take the lid off and bake for another 15-20 minutes or until bread is golden brown and makes a hollow sound when tapped.
Enjoy hearing that crust crackle!
Thanks, Lola! That’s Jim Lahey’s no-knead bread recipe, I believe.
I use these ingredients and measurements to make my baguettes. The only difference is that I use roughly 1 cup of water. I mix everything together and let rest in a bowl for 1 hour. Then I fold the dough over several times. No kneading, just fold over. Let rest another hour and repeat the folding. Then I refrigerate overnight in a greased, covered bowl. The next day, I divide it into 3rds, fold each one once, shape into a log and gently roll them with my hands, until they are roughly 13 inches long. Then I place them in a baguette pan with the lid and let rise 90 minutes. Slash the tops several times, spray a little water on the tops, cover and bake in a preheated oven at 450° F for 20 minutes and then uncover for 5-10 minutes or until the loaves are browned. My kids thought I bought the bread or brought it home from an Italian restaurant. I now make this weekly. It was my very first homemade bread that actually turned out!
Magnificent, April! Thank you!!!
Wow, wow, wow. Best ever!!! Really 5 minutes tops to start the dough. Made 2 generous loaves, 1 regular, the second I stuck full of garlic cloves. In my book Zoe and Jeff get a Nobel prize for bread making. Next time will try with chopped dill, maybe fried onions. Can’t believe the quality and taste of the final product. Dipped it in chimichuri HEAVENLY!!! Can see myself using Costco bags of flour!!!
I hear you! I’m now buying flour in 50-pound bags thanks to Zöe and Jeff.
What things can I add to the bread besides dill and garlic?
Wonderful Miriam, so happy you are enjoying all the bread! I love the idea of chimichuri dip, I’ll have to make some. Cheers, Zoë
I tried this bread recipe twice, although is is an easy recipe, I found it didn’t rise enough and it was very yeasty tasting. Threw it out.
Hi Deborah, Some people are more sensitive to the taste of yeast than others, so you can always decrease the amount of yeast in the recipe, but you’ll need to let it rest a bit longer. Here is some more information.
If your dough doesn’t seem to rise enough for your liking, you can always let it rest longer, and it will have a more open crumb. Here is more information.
Thank you! Zoë
Deborah; You probably had a problem with your technique or your ingredients. The recipe is perfect and works. Sorry you did not have a good outcome.