
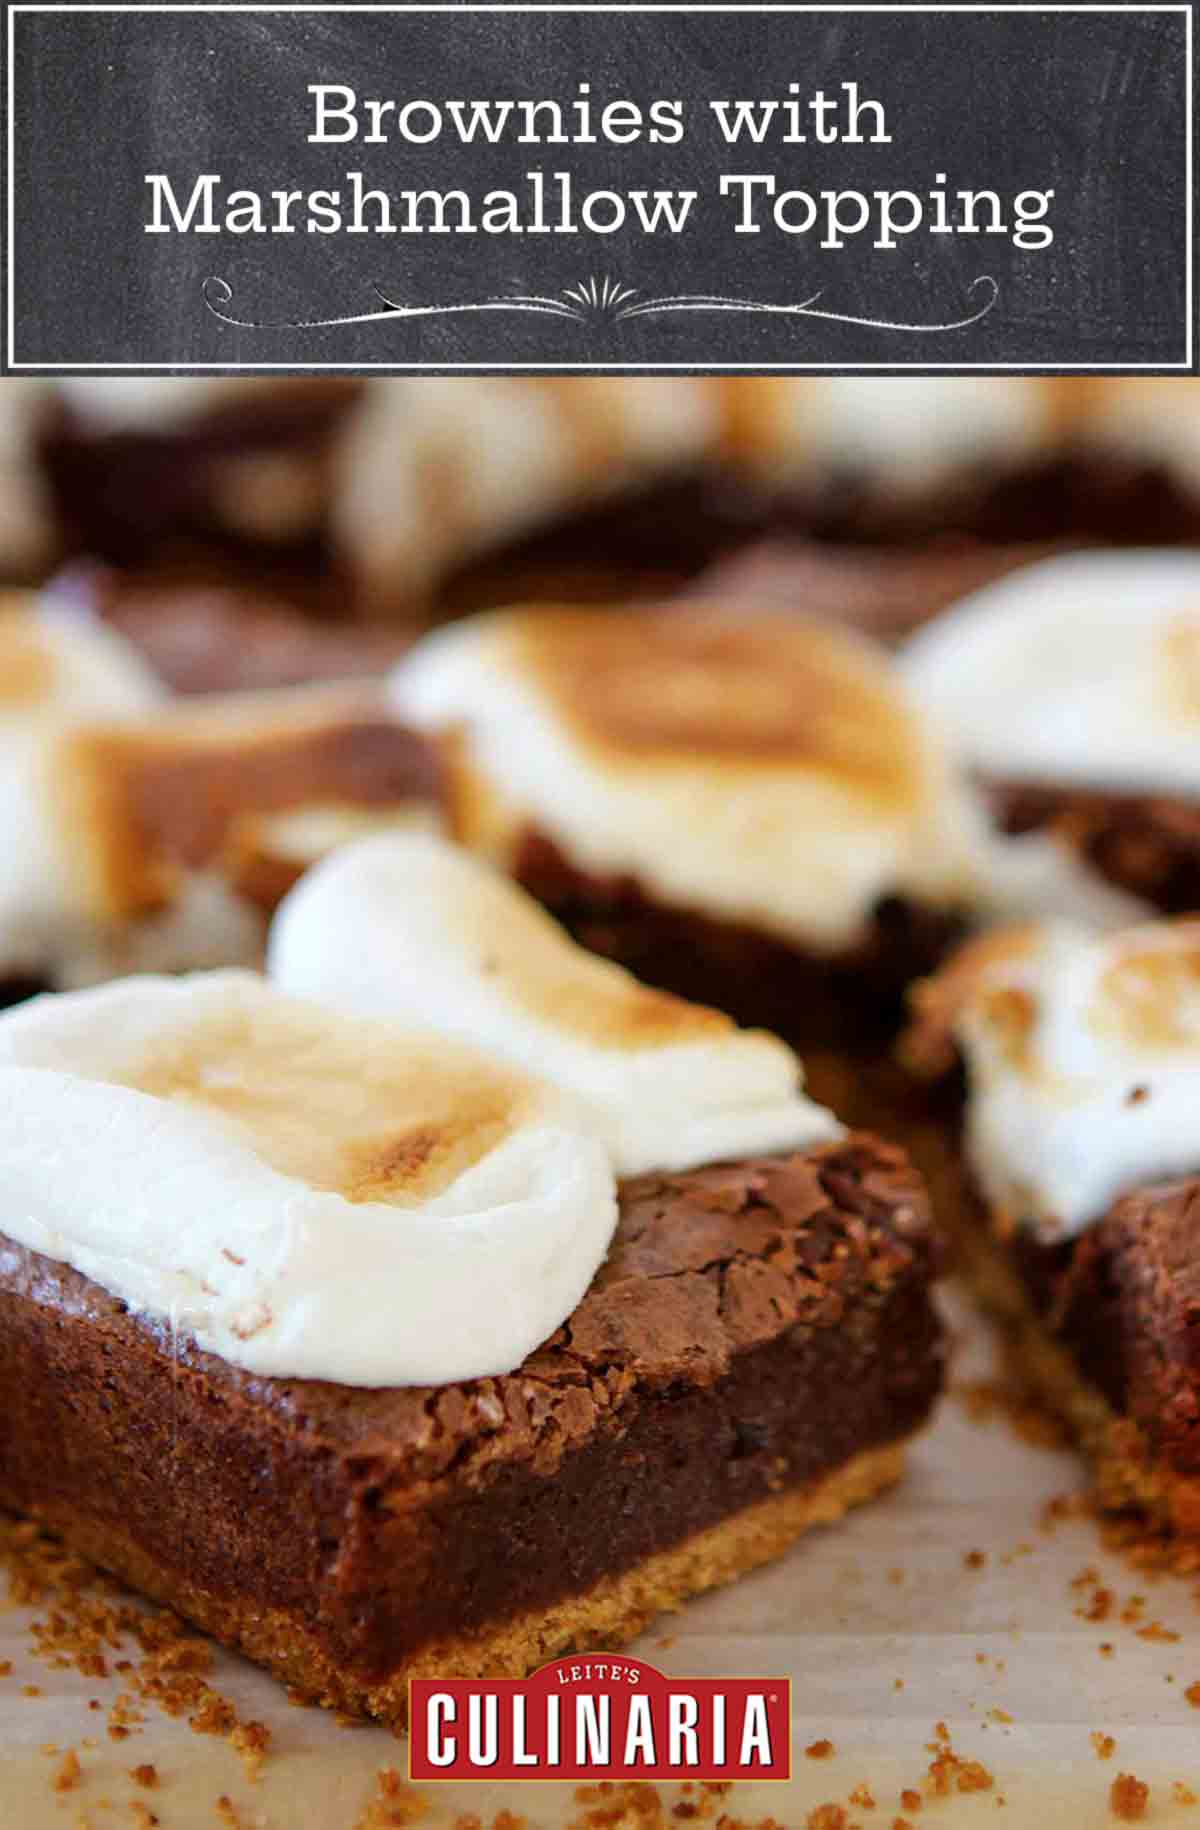
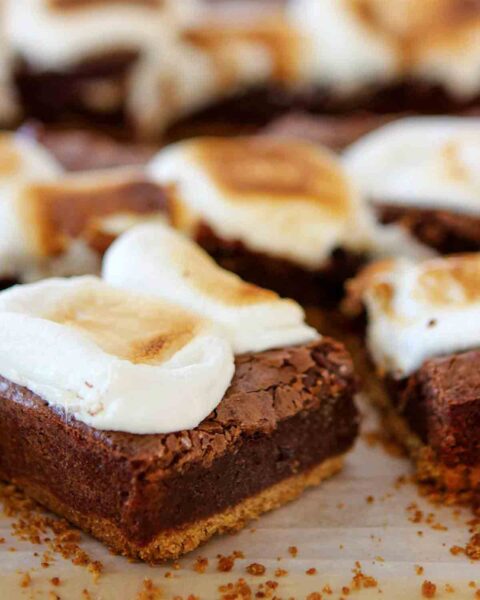
These brownies with marshmallow topping capture the gooey goodness of slightly charred, gooey marshmallows sandwiched between chocolate and graham crackers in a much more indulgent (and manageable) form factor. The crust is crumbly and subtly sweet, the brownies are the perfect melding of fudgy and cakey, and the toasted marshmallow provides a little levity. And no campfire or other outdoor pyrotechnics required.–David Leite
Brownies with Marshmallow Topping FAQs
We’ve tried various methods – placing crackers inside a ziptop bag and crushing them with a rolling pin (the bag always breaks on us and we end up having to sweep and mop the kitchen), trying to crunch them in a bowl with a hand mixer (0/10 stars – do not recommend) and using a food processor. Our preferred method is the food processor. It will get you a fairly even crumb in a matter of seconds, with very little mess.
You sure can, if your little sugar-coated heart desires. Storebought marshmallows are our go-to for these brownies though – mostly because they’re pre-made, and we get to eat brownies sooner than if we had to make marshmallows, too.
Store the brownies in an airtight container at room temperature for up to 3 days. We don’t recommend freezing them as the texture of the marshmallow topping will change.
Brownies with Marshmallow Topping
Ingredients
For the graham cracker crust
- 6 tablespoons (3 oz) unsalted butter, plus more for the pan
- 1 1/3 cups graham cracker crumbs, finely ground (from about 12 big rectangles)
- 2 tablespoons granulated sugar
- Pinch kosher salt
For the chocolate brownies and marshmallow topping
- 12 tablespoons (6 oz) unsalted butter, cut into pieces, plus more for the pan
- 6 ounces semisweet chocolate, roughly chopped
- 1 1/4 cups plus 1 tablespoon granulated sugar
- 3 large eggs, at room temperature
- 1 1/2 teaspoons vanilla extract
- 3/4 cup all-purpose flour
- 1/2 teaspoon kosher salt
- 12 to 16 regular or jumbo marshmallows
Instructions
Make the graham cracker crust
- Preheat the oven to 350°F (177°C).
- Butter the bottom and sides of an 8-by-8-inch baking pan and line it with parchment paper cut to fit the bottom of the pan. Butter the parchment paper.
- In a small saucepan over low heat or in a bowl in the microwave, melt the butter.
- In a medium bowl, combine the graham cracker crumbs, sugar, and salt. Add the melted butter and mix well. Press the crumb mixture evenly over the bottom of the prepared pan and flatten it with the back of a spatula.
- Bake the graham cracker crust just until the crumbs are golden brown around the edges, about 10 minutes.
Make the chocolate brownies and marshmallow topping
- While the graham cracker crust bakes, place a medium heatproof bowl over a saucepan filled with 1 to 2 inches of water (make sure the water doesn’t touch the bottom of the bowl). Add the butter and chocolate to the bowl and place the saucepan over very low heat, stirring occasionally, until the chocolate melts. Place the bowl on the counter and let it cool for 5 minutes.
- Add the sugar to the melted chocolate mixture and stir to combine. Slowly whisk in the eggs, 1 at a time, and mix until incorporated. Add the vanilla and stir until incorporated. Slowly add the flour in 2 batches and stir just until incorporated after each addition. Stir in the salt just until combined. Do not overmix.
- Scrape the brownie batter onto the warm graham cracker crust and slide it back into the oven until the brownies are set and the center is still a bit soft, 30 to 40 minutes. They should be soft but still a bit gooey when tested with a toothpick—you want moist crumbles on the toothpick. Start checking them after 25 minutes.
- Remove the pan from the oven, adjust the oven rack to the top position, and turn on the broiler.
- Arrange the marshmallows evenly on the brownies and slide the pan back in the oven. Broil until the marshmallows are softened and lightly toasted, 45 seconds to 1 minute. (Don’t turn your back on the marshmallow-topped brownies.)
- Carefully pull the pan from the oven and, using the back of a spoon, gently press down on the marshmallows to flatten them slightly. (You want to do this slowly so they don’t stick to your spoon.) Return the pan to the oven and broil until the marshmallows are nicely toasted, another 15 to 30 seconds.
☞ TESTER TIP: Before smooshing the marshmallows, you can spray the back of your spoon with nonstick spray to minimize goo clinging to it.
- Let the brownies cool in the pan for at least 1 hour. [Editor’s Note: We know, we know. Nearly impossible! But it ensures the brownies—in all their magnificent layers—fully set. Trust us.]
- Run a sharp knife under warm water and then run the knife along the edge of the pan. Cut the s'mores brownies into squares, ensuring each square has some ooey, gooey, toasted marshmallow on top. After each cut, run the knife back under warm water, wipe clean, and repeat. Go ahead and enjoy. Campfire optional.
Nutrition
Nutrition information is automatically calculated, so should only be used as an approximation.
Recipe Testers’ Reviews
S’mores + Brownies = Yummy. Especially when the brownies are super gooey and rich like these! I couldn’t believe how perfect these brownies were. They were the perfect mix of gooey and cakey. And they looked good as well with 3 distinct layers—a graham cracker layer, a chocolate brownie layer, and then a layer of toasted marshmallows. Ahhhmazing!
As much as it pained me to wait the hour after removing them from the pan, I did. I think it’s important to let everything kind of gel together and set. I think if you cut into the pan too soon the brownie layer will take over and you won’t get the distinct layers. My brownies took closer to 40 minutes to set. The tip about the spoon was somewhat helpful, but you will have some stickage when you spread the marshmallows. I think the key is to not lift your spoon once you start spreading and flattening the marshmallows. Whatever your technique, just make sure every corner of the brownies has some of the marshmallow topping.
These didn’t last long, not even 24 hours. Everyone loved them!

I’m not the biggest fan of s’mores because I hate smelling like a campfire, so anytime I can make something resembling them inside where there’s no residual smell—and no bugs—I’m happy. These brownies with marshmallow topping are insane. They’re damned delicious, and this is coming from a brownie purist who favors no nuts, no chunks of things, and certainly no frosting.
My brownies were slightly underbaked but after chilling they were fudgy and delightful. I baked them for exactly 25 minutes and could have used another 5.
The marshmallows are a bit tricky. I used 12 marshmallows from a bag simply marked “marshmallows,” just the regular size, not jumbo or mini. I lined them up 3 rows of 4 each and popped the pan under the broiler. When I pressed the marshmallows slowly and gently, they broke the top crust of the brownie—this is why you don’t want to underbake the brownies. Had the brownies been more firm, I would’ve been able to press them a bit more, forming one giant mass of floofy marshmallows.
These are a bit of a time commitment. They’ll take you just over an hour total. Start the filling while the crust bakes to maximize your time.
I cut them into 12 squares. Oh, and they’re pretty good the next day if there are any left over. Since they were rather gooey, I refrigerated them and brought them to room temperature before digging in again.

This brownies with marshmallows recipe was really delicious—so delicious that the extra work is completely worth it. The family really liked them. If you use regular-size marshmallows like I did, then 16 is a natural number. These are extremely rich, so this was the perfect size.
I used Honey Maid graham crackers. They come in packs of 8 and it took 8 to make 1 1/3 cups crumbs. Pressing the marshmallows with the back of the spoon does help, but it may be easier to spray the back of the spoon with nonstick spray. Pros: Delicious. Definitely has the feel of s’mores. Graham cracker crusts are the best—whether in a pie or in these brownies. Cons: This is a bit of a long recipe. While it isn’t difficult, it just takes time. The marshmallows get a little sticky, and it’s a bit of a pain to have to dip and cut all the time. Using 16 regular-size marshmallows meant that there were spaces between the marshmallows and so cutting the brownies wasn’t too bad unless you were trying to cut a single brownie in half.
The flavor held for several days without a problem. The graham crust actually stayed crumbly and delicious and it didn’t become soft and mushy the way they sometimes do with cream pies. However, the brownies were a little hard to cut and the marshmallows were a bit difficult beginning the next day.
This brownie with marshmallow topping recipe is a winning combination of chocolate and marshmallow. These reminded me of a campfire.
The brownies took 30 minutes to get a soft center with crumbles sticking to the toothpick. But after the brownies were completely cooled, I was sorry I hadn’t left them in the oven for another 5 minutes as they were still very soft. I refrigerated them, and that made them easier to cut. Regardless, these are not easy to cut neatly and require some patience.
I purchased standard Jet Puffed Kraft marshmallows. They didn’t have a size on the bag; they weren’t the minis and weren’t the giant ones. I used 25 marshmallows, as 12 would have barely covered the surface of the brownies in the pan. I wonder if it’s really necessary to broil these. I’m thinking that the marshmallows could be placed on top after 20 minutes and that they would soften and brown as the brownies finish baking. That said, the toasting time was spot-on, and the tip about slowly pressing on the marshmallows worked just fine.
I let the brownies set for an hour, and even then they were still warm and gooey. I ate a few bites and I was very happy. I opted to refrigerate the brownies before cutting them the next morning. I had no problem getting them out of the pan, and I am guessing that my husband’s colleagues will have no problem consuming them this morning. I put a few in the freezer, as I always like to see if it’s a good storage option. In this case, I think the brownies would be pretty tasty right out of the freezer. I was happy with 25 very small morsels of fudge goodness. When I serve something like this, I always put them in white cupcake liners on a serving plate. Makes it easy for members of a crowd to serve themselves and keeps the sticky gooeyness to a minimum.
These brownies are a crowd pleaser. Who doesn’t like s’mores?! The graham cracker crust adds a sweetness to the chocolatey yum in the middle. Browning the smooshed marshmallows on top made the final product pure s’mores delight.
They come together easily although they took about 25 minutes of hands-on time because of the layers.
Make sure you have lots of napkins or wet wipes ready because you’re gonna need them!
This was ooey-goey rich, but what do you expect from something called brownies with marshmallow topping?
I used 7 rectangles of graham crackers to make the crust. I didn’t have jumbo marshmallows on hand so used 16 regular-sized ones. My brownies took about 35 minutes to get moist crumbles. It only took 20 seconds to toast the marshmallows under the broiler. The tip of smashing the marshmallows down with a back of spoon worked fine to spread them out a little more. However, it only took 10 additional seconds before my marshmallows caught on fire! I think using overlapping pieces of foil to line the pan would have been better and saved us from the drama of flames and scorched marshmallows. I ended up scraping up the top layer of marshmallows off, and eventually put it back in to for 5 seconds to toast.
After letting the brownies cool for an hour, we cut into the brownie goodness. The crust ended up being a little dry and was crumbly, so I just served the brownies with a spoon and bowl. I might add an extra tablespoon or two of butter in the crust.


These were LUSCIOUS – though nearly impossible to cut. Next time I may try putting half the brownie batter on top of the graham cracker crust, topping that with the marshmallows and then the rest of the brownie batter.
Cathy, what made them hard to cut? Was the marshmallow too gooey? One thing I do is lightly oil a knife. It makes cutting so much easier.