

TL;DR (Quick-Answer Box)
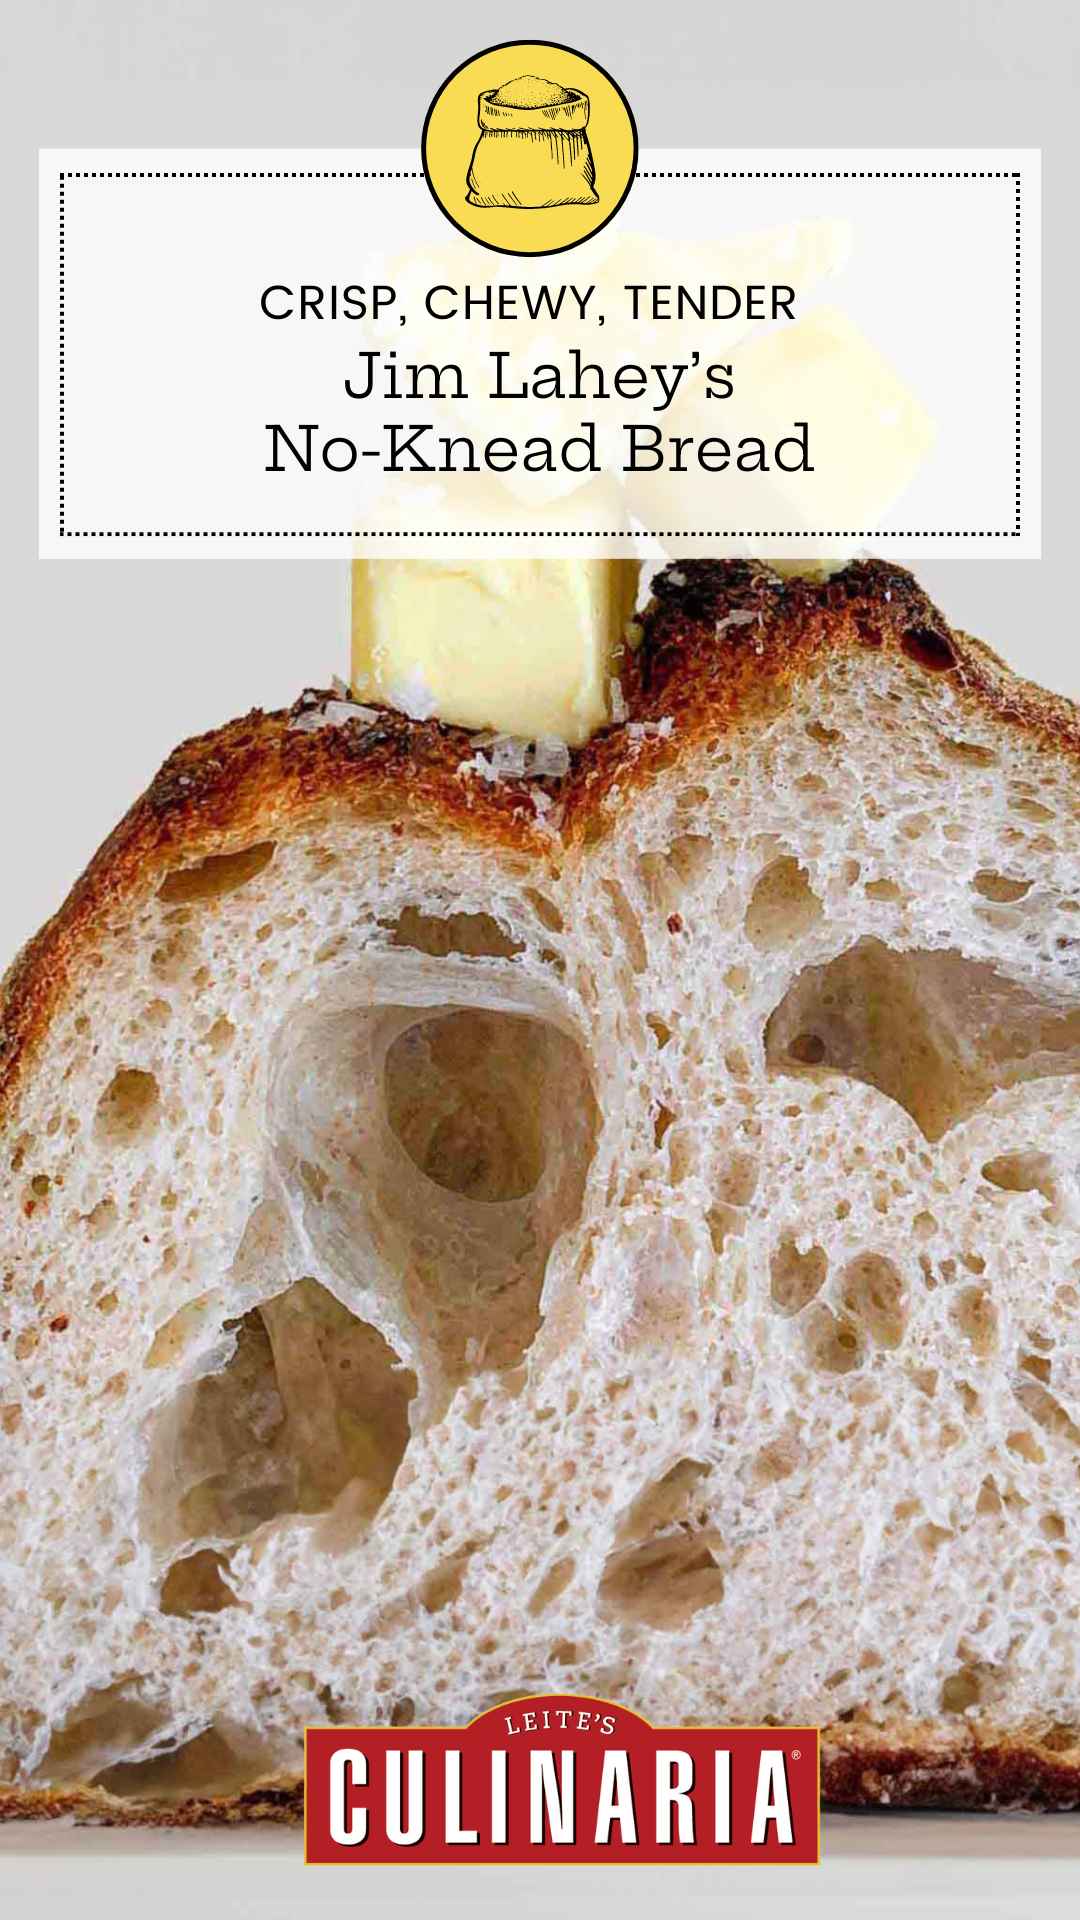
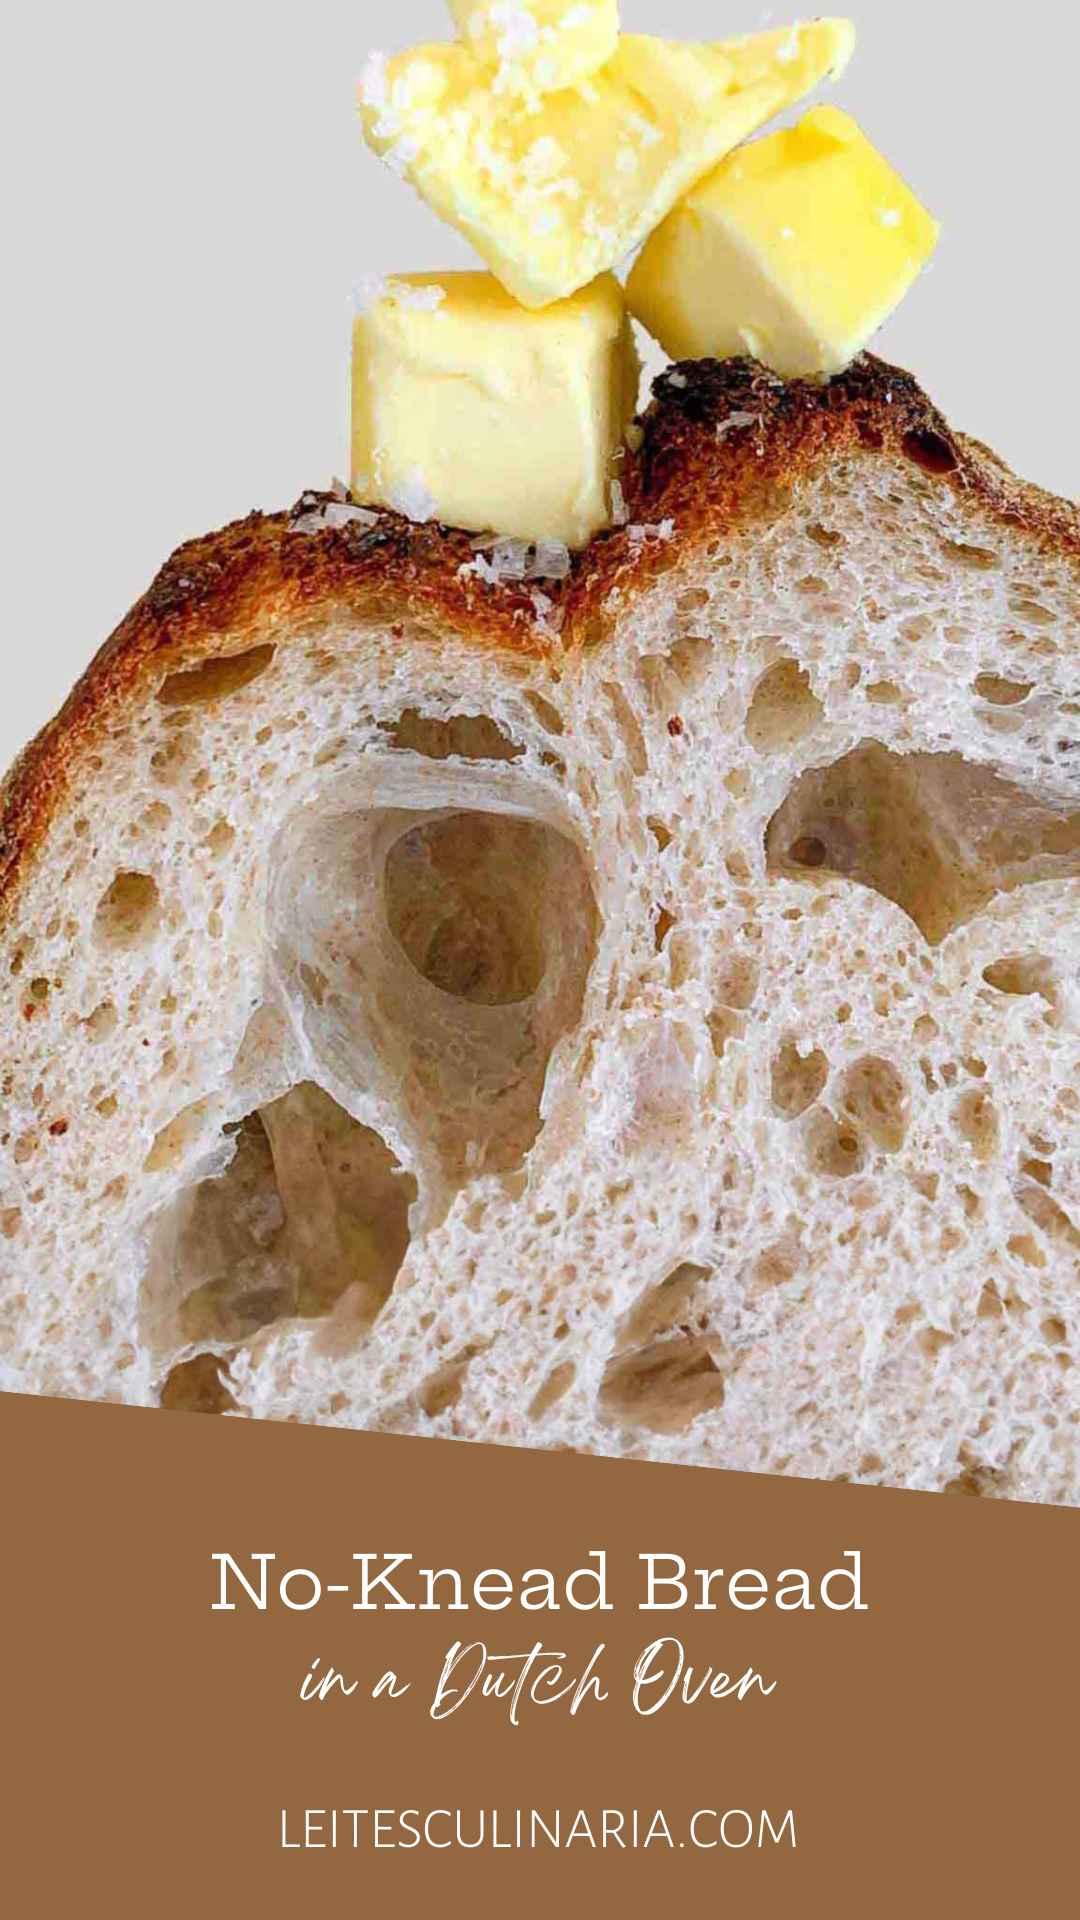
- What it is: The no-knead bread. The legendary, four-ingredient wonder that broke the internet and turned thousands of “I-can’t-bake” folks into artisan bread makers overnight.
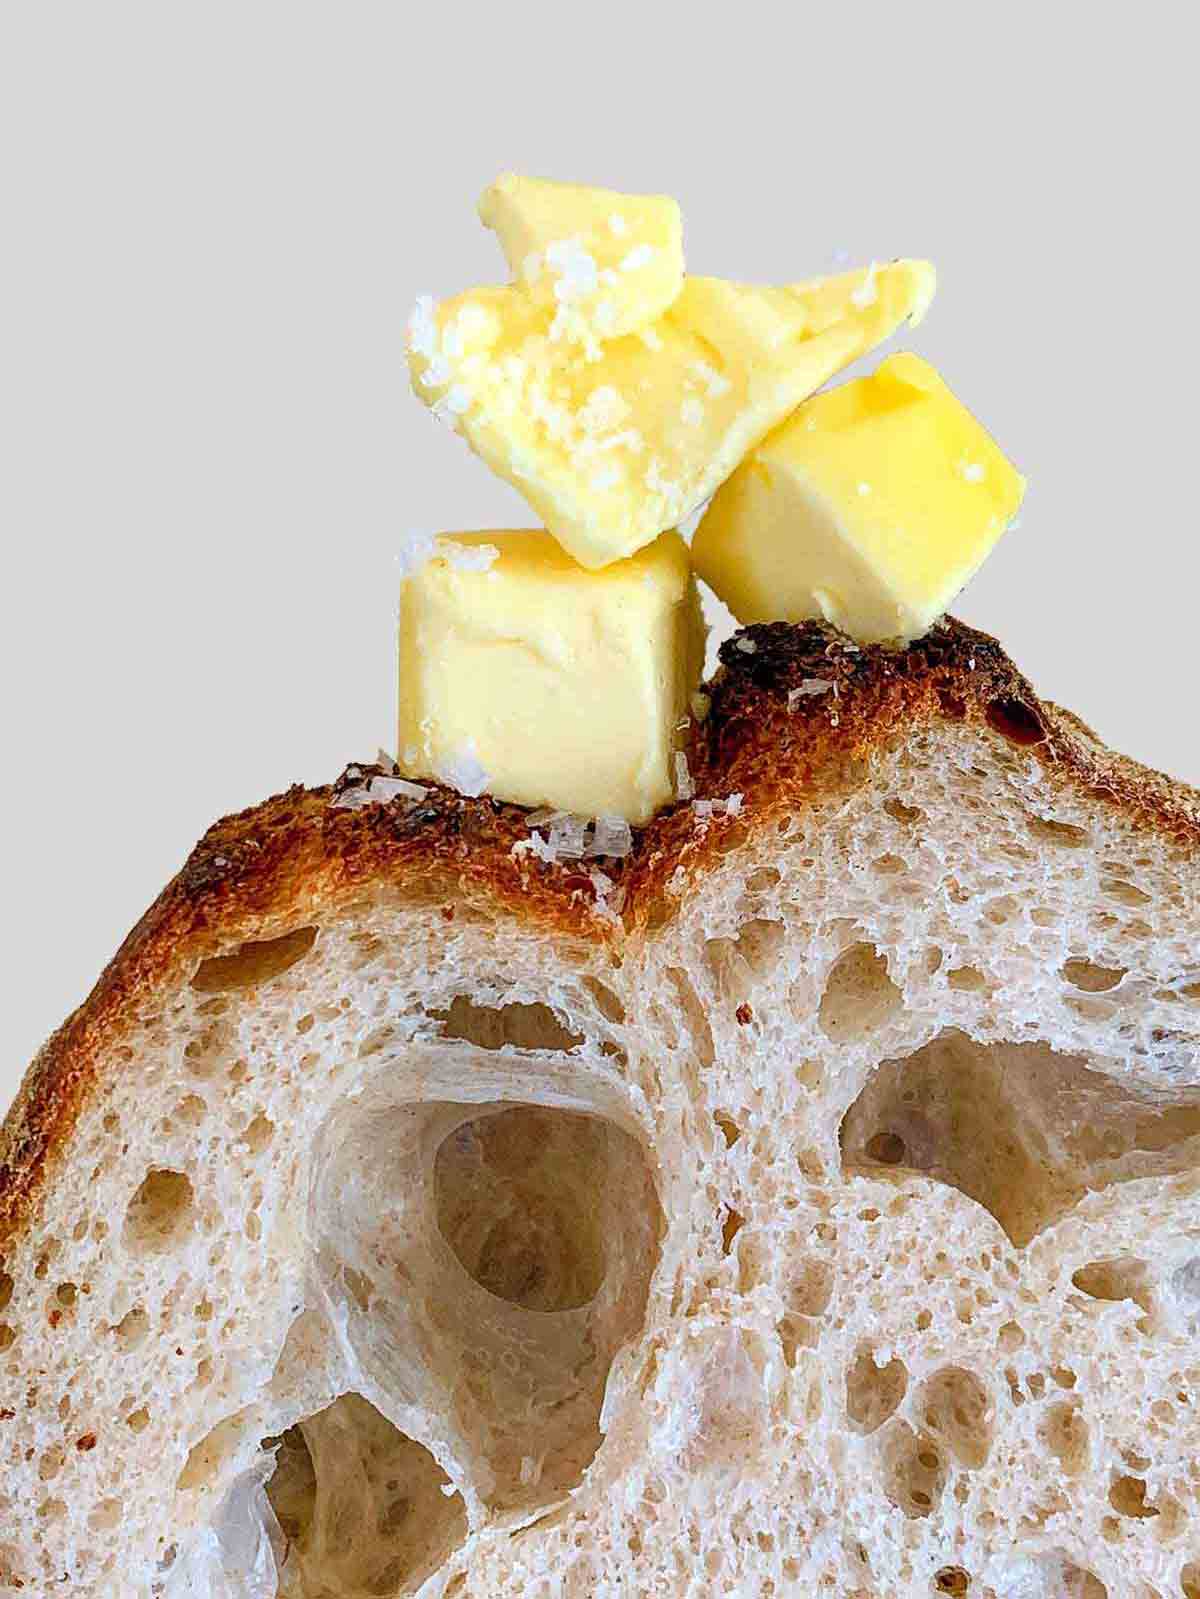
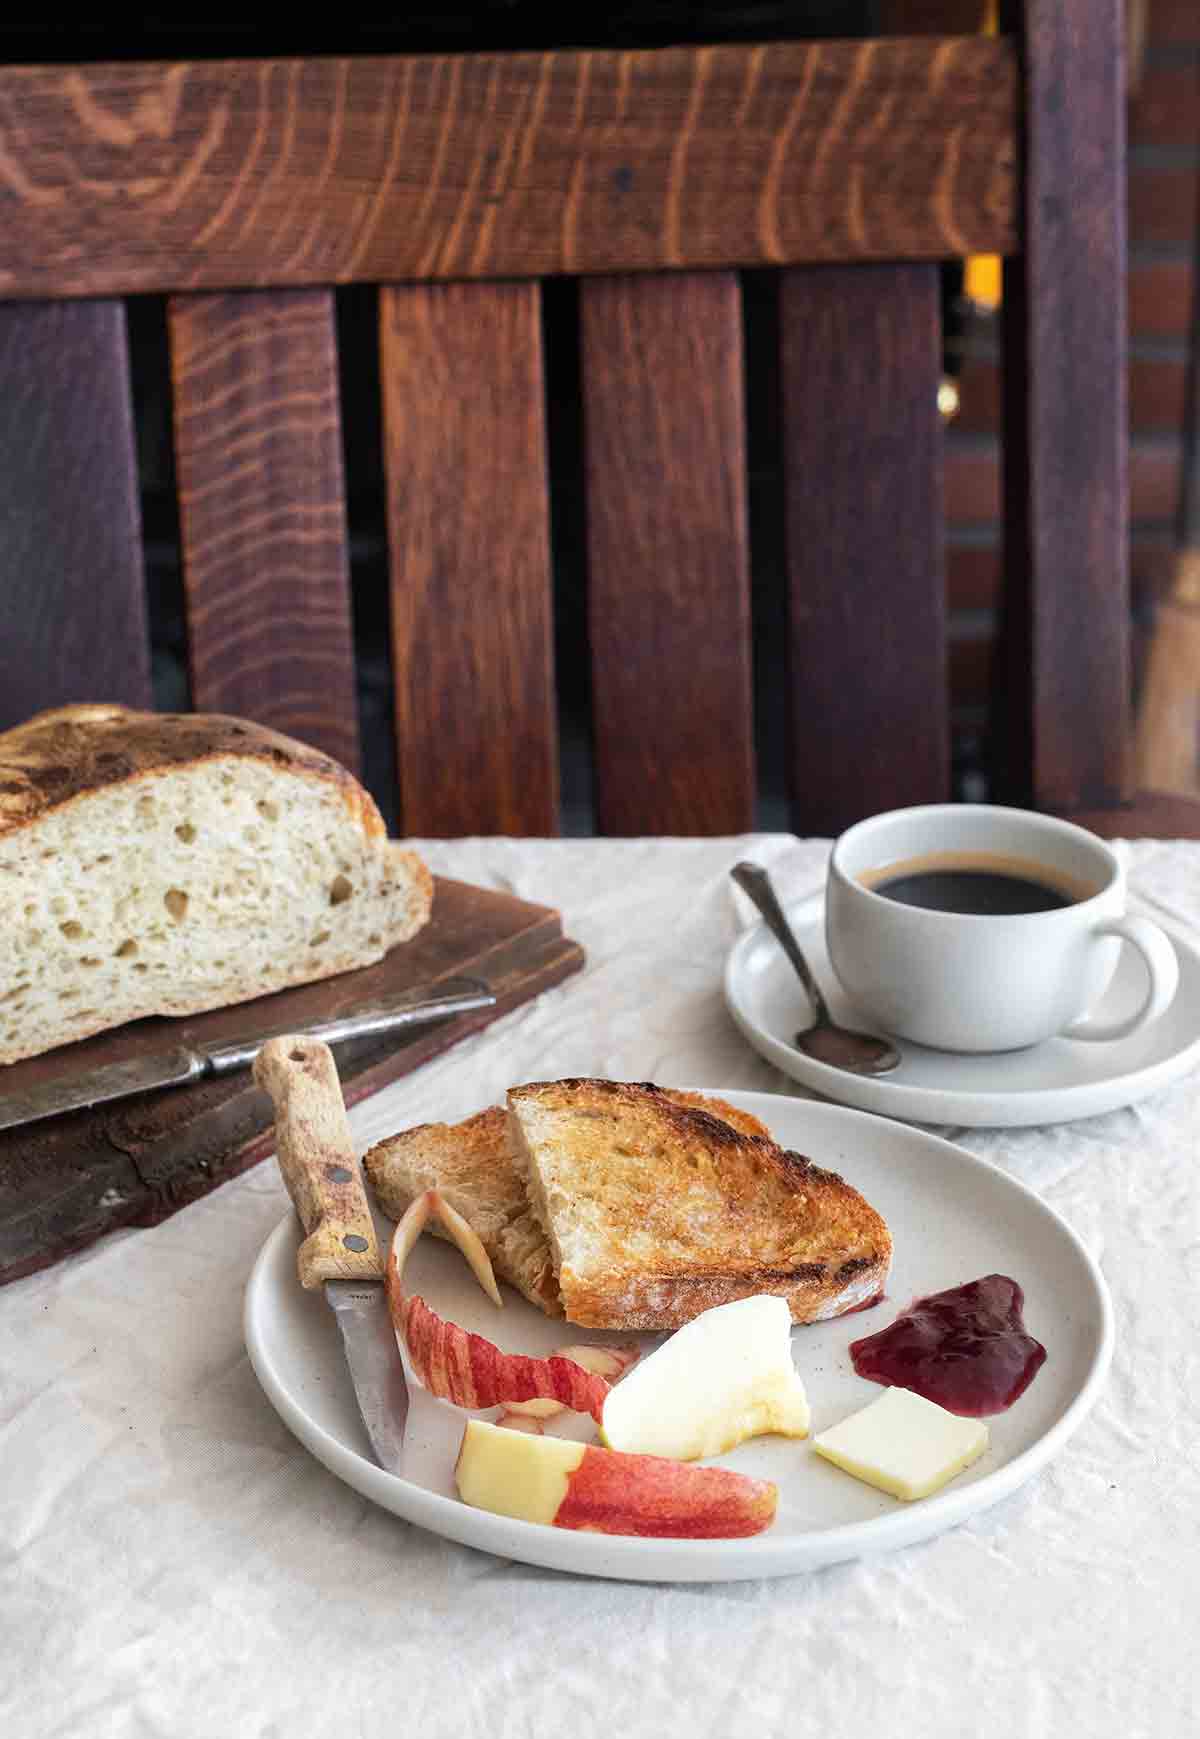
- Why you’ll love it: You get a ridiculously gorgeous loaf with a crackling crust and a soft, chewy, hole-riddled crumb. The best part? The dough does all the work for you. Pure magic with almost zero effort.
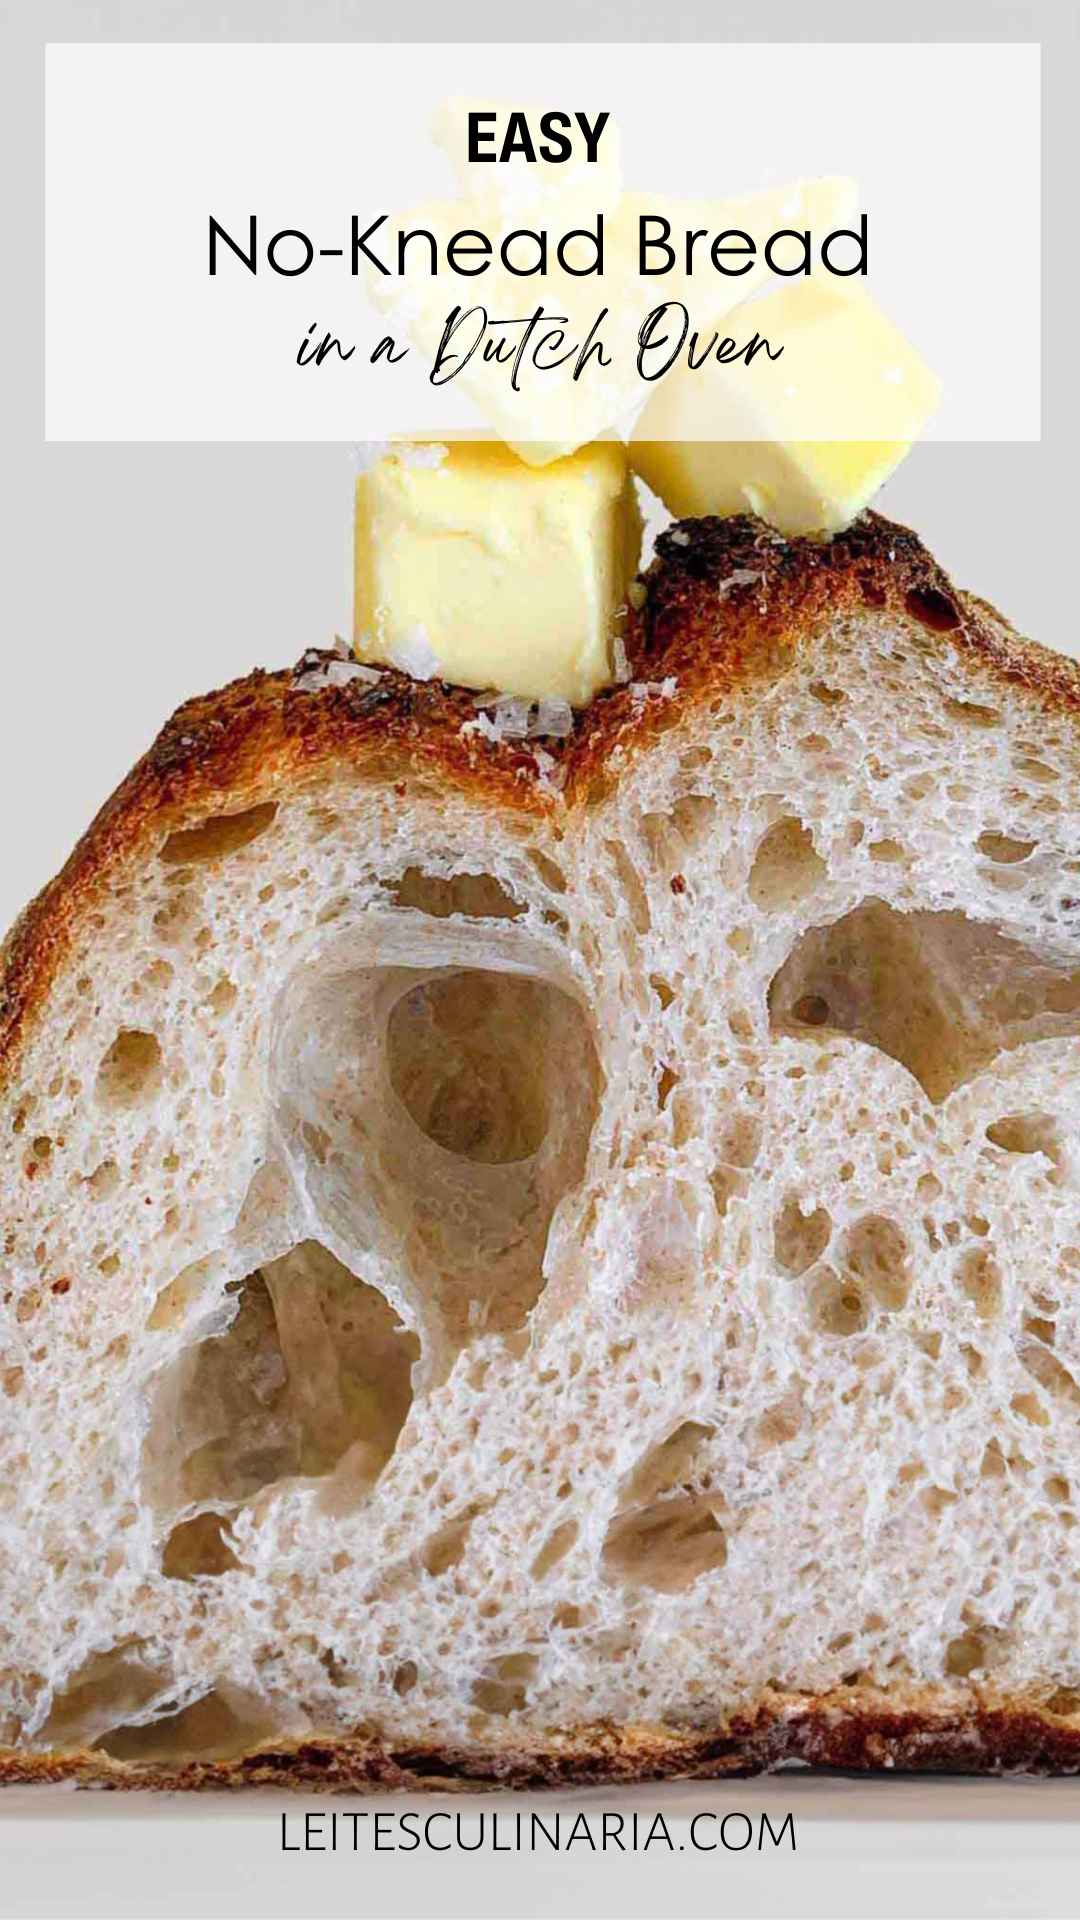
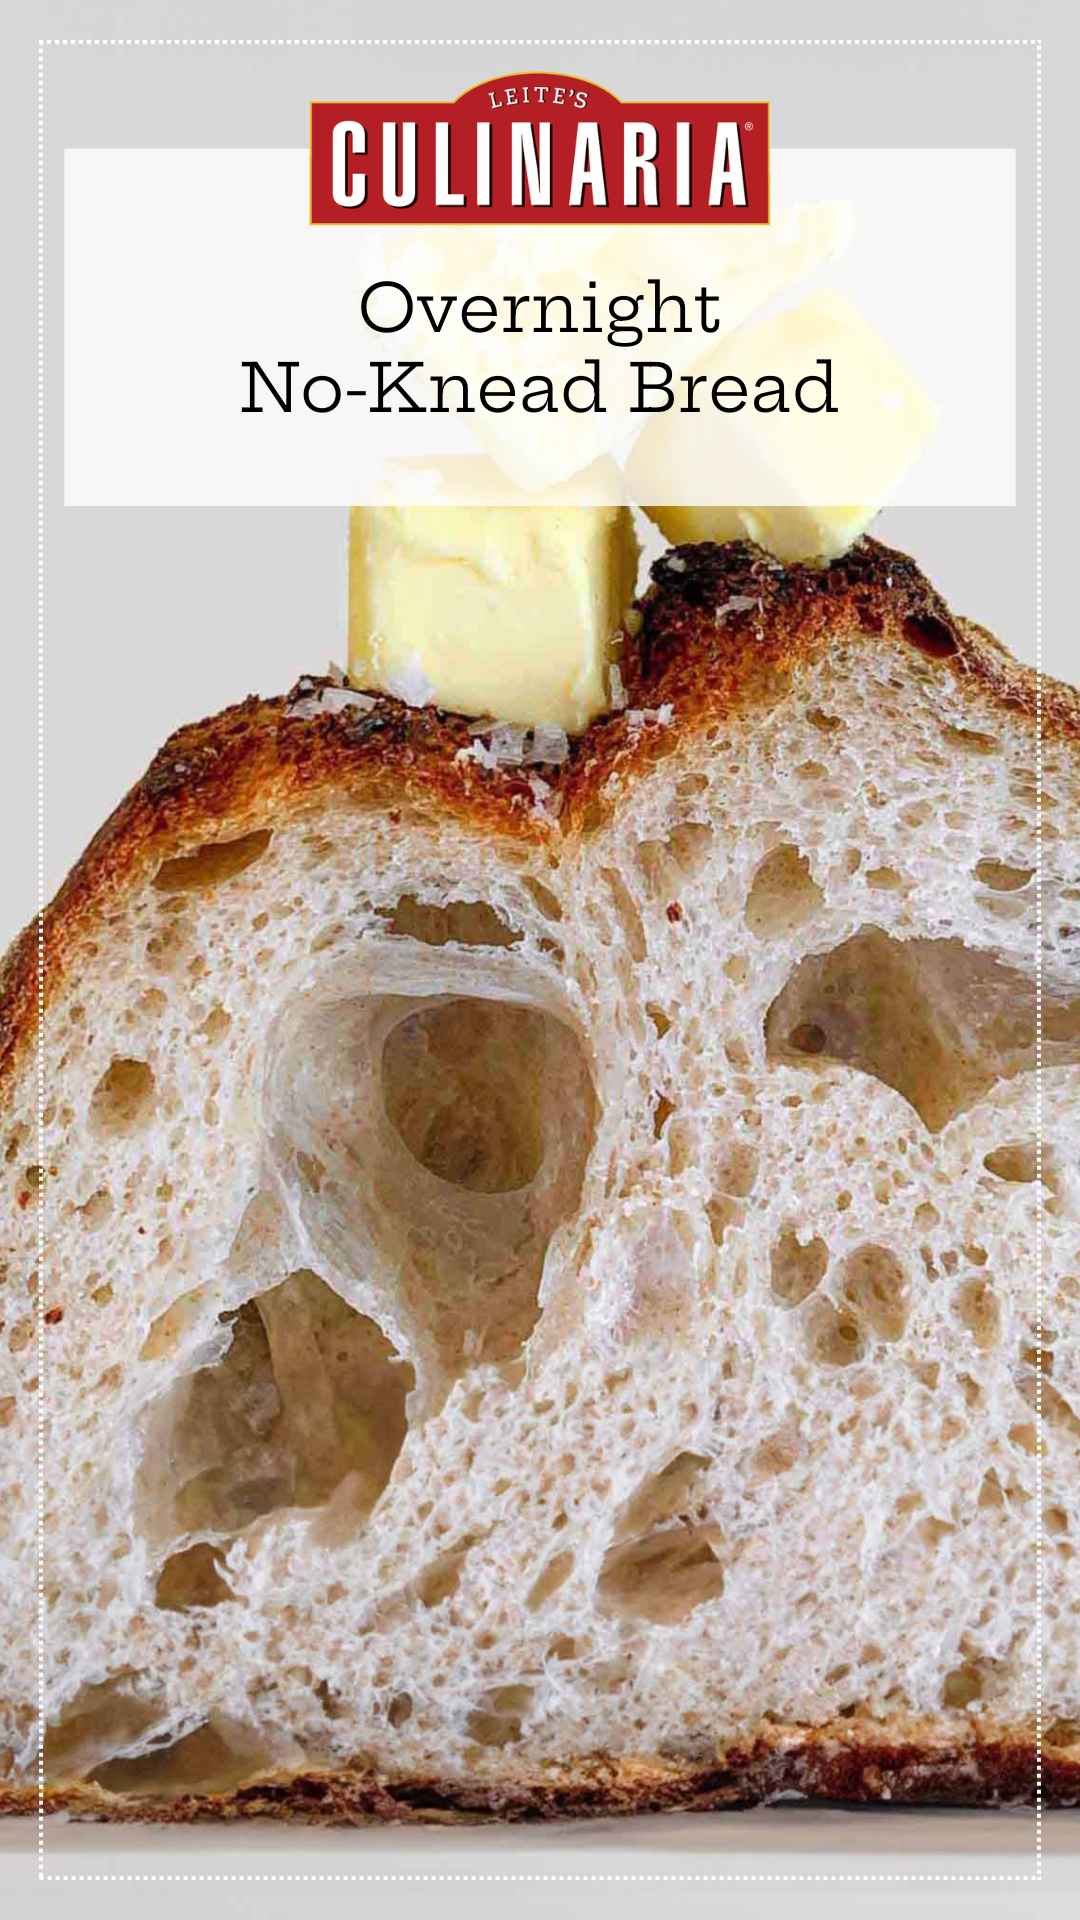
- How to make it: Stir flour, yeast, salt + water into a shaggy dough. Rest overnight (12–18 hours) to ferment. Give it a quick fold, a short rest on a towel, and then bake it in a screaming-hot Dutch oven.

Jump To
- TL;DR (Quick-Answer Box)
- Why This No-Knead Bread Recipe Works
- Your Foolproof Bread-Baking Schedule
- Get Your Customizable Bread Baking Schedule
- Notes on ingredients
- Visual step-by-step guide: No-Knead Bread
- A reader’s bread-baking tips: The colander method
- Your no-knead bread questions, answered
- Pro tips & troubleshooting
- More great no-knead bread recipes
- Chuffed about your loaf?
- Jim Lahey’s No-Knead Bread Recipe
- Recipe Testers’ Reviews
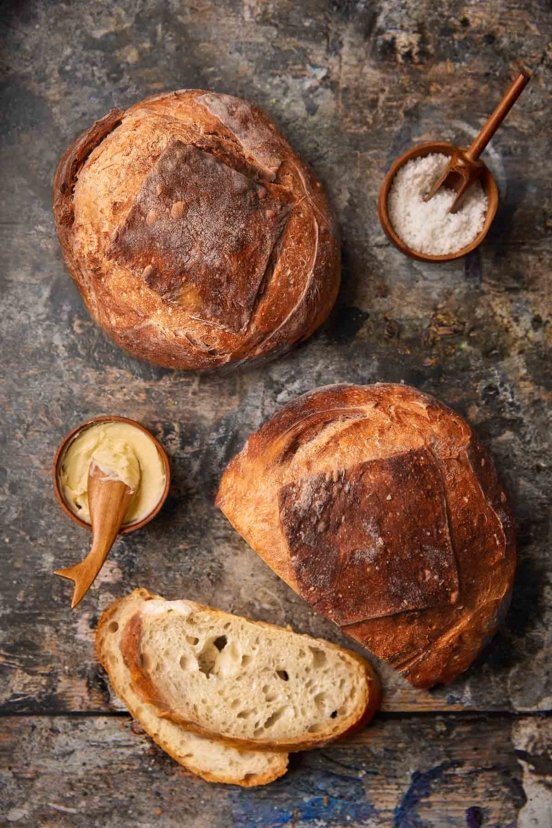
This is it, folks. Jim Lahey’s no-knead bread recipe, first featured in the New York Times, and the technique that revolutionized breadmaking.
This homemade bread recipe is ridiculously easy, even for first-time bread bakers, and will make you wonder why you ever spent all that time and effort kneading dough in the past.
The loaf is an adaptation of Lahey’s phenomenally and outrageously popular pugliese sold at Sullivan Street Bakery in Manhattan. And once you try it, you’re going to wonder where it’s been your entire life.
Featured Review
Great loaf! So much better than other “no-kneads.”
Linda
Sadly, I was not sufficiently generous with dusting the towel, and the bread stuck and deflated. I did it again using one of those silicone mat circles with handles, seam side up. The bread forgave me, came out just like the pictures (that NEVER happens) with crunchy crust and great flavor.

Why This No-Knead Bread Recipe Works
This recipe’s genius lies in its truly simple science. A super-wet dough and a long, slow fermentation build deep, complex flavors and a perfect gluten structure—no kneading required. Then, baking the loaf in a screaming-hot covered pot traps steam, essentially creating a professional baker’s oven on your rack. This is the secret to a magnificent rise and that legendary, shatteringly crisp crust. It’s foolproof, it’s brilliant, and it’s something anyone can make at home.
Your Foolproof Bread-Baking Schedule
Okay, let’s tawk. The hardest part of this recipe isn’t the work—it’s the waiting. And figuring out when the hell to even start. So, I’ve broken it all down for you. Think of this as your personal baking GPS. Just decide when you want to bite into a slice of that buxom, crackling loaf, and I’ll work you backward from there. Easy, right?
o make it even simpler, you can download a printable PDF schedule to fill out.
- Mix the Dough (16 to 22 Hours Before Serving)
This is where the magic begins. Stir everything into a shaggy mess (30 seconds, tops!), cover it, and walk away. This long, slow first date is what builds that incredible flavor. You’ll know the dough is ready when it’s covered in bubbles, practically winking at you. - Shape the Dough (4 Hours Before Serving)
After its long huddle, turn the bubbly dough onto a floured surface and gently fold it into a round. Don’t get aggressive here; you’re shaping, not kneading. Plop it seam-side down on a very well-floured towel, cover, and let it nestle for another 2 hours. - Preheat the Oven (2 1/2 Hours Before Serving)
With 30 minutes of rising time left, it’s time to bring on the heat. Slide your pot and its lid into the oven and preheat to a blistering 450°F (232°C). You want that pot blazing hot. - Bake the Bread (1 3/4 to 2 Hours Before Serving)
Carefully place your puffy dough into the hot pot. It might look like a misshapen blob for a second, have faith, folks. Bake covered for 30 minutes, then whip off the lid and let it go for another 15 to 30 minutes, until it’s a deep, gorgeous chestnut brown. - Cool the Bread (1 Hour Before Serving)
This is, without a doubt, the most agonizing step. You must—MUST—let the bread cool on a rack for at least an hour. This allows the crust to set and the interior to finish baking. Slicing into it early will get you a gummy crumb, and a lecture from me! 😉 - Serve the Bread!
The wait is over. Slice, slather with an obscene amount of butter, and bask in the applause.
Sample Timeline
Let’s say you want to serve the bread at 7:30 PM on a Saturday.
| Time | Day | Task |
| 9:00 PM | Friday | Mix the dough and cover for its 18-hour first rise. (Or mix at 3:00 AM Saturday for a 12-hour rise). |
| 3:00 PM | Saturday | Shape the dough and begin the 2-hour second rise. |
| 4:30 PM | Saturday | Begin preheating the oven and pot. |
| 5:00 PM | Saturday | Place the dough in the preheated pot and begin baking. (Assumes a 60-minute total bake time for a dark crust). |
| 6:00 PM | Saturday | Remove bread from oven and begin cooling on a rack. |
| 7:30 PM | Saturday | Serve bread |
Get Your Customizable Bread Baking Schedule
Download a PDF that you can fill in to make a custom breadbaking schedule.
Notes on ingredients
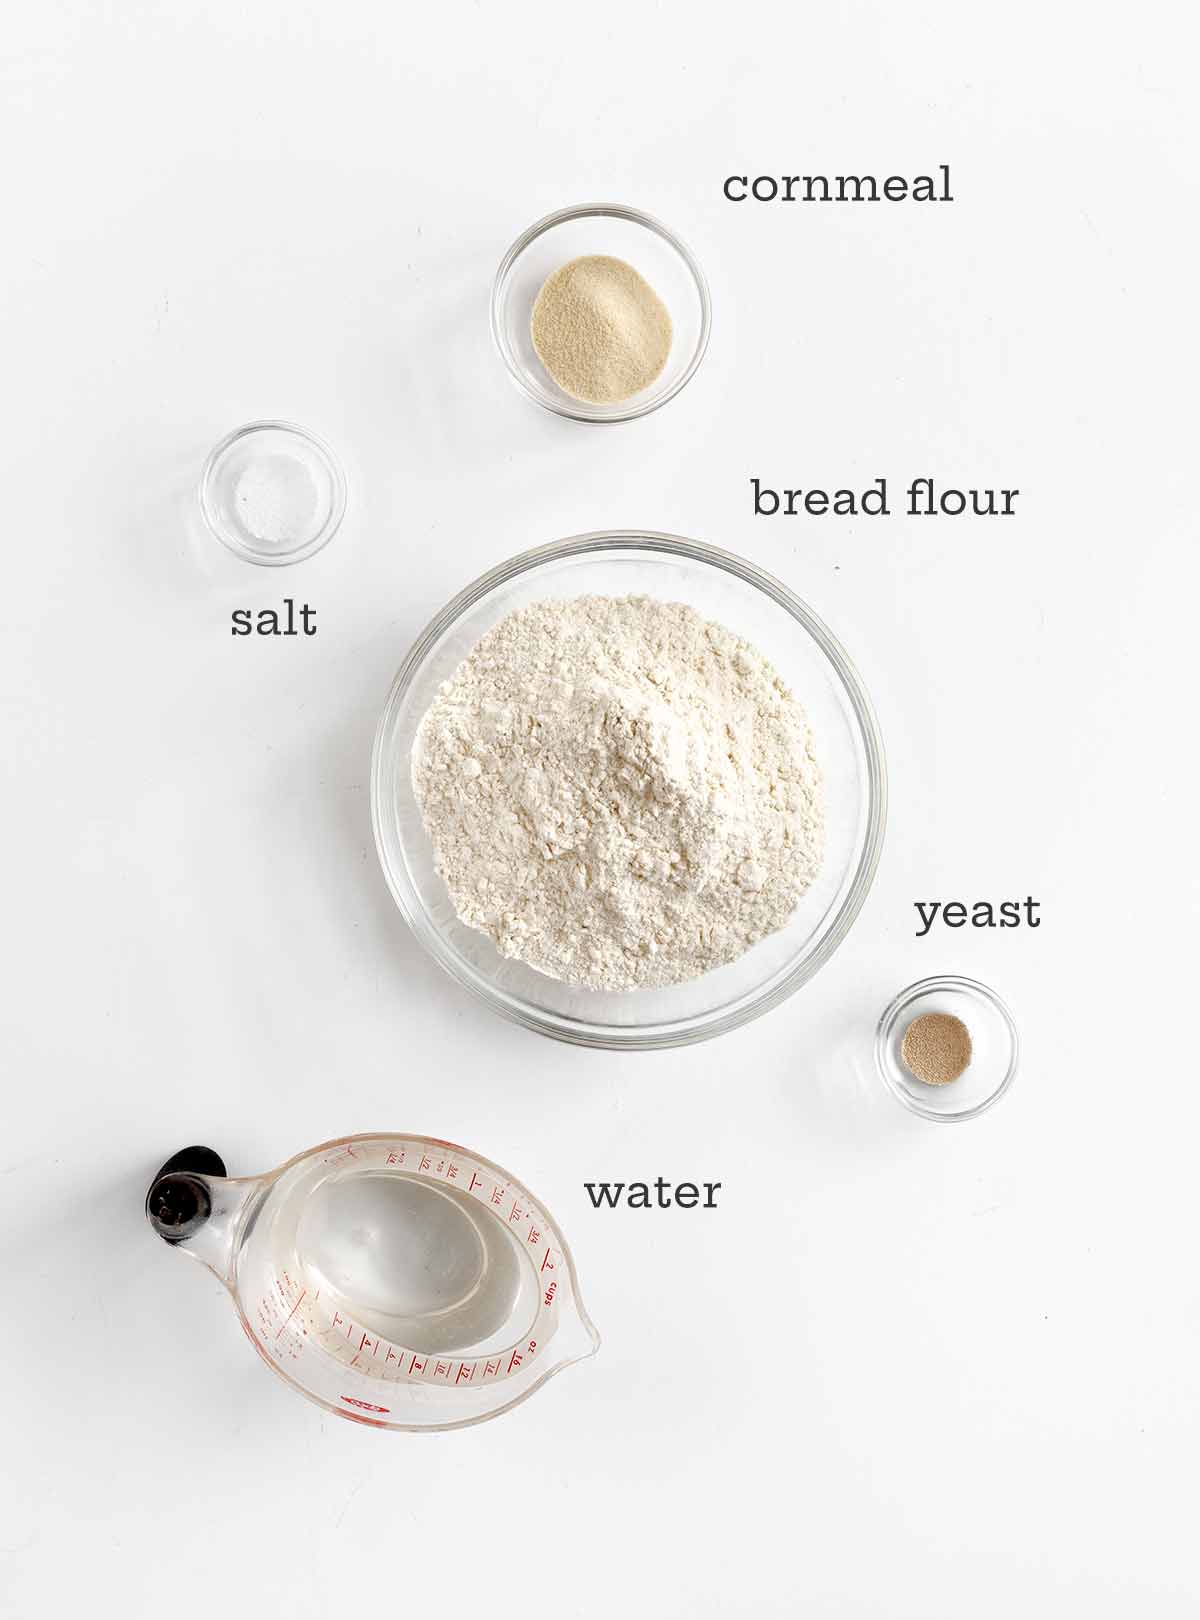
- Flour—You can use all-purpose flour or bread flour, or a combination of both.
- Instant yeast—You only need 1/4 teaspoon of instant yeast for this recipe. It seems like a very small amount, but the long fermentation time means that very little yeast is needed. To check the freshness of your yeast, mix a teaspoon of yeast with 1/3 cup of warm water and a big pinch of sugar. Alive yeast will develop bubbles or foam on top of the mixture. If there are no bubbles, your yeast needs to be replaced.
- Cornmeal—The addition of a little cornmeal helps to prevent the dough from sticking and adds a little texture to the finished loaf. You can substitute wheat bran or more flour for the cornmeal.
Visual step-by-step guide: No-Knead Bread
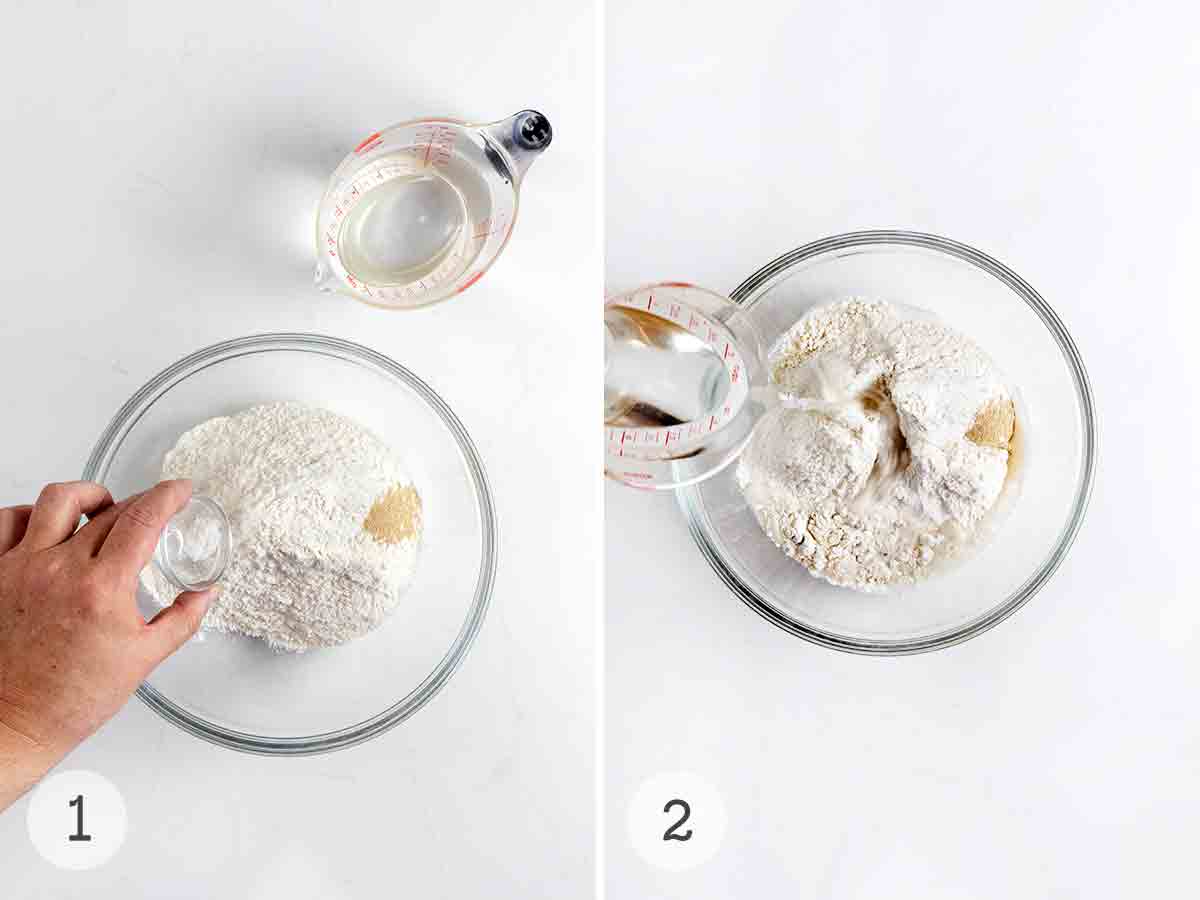
- Combine the flour, yeast, and salt in a large bowl.
- Pour in the lukewarm water.
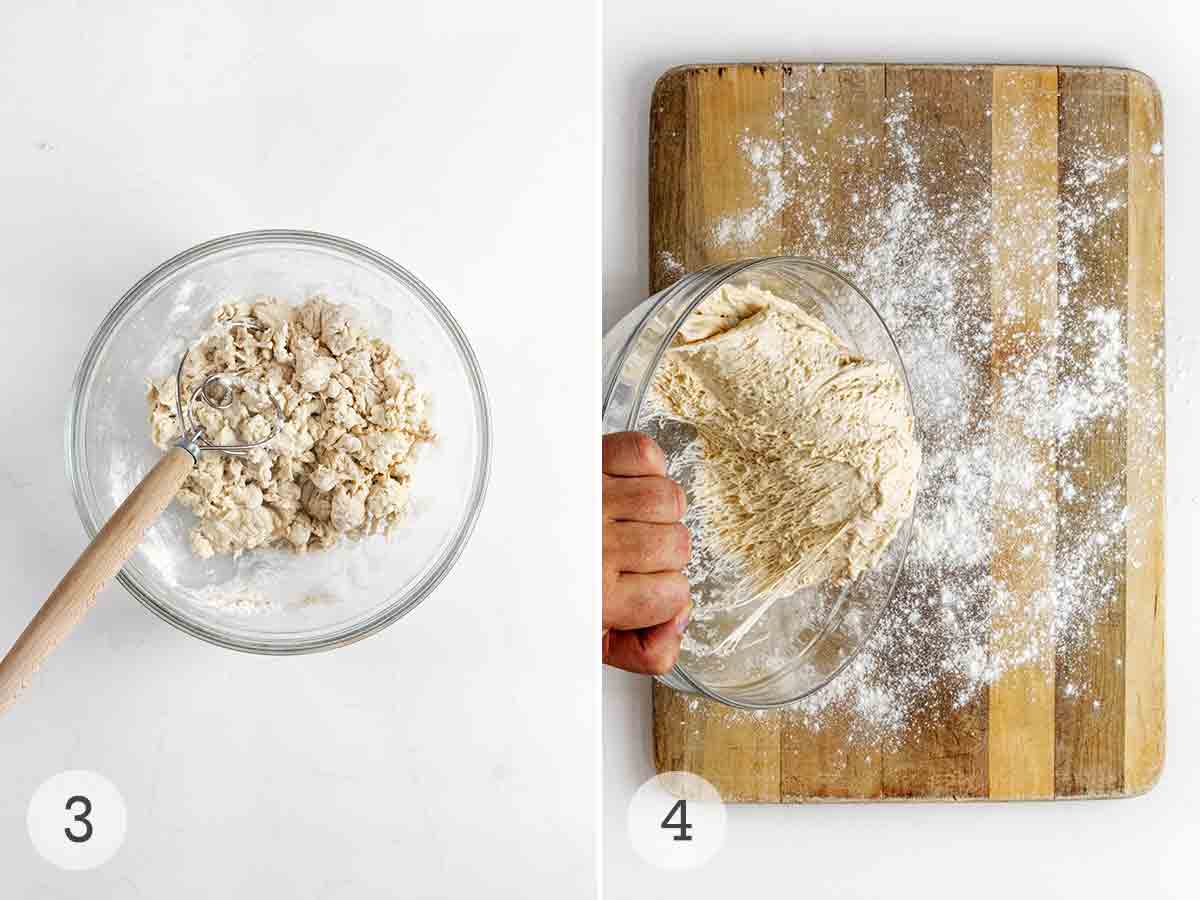
- Mix until you have a rough, shaggy dough. Cover the dough and let it rest until the surface is dotted with bubbles, 12 to 18 hours.
- Dump the dough onto a floured work surface.
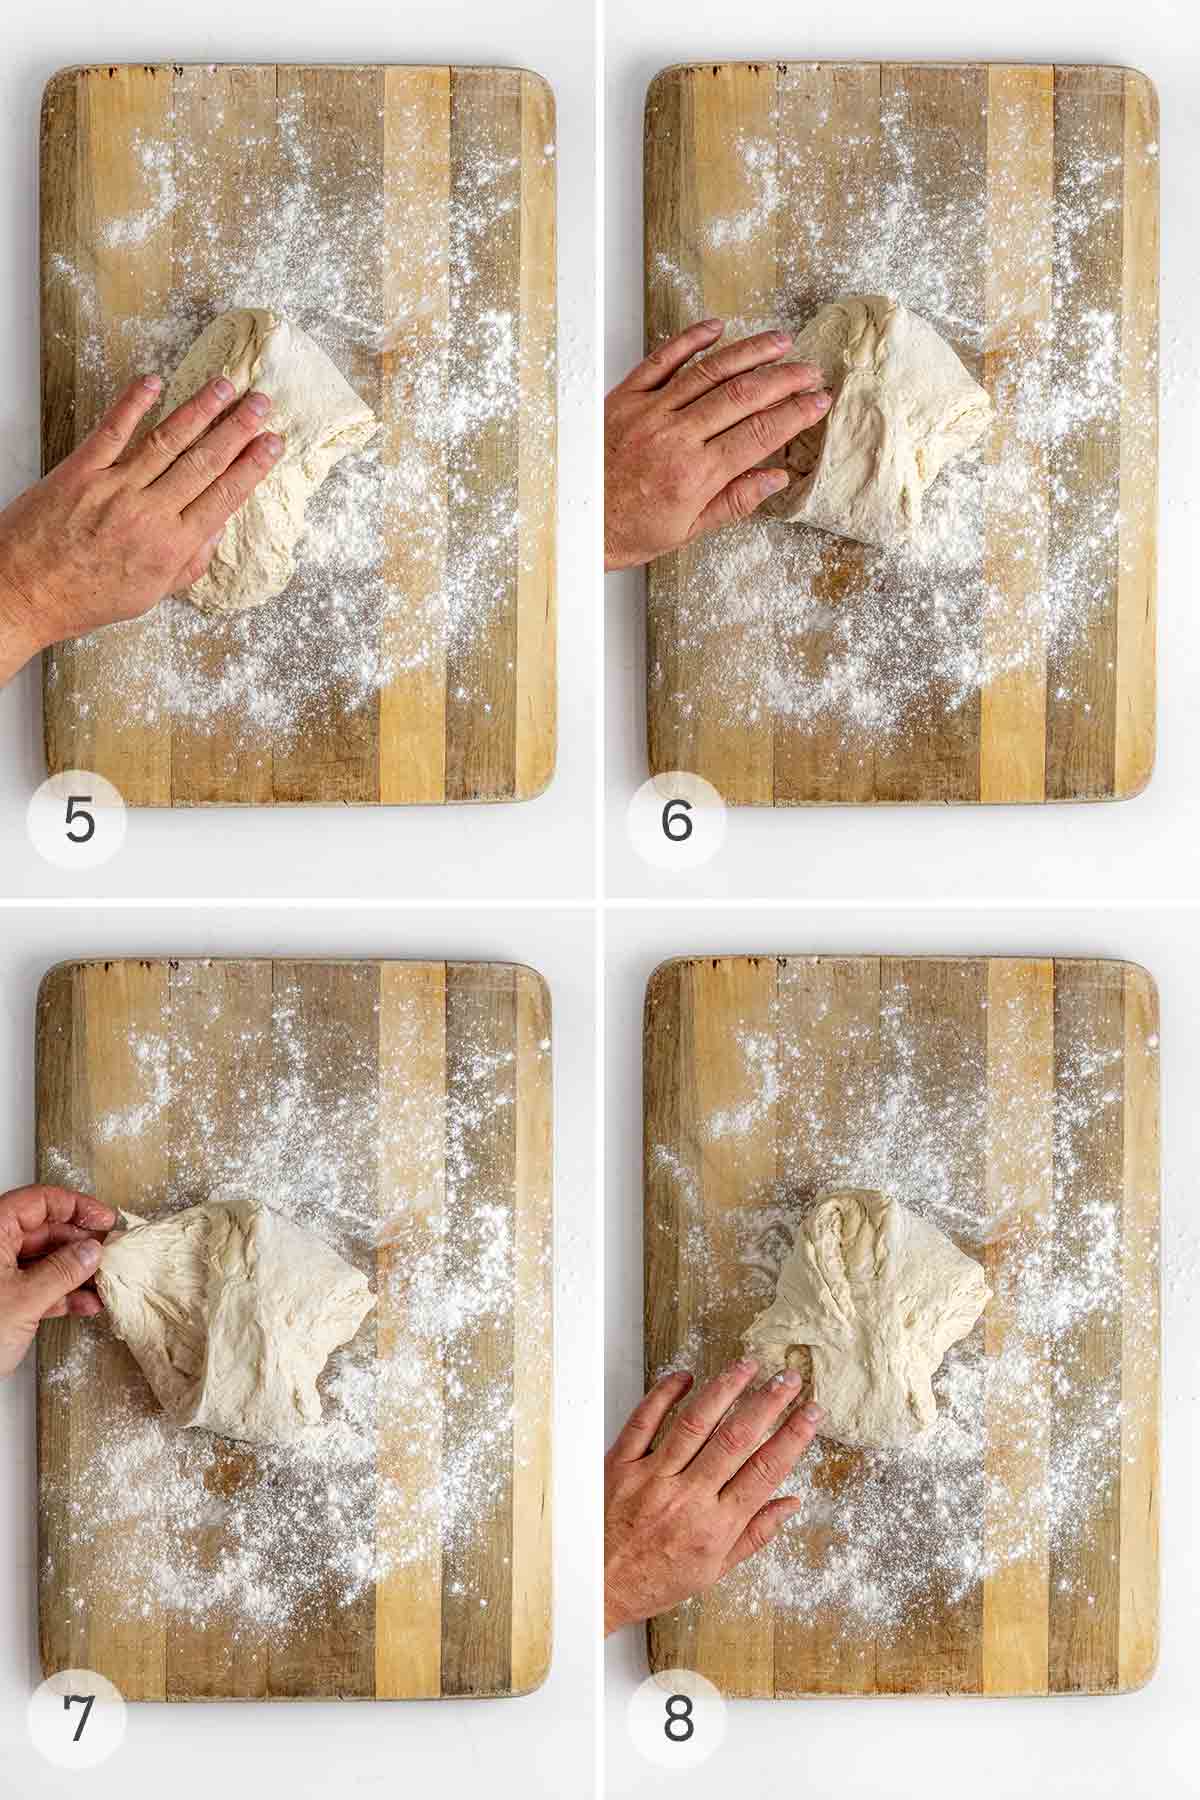
- Gently lift the top of the dough and fold it over itself.
- Pull the bottom of the dough up and over the folded section.
- Grab the left side of the dough and fold it up and over.
- Fold the right side of the dough up and over.
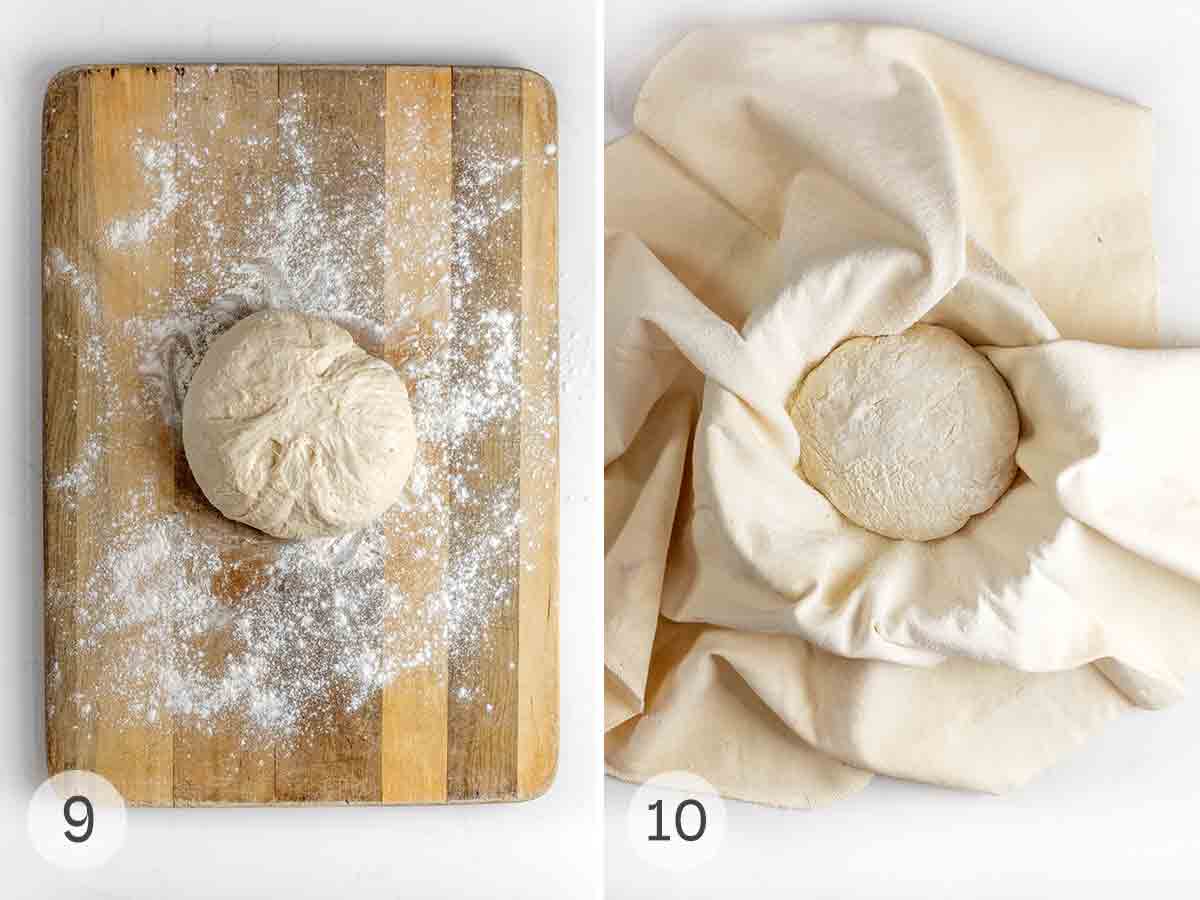
- Gently nudge the dough into a round shape. Don’t knead.
- Coat a cotton towel with cornmeal and place the dough, seam-side down, onto the towel in a bowl or proofing basket. Cover with a second towel and let it rise until doubled in size.
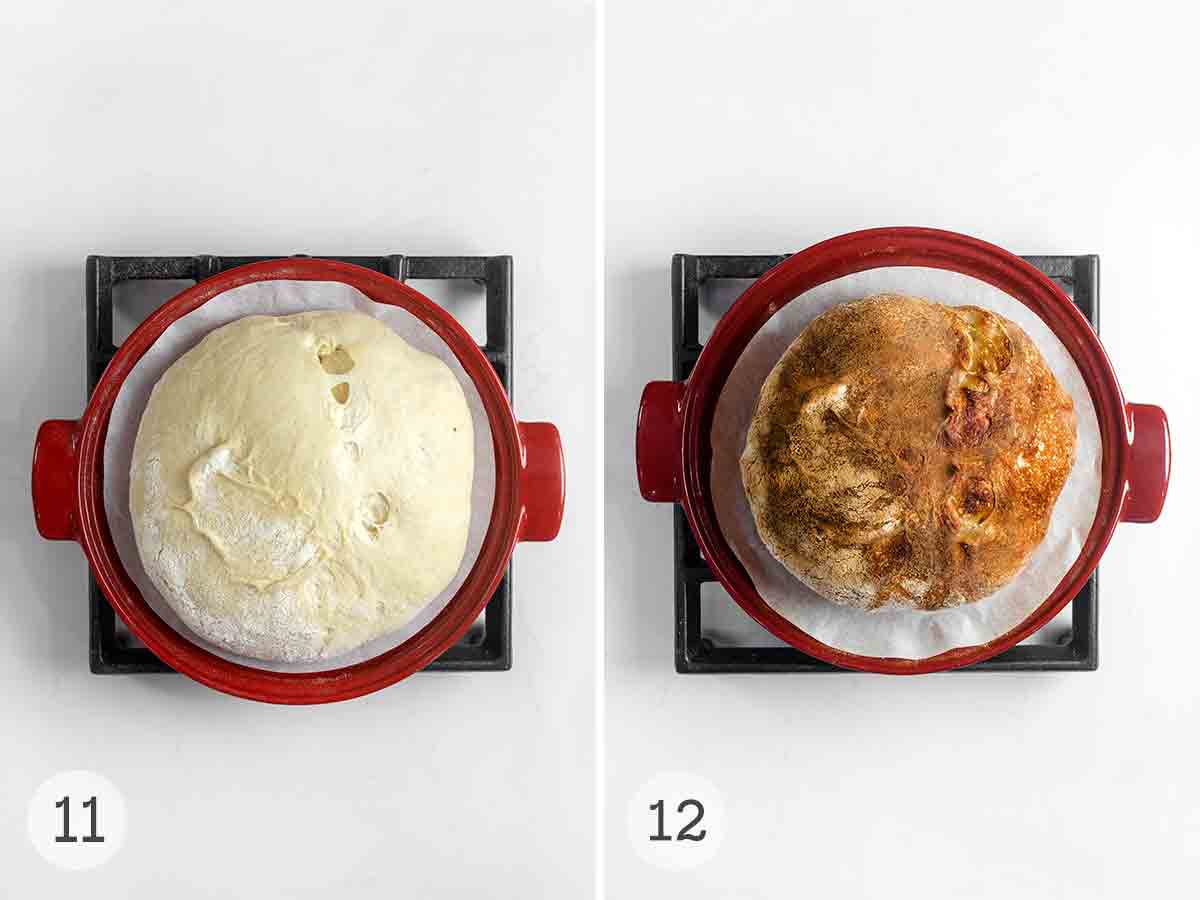
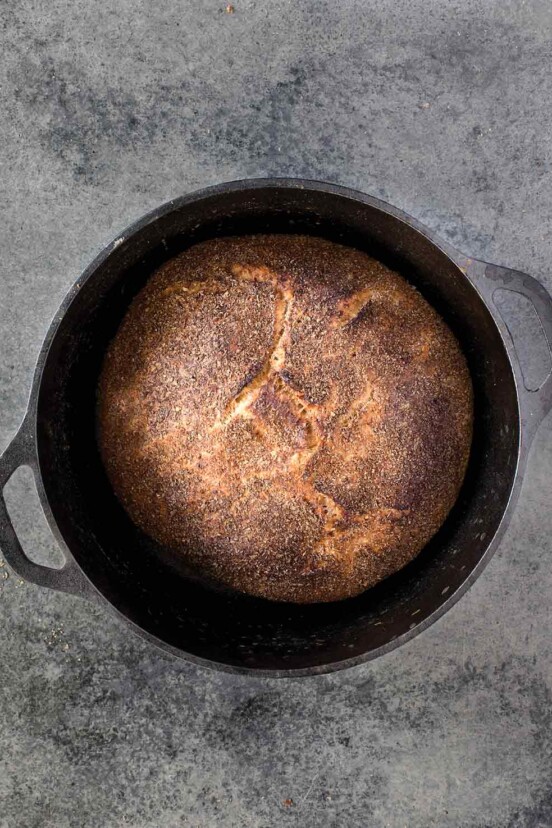
- Heat the oven to 450°F and place a heavy pot and lid in the oven to preheat. Transfer the dough to the pot, seam side up. Cover and bake for 30 minutes.
- Uncover the pot and continue to bake until the loaf is dark brown in color. Cool completely before slicing.
A reader’s bread-baking tips: The colander method
Over the years, I’ve heard from thousands of you about your no-knead adventures. Reader Ray Kruse shared three brilliant “necessary inventions” he uses to get a prettier loaf and a safer bake. If you’ve struggled with the dough losing its shape or you’re worried about singeing your knuckles, these are for you:
- The colander rise: After you’ve folded and shaped the dough, let it do its second rise in a parchment paper-lined colander. This provides a “cradle” that keeps the dough from spreading out too much, ensuring a taller, tighter loaf.
- Controlled oven spring: When the dough is ready, gently lift the parchment out of the colander and set it on the counter. Use a sharp serrated knife or a lame to make a few 1/2-inch deep cuts on top (Ray likes a square pattern). This gives the expanding dough a controlled “escape pathway” so it doesn’t split haphazardly and allows it to spring even higher.
- The parchment sling: Instead of trying to flip the sticky dough into the pot by hand, simply lift the whole thing—parchment and all—and lower it into the preheated Dutch oven. You won’t mess up the loaf, and you’re way less likely to get burned. The paper will brown a bit at 450°F, but it won’t affect the bread.
Your no-knead bread questions, answered
Don’t fret if your first loaf isn’t perfect. Bread is a living, breathing thing, and sometimes I think it has a mind of its own. Over the years, I’ve gotten hundreds of questions about this recipe, and they’re almost always the same ones. Here are the answers to the most common hurdles.
It almost always comes down to one of four culprits:
1. Not enough fermentation (rising) time
2. Using too much flour
3. Tired yeast
4. Being a little too rough when shaping
This dough is meant to be very wet and sticky—that’s what creates the open crumb. Be sure to let it have its full, long rise, measure your flour by weight if you can, and handle the dough as gently as possible during the final fold.
This loaf is designed to have a substantial, crackling crust, but you shouldn’t need a hacksaw to get through it. If it’s truly impenetrable, your oven may be running a little hot, or you may have baked it just a few minutes too long. For a perfect bake, the inside of the loaf should register 200° to 210°F (93° to 99°C) on an instant-read thermometer.
And if it’s specifically the bottom crust that’s giving you grief, you’ve hit on a common issue. That direct contact with the hot pot can sometimes be a bit over the top. Here are a couple of things you can do:
The Cornmeal Trick: My favorite old-school baker’s solution is to toss a generous handful of coarse cornmeal or semolina onto the bottom of the hot pot right before you add the dough. It acts like tiny ball bearings, lifting the loaf just enough to prevent scorching while giving the bottom a lovely, rustic texture.
The Silicone Mat: Some bakers swear by placing a round silicone baking mat (or sling) in the bottom of their pot. If you have one that fits, it’s a great way to diffuse that direct heat.
And here’s a great trick for any loaf that’s too crusty after cooling: just pop it into a plastic bag overnight. The trapped moisture will soften the crust beautifully by morning.
Nope, you did everything exactly right! That sticky, shaggy, seemingly unmanageable blob is the secret to this recipe’s magic. The high water content is what allows the gluten network to develop without any kneading at all. Don’t be tempted to add more flour to make it easier to handle. Instead, use lightly floured hands, a bowl scraper, or my favorite cheat: a sheet of parchment paper to act as a sling when you move the dough.
A flat loaf is usually a sign of one of two things: your yeast is past its prime, or the dough didn’t have enough surface tension before baking. Always test your yeast if you’re unsure. More importantly, that quick, gentle fold-over before the second rise is crucial. You’re creating a tight “skin” on the surface of the dough that helps it trap gas and spring upwards dramatically in the oven—what bakers call “oven spring.”
Not at all! What you need is any heavy, oven-safe pot with a tight-fitting lid that can handle the 450°F (232°C) heat. The goal is to trap steam. Our readers and testers have had great success with:
• A combo cooker (my personal favorite)
• A heavy stainless steel pot with a lid
• An oven-safe glass (Pyrex) or ceramic dish with a cover
• A clay pot or cloche
Pro tips & troubleshooting
- Seize the Day
The bread is best enjoyed the day it’s made. Extra bread can be stored in a plastic bag at room temperature for up to 3 days. - Patience is the Key
Don’t rush through this recipe and skim the details. Each word, each visual cue, each explanation has meaning. - Follow the (Written) Clues
Rely on the description of how the dough should appear or feel more than the timing. - It’s About Practice, not Perfection
Conditions in your kitchen change from day to day, and they affect your bread. Things such as the flour you’re using, temperature, and humidity (and have a sneaking suspicion whether Mercury’s in retrograde) all matter. So, some days, you feel like a bread ninja; on others, you’re positive you lost your baking mojo for good. It happens to me all the time. Accept it and eat the results. Lahey says it best: “Even the loaves that aren’t what you’d regard as perfect are way better than fine.”
More great no-knead bread recipes
Jim Lahey’s No-Knead Whole-Wheat Bread
13 hrs 30 mins
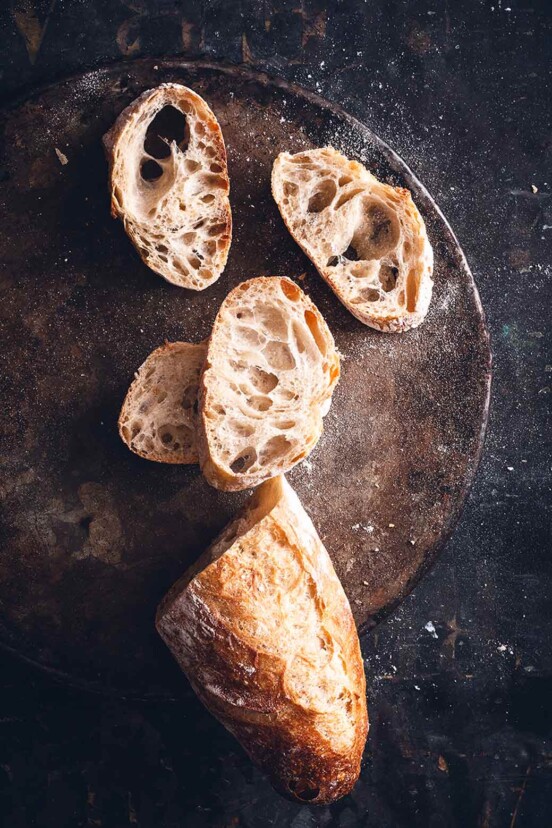
Jim Lahey’s No-Knead Small Baguette
13 hrs 45 mins
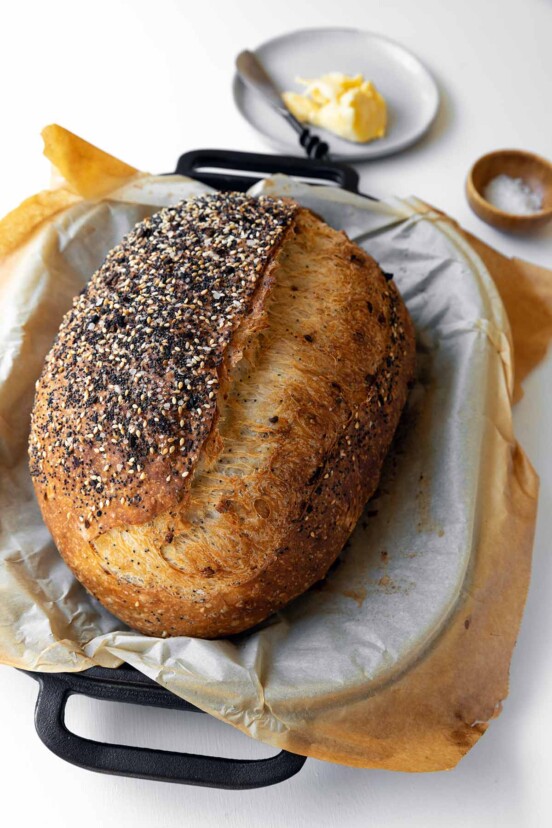
Once you’ve pulled that magnificent loaf from the pot, you’ll understand the magic of Jim’s method. And, between us, you’ll be hooked. The good news? The obsession doesn’t have to end here. For those days you want that same incredible result but are even shorter on time, there’s this five-minute artisan bread that’s just as hands-off. If you’re looking to sneak in some wholesome goodness, there’s this surprisingly light and airy whole-wheat version. And for a truly splendid bite, you absolutely gotta try my savory everything bagel loaf that’s perfect for sandwiches. Or you can impress your friends with these gorgeous little no-knead baguettes for your next dinner party—they’ll think you slaved away for hours—and don’t you dare tell them otherwise.
Chuffed about your loaf?
Did you make this no-knead masterpiece and loved it? Let me know. Leave a review, a star rating, and your best photo in the comments below. I love hearing from you.–David
Featured Review
This is, hands down, the best no-knead bread recipe out there. I consistently get beautiful loaves, and I’ve been using this recipe for a while. Thank you for sharing this wonderful bread recipe!
denise

Jim Lahey’s No-Knead Bread
Equipment
- 6- to 8-quart Dutch oven with lid
Ingredients
- 3 cups bread flour or all-purpose flour, plus more for the work surface
- 1/4 teaspoon instant yeast, (it's a small amount but trust me, it's correct)
- 1 1/4 teaspoons salt
- 1 1/3 cups lukewarm water
- cornmeal or wheat bran, as needed
Instructions
- In a large bowl, stir together the 3 cups bread flour or all-purpose flour, 1/4 teaspoon instant yeast, and 1 1/4 teaspoons salt.
- Add the 1 1/3 cups lukewarm water and mix with a spoon or your hand until you have a shaggy, sticky dough. This should take roughly 30 seconds. You want it to be a little sticky. (Many people who bake this bread find the dough to be sticker than other bread doughs they've worked with. Even though it's not what you're accustomed to handling, it's perfectly fine.)
- Cover the bowl with a plate, towel, or plastic wrap and set it aside to rest at warm room temperature (but not in direct sunlight) for at least 12 hours and preferably about 18 hours. (Ideally, you want the room to be about 72°F. In the dead of winter, when the dough will tend to rise more slowly, as long as 24 hours may be necessary.)
☞ TESTER TIP: You'll know the dough is properly fermented and ready because its surface will be dotted with bubbles. This long, slow fermentation is what yields the bread's rich flavor.
- Generously flour your work surface. Use a bowl scraper or rubber spatula to turn the dough onto the surface in one blob. The dough will cling to the bowl in long, thread-like strands and it will be quite loose and sticky. This is exactly what you want. Do not add more flour. Instead use lightly floured hands to gently and quickly lift the edges of the dough in toward the center, effectively folding the dough over onto itself. Nudge and tuck in the edges of the dough to make it round. That's it. Don't knead the dough.
- Generously coat a cotton towel (not terry cloth) with flour, cornmeal or wheat bran. Place the dough, seam side down, on the towel and dust the surface with a little more flour, bran, or cornmeal. Cover the dough with another cotton towel and let it rise for about 2 hours.
- When it's ready, the dough will be double in size and will hold the impression of your fingertip when you poke it lightly, making an indentation. If the dough readily springs back when you poke it, let it rise for another 15 minutes.
- A half hour before the dough is done with its second rise, preheat the oven to 450°F (232°C). Adjust the oven rack to the lower third position and place a 6- to 8-quart Dutch oven and its lid (whether cast iron, enamel, or ceramic) in the oven as it heats.
- When the dough is done with its second rise, carefully remove the pot from the oven and uncover it. Also, uncover the dough. Lift up the dough and quickly but gently turn it over into the pot, seam side up, being very careful not to touch the pot. The blob of dough may look like a mess, but trust us, everything is O.K. Cover pot with its lid and bake for 30 minutes.
- Remove the lid and bake until the loaf is beautifully browned to a deep chestnut color, 15 to 30 minutes more. Use a heatproof spatula or pot holders to carefully lift the bread out of the pot and place it on a wire rack. Don’t slice or tear into it until it has cooled, which usually takes at least an hour.
Notes
- Room temperature—If your room is cooler than 72°F (22°C), the bread will need longer to rise.
- Storage—The bread is best enjoyed the day that it’s made. Extra bread can be stored in a plastic bag at room temperature for up to 3 days.

Explore More with AI
Nutrition
Nutrition information is automatically calculated, so should only be used as an approximation.
Recipe Testers’ Reviews
Did you know only 68% of the recipes we test make it onto the site? This recipe survived our rigorous blind testing process by multiple home cooks. It earned the Leite’s Culinaria stamp of approval—and the testers’ reviews below prove it.

For me, this is the PERFECT bread recipe. Making bread is my obsession. I have made nearly every bread recipe you can name. As much as I love the ritual of old-fashioned bread-making—kneading, resting, proofing, etc.—this no-knead bread recipe is my go-to loaf.
I base this on two things: texture and flavor. This is hands-down the best-tasting “white bread” that I have ever eaten, let alone made. I use a digital scale and weigh my ingredients.
Good bread takes several hours to produce. GREAT bread takes nearly 24 hours. If you rush this recipe, you will be doing yourself a great disservice.
When Jim Lahey says this dough should be wet, trust him, it will be as wet as a ciabatta dough. VERY WET.
When folding the dough, it doesn’t have to be precise. I simply pull 4 edges up and toward the center. Then simply turn the dough, seam side down, on a floured cloth or linen. Do not scrimp on the flour for the tea towel. You will NEED a thick coating on the cloth or it will stick when you flip it into the 450°F Dutch oven. Trust me.
Don’t fret over how the dough looks when you put the lid on and just slide it back in the oven, set your timer for 30 minutes, and, like some crazy magic, when the lid comes off, it will always be perfect. The last 15 minutes is the hardest for me. I always want to take it out of the oven before it turns a lovely dark brown. DON’T DO IT! Let it bake without the lid for at least 12 minutes.
Remove your masterpiece from the oven, carefully place it on a cooling rack (I use 2 silicone spatulas) and, while you’re admiring your mastery, listen. The bread will crack and hiss and sing. Truly one of the most beautiful sounds that you’ll ever hear.
Yum! This no-knead bread recipe is perfect! I used bread flour and let it rise for 22 hours. I used a glass bowl so I could see many bubbles visible on top and throughout the dough along the sides. After the first rise, the dough is exactly as described—quite loose and sticky. I let it rise for 2 hours after shaping the loaf and baked for the recommended time. The bread matched the picture’s color.
I hopped into the shower and left the bread cooling and unguarded from bread lovers. When I came out, my husband had cut the bread only about 20 minutes into the recommended cooling time. There was no detriment to the bread. It retained a moist chew inside and a lovely, crunchy crust outside. I’ll definitely make this again.

This no-knead bread has been around for a few years, and I’ve made it a few other times. When the recipe was initially published in the New York Times, it pretty much shocked the bread-baking world. But the long fermentation definitely eliminated any need to knead the dough.
As long as you plan out the timing for the fermentation and baking, it’s very easy and only takes about 10 minutes of actual hands-on time. The crust is a nice crunchy brown, and the crumb is moist and airy.
You do have to follow the directions precisely and be sure to look for the clues given in the recipe to determine when the dough is properly fermented. The bread is best used the day it’s baked.
If you’ve been wanting to try making bread, this is a great way to get started. There aren’t a lot of ingredients or equipment to acquire, and the entire hands-on time commitment is under 10 minutes. For this, you’re rewarded with a beautiful, crusty loaf of bread with an open and airy crumb.
I’ve made bread in a machine and bread by hand/mixer before, but this is the first time I’ve tried no-knead bread and I am hooked.
The picture closely resembles what I produced, except my air holes were larger, and my crumb was more light and feathery.
I let my dough rest for 19 hours on my gas stove top (a little warmer than the rest of the kitchen during the winter). The recipe is correct in assuring that even though the dough looks like a mess, everything is OK. My bread still came out great, if a little oblong instead of round. I would try using cornmeal or wheat bran in place of flour on the towel in the future to see if that works better.
I allowed my dough to rise for 2 hours and 10 minutes. It held an impression at this point, but it did not appear to have doubled in size. It seemed more important to continue with the recipe once your fingertip left an impression, so I didn’t wait for the dough to double. I baked it for 45 minutes total—30 minutes with the lid and 15 minutes more without the lid. At this point, it was a lovely dark brown color.

No need to worry when making this no-knead bread! I was pleasantly surprised at this rustic, crusty bread I made with little effort. Total time (because of almost a full day of rising) is about 26 hours. But that sounds crazy since you literally have about 10 minutes total of hands-on time. The rest of the time was rising (18 hours for my first rise; 2 hours and 15 minutes for the second), then baking and cooling.
I chose to use half bread flour and half regular flour. For the coating on the cotton towel, I used cornmeal, and so glad I did. The directions are very clear, but I was skeptical about “dropping” the risen dough into the hot pot without touching the sides and with no oil! But to my surprise, every step was so simple, and the bread turned out amazing. It didn’t stick at all!
I let it cool for the complete hour as recommended. The bread didn’t last long after that. We smothered it with delicious Kerry Gold butter and couldn’t be happier with the results. The cornmeal added more texture to the crust and looked beautiful.
This recipe is a no-brainer. Delicious and quite impressive!
One of my favorite things about Leite’s Culinaria is the surprise of learning a recipe’s source after a test (yes, recipes are given to us blind—we get the recipe title, headnote, picture, and recipe).
This recipe was different—I instantly recognized the name Lahey as the developer of the no-knead bread that broke the internet, the bakery on Sullivan Street, and it was the only no-knead bread recipe I hadn’t tried. Seriously, I swear I’ve tried them all, for better or worse.
This loaf stood up to the hype.
A perfectly written recipe, flawless timing, forgiving ingredients, detailed directions, exact cook time and oven temp. Check-check-check.
Flour: all-purpose.
Salt: Morton’s kosher.
Water temp: purposely ignored.
A floured towel (this will never work!): No big deal!
Pitfalls: none. MAKE THIS LOAF. Then tweak it, play with it, and MAKE IT AGAIN. I’ll be right there with you.
Flipping the dough into the pan sounded disastrous. But even the loose flour that went along with the dough and anything sticking to the towel, which was inevitable but way less terrifying than I’d always imagined, was no biggie.
I gave it the full bake time to get a beautiful dark golden brown, a few minutes south of a scorch on the bottom…just how I love it.
I was happily restricting carbs in my diet until I made this bread…that’s all over now. This is by far the easiest bread I’ve ever made, and the results are incredible. For about 25 cents worth of ingredients and several minutes of hands-on time, you’re rewarded with a house that smells like a bread bakery and homemade bread worthy of praise.
The most difficult part of this recipe is figuring out what time to get it going based on when you’d like to serve this freshly baked masterpiece.
I allowed my bread to rest for 18 hours for the first rise, and my dough definitely took on all of the characteristics described in the recipe. (I love when I feel like the recipe writer is standing in my kitchen telling me what to look for!)
My second rise didn’t give me dough that had doubled in size, so I let it go another 15 minutes. I probably could have let it go further. Oddly, my dough felt cool to the touch at that point, and I wondered if my kitchen just was not warm enough for a proper rise.
I used my 7-quart enameled cast iron Le Creuset pot for baking, and my only concern was that I had once made this bread before, and it had darkened the interior of my pot. The bread doesn’t stick, but the enamel has continued to appear a bit darker after this high-heat baking.
I baked the dough as directed for the first 30 minutes but left it in only 15 minutes for the uncovered portion of the baking. I started to smell burning flour and got concerned. In retrospect, I think the bread would have benefitted from a bit more time in the oven to keep that crust crunchy. It was a beautiful color when I took it out, but I think it could have withstood a few more minutes to get it even darker.
I waited an hour for the bread to cool, always following directions…but then I sliced it…and it was delicious. Then I got out some butter, and it was even better. Then I thought of all the wonderful things I could eat on it or next to it! I opted to eat a bit more for dinner and then slice and freeze what was left, and it defrosted and toasted just beautifully over the weekend.
My loaf was 9 inches wide and about 4 inches high in the middle. I can’t wait to make it again. Admittedly, I am no longer carb-free. I had a job to do!


I make bread on a regular basis using Charles Van Over’s Best Bread Ever recipe and it’s delicious. I can’t wait to try this with the 24 hour fermentation! Also, I would love to have the rye bread recipe if you’re willing to share. 🙂
Hi Dana, we don’t have the rye bread recipe. Sorry!
Dana, We use Lahey’s recipe while substituting about 30 percent (2 out of 6 cups) of white flour with rye—or a mix of rye and whole wheat. We also thrown in a tablespoon of rubbed caraway seeds, since so many people associate that with rye. (Some think that’s the taste of rye!) Give it the full 18 hours fermentation—or, better, 24—for best results.
Greatly appreciate the suggestions, Himalayan Chef!
Do you have a recipe for sourdough bread?
China, I don’t, but I have heard and read that if you let this dough rise the first time and then refrigerate it for three to four days, you will have a more complex, sour taste. Not a sourdough, but closer.
China, The very best sourdough is the one by Chad Robertson in his book Tartine Bread. In short, here’s the short and modified version recipe:
Ingredients (Use a scale!)
• 1 cup (5 oz.) whole wheat flour
• 2 1/2 cups (11 oz.) white bread flour
• 1 1/2 tsp. salt
• 1 1/2 cups purified water
• 1/4 cup starter
Mix together the dry ingredients.
Dissolve 1/4 cup starter into purified water.
Add water / starter to dry ingredients and stir until the water is incorporated.
Cover with plastic and let sit 12-18 hours.
For the last 3 hours, fold the dough every 30 min – as though you were making a box (4 folds, long sides and 2 ends). As you do the folds, gently pull out each “side” to lengthen your pull before folding toward the center. This creates the long gluten strands that make those beautiful holes in the crumb.
Cover loosely with plastic and rest for 15 minutes.
Transfer to well floured towel, parchment paper or proofing basket. Cover with towel and let rise about 1 1/2 hours.
Prehead the Dutch oven to 500 degrees (with lid).
Bake in covered Dutch oven at 500 degrees for 30 minutes.
Remove cover; reduce heat to 450 degrees and bake an additional 12-15 minutes till brown.
Let cool completely on rack. LIsten to it crackle as it cools!
Consume bread, be happy.
Thanks for that, Evie.
China, to make really good sourdough you need a starter. It’s a flour, yeast, water mixture that needs to ferment for several days before it can be used. Look on line for sourdough starter recipes. The taste of the bread is worth the wait!
Thanks for that, Bettye. In Eve’s response to China she does state 1/4 cup starter in her recipe. And no need to look any further than this site for a great sourdough starter.
I followed this recipe but used 10 grams of a rye based sour dough starter instead of yeast. Perfect results, tangy, chewy and gorgeous. Thank you.
Jim, that’s great to hear! I truly think this recipe is indestructible.
Bettye, real Sourdough is nothing more than flour and water (NO yeast), allowed to ferment over a week or until it doubles on feeding.
THIS is my go-to bread recipe and my FAVORITE bread cookbook of the 20 or so that I own. The rye bread recipe is utter perfection!
Crazy. The instructions say to follow the instructions. Exactly! Well I did. When I told my gal that I didn’t think it raised quite as much as I expected she said well did you use warm water? (Yes the quick yeast had NOT expired.) I said the very specific instructions didn’t say warm water. So … whose FAIL?
Mako, we’ve made this bread many times with room temperature or cool water. True, most American bread dough recipes call for warm water, but because it’s a slow ferment at room temperature and there’s no rush, the water doesn’t need to be warm to jump start the process. The recipe mentions the ideal room temperature, I’m just curious if your kitchen was cooler than that? And sometimes yeast can fail to be viable even before its expiration date, so you may want to stir a little yeast into warm water just to see if it bubbles within a few minutes. Beyond that, I don’t know whose fail this is, as we and many, many others have made this without warm water and still had a rise.
Yesterday I made two batches – one with tap water and the other with warm water. It is winter where I am (outback Australia) so the tap water was quite cool/bordering on cold. After sitting for 20 hours I would defy anyone to identify which is which. Thank you for this recipe, it is truly wonderful bread and the word “fail” has no place in any description of it. Ever.
You’re so very welcome, Mark. Love your spirit of experimentation!
Thanks Renee
I have made this recipe a million times. I have added not enough or too much of each ingredient. I have made super wet and a little less than wet. I have waited as long as 26 hours (surface dries out) and as little as 8. This bread is truly idiot proof. If it didn’t raise for you, the yeast was probably old. Maybe not from when you bought it, but either how long it sat on the shelf or how old before being packaged. Don’t give up. Also make sure that when you look at it, that it is covered with a ton of bubbles. It should almost looks like tapioca. When you turn it out on the board, it should stick with long strands or “fingers.” If not, put it back in the bowl and let the yeast develop longer.
ps I dump all ingredients in a bowl and add room temp/tap water. Never fails. Seriously no muss no fuss.
Also I weigh my flour. If you just scoop and don’t spoon or weigh your weight could be too heavy for the amount of yeast to lift in the stated amount of time. look for the “eyes” or bubbles in the dough. That will tell you it is ready regardless of the amount of time that has passed.
Wonderful and helpful, noahesq. Excellent reminder. Thank you.
made the recipe again tonight…the dough was not wet, yet i measured the flour and water…i can’t figure out what i’m doing wrong…would the flour be too *dense* or?? i use “Wheat Montana” a-p flour and scoop it from the bag…it is amazingly wonderful, great, awesome, spectacular tasting bread…best loaf i’ve made yet…the holes are not as big as jim’s and mark’s — that has to do, i think, with the lack of wet dough…it first rise was about 16 hours — it turned dark but the top of the dough was not soft and bubbly; it was kinda hard, like dried out…
i’m not giving up, maybe tomorrow, again, to make that best loaf …
oh, btw, the bread came out great so no problem there, just dry-as-a-bone-dough….
darlene, are you weighing the flour? If it wasn’t wet, it means there is either too much flour or too little water. Since you had to use a measuring cup for the water, I believe the flour (either amount or brand or both) is the culprit. Scooping can be very troublesome and gives very different results as far as the amount of flour. My suggestion (and, yes, I’m sounding like a broken record…!) is to purchase a scale. This is the one I use and it is a lifesaver.
Thank you so much, noahesq!
noahesq, thank you! Such lovely advice. Much gratitude!
All I will say is that 3 cups of flour does not equal 400g, as mentioned in the recipe. For my first loaf I used 400g as I was following the instructions, and it was way too wet. You need around 500g of flour…
Greg, I see from your email address that you’re in the UK. I can say with complete confidence that flours differ around the world. I was unable to successfully bake my recipes from my own Portuguese cookbook while living in Lisbon. I had to make significant adjustments because the flour was not the same. I also checked some other US versions of UK cookbook (ex. Edd Kimber’s Patisserie Made Simple), and 3 cups equal 400 grams of all-purpose flour. That being said, I absolutely believe you need more flour. When I use the 400 grams as stated in the recipe, I get a tacky, sticky dough. It works beautifully–for me. All that’s important is that we keep baking on our respective sides of the pond!
Thanks for the reply, David. I’m actually in HK (South China) and it is very humid here at the moment so that may be a factor. I’ve ended up using 520g of flour and 320ml of water (salt and yeast no change) and it’s working out great, although the bread does come out quite flat, perhaps only a 2-3 inches tall. What are your thoughts about that? More yeast required?
Greg, Hong Kong! That’s on my Bucket List.
So, now that I know that, we have several factors affecting the situation. Yes, humidity is a player. I was in Singapore, and if Hong Kong is that humid, you have to account for that. Second, the flour you have is most likely different from ours here in the States. When I was living in Lisbon, I was never really was able to make the baked goods from my cookbook (which worked perfectly at home). That’s when I first understood that flours are different in different parts of the world.
As to the flatness, that’s not uncommon. You may want to give the dough more time in the second rising. And, yes, you might want to try a bit more yeast, as the humidity and type of yeast might be affecting it. Try one-quarter more yeast and report back! And send pictures, too!
Oh, I’m a bit worried now. Do you know if any other UK bakers have had a problem? I often use US recipes, now I know what to blame for them going wrong!
KT, I think it’s just a matter of trying several times to get the hang of it. To give you an idea of what I went through, take a look at this!
I too live in a humid climate. I find that I need to use at least half bread flour. Try using a stronger flour, they are more thirsty than regular all purpose flour. The bread flour I use is King Arthur brand, you might look to see what the equivalent is where you live.
Thank you, Anna!
I had the same thoughts when they said add water. What temperature of water? Anyone who makes bread knows you have to have warm water to make your yeast work sooo I will add warm water when I make my bread. I haven’t tried it yet but plan on making it tomorrow. My new cast iron covered pot arrived today in the mail so now I can get to baking! After reading other comments I see because of the long fermentation process I guess room temperature water would work but I am so old school I need to see that rise in my bread to make sure it’s working it’s magic. I’m sure it’s going to be out of this world delicious when I make it regardless of the water temperature! I can hardly wait to try it!
Bettye, because the dough sits in a warm spot for up to 18 hours, the temperature of the water isn’t that important. In fact, you want a slow, loooooong rise, so cooler water works just fine. I’ve made the bread many times and never thought twice about the water temperature!
Mako, how long of a rise did you give the bread? And was it in a warm spot?
Greg, there’s not a typo in the recipe. If you watch the video, you’ll see Jim use just about 1 1/2 cups of water. I’ve made this countless times, and I only have to add a bit more water in the winter, when the house and kitchen are particularly dry. Now, the 5-minute artisan bread calls for far more water and is a much wetter dough. But it doesn’t sit and rise as long as this. The long rise of Jim’s bread hydrates the dough and, of course, lends a better flavor. Sorry, the recipe as written didn’t work for you.
I had to add more water, also, because it’s so dry and cold here and our home is very well-heated (i HATE cold!!). I found, though, that the dough was dry on top and did not create the bubbles spoken of. The bread, however, was and is (the tiny piece left) absolutely delicious–great texture, not large holes, but that’s ok. It was awesome. Next time, I’ll add the water as I feel necessary. I own a great scale and will measure the next loaf. This stuff is ADDICTIVE, and I could make and eat it daily. Well, tomorrow is another day and I’ll put another loaf on to raise and we’ll see. Measure, measure, measure…lol.
Thanks, David.
darlene, I do think the dryness in your home contributed to the dry top. Consider covering it with plastic wrap; that should hold in some moisture. I can’t want to see how it turns out when you measure!
I have made this recipe weekly or more for years and never used warm water. Never had a failure. I’m going to guess your yeast was dead. Sometimes it just dies. Or maybe too much chlorine in your water? Try bottled water next.
Thanks for jumping in, Rusty.
Try instant yeast instead of quick rise. Quick rise uses hot water & isn’t as good as instant yeast for this recipe.
E, greatly appreciate you taking the time to share your advice!
Do I have to oil the pot to ensure the bread doesn’t stick?
Shelia, not at all. The heat and steam created in the pot will assure the bread doesn’t stick. Also, oiling the pot will cause a tremendous amount of smoke.
Thank you so much for your help David!
You bet, Sheila.
Followed the recipe as written. Turned out great, even at 5280 feet.
Excellent for toast or garlic bread.
Leonard, it looks amazing!