Want to save this?
TL;DR (Quick-Answer Box)
- What it is: A rustic, simple mashed potato recipe using yellow-fleshed potatoes, such as Yukon Gold, milk or cream, and a blend of olive oil and butter for incredible richness and flavor.
- Why you’ll love it: Skip the potato ricer and enjoy the ease of a simple fork-mash that delivers a wonderfully creamy-chunky texture perfect for any holiday or dinner.
- How to make it: Boil and drain the potatoes, season with salt + pepper, then add the hot milk or cream, olive oil + butter, and mash until you reach your ideal chunky or smooth consistency.

Featured Review
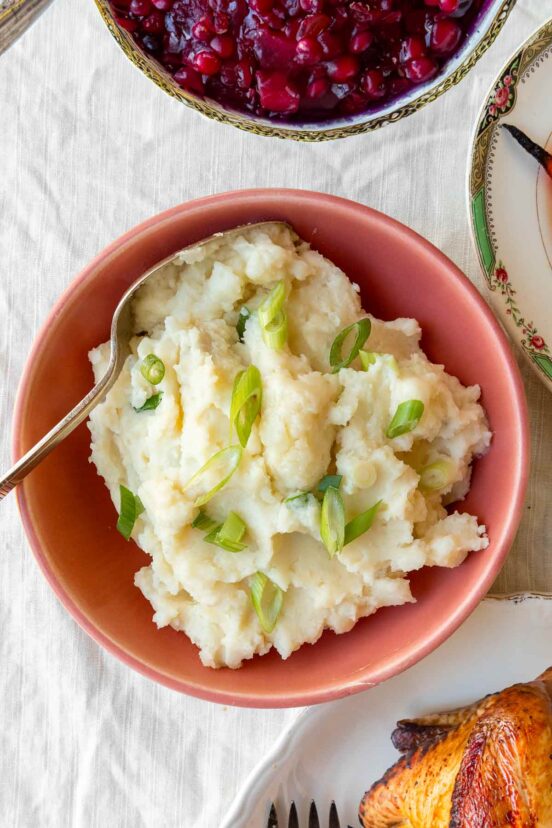
David, These potatoes sent me into ecstasy. They are beyond heavenly. I tested them for Thanksgiving and they will be a staple not only for special occasions, but for dinners galore. Your imagination knows no bounds. I am now a devoted fan and am on my way to becoming a Leite’s addict.
Karen
Jump To
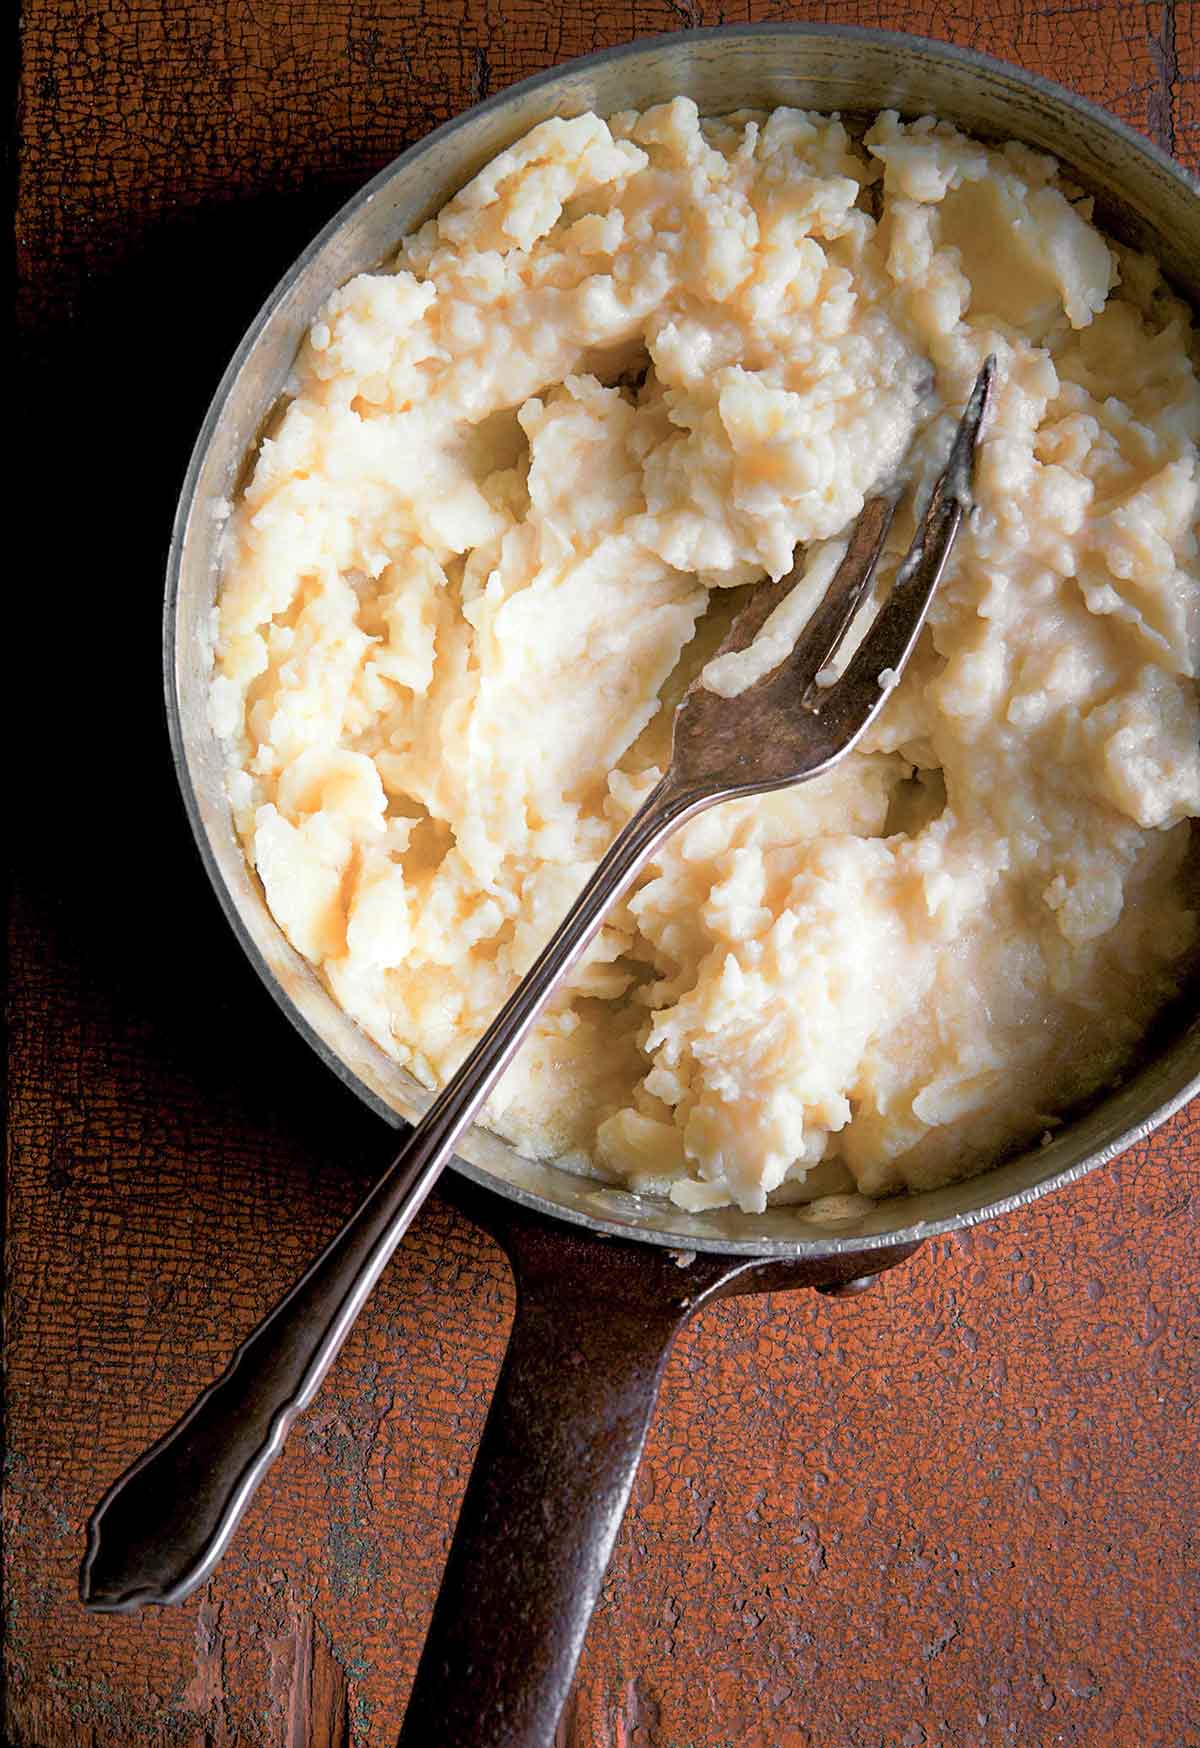
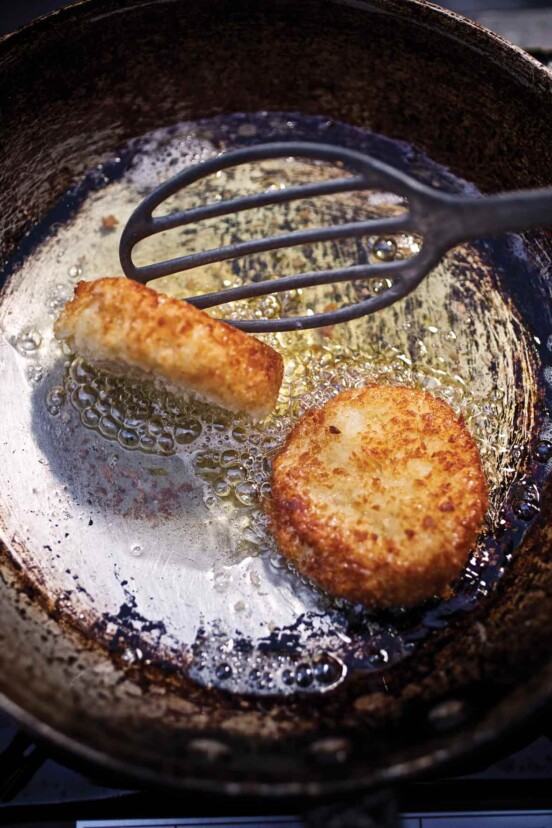
In French kitchens, they call this rustic little number pommes de terre à la fourchette, which sounds awfully high-hat for what is, at heart, a bowl of honest, homey mashed potatoes smushed with nothing more exalted than a fork. Make them silky if that’s your thing, or leave them lumpy and full of personality—there’s no wrong answer, only appetite.
In our kitchen, it is always smooth and silky. Although if I’m making a scrumptious cottage pie (a shepherd’s pie made with beef) or shepherd’s pie (made with a classic filling of lamb), I like to keep them chunky. That little extra texture adds a je ne sais quoi, as my French amis say.
Chow,

Best Variations and Stir-Ins for Rustic Mashed Potatoes
Next time you feel like fancying up a pot of potatoes, turn to these inspirations from the intrepid team of Leite’s Culinaria recipe testers, who divulged their tried and true tactics. You can reveal your own favorites in a comment below…
Stir-Ins
Just stir any of these right into the mash:
- Cheese, glorious cheese, whether Cheddar, Parmesan, Asiago, the Blues (I could go on….)
- Roasted garlic
- Minced chives
- Chipotles en adobo
- Bacon and scallions
- Peas
Add-ons
These indulgences can be added on in addition to or in place of the milk.
- Crême fraiche, cream cheese, sour cream, or cream
- Milk or cream that’s been infused with the essence of fresh herbs (simply warm the moo juice, toss in a few sprigs, and set aside to steep)
Cook-Alongs
Slip a few of these roots into the pot along with the spuds.
- Celery root
- Turnips
- Rutabagas and carrots (known as rotmos in Sweden)
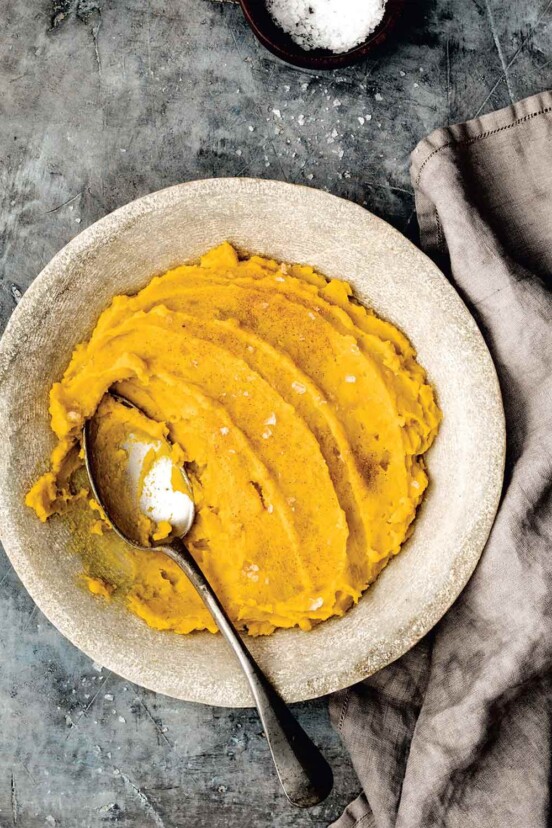
- Sweet potatoes
The Great Potato Prep Debate
Since we’re all about that je ne sais quoi of texture, here is a little cheat sheet to help you decide which spud is best for your suds (or gravy, as it were).
| Method | Texture | Effort | Pairing |
|---|---|---|---|
| Fork-Mashed | Rustic, lumpy, and unapologetically homey. “Full of personality,” as The One says. | Low. Just you, a fork, and some aggression. (Great therapy.) | Chunky, hearty gravies. Think sausage gravy, mushroom ragout, or a thick pan sauce that needs a little grip. |
| Riced | Fluffy, airy, and oh-so-creamy. | Medium. You have to dig out the ricer and—worse—clean it afterwards. | Delicate, silky sauces or a classic jus. |
| Whipped | Smooth, rich, and decadent. The “Sunday Best” of potatoes. | High. Requires a mixer and the gnawing fear of turning them into wallpaper paste. | A classic, glossy turkey gravy. The kind that flows like a river of gold. |
Your Fork-Mashed Potatoes Questions, Answered
Because, mes amis, sometimes simpler is better. And frankly, who wants to wash a potato masher? They’re the bane of the dishwasher. Plus, mashing with a fork gives you that rustic, “I just threw this together effortlessly” vibe that makes guests think you are a culinary whiz kid who doesn’t try too hard. It’s distinctively pommes de terre à la fourchette—fancy name, humble tool.
You certainly can, and you should. I swear by the Julia Child method (bless her). Just prop your pot of finished potatoes over a larger pot of barely simmering water, like a makeshift double boiler. Cover them loosely—leave the lid slightly ajar, perhaps propped up by the handle of a wooden spoon—and go have a cocktail. When you’re ready to serve, just give them a gentle stir. They’ll stay warm and happy for quite a while.
Don’t panic. Potatoes are thirsty little tubers. If your mashed looks dry, just dribble in a smidge more warm milk or cream. If you’re feeling particularly thin (or it’s a holiday and calories don’t count), throw in another knob of butter. Stir gently. All will be well.
You can. Do I recommend it? No. Yukon Golds have that naturally buttery hue and creamy texture that makes them superior for this kind of rustic smash-up. Russets can get a bit mealy. We want texture here, not sand. But if Russets are all you have, proceed with caution and plenty of butter.
Alas, no. Once potatoes turn into glue, there is no turning back. When you aggressively beat spuds with a food processor, you rupture their cell walls, causing a flood of starch to pour out and bind everything into a sticky, wallpaper-paste mess. But…You can try to mask it by stirring in a ridiculous amount of cheese and calling it Aligot (a French cheesy potato dish that is supposed to be stretchy), but otherwise, you might have to start over. Next time, stick to the fork. It’s safer.
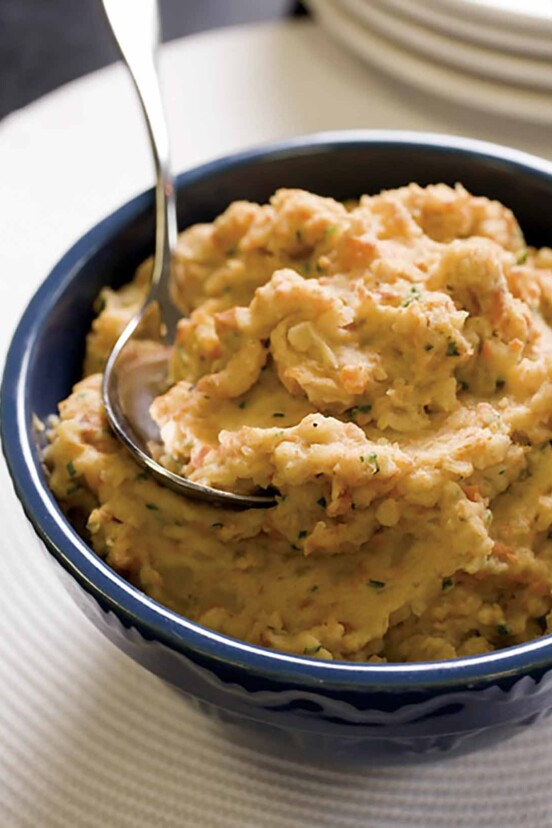
More Addictive Mashed Vegetable Recipes
Write a Review
If you make this recipe, or any dish on LC, consider leaving a review, a star rating, and your best photo in the comments below. I love hearing from you.–David

Fork-Mashed Potatoes
Ingredients
- 2 1/2 pounds yellow-fleshed potatoes, such as Yukon Gold, peeled and cubed
- salt and freshly ground black pepper
- 1/2 cup milk or cream
- 1/4 cup olive oil
- 2 tablespoons (1 oz) butter
Instructions
- Boil 2 1/2 pounds yellow-fleshed potatoes, such as Yukon Gold in salted water for 12 to 15 minutes, until fork-tender. Drain the potatoes and return them to the pot. Season with salt and freshly ground black pepper.
- Heat the 1/2 cup milk or cream in a small saucepan over mediumish heat until just under a boil.
- Pour the hot milk or cream over the potatoes and add the 1/4 cup olive oil and 2 tablespoons (1 oz) butter. Use a large fork to mash the potatoes to whatever consistency you like, then transfer to a warm serving bowl.
☞ TESTER TIP: If the mash appears slightly dry, stir in a smidgen more milk or butter or, if you're feeling flush, both.
Notes
How to Make These Mashed Potatoes Ahead of Time
When making mashed spuds for the multitudes and desperately want to save some last-minute fuss, I rely on the Julia Child trick of making them ahead of time and keeping them warm. You should, too.- Just place your pot or pan of just-mashed potatoes in a slightly larger pot of hot, but not simmering, water.
- Balance the lid on top, making sure it’s left slightly ajar—the handle of a wooden spoon that’s been stuck in the mash works quite well—and then forget about them while greeting guests, taking coats, shaking cocktails, and tending to the foods that do require last-minute fuss.
- Just before serving, stir the potatoes ever so slightly.
Explore More with AI
Nutrition
Nutrition information is automatically calculated, so should only be used as an approximation.
Recipe Testers’ Reviews
Did you know only 68% of the recipes we test make it onto the site? This recipe survived our rigorous blind testing process by multiple home cooks. It earned the Leite’s Culinaria stamp of approval—and the testers’ reviews below prove it.

This fork mashed potatoes recipe is simple and easy, and makes me ask, “Why didn’t I think of this?” As I was mashing the potatoes with my fork, it reminded me of growing up with my godmother, who would often serve boiled potatoes that I’d smash on my plate before adding big hunks of butter to them. This recipes goes just one step further, adding warmed milk to make them smooth and creamy. One thing that I really like is the ease of making this recipe for just the two of us, knowing that I can easily multiply it for a crowd.

If you like mashed potatoes at all, you’ll really like this recipe. It’s nothing fancy or outrageous—just good mashed potatoes. I usually use a potato masher for this kind of thing, but a fork yields a different, rustic texture. One note: At first, I thought that there was too much liquid, but it works its way into the potatoes without having to “whip” them into submission. I’d make this again, but with my masher, as it’s just easier that way.

I love mashed potatoes. I REALLY LOVE these mashed potatoes. They take me back to my boyhood. Simple, perfect. A pat of butter, a bit of sea salt and some coarse black pepper are all you need for a wonderful treat!


One of the best cookbooks I’ve seen! I love the Wild Mushroom Ragout and Fennel Soup and this recipe, too, will go on my favorites list. I like the idea of mix-ins…I’m tempted to put a colorful flourish right in the middle of a big bowl of all that potato yumfulness. Maybe a dollop of vivid purple beet puree…spiked with a drop or two of wine…? I’d like to try edamame or butter beans mixed in too. Or just eat them pure and rustic the way they were meant to be. I predict a future comfort food in the tasting. 🙂 Many thanks for sharing the recipe…cheers!
Wow, Nik, I like where this mashed potato brainstorming is going. Sounds like you’ll have a stunning dish no matter what you do. I’m so glad you found this recipe!