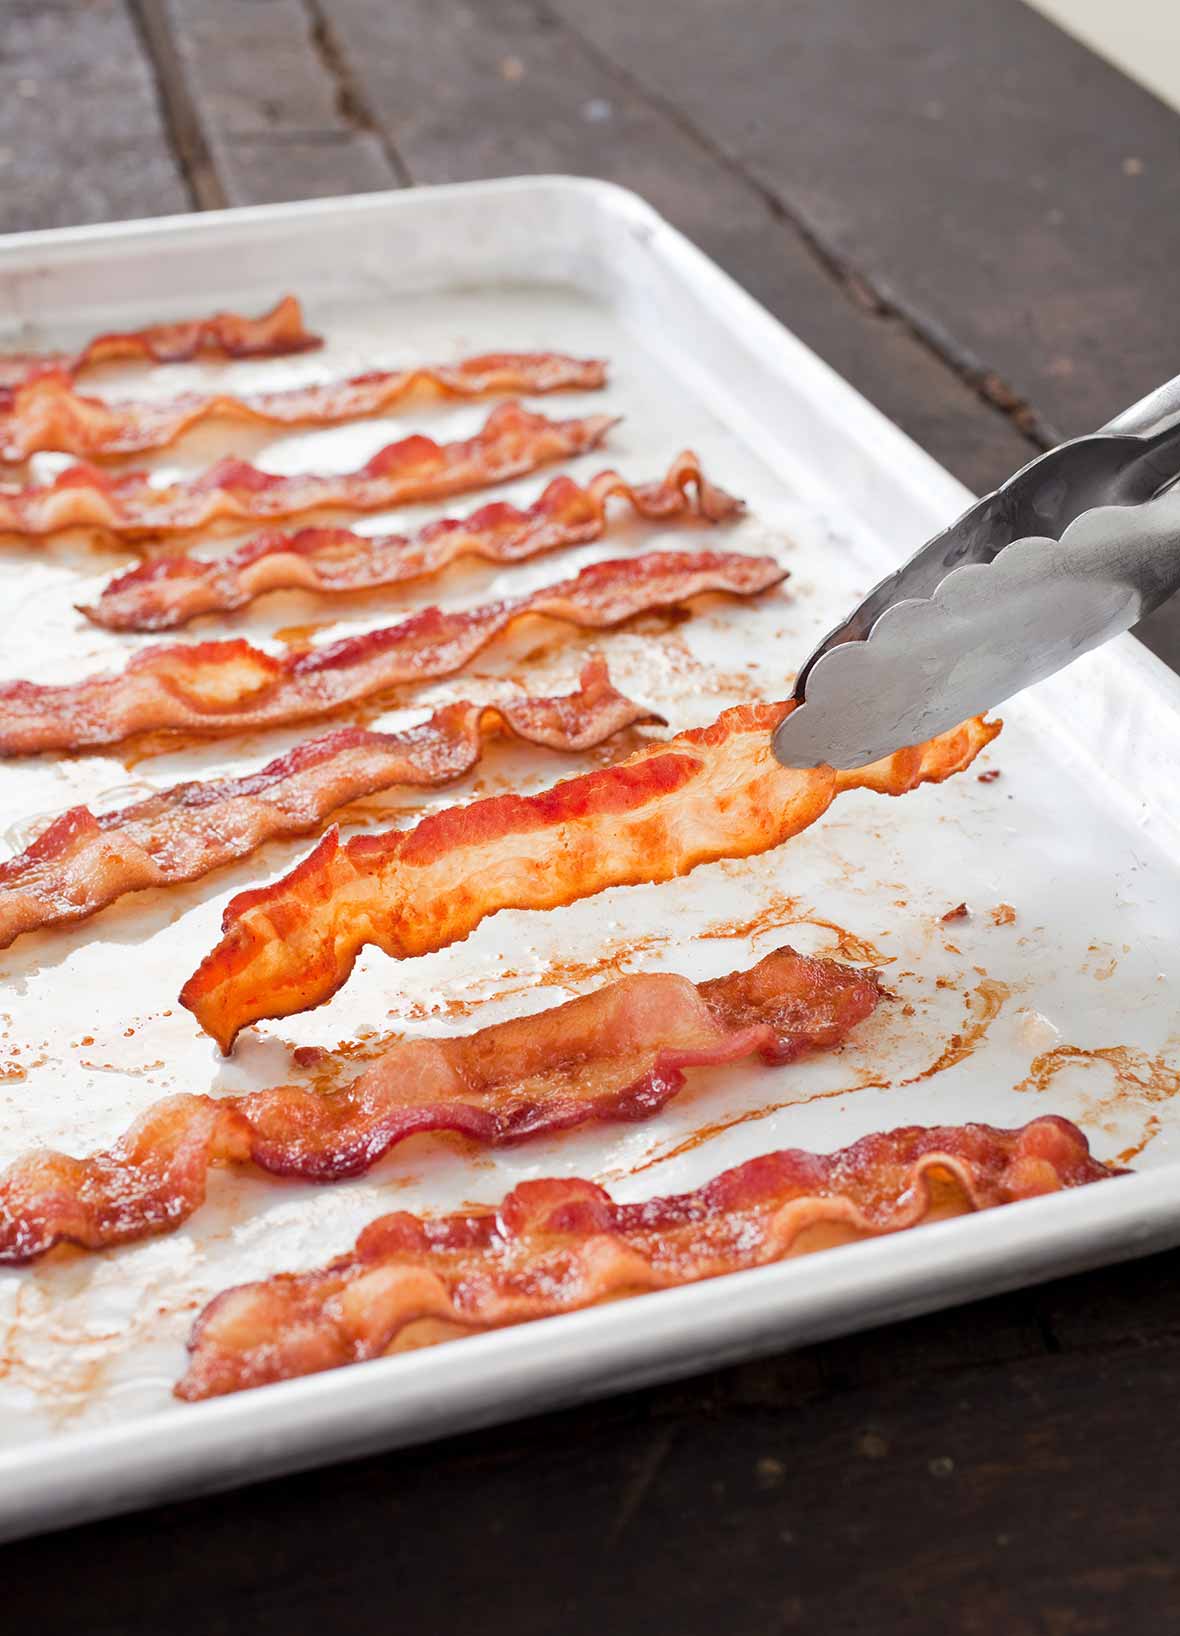
This is an easy oven technique for making bacon that’s perfect for those times when you just don’t have it in you to stand at the stove getting spattered by grease. Instead, simply place the strips of bacon on a rimmed baking sheet and slide the whole shebang in the oven. Tada! Perfect baked bacon for a crowd with barely any effort. And no hot grease spattered your way.–David Leite
How To Make Baked Bacon That’s Crazy Shatteringly Crisp
Place the bacon on a wire baking rack situated on the rimmed baking sheet or use the folded foil technique shown in the video below. These techniques allow the hot air to circulate around the bacon so the strips can crisp evenly. This works exceptionally well with thin-sliced bacon but also works with extra thick-cut bacon, too.
Baked Bacon
Ingredients
- 12 slices bacon
- foil or parchment paper
Instructions
- Adjust the oven rack to the middle position and preheat the oven to 400°F (200°C).
- Arrange the bacon slices in a single layer on a rimmed sheet pan lined with foil or parchment paper. Wait until the oven is completely preheated and then slide the baking sheet into the oven. Let the bacon cook, without turning, until the fat begins to render, 5 to 6 minutes.
- Rotate the baking sheet and continue cooking until the bacon is crisp and brown, 5 to 6 minutes for thin-cut bacon, 8 to 10 minutes for thick-cut bacon. if you're baking more than 1 sheet of bacon at the same time, swap their oven positions about halfway through cooking. Transfer the bacon to a paper towel lined plate or a brown paper sack to drain. Collect the bacon drippings in a clean Mason jar or another resealable container with a lid, tuck it in the fridge, and reserve for another use, such as our Bacon Fat Gingersnaps.
- Pile the perfectly crispy bacon onto plates or a platter and have at it.
Video
Notes
Variations On Baked Bacon
Bored with knowing how to bake bacon all by itself? Simply sprinkle the bacon with any of the following before you slide it in the oven. (And keep a close eye on the oven as any form of sugar can burn relatively quickly and easily. And you don’t want flare-ups—unless, of course, you’re into that sorta thing.)- Brown sugar
- Brown sugar and topped with chopped pecans
- Brown sugar and a pinch of cayenne pepper
- Brushed with maple syrup
- Brushed with honey

Nutrition
Nutrition information is automatically calculated, so should only be used as an approximation.
Recipe Testers’ Reviews
Why have I been frying bacon on the stovetop all this time when this genius method to make bacon exists? I’ll admit, I had heard of “frying” bacon in the oven, but to be honest I didn’t think that it would yield the same results, so I naively ignored it and kept to my old-school method of babysitting the bacon on the stovetop. Well, now that I have finally seen the light, this will be my go-to method, especially when I need to fry bacon in bulk! And you still get the benefit of bacon grease with this method. Genius, I tell you! I used a thick (but not chunky) cut of bacon, so maybe a medium-thick-cut bacon. I cooked it 5 minutes for the first round then rotated it for another 6 minutes.
Perfect. That is the one word I would use to describe this method for baked bacon. The fat began to render at 5 minutes. Because I used thick-cut bacon, I set the timer for 8 minutes more. When I checked it, the bacon was cooked medium, just like I would receive at a restaurant. My family prefers bacon on the crisp side, so I kept the bacon in the oven for an additional 3 minutes, and it was perfect—crisp yet not burnt, and it still melted in my mouth. No mess, no enslavement to the stovetop, just great bacon. The entire process took about 18 minutes from opening the package of bacon to placing the crisp bacon on the paper towels. The time it took to disappear was about 30 seconds.
I always bake bacon in the oven, a trick I learned ages ago when working in the restaurant industry. However, I’ve never really timed it because, well, you can smell when it’s done—if you’re paying attention. I’ll cook it at anywhere from 350 to 400°F, depending on my distractibility that day. I also have been in the habit of flipping the strips of bacon. But never again. For this “recipe,” I cranked the oven to 400°F and laid my strips of bacon on my old, rimmed cookie sheet that’s just right for this purpose. I turned the pan at 5 minutes, and most of the strips were done after 7 minutes more. No flipping and, if you use your kitchen timer, you barely have to pay attention. I used Niman Ranch Hickory Smoked Uncured bacon. It was perfect.
I remember learning to cook bacon when I was a young girl. We used a skillet on the stove and had to watch it closely, which is hard to do when you’re preparing all the other breakfast items, as the bacon could easily burn. Even worse, grease seemed to always pop out of the pan burning someone or just making a mess. The first time I tried the baking method for bacon was about 10 years ago, and I would never consider going back to the skillet method. I tried this recipe for oven-baked bacon, which is a little different from my original method in that this did not require starting in a cold oven. I had been told that if I did not start with a cold oven, the bacon would curl up. Now I know that is not true. In the past week, I’ve made 4 pounds bacon using this recipe, and each batch has turned out perfect. A few notes: For several batches, I failed to turn my pan after the first 5 to 6 minutes and could tell no difference in the final outcome. I used thick-cut, applewood-smoked bacon, and it took 23 minutes total. I lined my rimmed baking sheet with heavy-duty foil, which made for very easy cleanup. MY BEST TIP is to buy a lot of bacon at one time. Cook it all just to the light golden state, 1 minute or 2 before you would have taken it out if you were planning to use it immediately, and put the cooked bacon on paper towel-lined aluminum foil to drain. Wrap the bacon in the foil and store in the refrigerator for the next morning or freeze and pull out as many pieces as you would like at one time. Just heat for a few minutes in the oven or in the microwave for 15 to 30 seconds. It’s the easiest way to have perfect bacon quickly or make serving bacon to a crowd a breeze!
Allow me to share with you the ability to make copious amounts of bacon in little time, you say? Sign me up! We used hickory-smoked, center-cut bacon for this baked bacon recipe. It went into the preheated oven for 6 minutes, then we rotated the pan and left it in for another 10. We like our bacon on the crisp side, so the first time you make this recipe, I’d keep an eye on it. And for the love of all things porcine, line your baking sheet with foil so you have zero clean up.
This recipe is the perfect way to cook bacon—no muss, no fuss. I lined a rimmed baking sheet with tin foil and used thick-cut bacon. I rotated the pan after about 12 minutes and the baked bacon was done in about 23 minutes. I wrapped the tin foil around the cooled bacon fat and tossed it in the garbage—no greasy pan to clean! Perfect!
If you haven’t tried baking bacon in the oven instead of stovetop, what are you waiting for?! Cooking bacon in the oven is my preferred method for 2 reasons: 1. You don’t end up having to clean the grease from your stovetop, and 2. It allows you to place the bacon in the oven while you prep and cook the rest of your breakfast. It doesn’t change the flavor at all, and it’s just easier in general. For this baked bacon recipe, I used a thick-cut bacon and cooked it for 6 minutes first, then turned the pan and cooked it 8 minutes more. It was lovely and crisp, and the hands-on time for this recipe was minimal.
This recipe perfectly describes what has long been my go-to method for making large quantities of bacon. If you need to do more than just a few strips, this is your answer. No frying in batches. The fat renders perfectly in the oven, and no, the bacon does not need to be on a rack. It can fry in its own grease, just like on the stove. Be sure to save the rendered fat, which will be “cleaner” than what you get when using a skillet. In my oven, I have not needed to turn the pan midway through. You know your own oven—if yours heats evenly, feel free to skip that step, and if it doesn’t, rotate the pan. My total cooking time is usually in the 15 to 20 minute range for moderately thick bacon, which is fairly consistent with what is given here. Keep a close eye on it, as the bacon can go from perfect to blackened pretty quickly. Also, keep in mind that it will continue to darken a bit even after you take it out of the oven.
What a great technique to make bacon. It’s so easy. No standing at the stove, getting splattered with bacon grease. No adjusting the flame. No guesswork at all. I used thick-sliced, uncured, apple-smoked bacon. I let it bake for 6 minutes, rotated the pan 180°, checked it after 8 more minutes, and chose to leave it in the oven for 1 more minute. Although I thought that it could have gone a little longer, I decided that carry-over cooking would bring the bacon to where I wanted it to be. I let the bacon rest on paper towels for a few minutes, and it crisped up beautifully. Crisp bacon, not at all greasy. It disappeared quickly.
What a great technique to make bacon. It’s so easy. No standing at the stove, getting splattered with bacon grease. No adjusting the flame. No guesswork at all. I used thick-sliced, uncured, apple-smoked bacon. I let it bake for 6 minutes, rotated the pan 180°, checked it after 8 more minutes, and chose to leave it in the oven for 1 more minute. Although I thought that it could have gone a little longer, I decided that carry-over cooking would bring the bacon to where I wanted it to be. I let the bacon rest on paper towels for a few minutes, and it crisped up beautifully. Crisp bacon, not at all greasy. It disappeared quickly.
This is exactly the way I always fry larger quantities of bacon. It works pretty well, depending how evenly your oven heats. I prefer uncured bacon from Niman Ranch. When I do huge events for 50 or 60 guests, I use the precooked bacon from Costco (this eliminates the problem with the huge amount of fat you render from the bacon, although it doesn’t taste as good as quality bacon).
This is a good technique, one which I’ve used in the past but never paid attention to before. I used a thick-cut bacon for this, and it took longer to brown and crisp up to my liking than the recipe suggested. After the first 6 minutes, I rotated the pan and cooked for another 10 minutes (the maximum they give for thick bacon), and it was still pretty pale and flabby. At that point, I turned the strips of bacon over and cooked them for an additional 12 minutes. Of course, this is a “your mileage may vary” type of thing. If I were cooking a lot of bacon ahead of time that would then be cooked more before specific uses, the guidance in the recipe would have been more accurate. I often cook a lot of bacon ahead of time for that purpose, and this is a great method for doing it. If serving at a meal, the 4 to 6 serving size is adequate, at 2 to 3 strips per person. The bacon required a paper towel-lined baking sheet for draining.
i must be the last person on earth to realize how useful this technique is. It’s nearly spot-on in the timing, and cleanup is a breeze, but what really has made me a convert is the results. My outlook on bacon is not too much at a time and only really good bacon. We used lovely bacon purchased from a favorite butcher, Thistle Meats, in two styles, including unsweetened herbed bacon and proper plump rashers (UK style), all sliced about 1/8 inch thick. We gave the bacon 5 minutes, rotated the pan, baked it for another 6 minutes, and then gave it an extra 3 minutes (total oven time of 14 minutes). It all had a perfect crackle, which was especially nice since some of the bacon had the rind on, and we’ve noticed that when the rind is cooked in a pan on the stovetop, it was rendered too tough. Because we were serving this with a batch of aebleskivers, we drained and cooled it completely and then simply popped the bacon back in the still-warm oven for 4 to 5 minutes to reheat. This makes very little mess—if you wanted to save the bacon fat, it’s easy to do so once it cools a bit. This method is a perfect way to respect some very special bacon. It’s perfectly crisp, flat, and cooked through without the mess or constant attention.
Love, love, love this method. You don’t have to stand over a pan with tongs constantly flipping bacon. We started our timer after turning on our oven. It took 5 minutes to get our deli-style bacon onto a tray and in the oven. We cooked the bacon for 5 minutes and then turned the tray 180°. I checked it after 8 minutes more, and it was still on the rare side. I set the timer for 4 minutes and when it rang, we were closer to the desired doneness and I added just 3 minutes more. After 20 minutes at 400°F in a gas oven, we had perfect bacon.
I’ve been making bacon in the oven for a long time without a recipe and was curious about whether this recipe would turn out the same cooked bacon I usually produce. I was surprised at how long it took to roast the bacon. We like it browned and crisp. The bacon really didn’t seem roasted, and I kept putting it back into the oven. I kept it in the oven 6 minutes longer than the recipe specified. If I were making the recipe again, I would probably set the timer for 12 minutes to start and then keep checking.


Our household has converted to oven cooked bacon. Whenever I open a package I make it a point to cook the entire amount in the oven. After cooking, any leftovers are wrapped in a foil sheet to be reheated in the toaster oven.
Many thanks for sharing your trick, M! That’s exactly what my husband does. Works like a charm.
This is the only way to roll. My process uses the oversized Costco parchment (and several metric tons of Kirkland bacon). After cooking, you can fold a corner of the parchment into a little spout to pour the fat into a jar. When cold, you can trash the parchment, leaving a clean, greaseless baking sheet.
Love it, Mike. Much obliged!
I love doing bacon this way…near the end of the cook time I brush it with good maple syrup. YUM!
Karen, I think you and I are kindred souls…