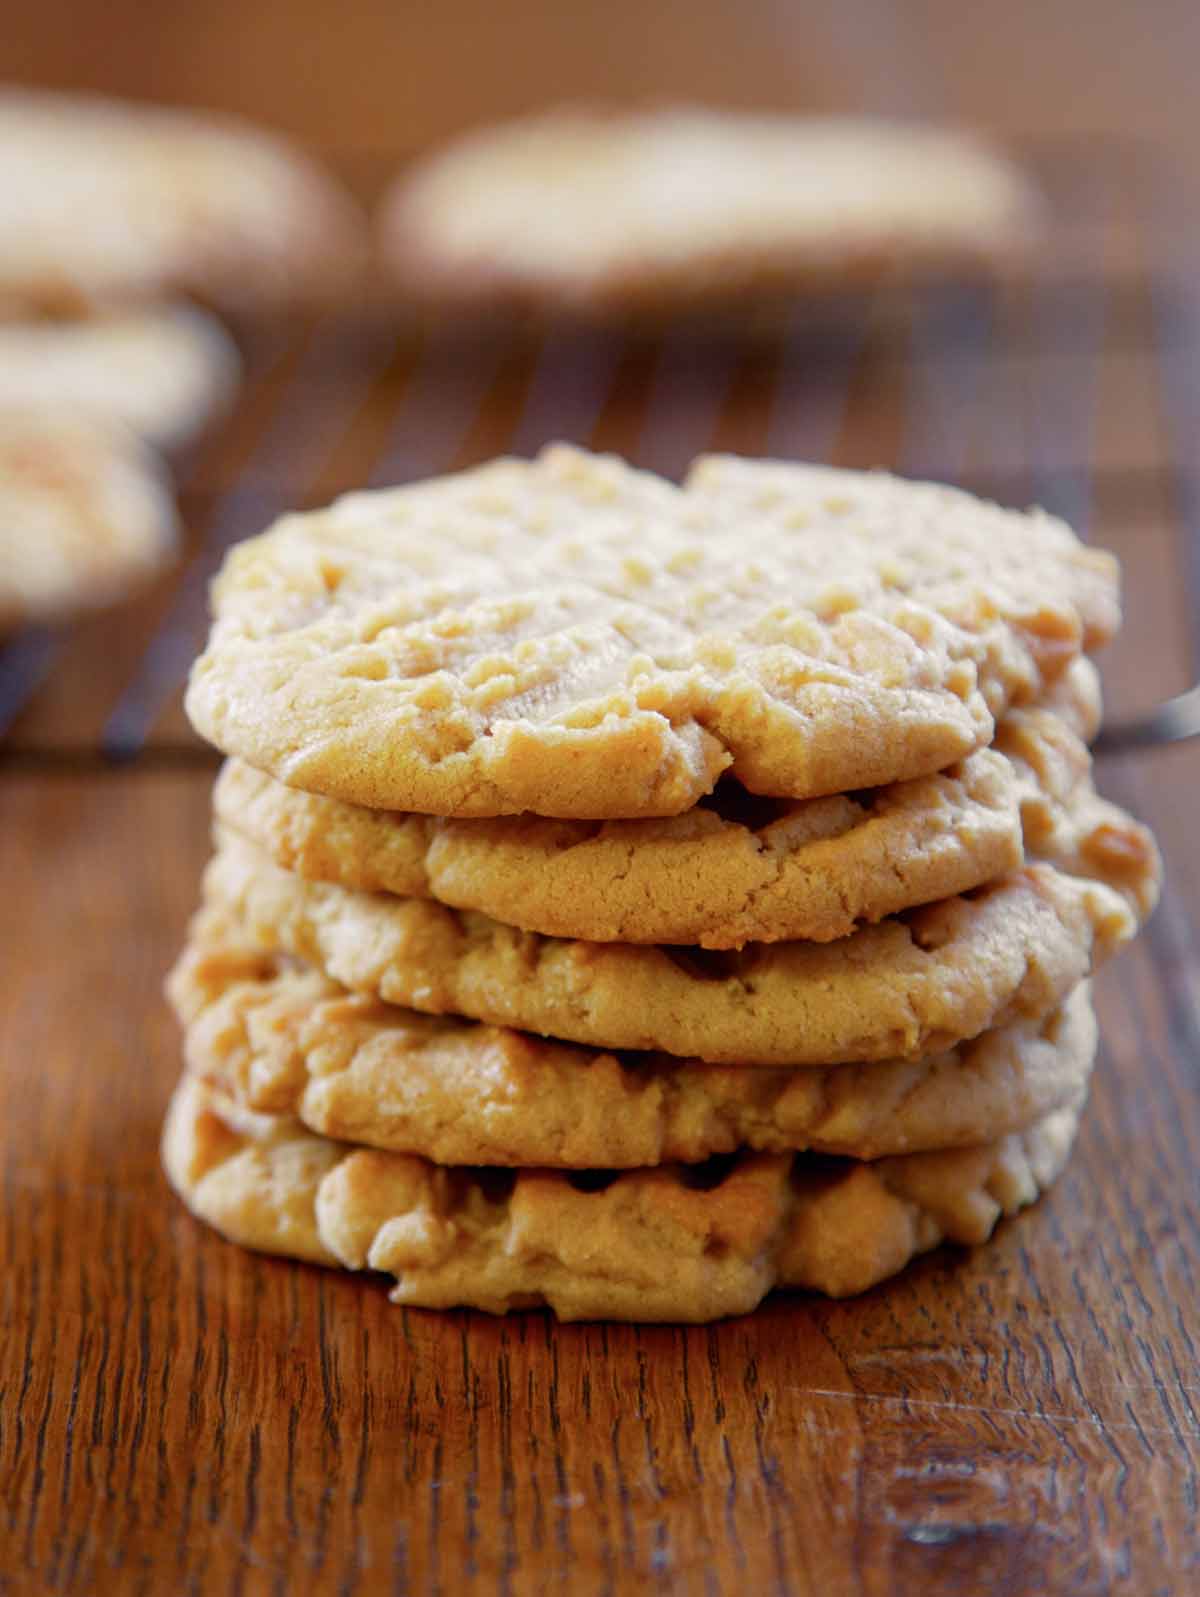
According to the authors of the cookbook in which we found this recipe, these yummy peanut butter cookies come from Mila Klomp, who won 1st prize in the 9- to 12-year-old category at a local fair. While don’t know Mila, it’s abundantly clear to us that she certainly knows her peanut butter cookies. Er, let us rephrase that. For someone so young, she certainly knows her old-fashioned peanut butter cookies. Crisp at the edges, chewy on the inside, and peanutty through and through. [Editor’s Note: If you have a thing for peanut butter cookies that are crisp throughout, fear not, we can appease that craving with a recipe, too.] Pass the milk, please.–Renee Schettler

Old-Fashioned Peanut Butter Cookies
Ingredients
- 1 cup granulated sugar
- 1 cup firmly packed brown sugar, preferably light
- 2 sticks (8 oz) unsalted butter, at room temperature
- 1 cup creamy or crunchy peanut butter
- 2 large eggs, lightly beaten
- 1 teaspoon vanilla extract
- 3 cups all-purpose flour
- 1/2 teaspoon fine sea salt
- 2 teaspoons baking soda*
- 1 tablespoon hot water
Instructions
- Preheat the oven to 375°F (190°C). Line a baking sheet with parchment paper.
- In the bowl of a stand mixer using the paddle attachment, beat the granulated and brown sugars and butter on high until light and fluffy, about 3 minutes. Add the peanut butter, eggs, and vanilla, reduce the speed to medium, and beat until thoroughly combined.
- Mix the flour and salt together in a small bowl. With the mixer on low, slowly add the flour and salt to the peanut butter mixture and blend thoroughly. In a small bowl, stir together the baking soda and hot water and add it to the cookie dough, mixing until just combined.
- Drop the dough in heaping tablespoons onto the parchment. Gently press a fork into each cookie, first vertically, then horizontally, to create the classic peanut butter cookie crisscross. (If an extra sparkly, extra crunchy cookie is desired, dip your fork in a little granulated sugar prior to pressing it into the dough.)
- Bake for 8 to 12 minutes, until the cookies have barely begun to turn golden at the edges.
- Let the cookies cool for a minute or more on the baking sheet, then move them to a wire rack to cool at least a little. (The cookies will get crisper the longer they cool.) Store the cookies in an airtight container for up to 5 days.
Notes
*Why do you dissolve baking soda in hot water for baking cookies?
First off, you use baking soda to help keep those peanut butter cookies from spreading too much (and becoming one giant cookie, as good as that sounds). But why mix it with hot water? Have you ever gotten a taste of pure baking soda? Yes? That’s why. Dissolving it a little bit, at the end of the recipe, and then combining it with all the other ingredients ensures that it’s evenly distributed within the mixture.
Nutrition
Nutrition information is automatically calculated, so should only be used as an approximation.
Recipe Testers’ Reviews
This is a perfect old-fashioned peanut butter cookie. The recipe is as simple as a cookie can be: cream together the butter and sugars, add the dry ingredients, scoop, and bake.
The yield really was 5 dozen and the cookies baked in exactly 8 minutes to achieve a perfect crunchy edge and chewy center.
This will definitely be my go-to peanut butter cookie recipe.
I wasn’t a big fan of peanut butter cookies, but this recipe made one out of me. This is an amazingly moist and chewy cookie that can be made in a cinch. Just lovely.
The time of 8 minutes was bang on.
These cookies are everything everyone loves in a good peanut butter cookie, right down to the crisscrosses on top. They were perfectly chewy with crisp edges and a wonderful flavor. I took them to work to share and while sitting in my office heard my coworker yell from next door, “These cookies are the bomb!” I think that says it all.
The addition of the hot water and baking soda was a new step for me, and whatever it did, it made for a really good cookie! I used a cookie scoop and they cooked perfectly in 8 minutes.
These are simple to make and delicious—crispy on the outside while still moist and a little chewy on the inside. The only thing missing is a cool glass of milk!
These were a big hit. I’m generally not a huge fan of peanut butter cookies because they can be a little dry. Not so with these cookies. They had big peanut butter flavor and were nice and chewy.
The next time I make these, I’m planning on coating the bottoms with chocolate once they’re cooled. What goes better with peanut butter than a little bit of chocolate?
These old-fashioned peanut butter cookies were wonderful! My husband has repeatedly requested another batch. The dough is easy to put together and the cookies puff up and spread during baking, so don’t be surprised when you have a nice-sized cookie in the end.
My only thought on improving this cookie recipe is the addition of chocolate chunks to the dough or a drizzle of chocolate over the finished cookie!
I really love peanut butter cookies, but once I started thinking about it, I realized that I had never made them before. This is a great introductory recipe. Not too many ingredients, not too many steps, and really delicious stay-soft cookies.
I may have snuck some chocolate chips into that last dozen I baked, which was also delicious.
I’m a horrible baker, so anytime I see a baking recipe, I cringe slightly and then go on to the next recipe. Well, it’s time to face my fear of burnt pastry and crying helplessly in the corner of my kitchen. This was a gleaming example of how a baking recipe can go so right. Following this recipe exactly produced cookies with a perfectly crisp exterior and chewy interior. For a guy who can’t bake, these were some of the yummiest cookies I’ve accomplished.
My only beef (or peanut) was the whole “drop the dough by heaping tablespoons” thing. I prefer a uniform look when cooking, so I used an ice-cream scoop and divided the ball in half. This produced a consistent-looking cookie; however, this method also produced larger cookies, as I was only able to get 3 1/2 dozen from this recipe.
While I may not be the baker in the family, this recipe inspired me to put on my brave face, turn on the oven, and try.
I tried this recipe with a really good organic, unsweetened peanut butter and the finished cookies were delicious. Not too sweet, lots of nutty flavor, and a great texture. They were incredibly easy to make. If you do use an organic peanut butter, give it a quick zap in the microwave on low power to soften it up if straight out of the refrigerator.
These simple but classic old-fashioned peanut butter cookies are perfect for any bake sale or event where baked goods are needed! I love that the proportions are easy enough to halve or double as needed. The cookies come together in no time and they’re predictably peanut buttery and addictive. Keep an eye on them though—mine took a bit longer to cook than indicated so use your judgment.
This is a simple peanut butter cookie. Often recipes require refrigeration before baking for a great peanut butter cookie, but this one delivers without the wait. The cookie dough comes together in a flash and then is ready to bake—no rolling or shaping, just drop, fork, bake, and eat.
They’re best served warm, while they’re soft and chewy, but are easy to eat cold too, when they become more crisp and crunchy. I wouldn’t have a problem eating them either way.
These buttery and oh-so-easy-to-make cookies are highly addictive. These simple treats are in fact quite dangerous because they’re a snap to make and take even less time to devour. The flavor is subtle, sweet, and so very sweet-tooth satisfying.
The recipe makes about 42 medium–large cookies, so find some friends to share them with. The finished product ends up looking like the traditional design we’ve come to expect and love.
This is a definite keeper in the family cookbook of recipes worth craving.
These are delicious cookies. Not sure what the hot water and baking soda do for the cookies, as they taste similar to many other peanut butter cookies with flour in them. I’m always up for trying a new PB cookie recipe and this young lady certainly did a great job with this one.
I made a half recipe since this one easily halved and I didn’t want 5 dozen.
While my family enjoyed them, they didn’t let it stop them in reminding me that even though they would eat these anytime they still prefer the ones my daughter makes with only three ingredients: sugar, egg, and peanut butter. I still say these are worth a go if you enjoy peanut butter cookies.
These peanut butter cookies are so legit. They were super easy to make, called for ingredients I had on hand, and I went from no cookies to cookies (and a cleaned-up kitchen) in an hour. The recipe was so straightforward with the exception of the baking soda and water step, but whatever that did, it resulted in a not-too-sweet peanut butter cookie with a very delicate crumb.
I did half of the cookies with the sugar-dipped fork and it did give it a nice crunch and a sweet hit. I actually didn’t expect to notice it and it was a nice little treat!
I baked the cookies for 11 minutes. (Maybe it’s just me, but a window of bake time that big on cookies stresses me out! It seems like a 4-minute window can take a perfect cookie to overdone. Don’t worry, I sat in front of the window with the oven light on to ease my anxiety.)
I let the cookies cool until they were just barely warm to the touch which resulted in a cookie with crisp edges and a delicate, cake-y center. The cookie leans more cakey than the advertised chewy although I did use an all-natural PB which may have been the cause. I’d definitely make these again and try them with a more processed peanut butter.
Solid classic peanut butter cookies, as billed. A classic mix-and-bake recipe that produces chewy cookies with good peanut butter flavor. They also have that addictive balance of sweet-to-salty. Since I had 8 dozen cookies (I made the recipe twice!) I didn’t just share a few cookies with friends and neighbors, I passed out stacks of cookies. A neighbor had no shame in declaring that her stack was “lunch” since they weren’t too sweet. She ate them one following the other. I think this says it all!
I made 2 separate batches of these cookies because I rushed the first batch. I was so relieved that the cookie dough didn’t require time in the freezer or overnight in the fridge that I assumed everything else in the recipe was standard and I rushed as I weighed and mixed the dry ingredients, completely missing how the flour and salt are combined and then added to the wet ingredients. The baking soda blended with hot water is mixed with the cookie dough last. Ahh! There was no way to correct this mistake. I baked them as is, expecting the baked cookies to spread flat as a result. They did spread but not noticeably. I chose to dip my fork in flour instead of sugar to keep the fork from sticking in dough. The recipe already had plenty of sweet with the 2 cups of sugars along with Jif, a sweetened peanut butter. The baked cookies were tender and delicious.
In my second batch of cookies, I was more careful and follow the recipe closely as written. These cookies were slightly more chewy but in the end, I couldn’t taste the difference between the first and second batch.
I subbed in Heilala vanilla paste for the extract since I ran out. You can sub 1 for 1 in most recipes. I do think vanilla paste rounds out the flavor in everything.
With the cookie trays inside, my little stacked ovens struggle to maintain the preheated temperature so my cookies took 8 minutes at the beginning and then 10 to 11 minutes longer near the end. I had some light and medium bakes. All were addictive and delicious. I generally like a dense cook that is soft and chewy. The next day the cookies were still soft but I actually preferred the darker cookies because the peanut butter flavor was more pronounced. Great easy cookies, especially if you don’t rush!
As a side note, after sharing the reason why I made 2 batches of cookies with my teenage son, he nodded in agreement, saying that in his job as prep cook at an Italian restaurant, the chef has him add the baking soda last to their zeppoli batter. I had never encountered this. Trade secret! Happy to learn and enjoy.
My son was visiting and he loves peanut butter cookies. His favorite recipe for these cookies has been one that is soft and uses peanut chips—not a traditional peanut butter cookie, but still very good. My husband is a texture guy and for him, these cookies have always fallen short because they lack great texture. I was excited to try this recipe to see if it could meet both of their requirements for a great peanut butter cookie— taste and texture.
After years of cooking and baking, I have realized the importance of reading the directions to any recipe through completely prior to making it…this recipe is a great example of why you need to do this. So many recipes call for mixing all the dry ingredients together first and it would be very easy to mistakenly add the baking soda to the dry ingredients and not mix it with hot water and add at the end as the directions state. Other than this one deviation from most recipes, it’s very simple and straightforward.
When I read the directions where it tells you to mix the baking soda and hot water my heart did a little happy dance. To me, this was a sign this recipe came from a Southern family and was an old recipe. As a good Southern girl, I learned early on that to make light fluffy Southern buttermilk biscuits you needed to mix the baking soda with hot water first—my mom said this was to activate the baking soda. I don’t know if this is true or just the way things used to be done, but it still makes me smile to think of doing it like my grandmother did years ago.
The recipe was very simple to put together. I used Jif crunchy peanut butter to add a little extra texture with the nuts. I checked the date on my baking soda and it was expired but luckily I had a new box. In no time my dough was ready, so I started scooping the cookies (I did not roll them in sugar) using a golf ball-size cookie scooper. Maybe this was larger than the heaping tablespoon as I ended up with only 40 cookies, but even with the larger size they still only took about 8 minutes to bake.
The cookies were soft and chewy on the inside and crispy on the outside. The perfect combination for my texture-loving husband And the taste isn’t too sweet and packed with flavor for my peanut butter-loving son. Because of the comment at the end of the recipe that they would get crispier the longer they cool, I was concerned the next day they would be too crisp, but not at all. They maintained their perfect texture inside and out even 1 to 2 days later. For our family, this was a winner.
These peanut butter cookies can be adjusted to your cookie preference in terms of texture, which is pretty great. I used peanut butter I made in my Vitamix from organic unsalted roasted peanuts I buy in bulk. I can vary the texture. This time is was creamy peanut butter.
This was the first time I’ve ever mixed baking soda with hot water before adding it to a dough. It was an interesting technique and I think it did help to make the cookies rise and spread well (they spread more than I expected!).
I did not use a sugar-dipped fork when I was shaping the cookies—they seemed sweet enough with 2 cups of sugar blended in. I might try cutting some sugar from the recipe to create the sparkling crunchy exterior in future.
I got 42 large cookies. They rose and spread a lot compared to other peanut butter cookie recipes I have previously tried.
I cooked them in two batches. The first ones I left in till just browning underneath but still blonde. This took 11 minutes. The second batch I cooked till more uniformly golden brown, about 14 minutes. The blonder ones came out the oven softer and slightly crumbly to the touch and as I let them sit they did crisp up gradually. I tried the first one after 5 minutes. It was warm and almost doughy in the center and slightly crispy on the edges. At 10 minutes, the cookies weren’t so warm and doughy and were even crispier with a delicate crumbly crumb.
The later golden brown ones were crisp right away out of the oven and continued to crisp as they cooled until they were straight up crunchy. I prefer the cookies this way, but I’m happy with both variations.
On the whole, it was simple recipe that takes minimal time and effort. I store extra baked goods in the freezer typically, and sometimes I like cookies even better from there! I’ll see how these respond to that treatment.


I double the salt (tested 4 different ratios and that was the best) and chill the dough as my only variations, but otherwise these cookies are absolutely perfect! The texture is amazing, and the peanut butter flavor is appropriately pronounced.
Thanks, Jiin! So glad you enjoyed them.
These are just lovely! I was initially worried because all that I had was natural, unsalted peanut butter, and I’m used to using the more sugary and salty variety for cookies, but I daresay it was even better this way. I made a variation and baked them in mini muffin tins for about 9 1/2 minutes and made one of my childhood favorites with Hershey’s Kisses. Delicious and easy recipe.
Trisha, we are all about the childhood favorites! Food and memories and emotions are so inextricably intertwined, yes? We so appreciate you taking the time to share your comment and your lovely photo with us…
They’re ok.. I made them exactly as directed and baked them for 10 minutes.. they were crunchy on the outside and chewy on the inside, but not moist. They were pretty dry. I think 3 cups of flour is too much.
Ashely, sorry about the dryness. Our testers found them to be quite moist. Did you weigh the flour by any chance, or did you scoop the flour?