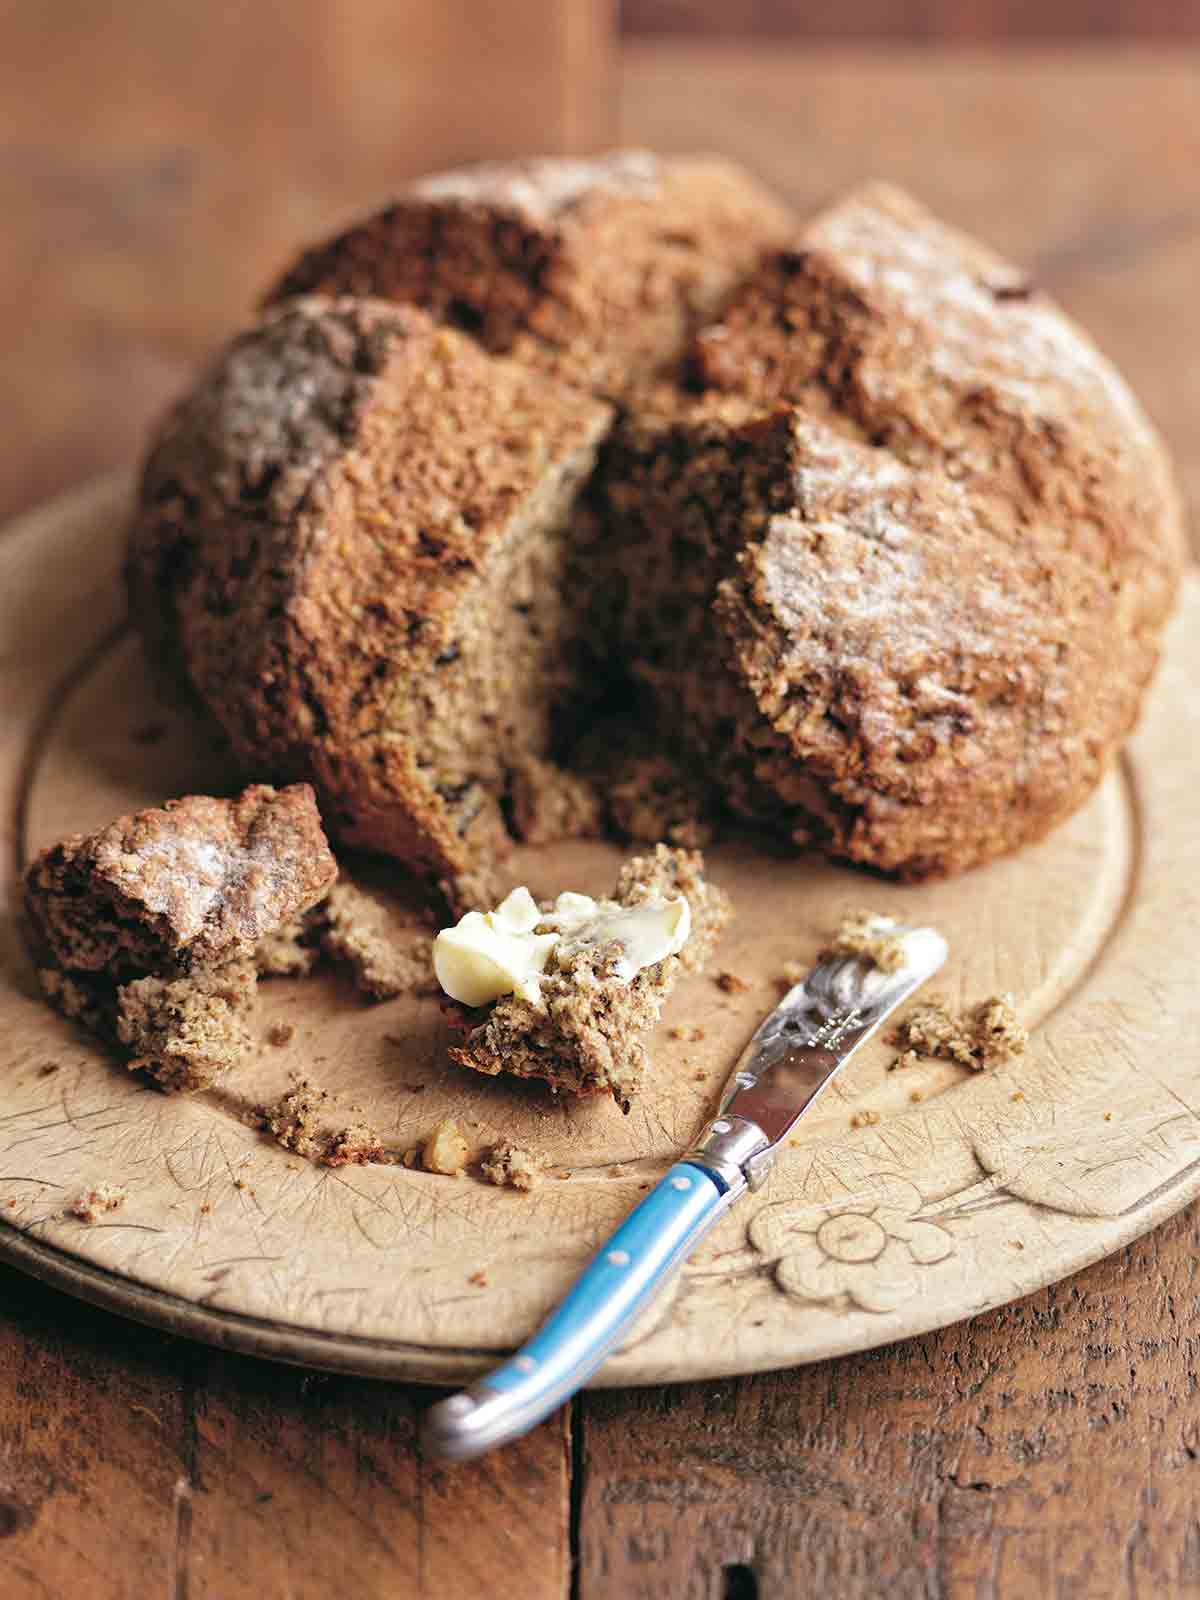
This Irish soda bread has a moist, nutty wheatiness with a dense, subtle sweetness, and crunchy crust. It has loads more flavor than normal bread and is lovely on its own but also goes perfectly with cheese, soup, marmalade…we could go on. Plus, it’s incredibly easy to make and seems to keep for a week without becoming stale or dry.–Wild at Heart
Irish Soda Bread FAQs
The straining process that gives Greek yogurt its noticeably lush texture is also what keeps it from being suitable in this recipe. You’ll find that yogurt with a runnier consistency will help to keep your soda bread moist. Save that Greek stuff for something a little thicker and richer.
Remember that this is a quickbread, which makes it a little denser than something that has yeast to help it lift and rise. This soda bread has a dense crumb with a moist tenderness, even for a whole-wheat dough. The crust has a crisp, crunchy texture that’s perfect for holding onto all that beautiful butter.
In practical terms, slashing the dough lets the heat from the oven penetrate into the thickest part of the bread, allowing the bread to stretch and expand as it rises. For Catholics in Ireland, the symbolism can also be interpreted as a blessing by crossing the bread.

Irish Soda Bread with Walnuts
Ingredients
- Mild vegetable oil, for the baking sheet or pan
- 2 cups walnut halves or pieces
- Scant 4 cups whole-wheat flour, plus more for the work surface
- 1 tablespoon demerara or light brown sugar
- 2 teaspoons baking soda
- 1 teaspoon salt
- 2 to 2 1/2 cups plain full-fat or low-fat yogurt, (do NOT substitute Greek yogurt), plus more as needed
Instructions
- Preheat the oven to 350°F (180°C) and lightly oil either a baking sheet (if you prefer to make a free-form, traditional round loaf) or a loaf pan (if you'd rather a more contemporary loaf.)
- Blitz half the walnuts in a food processor until you have a coarse powder. Chop the remaining walnuts into largish chunks.
- Place all the walnuts in a large bowl, add the flour, sugar, baking soda, and salt, and mix well to ensure the baking soda is evenly dispersed.
- Stir in 2 cups yogurt and gently combine, mixing first with a whisk or wooden spoon and then switching to your hands, until a soft dough forms. The dough will be a shaggy mess, but bring the ingredients together as best you can, being careful not to knead the dough as this bread benefits from being handled as little as possible.
☞ TESTER TIP: Different yogurts have different moisture contents. We found that depending on the yogurt used, you may need to work the dough a little more than you expect or you may even need to add a few tablespoons or even up to 1/2 cup more yogurt.
- Turn the dough out onto a well-floured surface. If you're going to bake it in a loaf tin, form the bread into a log shape and drop it into the tin. If you're going to bake it in the traditional round, form it into a ball, place it on the oiled baking sheet, and score a deep cross into the top using a sharp knife.
- Bake for 45 to 50 minutes, until the loaf is well risen and browned. Let the bread cool on a wire rack for about 30 minutes—if, that is, you can manage to keep your hands off it for that long.

Nutrition
Nutrition information is automatically calculated, so should only be used as an approximation.
Recipe Testers’ Reviews
Everything I love about this recipe is right there in the intro. It’s crazy easy to make and delivers “moist, nutty wheatiness with a dense crumb and crunchy crust.” I baked it in the evening and we enjoyed it for breakfast the next morning—and for a couple of days after that. We tried it with butter, peanut butter, honey, and sharp Cheddar.
The most surprising aspect of this loaf is how moist it is, considering the fact that it doesn’t have any fat other than the yogurt (I used 2%) and walnuts. The flavor is pure, nutty whole-wheat goodness and deep, rich walnuts. I would love to try the recipe again with some chopped prunes mixed in.
I halved the recipe and noticed that the dough needed an additional 1/4 cup yogurt to be properly moistened, but this might be due to the type of yogurt I used. Brands vary when it comes to moisture content.
Wow, is this bread good. And—dare I say it?—it might even be good for you. I love the combination of whole-wheat flour, coarsely ground walnuts, and coarsely chopped walnuts. The result is nutty and, thanks to the yogurt, incredibly moist.
I used low-fat yogurt and didn’t notice anything lacking. Please don’t be tempted to add another tablespoon or two of brown sugar. The bread shouldn’t be too sweet. And it’s true—the bread lasts for days without becoming dry or tasting stale. It’s divine plain or slathered with lightly salted butter or homemade jam. And don’t get me started on how great it is toasted. Please, please, please make this bread!
Super simple, indeed! What an absolutely lovely twist on the standard white flour soda bread, yielding a more nutritious bread. Also, thanks to the walnuts, this bread has plenty of great flavor and texture. It’s moist, has a nice crumb for a quick bread, and the crust was not only appropriately crunchy but also beautifully golden brown after the 50 minutes of baking time called for by the recipe.
I used European-style whole-milk yogurt and made sure the brown sugar and baking soda were mixed in well. My dough never seemed soft, though, and it took more handling to bring it together than I would have liked. But fear not, the bread came out great and would go perfectly with cheese, soup, and marmalade. I especially think it would pair well with the cream cheese and the Concord Grape Jam.
It is, however, not the most visually appealing loaf. I chose to make one large free-form loaf, and it baked perfectly through to the center. While the bread was pretty when sliced, it did not make a very attractive loaf. My friend Pam commented that it looked like a brain. However, it was quite tasty, and a day later it was still moist and fresh-tasting.
This is a great recipe for Irish soda bread and is definitely something every cook should have in his or her arsenal as it’s almost too easy. I was hoping for a dense, rustic loaf of bread, and this recipe turned out to be just what I wanted. Not only was it what I was craving, but it also came together very quickly, and I’m sure that I’d have all the ingredients on hand at any given time. I would enjoy eating this bread in the morning with a touch of jam.
The recipe is pretty laid-back and undemanding, but beginners might find the following a touch difficult. My mixture required more liquid in order to come together as a workable dough, so I added about another 1/2 cup yogurt (I used low-fat plain yogurt). Next time, I’ll try mixing in some dried berries with the walnuts.
Easy, delicious, and versatile—this humble bread offers so much! It’s ever so slightly sweet but mostly neutral tasting, so as the description says, it goes well with many things: good old butter, jam, cheese (blue cheese with walnut is a no-brainer), salads, etc. It’s nice and dense, too, so a little goes a long way.
I used grapeseed oil for the pan (didn’t want to use strongly flavored oil) and whole-milk yogurt. The dough is sticky, and it doesn’t have the smooth “kneaded” appearance, but don’t fret—it bakes just fine. Mine was free-form and baked perfectly in 50 minutes.
This is a really quick bread with good flavor and texture. I liked that the flour measurement was given in weight.
I used King Arthur white whole-wheat flour, light brown sugar, and fat-free yogurt. I made the bread in the traditional round crossed loaf, and it took just 50 minutes to bake. I actually made it twice, using pecans the second time, and liked that loaf better as I thought it had a mellower flavor, but my husband preferred the walnut version.
My only negative comment is that the dryness of the dough made it difficult to bring together, which might frustrate someone not familiar with making soda bread. I might try using honey instead of brown sugar next time. And there will be a next time.
I really loved the flavor and texture of the walnuts in this bread and couldn’t stop at just one slice. I have to admit, I was a bit skeptical about this recipe at first. The dough was still quite dry and crumbly after incorporating the yogurt with the dry ingredients, and it didn’t come together as well as I’d hoped. Nevertheless, I proceeded to form it into a round, slice the top, and bake it in the oven. The smell of toasted walnuts and warm wheat were overwhelming and absolutely irresistible. Once baked, the outside of the loaf still looked too floury and quite crumbly. Much to my surprise, though, when I sliced the loaf, a moist yet dense, nutty, heavenly slice of bread revealed itself!
This bread would be great in its simplest form with a slather of butter or jam or accompanying a warm wintry soup. I still feel that it could use a bit more liquid to allow for better incorporation and a more cohesive dough, but otherwise, it was fantastic.
This soda bread surprised me in a good way. Based on the ingredients, I expected an overly dense bread that was one-dimensional in flavor. Instead, I got a hearty bread with a cornbread-like texture and great nutty flavor and crunch from the walnuts. The yogurt adds some moisture to the bread, and I think it helps the bread from being too dense. The brown sugar adds a touch of sweetness.
The bread worked really well with a creamy, spreadable cheese, and I think it’d also be great with something sweet, like apricot preserves. The bread is good alone too, but the flavors seem to shine when it’s served with something else.
A few tips that I’ll follow the next time I make this: Use a whisk to mix the dry ingredients. It was much faster than a wooden spoon and better at evenly mixing all of the ingredients. It’s easier to mix in the wet ingredients with your hands than with a spatula or wooden spoon, but be warned: it’s really messy. You end up with a lot of the dough on your hands that you have to scrape off. After I mixed in the yogurt, I noticed that a lot of flour still wasn’t incorporated. I let the dough sit for about 5 minutes and then continued mixing, which seemed to help.
The crust of this Irish soda bread was crunchy and the interior had a good distribution of walnuts throughout. It tasted pleasantly of walnuts without being overpowering. I would make this bread again and found it easier and tastier than the soda bread I normally make.
I used a brand of Irish soda brown bread flour, which is available from a flour mill in Britain. Towards the end of the mixing, I found it necessary to add a little milk to bring the remaining dry flour together into the dough. Instead of baking the bread on an oiled baking sheet, I oiled a baking sheet, pressed a piece of baking parchment down on the oil, and placed the loaf on that. The loaf didn’t expand significantly. In my opinion, it was a small to medium loaf. I cooked it at 180°C (356°F) for the 50 minutes stated, which gave the crust a golden brown color.
This soda bread has really good flavor and it is, indeed, easy to make. It took about 45 minutes to bake.
A quick tip: In step 2, you could just add the remaining walnuts to the food processor and pulse to get a few chunks rather than chop the walnuts by hand.
This is one yummy soda bread and so easy to make. Just throw everything together, mix, and bake. Super easy.
The recipe works great as it is written with the baking time on the dime at 50 minutes. I substituted 1/2 cup almond meal for the walnut meal just because I was low on walnuts. The bread came out perfectly, has a very hearty flavor, and stays fresh for multiple days. Everybody in the family loved it. A keeper, for sure!
Yum! I got a delicious, slightly sweet, slightly salty, nutty soda bread. I’ll take my hunk straight up with some salty butter.
But hold on. We need to back up a minute before we get ahead of ourselves. This bread relies solely on a reaction between an acid (yogurt) and a base (baking soda), so we should double-check that box of baking soda, which may or may not have been in your pantry since last year’s 2-day holiday baking fandango. Because if that baking soda has lost its oomph, your walnut soda bread will be an unleavened walnut rock. How do I know? My baking soda had lost its bubble power, and my first batch of bread was leaden. Let’s check the baking soda: Add 1/4 teaspoon vinegar to 1/2 cup hot water. This is your acid. Add 1/4 teaspoon baking soda. You’ve got lots of bubbles right? No? Sorry, hon, then it’s off to the market with you for a fresh box.


Just made this bread and it is delicious! I grind my own flour, a mix of hard white, spelt, and kamut berries not so finely ground. Used buttermilk as its always on hand, whereas yogurt isn’t. Baked one in a cast iron loaf pan and the other as a boule on parchment covered cookie sheet, and both turned out great. Am wondering if it would work as well if I soaked the buttermilk and flour together first (as in Peter Reinhart’s “Whole Grain Breads”, to neutralize the phytic acid, then proceed with the recipe? Thank you for all the great recipes.
Carolyn, so happy it turned out well!! We didn’t test it with soaking the flour, so we can’t say for sure. But if you try, do let us know. Curious cooks want to know!
Delicious, hearty, and yes, moist – a real winner. We keep full fat Greek yogurt, so that’s what I used and it worked just fine (I had to add a little extra because it’s a denser yogurt). We don’t prefer walnuts so I ground up pecans instead and they added a richness (and protein) that was lovely. We enjoyed this satisfying loaf many ways for a couple of days. Thanks!
Terrific, nlh! Thank you SO VERY MUCH for taking the time to share your experience with us. I so appreciate it. Have a delightful time enjoying the rest of the loaf.
As an Irish person living in Ireland, I’m really interested in your addition of walnuts to this recipe, not something I’ve ever seen before in a brown soda bread recipe (although I may try it myself). My mother and grandmother only ever used buttermilk, I, on the other hand, have used plain yogurt with a splash of milk occasionally if I have forgotten to buy buttermilk 🙂 My mother-in-law omits the sugar and adds a tablespoon of golden syrup to her bread, which is beautiful by the way! I was taught to tap the bottom of the bread to tell if it’s fully baked, looking for a hollow sound when tapped and then while cooling the bread, wrap in a clean tea towel upside down on a cooling rack for a softer crust. Greetings from Ireland and your website is an excellent resource that I will return to time and time again.
Thanks for all those lovely suggestions, Lisa!