
Why make homemade larabars when you can instead buy them? Well, they’re easy. They’re more economical when you buy your ingredients in bulk. And they’re eminently easy to customize. Although we think the biggest reason these homemade larabars are so darn indispensable is because they taste ridiculously terrific.
The recipe that follows is for cherry pie, but we’ve also included variations beneath the recipe for dark chocolate brownie, banana bread, pb&j, cookie dough, apple pie, and more.
Or rely on your own imagination. Let us know your loveliest creations in a comment below.
Chow,

Featured Review
These are to die for! So, so good. My kids are nuts about them, too. The only tricky thing is making them last because we gobble them up so fast. We’ve done the gingerbread version, the lemon bar version, and the dark chocolate brownie version. My dates are already nice and soft so I haven’t even had to soak them beforehand.
Meg
Your Homemade Larabars questions, answered
Whole dates are best for this homemade Larabars recipe, but if prechopped dates are all that you can find in stores, go ahead and use them.
You’ll need to soak prechopped dates separately from any other dried fruit you may use in this recipe because they only need 2 to 3 minutes of soaking. (If they’re left to soak for too long, they’ll begin to disintegrate.) And not to worry if your prechopped dates come coated with oat flour or sugar. The coating will rinse away with the soaking water.
Wrapped tightly and individually in plastic wrap, these homemade Larabars will keep for up to 3 days at room temperature, 3 weeks in the fridge, and 3 months in the freezer. Frozen Larabars should be thawed for about 1 hour before eating.
More must-make snack recipes
Write a review
If you make this Larbars recipe, or any dish on LC, consider leaving a review, a star rating, and your best photo in the comments below. I love hearing from you.–David
Featured Review
[I] tried these with almond flour and they’re perfect. … Five ounces equals one cup of whole almonds—a total game-changer. … I also swapped walnuts for hazelnut flour … for a sophisticated twist. Delicious!
Debbie D

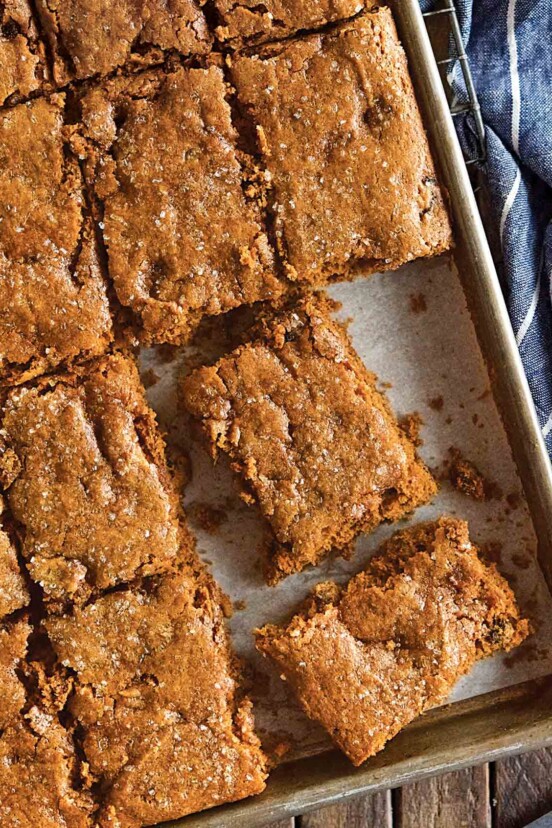
Homemade Larabars
Ingredients
For cherry pie larabars
- Mild olive oil, vegetable, or coconut oil, for the pan
- 1 cup packed dried cherries
- 1/4 cup packed, pitted, soft whole dates
- 1 cup warm water, for soaking the fruit
- 1 cup raw almonds
- 1/4 teaspoon ground cinnamon
- 1/8 teaspoon fine sea salt, (optional)
Instructions
- Rip off a large piece of parchment paper or plastic wrap, press it into a 9-by-5-inch loaf pan, and, if using plastic wrap, slick it with a little oil.
- Combine the cherries, dates, and warm water in a small bowl. Let stand for 5 to 10 minutes, until the fruit is soft. (If the dried fruit you're using is already super soft and moist, you can skip the soaking step.)The exact timing will vary according to the dryness of the fruit.
- Drain the fruit, discarding the soaking water. Pat the fruit completely dry with paper towels.
- Meanwhile, place the almonds in a food processor and process until finely chopped but not paste-like.
- Add the drained fruit, cinnamon, and salt (if using), to the food processor and pulse until the fruit is finely chopped and the larabar mixture begins to stick together and clump against the sides of the bowl and your processor starts hopping on the counter just a little. This could take up to 2 minutes.
- Transfer the larabar mixture to the prepared loaf pan. (Alternatively, you can form the mixture into any size or shape you can imagine. Go a little crazy.) Place a large piece of parchment paper or wrap slicked with oil atop the bar mixture and use it to spread and flatten the mixture evenly in the pan. (If you have a second loaf pan, you can nestle it inside the first and press the pan down to evenly flatten the mixture.) Leave the paper or wrap in place. Refrigerate for 30 minutes.
- Using the paper or wrap hanging over the edge of the pan, lift the bar mixture from the pan and transfer it to a cutting board. Discard the paper or wrap and cut the rectangle into 6 bars. Tightly wrap each bar in wrap.
- The bars will keep at room temperature for up to 3 days, in the refrigerator for up to 3 weeks, or in the freezer for up to 3 months (let the frozen bar thaw for 1 hour before attempting to bite into it).
Notes
Larabar Variation
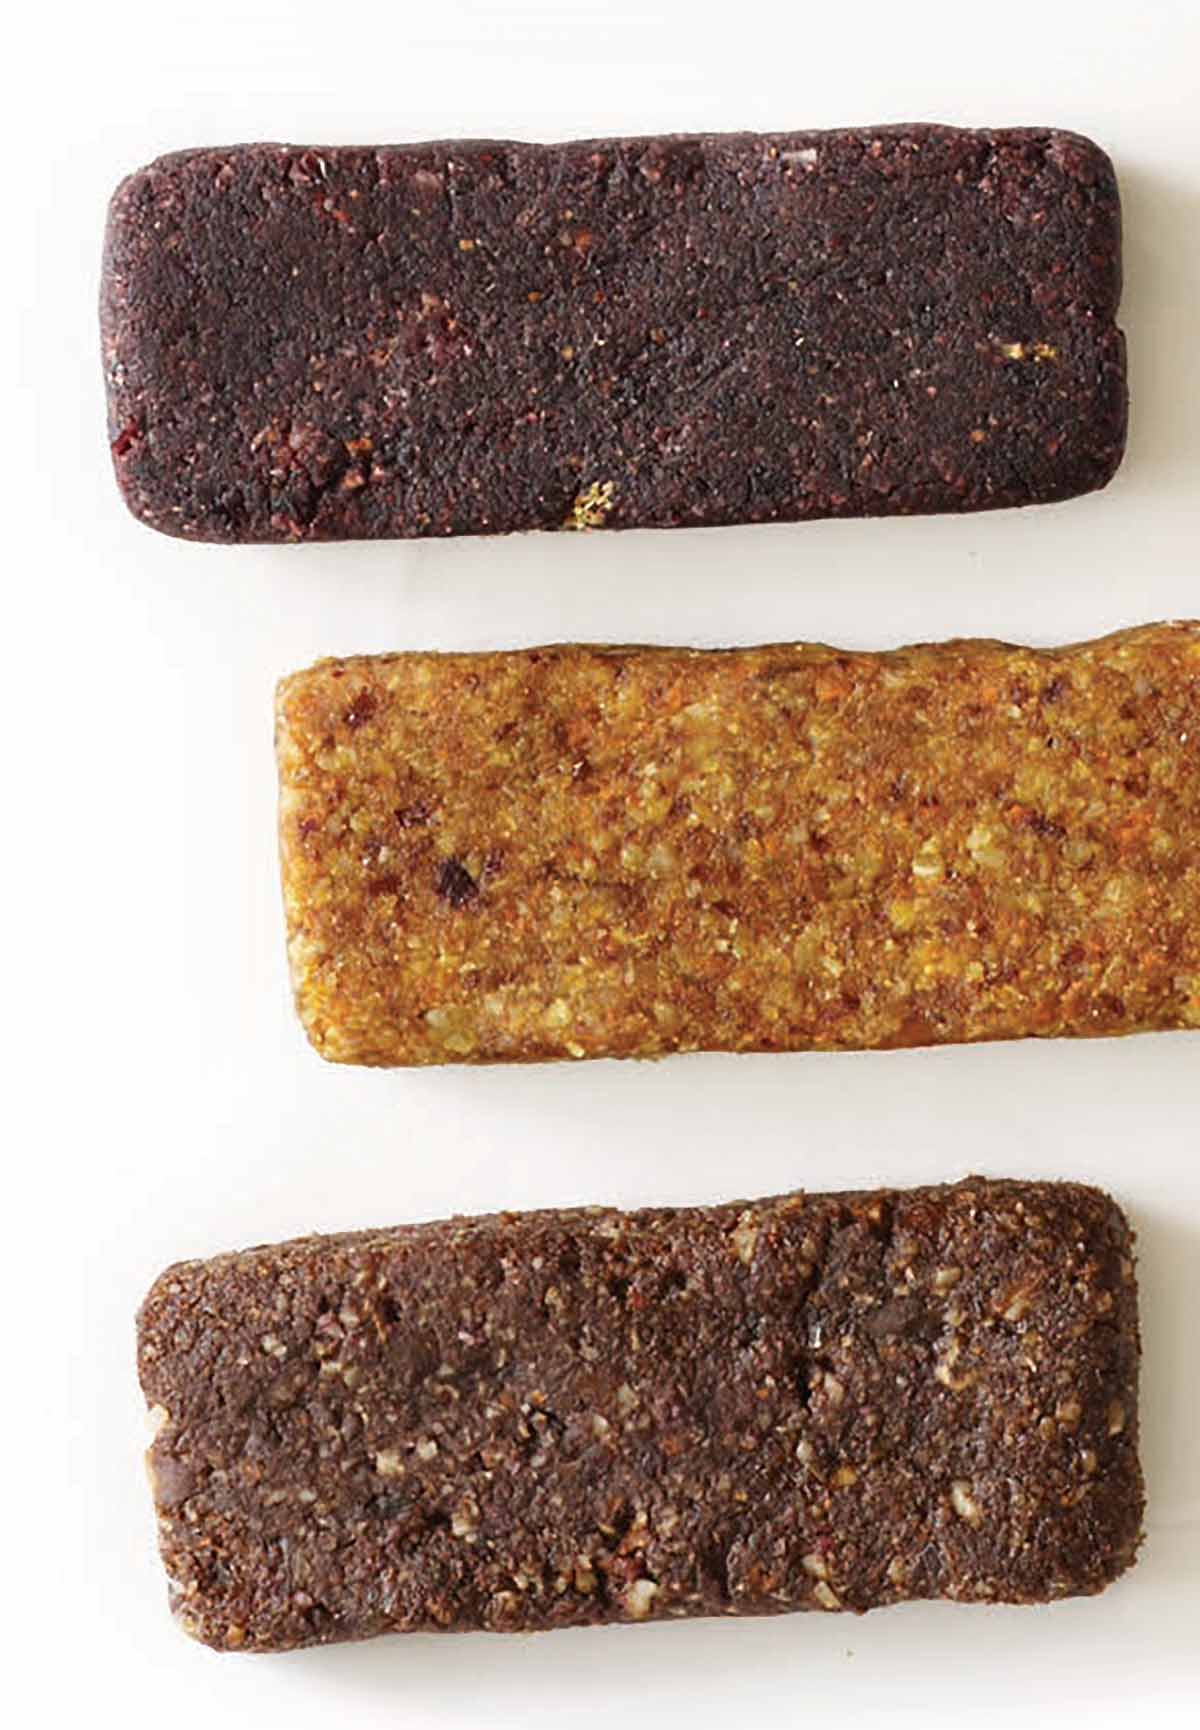
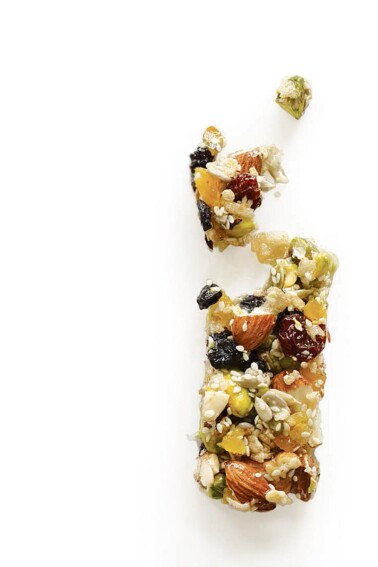
Dark Chocolate Brownie Larabars Prepare the bars according to the above recipe, substituting the following ingredients: 1 cup packed, pitted, soft whole dates, 1 cup warm water, 1/2 cup raw almonds, 1/2 cup raw walnuts, 3 tablespoons bittersweet or semisweet chocolate chips or chopped dark chocolate, 2 tablespoons unsweetened cocoa powder, and 1/8 teaspoon fine sea salt (optional). Apple Pie Larabars Prepare the bars according to the above recipe, substituting the following ingredients: 1 cup dried apples, 1/4 cup packed, pitted, soft whole dates, 1 cup warm water, 1 cup raw pecans or walnuts, 1 1/2 teaspoons ground cinnamon, and 1/8 teaspoon fine sea salt (optional). Cashew Cookie Larabars Prepare the bars according to the above recipe, substituting the following ingredients: 1 1/4 cups packed, pitted, soft whole dates, 1 cup warm water, 1 cup raw cashews, 3 tablespoons bittersweet or semisweet chocolate chips (optional), and 1/8 teaspoon fine sea salt (optional). Peanut Cookie Dough Larabars Prepare the bars according to the above recipe, substituting the following ingredients: 1 1/4 cups packed, pitted, soft whole dates, 1 cup warm water, 1 cup raw peanuts, 3 tablespoons bittersweet or semisweet chocolate chips (optional), and 1/8 teaspoon fine sea salt (optional). [Editor’s Note: The use of peanuts makes this version not acceptable on the whole30 plan.] Pecan Pie Larabars Prepare the bars according to the above recipe, substituting the following ingredients: 1 1/4 cups packed, pitted, soft whole dates, 1 cup warm water, 1/4 cup raw almonds, 3/4 cup raw pecans, and 1/8 teaspoon fine sea salt (optional). Gingerbread Larabars Prepare the bars according to the above recipe, substituting the following ingredients: 1 1/4 cups packed, pitted, soft whole dates, 1/2 cup raw almonds, 1/2 cup raw pecans, 3/4 teaspoon ground ginger, 1/2 teaspoon ground cinnamon, and 1/8 teaspoon ground cloves. PB & J Larabars Prepare the bars according to the above recipe, substituting the following ingredients: 1/2 cup packed dried cherries, 3/4 cup packed, pitted, soft whole dates, 1 cup warm water, 1 cup raw or roasted peanuts, 1/8 teaspoon fine sea salt (optional). [Editor’s Note: The use of peanuts makes this version not acceptable on the whole30 plan.] Cappuccino Larabars Prepare the bars according to the above recipe, substituting the following ingredients: 1 1/4 cups packed, pitted, soft whole dates, 1 cup warm water, 1/2 cup raw almonds, 1/2 cup raw cashews, 1 tablespoon roasted coffee beans, 1/2 teaspoon vanilla extract, and 1/8 teaspoon fine sea salt (optional). Tropical Escape Larabars Prepare the bars according to the above recipe, substituting the following ingredients: 1 cup dried, unsweetened pineapple, 1 cup warm water, 1 cup raw cashews, 1/4 cup dried, unsweetened flaked or shredded coconut, and 1 tablespoon finely grated tangerine or orange zest (preferably organic). Oatmeal Raisin Cookie Larabars Prepare the bars according to the above recipe, substituting the following ingredients: 1 cup raisins, 1 cup warm water, 3/4 cup raw cashews, 3/4 cup old-fashioned or quick-cooking rolled oats, 1/2 teaspoon ground cinnamon, 1/8 teaspoon fine sea salt (optional). Blueberry Cobbler Larabars Prepare the bars according to the above recipe, substituting the following ingredients: 1 cup packed dried blueberries, 1/4 cup packed, pitted, soft whole dates, 1 cup warm water, 3/4 cup raw walnuts or raw pecans, 1/2 cup old-fashioned rolled oats, 1/2 teaspoon finely grated lemon zest (preferably organic), and 1/8 teaspoon fine sea salt (optional). Carrot Cake Larabars Prepare the bars according to the above recipe, substituting the following ingredients: 1/2 cup packed, pitted, soft whole dates, 1/4 cup raisins, 1/4 cup dried, unsweetened pineapple, 1 cup warm water, 1 cup raw walnuts, 1/4 cup peeled, shredded carrots, 1/4 cup unsweetened flake or shredded coconut, 2 teaspoons coconut oil, 1/4 teaspoon ground cinnamon, and 1/8 teaspoon fine sea salt (optional). Apricot Ambrosia Larabars Prepare the bars according to the above recipe, substituting the following ingredients: 1 1/4 cups dried apricots, 1 cup warm water, 2/3 cup raw almonds, 1/2 cup unsweetened flaked or shredded coconut, 1/4 teaspoon ground cinnamon, and 1/8 teaspoon fine sea salt (optional). Key Lime Larabars Prepare the bars according to the above recipe, substituting the following ingredients: 1 cup packed, pitted, soft whole dates, 1 cup warm water, 1 cup raw cashews, 1/3 cup unsweetened flaked or shredded coconut, 2 tablespoons fresh lime juice, 2 teaspoons finely grated lime zest (preferably organic), and 1/8 teaspoon fine sea salt (optional). Lemon Pie Larabars Prepare the bars according to the above recipe, substituting the following ingredients: 1 1/4 cups packed, pitted, soft whole dates, 1 cup warm water, 1/2 cup raw almonds, 1/2 cup raw cashews, 2 tablespoons fresh lemon juice, 2 teaspoons finely grated lemon zest (preferably organic), and 1/8 teaspoon fine sea salt (optional). Coconut Cream Larabars Prepare the bars according to the above recipe, substituting the following ingredients: 1 cup packed, pitted, soft whole dates, 1 cup warm water, 1 cup raw cashews, 1/2 cup unsweetened flake or shredded coconut, and 1/8 teaspoon fine sea salt (optional). Banana Bread Larabars Prepare the bars according to the above recipe, substituting the following ingredients: 1 cup raw or dry roasted almonds, 1 cup dried bananas, and 1 cup Medjool dates.
Explore More with AI
Nutrition
Nutrition information is automatically calculated, so should only be used as an approximation.
Recipe Testers’ Reviews
Did you know only 68% of the recipes we test make it onto the site? This recipe survived our rigorous blind testing process by multiple home cooks. It earned the Leite’s Culinaria stamp of approval—and the testers’ reviews below prove it.

We absolutely love Larabars at our house, so this recipe was really a dream come true. Not only is it healthful, using minimal ingredients that are widely available, but it’s so easy. It only took about 10 minutes to put together. I made the cashew cookie and cappuccino varieties, and they were both outstanding. My husband mentioned he liked them better than the packaged brand. This recipe produces a snack that’s chewy and satisfies a craving for something sweet.
The recipe works exactly as written. I found that the recipe is very forgiving and that the nuts in each recipe are interchangeable. (I made the cashew cookie recipe with both almond and cashews in it, while I accidentally used only cashews in the cappuccino mixture.) I’d like to play with the recipe and add some pumpkin with pumpkin pie spice to the basic ingredients.
What a fantastic, healthy, no-cook nut-and-fruit bar recipe! These taste much better than I imagined they would. I mean, they were roll-your-eyes-to-the-back-of-your-head good. My family LOVED them! And it’s amazing how quickly these come together. I’ve already made them twice in one day.
I make other types of granola bars, but I’d never tried Lara before, so I was excited to try this recipe. I purchased the ingredients in bulk as suggested, and I even stopped by the granola bar section to read the nutrition label on the “real thing.” Sure enough, the ingredients are very basic, just like this recipe. I first made the cherry pie, blueberry cobbler, and pecan pie varieties. Later on in the day I made the cashew version, once I found out it’s my mom’s favorite Lara flavor. And I recently made the banana bread variation as well and it was soooooo good! I dried my own bananas in the oven because I don’t have a dehydrator. (I sliced 3 bananas into 1/4-inch rounds, spread the slices out onto greased parchment paper—don’t skip this step—and stick them in the oven at 175°F for 2 hours. My yield was 1 cup unsweetened dried bananas that were floral, sweet, and addicting!)
All the combos are great, making it hard to pick a winner, but if I had to choose, it’d be the blueberry cobbler.
This is a quick and easy and fun recipe to make. I felt like a kid in the kitchen and my husband was impressed with “my” creativity. The most time-consuming part of this recipe is wrapping the bars!
My tips are as follows:
Use very moist dates; it makes a huge difference. I didn’t soak my dried cherries and blueberries, as the dried fruit still felt somewhat soft and I was afraid of too much moisture in the bars. The mixture still came together in the food processor just fine.
When pressing the mixture into the pan, I placed a piece of parchment paper on the bottom and pressed the mixture down into the shape of the pan, then placed another piece of parchment paper over the top of the mixture and flipped the whole bar over and back into the pan. Then I pressed out the whole length of the uncut bar, making it even and flat on both sides. I did this for all 3 flavors and then just stacked them on top of one another in my loaf pan with the parchment paper separating each flavor. The 3 batches stacked in my loaf pan perfectly, and I popped the whole thing in the fridge covered in plastic wrap.
The ingredients for these bars can be pricey, especially if making versions with pecans or dried fruit. But they’re delicious and well worth the $$$ and effort.
This is an excellent recipe, and I’ll be making it often.

No one in my family had ever tried the store-bought version of this bar so we really didn’t know what to expect. I did soak my dried fruit because it seemed a little dry and I was surprised how nicely the fruit plumped up in just 5 minutes. I can’t imagine anything more simple to put together, so I decided to whip up a few more versions as long as my food processor was out. I had ingredients for and made the standard bars, the blueberry cobbler bars, the key lime bars, and the oatmeal raisin cookie bars. About 6 hours later, after dinner, I pulled them all out for reviews. Everyone seemed to have a different favorite, but they were all a hit.
I have to admit, I do wish they looked more tasty and were easier to tell apart by appearance. (After I wrapped them in plastic wrap, I put them in separate resealable plastic bags labeled with the type.) But it’s such a simple recipe and so easy to customize to just how your family likes them.
I used the same loaf pan over and over; I put the loaf pan in the refrigerator while mixing the next version, then pulled out the wrapped loaf of bars, left them in the fridge, and started over with the same pan.

We made the dark chocolate brownie bar version and they were delicious. Although these didn’t hold together very well when I cut them into bars, they were so good. My great-niece helped me with these and I think we didn’t get them pressed into the pan as tight as we could’ve and that might’ve been the problem. I’d definitely make them again. I love that there’s no added sugar in these; the dates give them just the right amount of sweetness.

Couldn’t wait to try these, as I love Larabars. Well, I must say that this will become a Sunday staple in our household so that each member of the family will have bars for the whole week to take to school as well as to work. Here are the ones that I decided to test, but I cannot wait to try to make the others, as well as create new ones:
Apple pie bars: This one was my 4-year-old’s favorite. Not too sweet, nice taste of apple, and similar in flavor to an apple pie.
Cappuccino bars: Oh my! This will be my to-go bar on the way to drop off the girls at school as well as a midafternoon or midnight snack. Again, it isn’t too sweet, yet has a nice coffee flavor, similar to a Frappuccino actually. (Next time I’ll make a version with 1 teaspoon cocoa added to give it a mocha flavor.)
Oatmeal raisin cookie bars: This was another favorite of my 4-year-old. Again, this has the taste you’d expect. This one felt more filling than the rest.
Blueberry cobbler bars: The taste was great and this was my husband’s favorite. The only one problem I had was that the mixture didn’t fill the 9-by-5-inch pan; it only filled 3/4 of it.
Dark chocolate brownie bars: This was my teen’s favorite. It totally has that gooey brownie taste.
In general, we loved them all. I was expecting they’d be thicker, but in a 9-by-5-inch pan, I was only able to get 1/8-inch thickness. But it’s great to learn the technique and the basic amounts of each type of ingredient so then you can start to create your own. Ones we thought of right away to try include mocha, dried banana and chocolate, and dried mango with nuts.
I have to admit that I’ve spent a small fortune on Larabars and was delighted to discover that I can make them at home at a much lower cost. I tried the dark chocolate brownie bar variation. While the overall consistency was less moist than the original, these were just as tasty with an intense chocolate flavor. Make sure to double or triple the recipe, because you’ll want to have these on hand to satisfy any and all cravings.

Chewy, tart, and wonderful! I chose to make the cherry pie bars because I love dried cherries. These bars are super easy to make and so healthy. I can see how you can make many variations of this delicious and nutritious snack. This would be an exceptional—and acceptable—sweet treat on a diet like “Eat to Live.” Definitely can see why the author makes a batch or more at the beginning of each week.
I used whole dates like the recipe recommends and the cherries I had were quite soft and didn’t require soaking.
Not only do these bars make for a great on-the-go breakfast or snack, but they can practically be made while on the go. I whipped these up as I was packing three school lunches this morning and still got everyone out the door on time.
There are very few steps and no cooking involved and, as the endless options illustrate, they’re very versatile. I made the cherry pie bars this morning. At first I was a little concerned the cinnamon would overpower the finished bars, but I was wrong. By the next day the cinnamon was still there, but in the background. I’m excited to try the other flavors soon.
One trick to forming these—I lined the bread pan with plastic wrap as suggested. Once I had the mixture in the wrap, I folded the excess wrap down over the mixture and then used the bottom of a second bread pan to uniformly press the bars flat.
These bars couldn’t have been easier. I presented them to my husband and 3-year-old for the true test. My husband said they tasted like a Christmas candy (a good thing, I think!) and my 3-year-old wanted more and more and more. A hit all around! Very few dirty dishes to deal with in the end, no hot stove, and a product that could slip by as a dessert or a breakfast bar. I’m excited to try some of the other variations!
I made the cherry pie version because of the things I had handy in my pantry. I thought the fruit I was using was fairly moist, so I didn’t soak it in the water. Turns out it maybe wasn’t quite as moist as necessary, as the mixture wasn’t coming together at all in the processor, so I threw a couple tablespoons water into the mix and all was good. I sprayed my plastic wrap with coconut oil, pressed the mix into the pan, and placed it in the fridge for nearly exactly 30 minutes.
The bars cut easily, although they were slightly sticky (perhaps I added a little too much water?).
This recipe is so fast and easy. And once you try some of the variations, it’s easy to improvise and try other substitutions. I made Gingerbread, Oatmeal Raisin Cookie, and Dark Chocolate Brownie, with the latter being the most popular bar at our house. Gingerbread could have used more spices–I’d up the cinnamon to a full teaspoon.
I left the bar in its large rectangular shape and then cut it into 2 inch squares, and they didn’t last long enough to wrap individually! The texture of the bars was very similar to the brand-name bar. We will definitely be making these often!
Both the Cherry Pie and Pecan Pie homemade bars are so much better than the “compare to” brand-name bars! These have a fresh taste that I don’t think any commercial bar can come close to because of the time required for making, packaging, shipping, and storing. Even the most natural bars on the market always have a slightly “stale” taste to them. I have cut way back on buying them for that reason.
The ingredients are what they are, and the beauty of these recipes is the fact that you can make adjustments to your own personal taste. I can see making use of chocolate and grated citrus zest in several other bars. I plan to try all the flavor combinations in the near future.

Buy dates, lots of them. And then buy some more. After making the first version, you will want to try another. And another. This recipe is simply addicting and so much better than the store-bought version.
I found that the bars were the right consistency when a ball formed in my food processor and the processor started dancing on my kitchen counter. The dark chocolate bars needed a tad of water to get to that stage. I used a cooking spray to slick my plastic wrap and the bars slipped right off.

I made these in response to a reader’s request for a Cinnamon Roll Larabar. Based on the ingredients list in the reader’s comment, dates are the primary ingredient followed by the nuts then raisins. So I prepared the recipe using the formula below and it came out very nice.
The raisins and dates were very moist so I didn’t need to soak them and had no problem processing them. The bars had a nice cinnamon flavor and the walnuts gave them that cinnamon flavor. My youngest said they tasted like cinnamon toast crunch so I think they worked out well.
I cannot tell how close they are to the real thing because I’ve never had them, but through some Googling and simple math my recipe ends up having roughly around 212 calories per each of the 6 bars, which is very close to what the reader said the real Larabars contain.
200 g Medjool dates (1 cup, tightly packed)
60 g walnuts (3/4 cup)
60 g almonds (3/4 cup)
55 g raisins (1/4 cup tightly packed)
2.5 tsp cinnamon
pinch salt
I tried to replicate the the Cinnamon Bars Larabar and used the following amounts ad soaked the dates and raisins for about 5 minutes before formed them into balls instead of bars. There was no problem with them holding together. The taste is good but the bars need more cinnamon.
Ingredients
100 g dates
35 g raisins
35 g almonds
50 g walnuts
1/2 tbsp cinnamon
1/8 tsp kosher salt
Instructions
- The total weight of mixture was 220g. Larabars are around 45 to 50 g per bar, so this would make around 4 1/2 Larabars. The nutritionals for 4 1/2 bars would be 206 kcal, 11.1g fat (1 g sat fat), 19 g carb (4.4 g fiber, 15.7 g sugar), 4.3 g protein.
Based on that info, if you decrease the almonds to 25 g and increase the dates to 112g, you get pretty spot on nutritionally. Just add more cinnamon!
201 kcal, 10 g fat, 0.9 g sat fat, 20.4 g carb, 4.3 g fiber, 17.5 g sugar, 3.9 g protein.

In response to a reader request for Cinnamon Roll Larabars, I used the master recipe for homemade Larabars above and made the following changes:
1 cup golden raisins
1/4 cup dates
1/2 cup almonds
1/2 cup walnuts
2 1/2 tsp cinnamon
1/8 tsp sea salt
I used the same method listed in the recipe. I soaked the dates and raisins to soften. I needed quite bit of cinnamon to get that “cinnamon swirl” taste to come through. I found the bars to be delicious, filling, and nutty and cinnamon-y just like a cinnamon bun!


Haven’t made them yet. Hope to make them this week!
Maria, let me know!